Showing posts with label school. Show all posts

Sunday, November 11, 2012

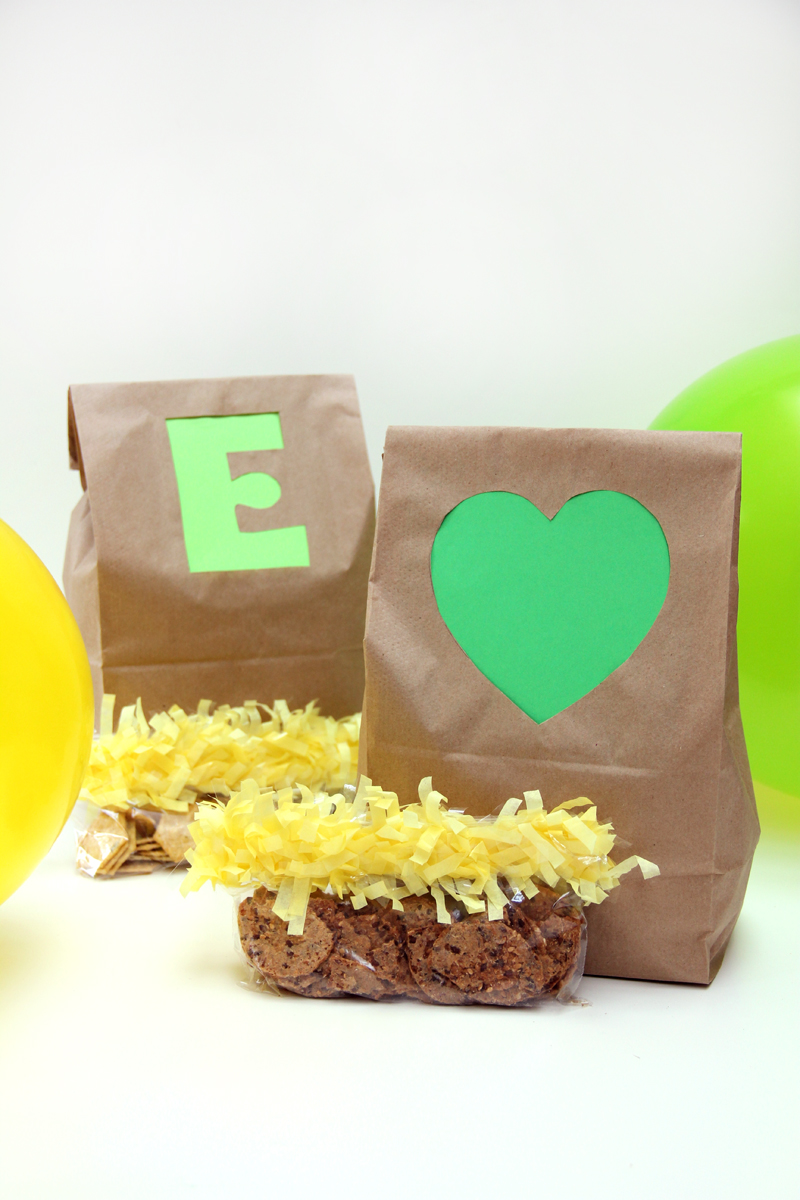
DIY: Colorful Lunch Bag Cutouts

We are taking a brief hiatus from ornament DIYs today to show you a great project from Studio DIY's blog!  Be sure to check them out.  These lunch bags would be great for a pick me up during a long school day!
DIY Back to School Lunch Bags
Supply List:
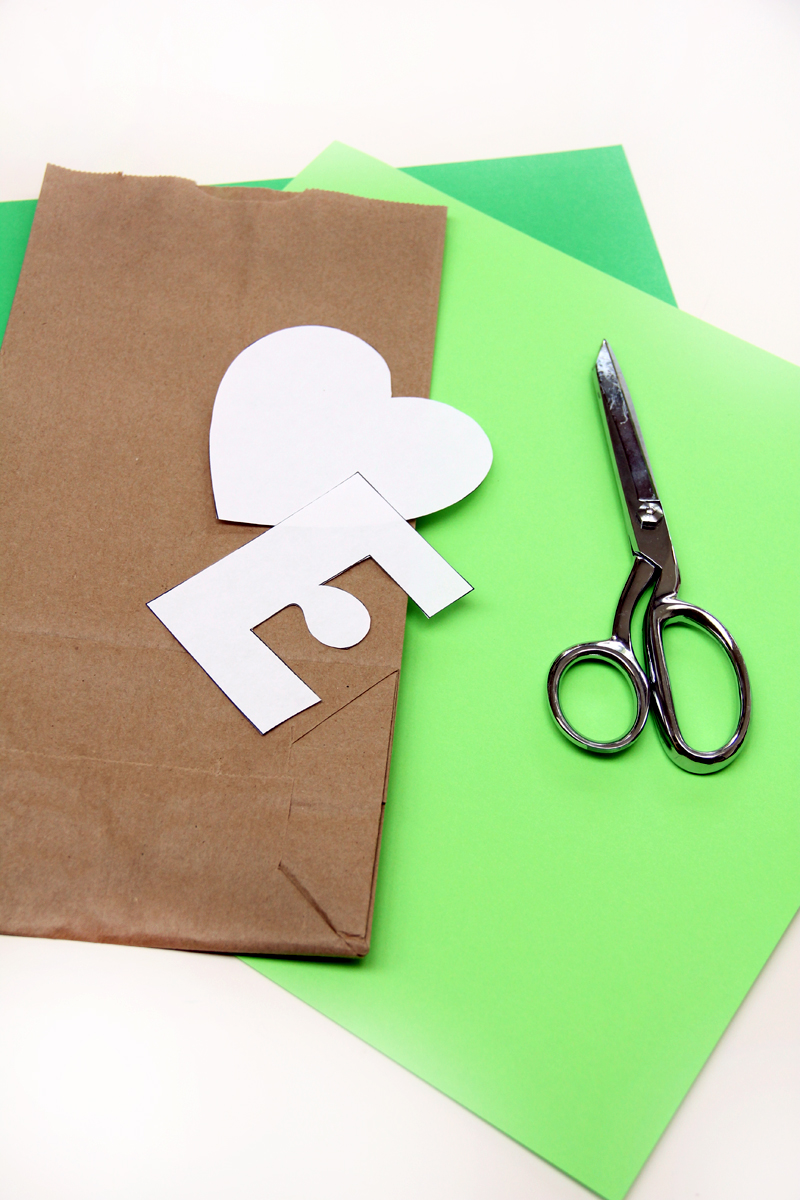
Brown Paper Lunch Bags
Letter or Shape Templates (Print out large letters from your computer, or free hand it!)
Pencil
Scissors (x-acto knife helps too!)
Colored Card stock
Tape and/or Glue
To Make:
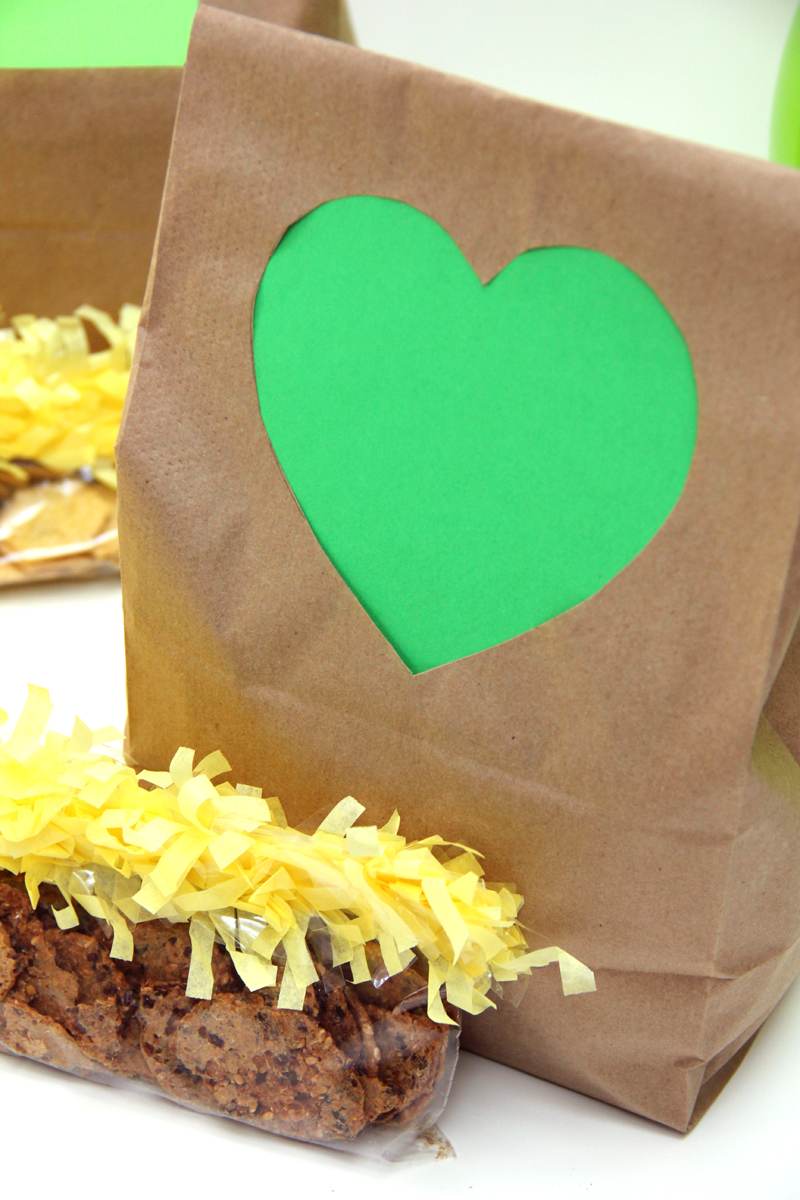
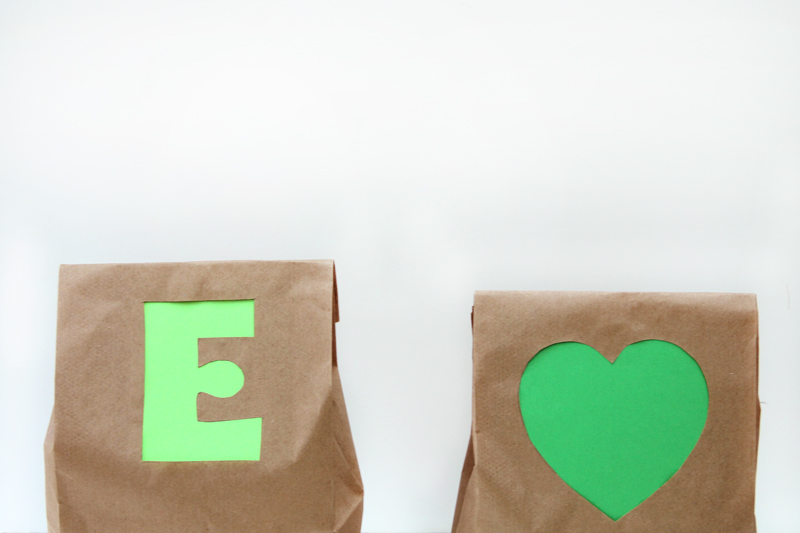
Trace your shape onto your lunch bag. Make sure to leave enough room at the top so you can fold the bag over (I’d do mine even lower next time).
Back to School Lunch Bag DIY DIY Back to School Lunch Ideas
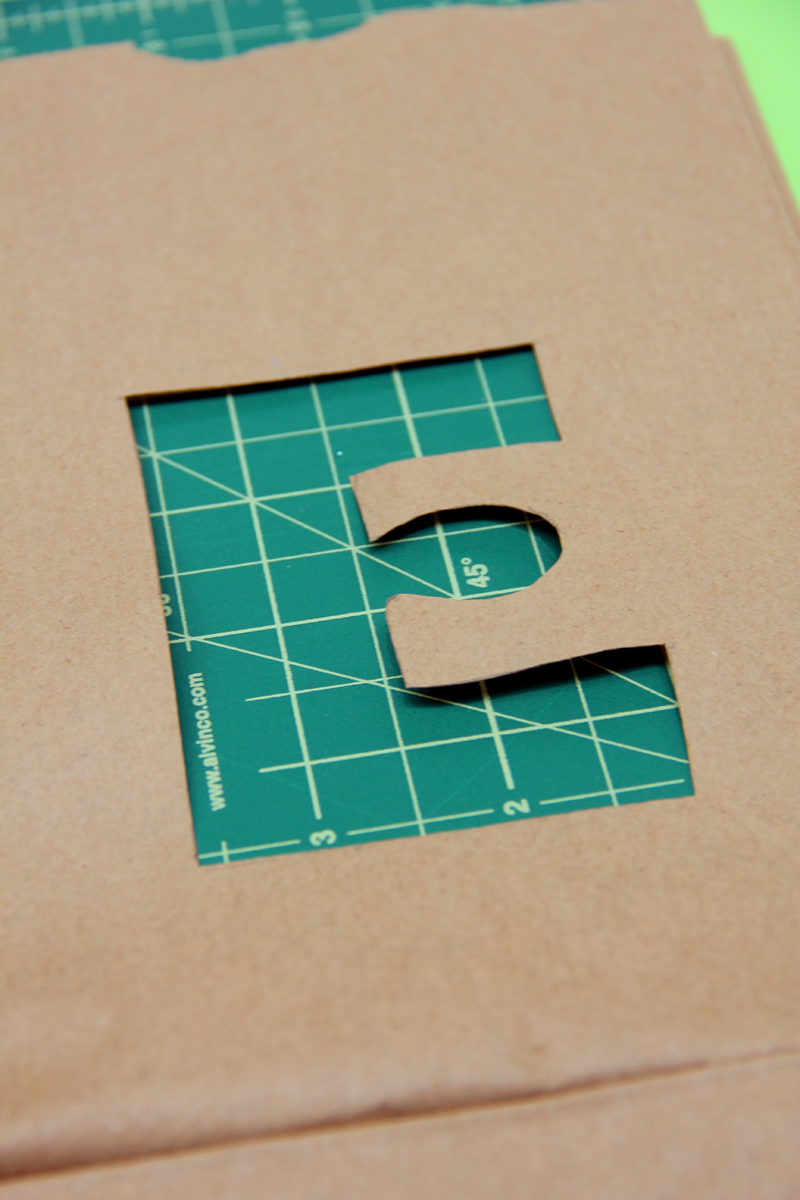
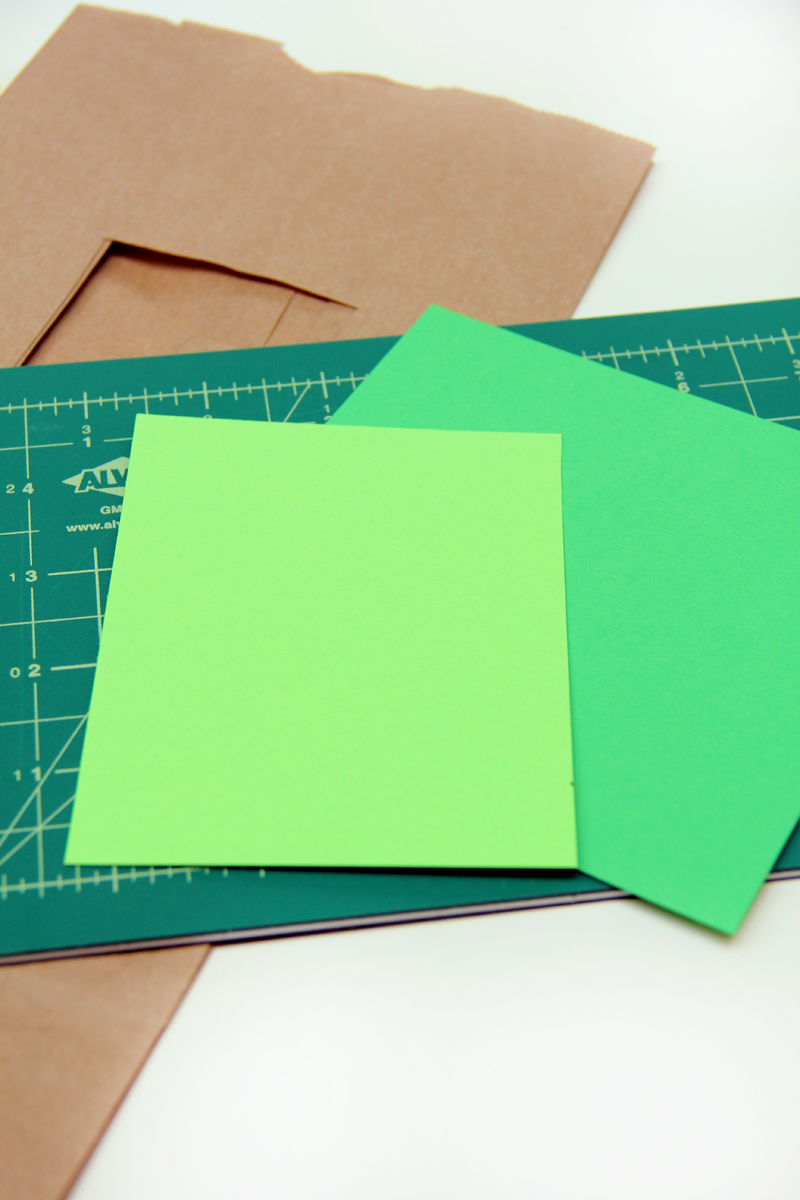
Cut out your shape, I did this with an x-acto and put a small cutting board inside the bag to prevent cutting through both sides. You could easily do this with scissors too. Then cut a rectangle of colored paper, just big enough to cover your entire cut out.
DIY Colorful School Lunch Bags DIY Graphic School Lunch Bags
Tape and/or glue your paper inside the bag behind your cut out. I taped mine first, then added glue (you can do this with a tooth pick or small glue stick) to seal down the loose edges.
DIY Graphic Lunch Bags DIY Colorful Lunch Bags


Thursday, November 1, 2012

DIY: Snowman Cups

Well hello there November!  We would like to welcome you into 2012 by featuring a snowman tutorial.  These festive favor cups are wonderful and CUTE!  Take these into work filled with hot cocoa packets and you'll be the hit of the office - or take them into school filled with candy treats for your children's friends and you'll be the hit of the class (maybe bring them at the end of the day so the teacher doesn't hate you for it).  ;)

Check out Blue Cricket Design's blog for even more fun DIY!!


Ever seen such an adorable little face! Well if you’ve been reading my blog for a while you may have remembered my “Chinese take out Snowman gift box” and these I guess you can call their little offspring!
I thought I could come up with a smaller version perfect for sending little treats to my girls school class rooms! These darling little Snowman fit the bill and were a breeze to create!
6 oz Styrofoam cups and lids found at Orson Gygi were just what I needed and you can’t beat the cost of this project. 25 pack of cups: $1, 100 pack of lids: $1.55,  stiff felt: $1. And we all seem to have paint on hand! Even if you make 100 little gift cups it would cost you about $7 before you fill them with goodies!
 
First things first! Fill all your cups with goodies and close them with the lids! This makes them easier to hold when you paint them giving the super light Styrofoam a little more weight and with the lids on you can stack them!
 
Using pink paint and a small round sponge, you’ll  add your rosie cheeks! Next you’ll use the end of a paintbrush and black paint to add your coal smile and eyes! Lastly you’ll hot glue on your felt nose cut from a sheet of stiff felt. I painted all my cheeks then all my mouths and eyes and then glued on my noses. By the time I moved onto the next step, the step I just finished was dry!

I loved this little army of smiling snowman!

It took me about an hour to create 75 Snowman cups! These are perfect for Holiday classroom party favor or little treats for your kids to pass out to their friends!

Wednesday, October 24, 2012

DIY: School Supply Bouquets

Oleander and Palm's blog has a great "back to school" tutorial, that we think would be great anytime for teacher or for your own home!  You could easily whip this up for a teacher on their birthday, or use it as a decoration on your own craft table.  So many things you can do with these, so much fun to be had!

Well, the kids are definitely back in school.  We are starting to get into a bit of a routine.  I like to start the year off with a gift for my kid's teachers.  It's simple Math - Happy Teacher = Happy Students!  Last year I made fresh Apple Scones for the teachers and the year before, I made reuseable coffee cup sleeves.  


This year I thought a flower bouquet would brighten their day.  These we easy to make and really didn't cost too much.  

Supplies:
Pencils (about 32)
Crayons (about 25)
An empty baby food jar
An empty Starbucks Frappacino Bottle
2 rubber bands
Ribbon
Flowers


For the pencil vase, I wrapped an empty frappacino bottle with an elastic band and the inserted the pencils all the same direction.  And for the crayon vase I just used an empty baby food jar.  Then I simply tied a cute ribbon around the rubber band to hide it and then filled them with flowers.

Are your back into a routine with the start of school?  Is that routine welcomed or are you longing for more summer?

Monday, October 22, 2012

DIY: Lined Paper Tee Tutorial

U Create has some amazing tutorials and DIY projects.  We highly recommend checking them out for more!  Today's highlighted tutorial is a lined paper tee.  These are so cute and would make a great gift for not just students, but teachers!
 
A little about me first . . .
 
My name is Rachel, and I blog over  Maybe Matilda. I'm from small-town New York, currently living in Utah with my soon-to-be-chiropractor husband and our soon-to-be-one-year-old son. When I'm not sweeping up Cheerios, I love sewing and crocheting for my etsy shop, and sharing what I make on my blog.
 
I think this lined paper tee is such a fun way to bring out the inner student, and possibly even encourage a little bookishness in a little one (maybe that's a stretch, but a girl can hope, right?).
 
 
It's really simple to put together, and you can easily make it in any size. And how cute would it be if you embroidered or stamped your child's name or a favorite quote onto the lines?
Here's what you'll need to make this tee:
 
a white tank, tee, or onesie
masking tape
foam brush
blue and red acrylic paint
fabric painting medium (available at craft stores--you'll find it with the paint supplies)
 
To start, place some cardboard between the front and back of the top so your paint doesn't bleed through to the back of your shirt, then place your tape in straight horizontal lines across your shirt to mark the areas where you'll paint your blue lines. I put my first strip of tape right beneath the sleeves. I spaced the tape strips about 1/4" apart from each other, but only painted in every other open space (on an adult size tee) to create a little more distance between the lines. For my little guy's onesie, I painted in the spaces between each tape strip.
 
Mix your blue paint and fabric painting medium according to the directions on the medium (usually a 2 to 1 mixture of paint to medium), and lightly sponge it between your tape strips. A little goes a long way, so try not to get too heavy-handed with your brush. (And personally, I really like the look of a lightly painted, sort of splotchy paint line!)
 
 
(You can see here that I only painted in every other open space for the adult tee. For a baby/toddler top, you can paint in each open space.)
Give it some time to dry, then carefully remove the tape. Place two long strips of tape vertically down the left side of the shirt where you'll paint your red line. Again, place the strips about 1/4" apart, and make sure they're running straight down the tee so you don't end up with a wavy line.
 
 
Mix your red paint with the fabric painting medium according to the directions on the package, and sponge it on as you did for the blue lines. Let it dry for a while and carefully remove the tape.
 
 
If you're making a baby onesie, don't forget to lift up the shoulder flap to tape and paint underneath it!
Make sure you read the directions on your fabric painting medium to find out how to finish your shirt--you'll probably need to let it air dry for 24-48 hours, then iron it to set the paint. You can just turn the shirts inside out and toss them in the washing machine, and the paint holds up just fine.
 

Friday, September 14, 2012

DIY: Crayon Wreath

A Bushel and a Peck has given us the perfect idea of what we are going to make for my sister this year for her classroom!  We love this crayon wreath idea, and the instructions spell it all out despite the lack of pictures.

I love wreaths and love all the creative ways to create wreaths for any occasion. I saw this idea out there in blog world and thought what a great Christmas gift for preschool and kindergarten teachers. So, this year Ella's teachers will be getting this cute crayon wreaths for Christmas.

They are super easy to make. All you need is embroidery hoops (one size 12 inches and one 8 or 9 inches). Put the smaller one inside the larger hoop and start places crayons around the hoops to form a circle. I used a few more crayons than the 64 count box. Then I hot glue gunned the crayons to the hoops and tied a ribbon on top to hang the wreath.

I love how they turned out. To present them to the teachers, I bought some large Christmas circle platters and will use those as part of the gift and a way to transport the wreaths carefully.

Wednesday, August 29, 2012

DIY: Pencil Starburst Mirror - Dollar Store Crafts

We love both color variations of this wonderful dollar store craft - we would be hard pressed to pick just one to make...so maybe we'll make both??  This would be a great Christmas / holiday gift for a teacher!

Check out Tatertots and Jello's blog for more cheap and easy DIY!


Tutorial: Penciled Starburst Mirror


You’ll use about 54 pencils, depending on your spacing


Hot glue, stick ‘em on, repeat:)


(The ribbon part is optional)


If your silhouette is behaving, (mine wasn’t), you can use transfer paper to make the placement of the vinyl much easier


Personalize your gift with a cute lil tag…


Tuesday, August 21, 2012

DIY: Muffin Tin Crayons

This tutorial from Kaboose's blog couldn't be easier, more fun, or cheaper!  Three things that we just love in any craft.  

What you'll need:

  • Cupcake/muffin tin
  • Non-toxic broken crayons
  • Vegetable oil
  • toothpick

How to make it:

  1. Preheat the oven to 275 degrees F.
  2. Remove all the paper labels from crayon pieces. (Please check to make sure they are non-toxic crayons.)
  3. Put ¼ teaspoon of vegetable oil into each muffin pan cup, no cup liners needed.
  4. You will use the equivalent of 4 new crayons for each cup. Place broken crayons (no longer than an inch each) into the muffin pan. This will fill the cup about 1/3 full.
  5. Place into the preheated oven and watch carefully, they melt quickly!
  6. Bake crayons for 8 minutes or so.
  7. When the crayons begin to melt, remove them from the oven and stir gently with a toothpick.
  8. Crayon will look “ugly” and the colors may appear blended too much. Don’t worry! They look much better on the other side.
  9. Let the crayons cool completely.
  10. Once cooled, pop the crayons out of the muffin pan by tapping on the backside of the pan. Crayons should fall right out.
 

Tips:

  • If you have any new crayons available, use one as a measuring stick. Lay broken crayon pieces along side of the new crayon to measure out 4 full sized crayons. This is how many you will need for each completed chunky crayon.
  • Be sure to use extreme caution around kitchen utensils and the oven. Always use oven mitts and do not stick you fingers into the melted crayons.
  • If you don’t have any broken crayon pieces, you can buy a large box of cheap crayons at the Dollar Store.

Wednesday, August 8, 2012

DIY: Bubble Blowing Wall Art Project

52 Weeks Project has an unbelievable blog filled with fun!  We just adore this bubble blowing art project they've come up with...and how amazing would this look in your own home?  We have seen bubbles at the dollar store and same goes for the jar.  Watercolors are pretty inexpensive at Michael's or Joann's if you use a coupon!

Get a watercolor pad here!

Time: 1 hour
Materials:  watercolors, watercolor paper, bubbles, jars