Showing posts with label wreath. Show all posts

Saturday, December 8, 2012

DIY: Upcycled Felted Sweater Ornaments

We may explode from the excitement brought on by this tutorial from Alphamom's blog.  It's Christmas themed, it's upcycling, and it's easy!  The trifecta.
ornaments-3.jpg
It’s all about doing more with less this holiday season. So deck the halls with these miniature wreath ornaments made from cast-off wool sweaters. Felted sweaters are a thrifty and eco-friendly way to use recycled materials. Your old moth-eaten or thrifted sweaters can be made into plush toys, mittens, patchwork blankets, skirts, purses, scarves, laptop covers or anything else that you can imagine. The possibilities are endless. To felt a sweater, you must wash it in hot water and run it through the dryer. Keep in mind that your sweaters must be 100% wool in order to felt properly.
ornament-close-up.jpg

ornament-detail.jpg

I used tapestry needles for this project because they are easy for young kids to handle and have a blunt tip. You could make these ornaments as large as you want, but if you get any bigger than 5″ in diameter you might need to use wire to keep the circular shape.
Supplies:
· Felted sweaters
· Tapestry needle
· Heavy-duty coated cotton thread
· Twine or ribbon
Instructions:
Once felted, you’ll need to cut your sweaters into 1″ squares. Older kids can do this, but I find that my young kids are frustrated when trying to cut any type of fabric. After I cut the sweaters, I put the squares in a bowl for the kids and let them choose their colors. You’ll need about 50 squares for each ornament. This may seem like a lot but once you get going, it moves along quickly.
bowl-of-felt.jpg

Then cut a length of thread at least 30″ long. Thread the needle and tie the ends of the thread into a knot, forming a loop. You’ll want to make a couple of knots so that it won’t slip through the loose fibers of the sweater. Older children can practice their knot tying skills. I have found that a loop is easier for children to sew with as the needle won’t come un-threaded.
The kids can string the felt pieces by simply poking the needle through the center of each square. Once the thread is close to full (with a few inches on either end), you’ll want to make sure that it will form a nice loop. You can see that my kids ran out of patience on a couple of these. Then you can pull your knot down a bit to make room to tie the two ends together a couple of times. An adult or older child will need to do this as the thread needs to be pulled tightly. Then add some twine or ribbon for hanging and you’re done.
stringing-felt.jpg

knot.jpg

tying.jpg

When crafting with younger kids, it’s essential to have all of your supplies prepared and ready to go. My four-year-old stayed focused on this project for about 15 minutes, which was long enough to make one full ornament. My older daughter (almost six) made four of them! I think these little ornaments would make great teacher or neighbor gifts. Remember that these are made of wool, so be sure to store them in an airtight container to keep the moths away.

Thursday, November 29, 2012

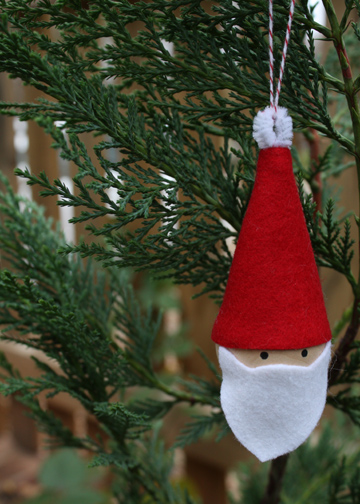
DIY: 10 Minute Santa Ornament

The Long Thread's blog is helping us keep to our overall theme of simple projects that are quick and wonderful!  Be sure to check out their blog.

santa-ornament
Ten minutes. Really. This is sort of a variation on the elf skittles that I posted about last week. But even easier. I think these would make cute additions to gifts for family, friends or teachers. The kids can help make these if you skip the glue gun and use regular school glue. You  could sign them on the back and add the year.  You could use even smaller wooden balls to make teeny tiny Santas. Or you can take it a step further and make a little body with chenille stems, a larger ball for the belly and beads for the arms and legs.
Supplies:
  • wooden ball (1 1/2″ diameter)
  • red and white felt scraps
  • black acrylic paint
  • white chenille stem (cut to 2″)
  • twine
  • glue gun
santa-ornament-instructions
  1. Cut out the hat and beard from felt according to this template.
  2. Bend the end of your chenille stem and cut to 2″.
  3. Insert the chenille stem in the top of the hat felt and sew, right sides together, using a scant 1/4″ seam allowance. Turn right sides out and poke out the tip with a blunt tool.
  4. Place a couple of drops of glue on the inside rim of the hat and fit onto the wooden ball. Glue the beard on as well, just meeting the hat at the corners.
  5. Draw eyes with a pencil and then paint them on with black acrylic paint.
  6. Loop twine through the chenille stem and tie in a knot. Trim off the ends and put a tiny drop of glue to hold the knot in place just at the chenille stem. All done!

Friday, November 23, 2012

DIY: Burlap Bubble Wreath Tutorial

Today's Fabulous Finds - Tomorrow's Treasure's blog is really amazing at taking step by step pictures and explaining everything she does no matter how seemingly small.  This makes it incredibly easy to duplicate her stunning results!!

Supplies Needed

1-10" foam wreath
(check your dollar store)

1 1/4 -1 1/2 yds. burlap, or other fabric

@100 pins with large heads
(You can use small headed pins for fabrics with a tighter weave. 
I used my old sewing pins and then bought a new package to replace them, now I have new pins for sewing.)

How to Make A Burlap Bubble Wreath


I used a white pin in the pictures to show where you will hold the fabric with your thumb and index finger when folding it.  You don't need to pin it until step five.

1. Cut your fabric into 4" x 4" squares (or close to that).   I cut one square first to make sure it was the size that I wanted and then used it as a guide to cut the rest of the squares.  

Cut the fabric into 4" strips and then cut each strip into 4" squares.  The squares don't need to be measured and cut precisely if you don't want to take the time, but should all be cut pretty close to the same size. 

2.  Fold the square in half to form a triangle.  Take the right hand corner (pinch one layer of the fabric on the very tip) and bring it to the front.  Line up the corners.

3.  Take the left hand corner (pinch one layer of fabric on the very tip) and take it to the back.  Line up the corners.

4.  All four corners should be lined up at the bottom.  It should look like a bubble now.

5.  Pin through all four layers of fabric.

6.  Pin the 'bubbles' to the wreath.  Pin one bubble on and then place the next one close to it so that it hides the pin on the one that you just added.  The bubbles should be just close enough so you don't see any of the foam wreath or the pins.


This pic of the back will give you a better idea of how it all goes together.  You'll want to bring the bubbles around the edge just far enough so when the wreath is against the glass/wall the green doesn't show from the side.  (You can cover the back with fabric first if you'd like.)

To give you an idea of how many it will take, I used just over 90 burlap squares for this wreath.


Friday, November 16, 2012

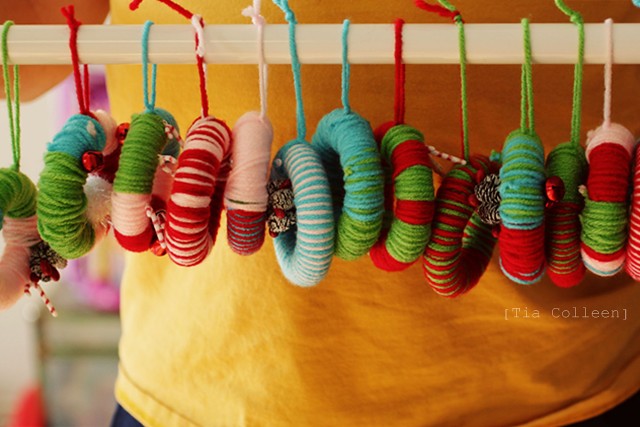
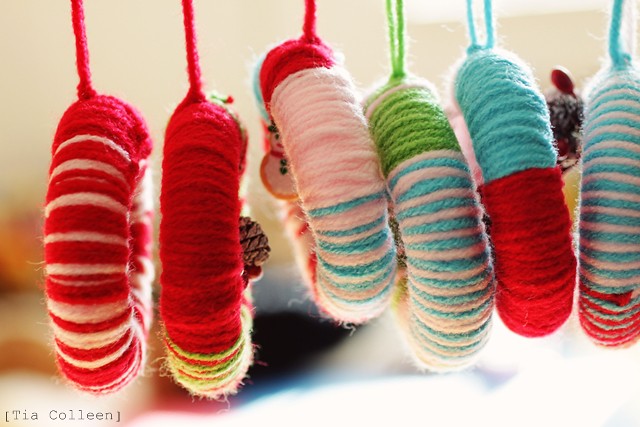
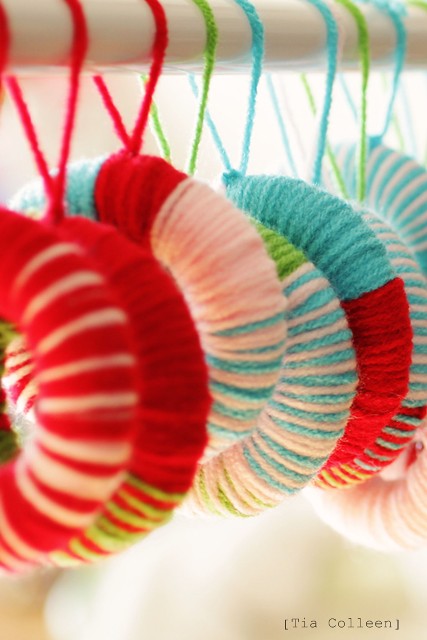
DIY: Yarn Wreath Ornaments

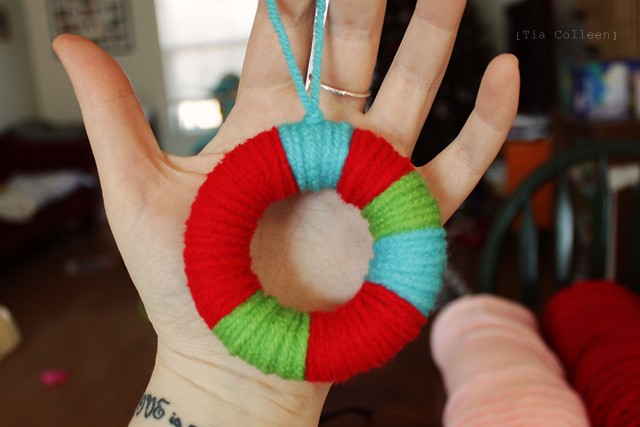
We found this archived ornament tutorial that is so easy it's kind of ridiculous!  We love love love it.  Christopher & Tia have these step by step direction on this budget friendly ornament tutorial.  Be sure to check out their blog for more.


What you will need:


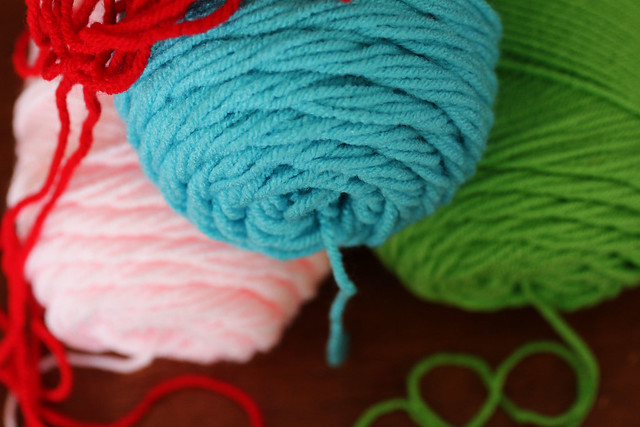
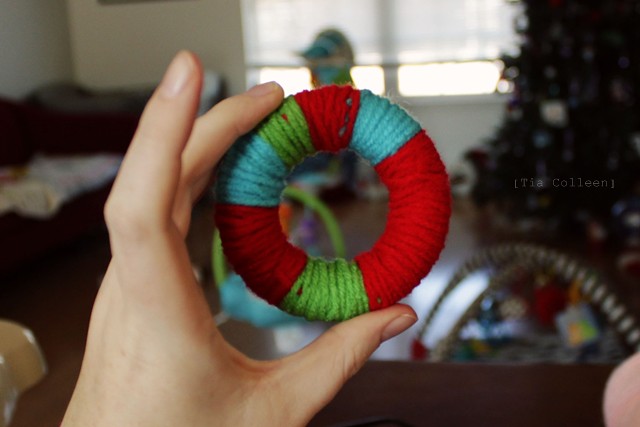
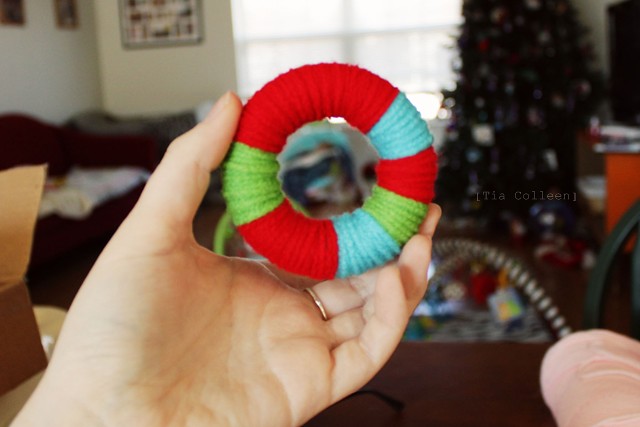
I went to Hobby Lobby and picked out 4 Christmas-ish colors that I thought would be fun to mismatch on all 30-something of my ornaments.


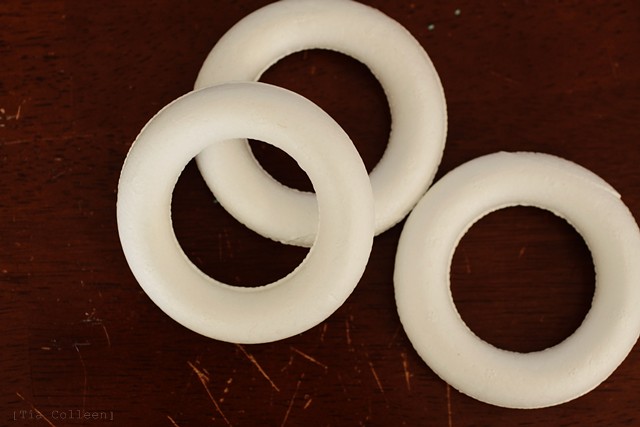
I ordered mine from here. I had looked at both Hobby Lobby and Michaels, but didn't find any that were nearly as affordable. Plus I like ordering things and then getting mail as a result :)


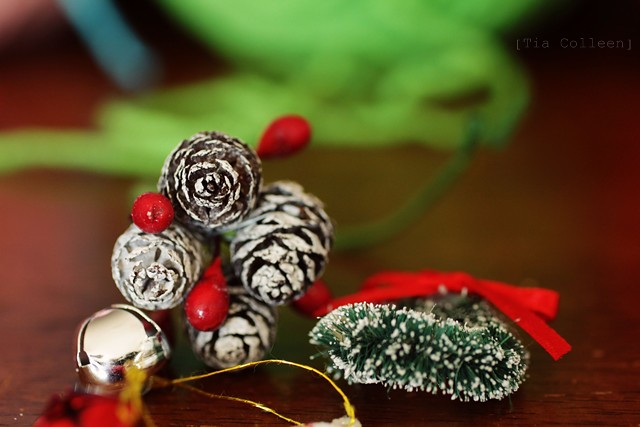
...ok those are totally optional. I did some with, and some without. The ones that I did without, were easier to wrap and send off, and took much less time to make, because- have you ever tried stringing up a jingle bell onto a piece of yarn (ya know how the end of yarn frays and is all puffy and stuff)? It wasn't my favorite part of the craft project, I'll tell ya that much.

Ok now heres how you do it...
Well actually, I'm going to show you how to do two different styles. The "candy cane" style, and then a regular multi color style. Lets start with candy cane...


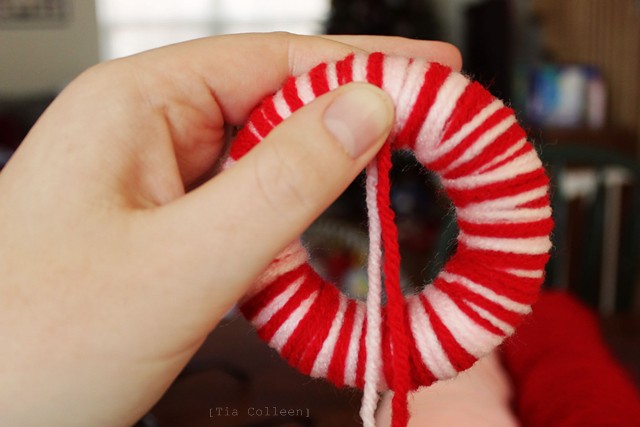
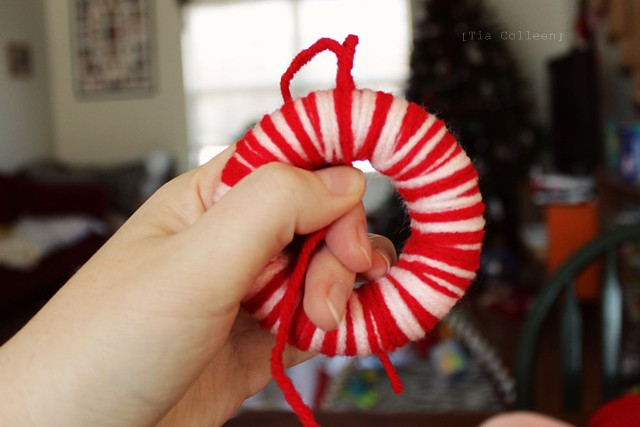
Start with 2 different colors of yarn. I chose pink and red, because together I think they look a little bit like a candy cane swirl.

So- take two different colors of yarn, put the ends together, and give the strings a good yank. About 4 arms length pulls should do it. And then cut them.

Remember, these are no-glue ornaments. I know that a lot of yarn wreaths are made using hot glue or whatever, but I'm making these with my kids- so the easier, the better.

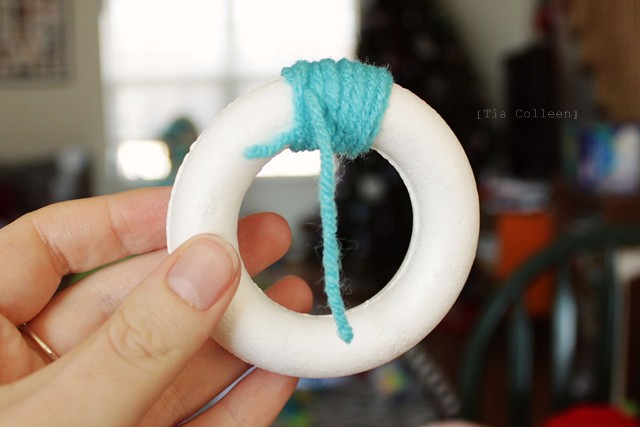
-Wrap your yarn around your styrofoam.

-Tie a knot.

Simple.

-Pull the short end of the excess string off to one side.

-Now start looping the long end of the yarn around the wreath, going in the direction that your loose ends are facing. Does that make sense?

Here, kind of like this...


See what I mean? If not, then I'm sure you can figure it out as you go. Really, all you're doing is wrapping yarn in a loop over and over again- theres really no way to mess it up.

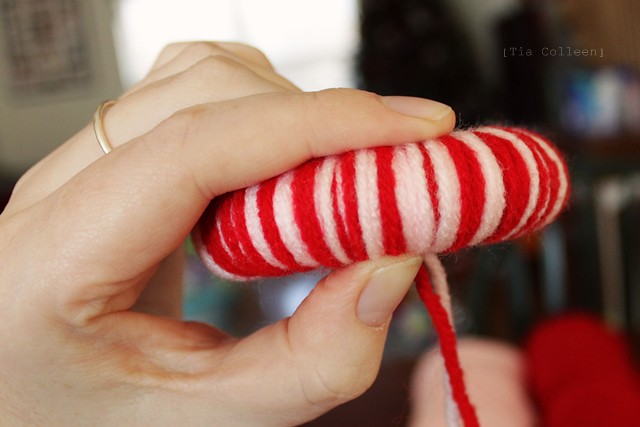
-So keep wrapping your yarn around your styrofoam. You can do a tight wrap, doing just a single layer of yarn. Or you can do a sort of messy wrap, doing layer over layer. I like the messy look, I think it looks more handmade, and its brighter and bolder from farther away.


After you get all the way around, your wreath should look something like that.

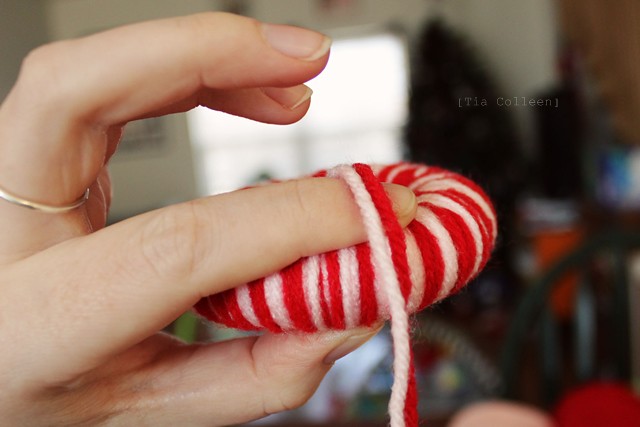
-Now tie it off.

Heres how you do that...
(even though its sort of self explanatory)


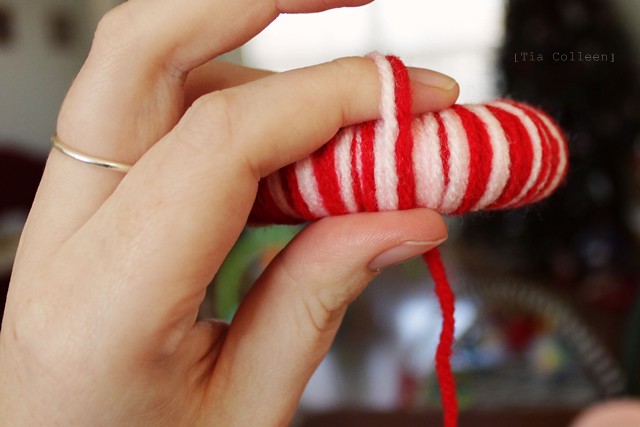
-Wherever you decide to end your wrapping, put your thumb down on the yarn, and let the excess hang down.


-Put your index finger on the back.

-With your other hand, wrap the string that was hanging down around again, up and over your index finger that you were holding in place.


-Now take that piece of string that you just wrapped around, and put your thumb on it, like in the above picture.

-Wrap the excess string around again, and then pull your index finger away(we're tying a knot here).

-Pull the excess through the loop. Pull it tight. Make sure you're doing this on the "back side" of the wreath (the side that you weren't looking at, when wrapping).


See, like that.
-Now cut off the excess string with a little bit to spare, and tie those pieces in a knot.
Picture on the way...


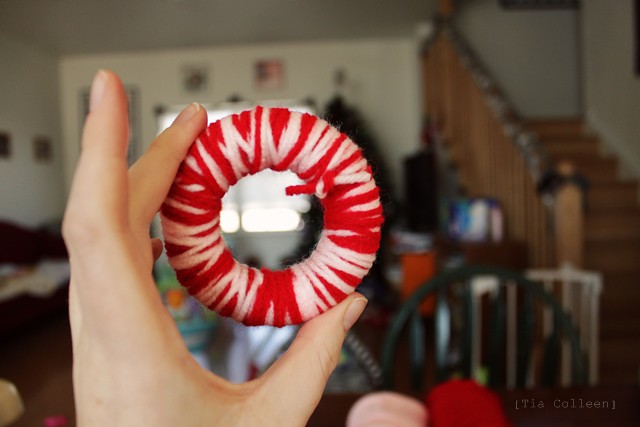
It should look something like that.

Now you need a way to hang it up!


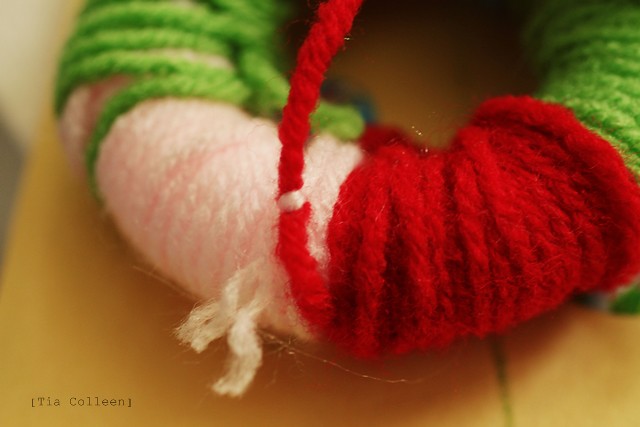
-Cut another piece of yarn. Fold it in half. Tie a knot.


-Now tie that, around your wreath (and when you do, make sure that your knot is on the back, so you can't see it). Cut the ends-

And voila!
...Okay, I realize that I could have just said "tie a knot", rather than posting 8 billion pictures describing how to do so, but... that wouldn't make for a very interesting tutorial, now would it? Haha.

But now that you get the point, I'll just post pictures for the single strand style? I'm sure you'll get the idea.


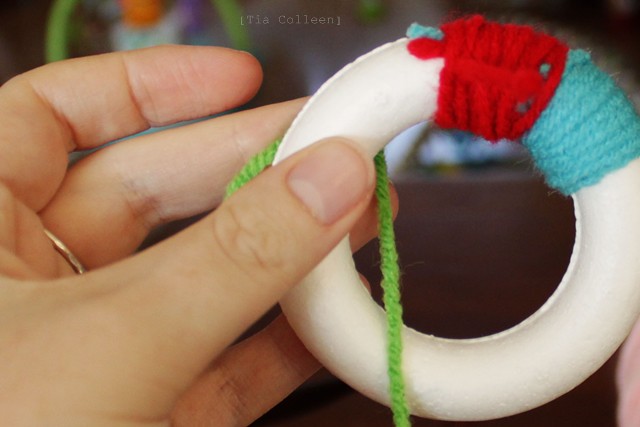
You start with one color, tie it onto the wreath, wrap the yarn to cover the area that you want covered, tie it off.

Lather rinse, repeat.

The back will look messy like this...


But the front should look a little more tidy, like this...


Tie a string on, the way that I showed you up there with the candy cane style, and-

Another one done!
Yarn!
Styrofoam wreaths!

Little decorations and charms!


Wrap wrap wrap, wrap wrap wrap.


Thursday, November 15, 2012

DIY: Tea-Stained Coffee Filter Wreath

Design Dining + Diapers Tea-Stained Coffee Filter Wreath is just breath taking.  We love this idea for our decorations for the holidays!

Coffee Filter Wreath
Tea Stained Coffee Filter Wreath

Instructions:
1. Place 5 dark color tea bags into a large pot. Bring to boil and then place on low-medium heat.
2. Place 20 coffee filters into the pot and use a spoon to make sure they are fully submerged. Soak them for 10-20 minutes or until you get the color that you want. Repeat until all of the coffee filters are stained ( I used about 100 for this wreath).
I clipped the coffee filters onto pant hangers and hung them in the laundry room to help them dry faster. I also spread a few out on top of paper towels and that worked too.
3. Let the coffee filters dry completely so they are not as fragile.
4. Wrap the coffee filter around a screw driver and push it into the wreath. You may need to do a few extra jabs to really get it secure in there.
5. Place the coffee filters about 1-1 1/2″ a part (to get the fullness of this wreath).
Repeat until the wreath is completely covered and add some bling of your choice!
Tea Stained Coffee Filter Wreath

Saturday, November 10, 2012

DIY: Acorn Wreath in Any Color!

Made has a tutorial that is completely customizable to your taste and home decor!  This seems like it may be a little time consuming, but we bet that if you get a few friends together and perhaps have a coffee or a glass of wine together, this will be together in a jiff!  

Sewing is a love to me. In fact, it may be addiction. But crafting is a new-found interest. Until we moved into a house two months ago, I had kept the crafts at a minimum. Our old 2-bedroom apartment felt like piles of projects were caving in on me. The last thing I needed was more decor. But now that I have bare walls that can breathe, I’m exploring all those wonderful craft projects I’ve admired from afar in the blogging world. And this one caught my eye.
I love the simplicity of it and monochromatic color. And better yet, it was made from acorns!….something the kids and I see everywhere at the park. So last week, with empty bread bags (from feeding the ducks) the kids and I loaded our bags as full as we could with brown acorns. I felt like one of my toddlers, gathering treasures, slightly giddy with craft excitement. And I loved that we were working on a project together.
Though my acorns are not as cool looking as hers, I hope you enjoy my acorn wreath adventure. Let’s get started!
Skill Level: Beginner
Needed:
* Acorns (or nuts or wooden beads)
* Floral wreath
* Hot Glue-gun

1. Gather acorns. If you can find the ones with the little hats on top, totally cool. I just had these to work with. But in the end I still liked the result. If you don’t have acorns in your area, you might try what the woman in the above link did. She posted on her blog, asking readers to send her some and four boxes showed up on her doorstep! What an amazing network this blogging place is.
2. Clean and BAKE your acorns. Oh my, this is an important step. At first we brought the acorns home and since they had been outside, I washed them and just laid them on a towel to dry. Then I read the post above in thorough detail. And when I got to the part about her dormant box of acorns festering with little maggots, I freaked out and threw my acorns in the oven for 15 min at 350 degrees to make sure any little creatures living within had croaked. (for more info read here).
3. Gather a wreath and glue gun. I purchased one of these very inexpensive straw wreaths (only because we were at the end of our budget for the month and I was trying to be a responsible wife). You can also use floral or wooden wreaths.
4. Start glue-ing! I chose to do mine in a diagonal wrap-around pattern. So first I drew one line with a marker around the wreath, put some hot glue on that line and laid the acorns on top.
5. Glue acorns all around the wreath (But don’t bother glueing them on the back. No one will see it and it will lay flatter on your wall or door. ) As you go around the wreath, it may be hard to keep each line curving with the same degree as the previous one. I continually adjusted here and there as I went.
6. Add a ribbon, admire your (tedious but exciting) work, and hang it up.
Total cost for the project:
Wreath: $2.50
Spray Paint: $1
Acorns: FREE!
This ribbon was made of braiding three strips of white gauze fabric together:
Of course, if you’re anything like me, it’s hard to decide which color you like best. So, I spray painted it white. And I love this version even better. Jordan Almonds anyone?
Next to the charcoal gray door, white adds perfect contrast. And it works for most seasons! When Thanksgiving is over, tie a red, green, or gold ribbon on there.
Or better yet, paint it green!
Raspberry pink for Valentine’s Day: