Showing posts with label craft tutorial. Show all posts

Tuesday, January 29, 2013

DIY: Wood and Felt Arrows

"Today's Assignment: Be Inspired" is a wonderful blog with tons and tons of fun ideas.  We especially love these arrow that could make for a stunning center piece or hanging mobile!

Here’s a sweet little project that your little crafters can make for Valentine’s Day.
Make some simple Valentine Cupid’s arrows out of items on hand like twigs and felt. Use craft glue to adhere the felt arrow heads and feathers to the twig. 

Add Baker's Twine or even attach a sweet message. For little crafters who are too young for twigs, you can use straws instead of twigs.

Saturday, January 12, 2013

DIY: Valentine's Containers

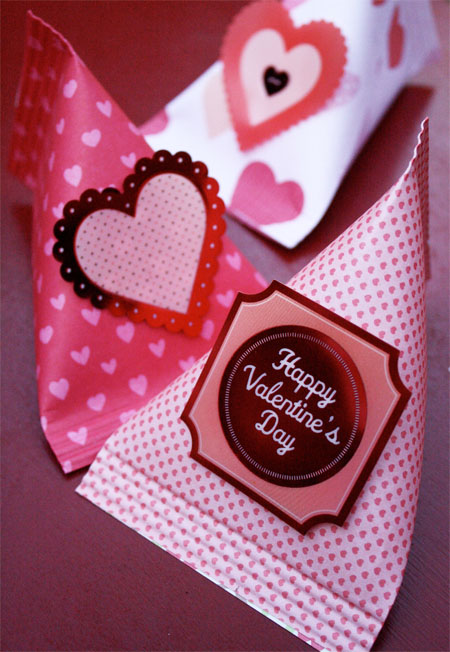
Are you having a Valentine's Day party or are you looking to give out some fun favors for a school / work / church event?  Skip to My Lou's blog has some wonderful DIY containers that are just adorable.  We walk by those paper book packs at Michael's all the time and wonder what we can do with that much holiday paper...now we know!!

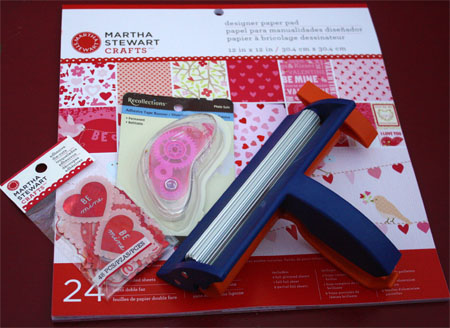
I have been making them for years, but with all the new printed papers and embellishments it is a new quick an easy craft. I found everything I needed at Michael’s Arts & Crafts. Look for heavyweight paper or cardstock {loving this pad from Martha Stewart} for these containers, cute embellishments, adhesive tape runner and a Fiskars paper crimper.
 
These containers can be made any size.  I cut paper 4.25″ X 5.5″ (roughly cutting an 8 1/2 X 11 sheet of paper in half).
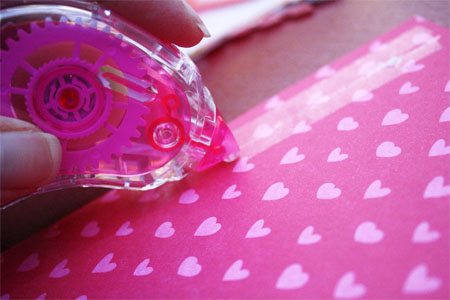
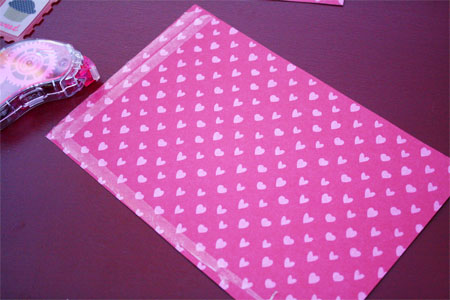
With a tape runner put two rows of tape on one edge. Glue stick or Double Sided tape can also be used. Be generous with the adhesive!
 
Put  the adhesive tape runner {my favorite} along the end and one side of the paper on the wrong side.
 
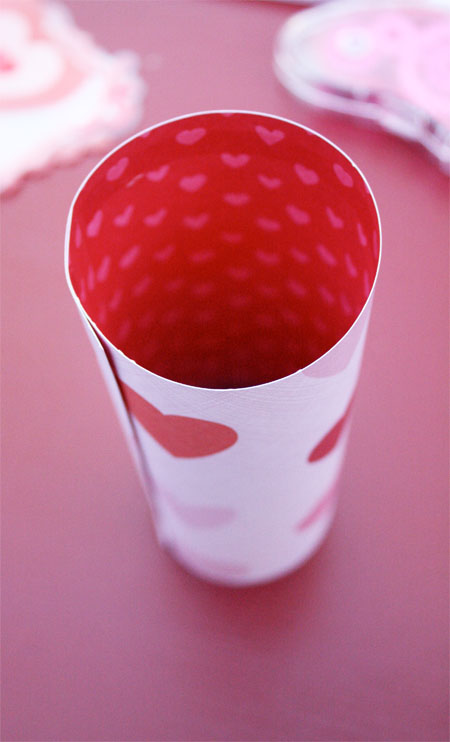
Roll paper into a tube, overlapping the edge about 1 inch.
 
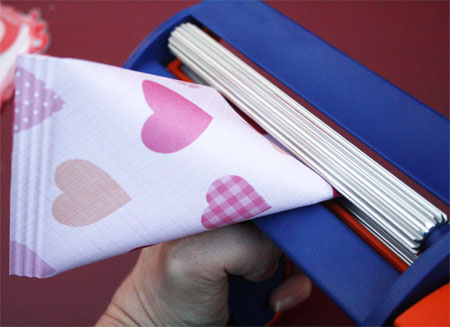
Pinch the edge with the adhesive closed. Place the closed end in the paper crimper. Turn crimper about three to four times.
 
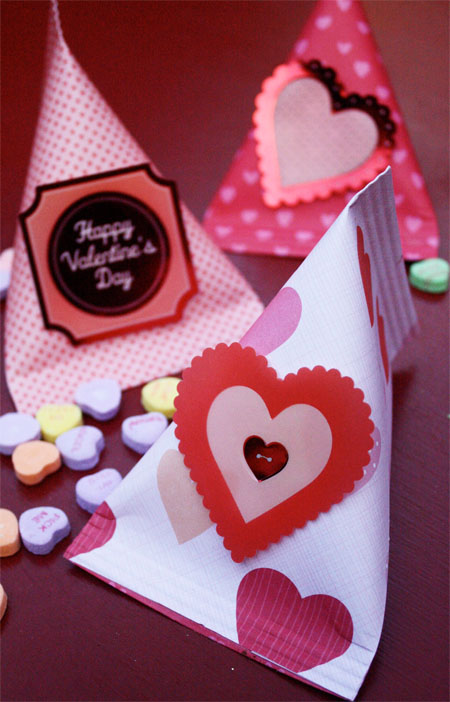
Fill container with goodies. Place adhesive on the inside edge  of the other end. Press end together in the opposite direction. Crimp close.
 
It works best if the seam is off center.
 
Attach embellishments to the containers.  These make a fun containers to hold yummy goodies for your special Valentine!

Friday, January 11, 2013

DIY: Valentine's Day Wrapping Paper

Thirty Handmade Days has a very fun paper design that they are sharing with the rest of us!  Head on over to their blog for some fancy pants paper!


At Christmas my genius friend Jaimee posted some beautiful wrapping paper.  I LOVED the idea and decided to make some for Valentine’s day.  I honestly ADORE the results and am working on more projects similar to this.

I made one traditional subway art type of wrapping paper.  And then I had a little fun with another sheet.  I made paper that had lyrics from what Josh and I call “Date Me” songs.  These are songs that we hear and immediately think of each other and when we were dating (14 yrs ago!).  Most of the time it’s when I’m listening to 90′s on 9.  ;) Try really hard not to laugh at the lyrics because most of them are not mushy!
Follow Me on Pinterest

Sunday, November 18, 2012

DIY: Pencil Holder Using an Upcycled Can

Hello Inspirations by D's blog has a great upcycle DIY for those metal cans you get your veggies or other groceries in.  We love this and think it'd make a great gift for someone that loves crafts (ex. YOU!). 
Hi everyone!  Today I'm sharing a tutorial on how to make your own pencil holder
with a recycled can.  Are you ready?  Here we go...
First you will need these items:


* A recycled soup or bean can (cleaned)

*Scrapbook paper, wall paper
or gift wrap paper
* Scissors or other cutting device
* Spray adhesive or mod podge
*Clear tape
This is what I did...

I purchased scrapbook paper which runs about 50 to 60 cents a sheet.
I grabbed a soup sized can from the recycling bin.
I Removed the wrap from the can.
I Cleaned the can with soap and water and set it to air dry.
I measured the original can wrap against the scrapbook paper with a ruler.
Made marks with a pencil and erased later.
Once I had my measurements, started cutting the paper.
I Wrapped the paper around the can, to keep it sturdy,
I took a small piece of tape and taped down one end of the sheet of a paper on the can,
then wrapped the sheet of paper around the can and sealed it with clear tape, you can use mod podge.
Hello new pencil holder and it holds magnets too!!
Be creative!!  You can add extra decor by using buttons, ribbons and other decorative items.

Thursday, October 25, 2012

DIY: Book Page Pumpkin Tutorial

Halloween is just around the corner, and this tutorial can be made in just a short time, so it's perfect for last minute decorating!  We love this idea which is from Creations by Kara's blog - so check her out!
book page pumpkin
Book Page Pumpkin Tutorial
1- Make a pumpkin shape out of a piece of paper. I roughly drew one, then folded the paper in half and cut it so it would be symmetrical. Book Page Pumpkin 
2-Take the cover off of your book and place the pumpkin pattern with the fold on the binding edge. If it doesn't fit, trim it a little. Book Page Pumpkin 
3-Trace around the pattern with a pencil.
 Book Page Pumpkin 
4-Now it's time to cut out your pumpkin. You can use an exacto knife, but I found that it was easier just to use scissors. I could cut through 5-6 pages at a time pretty easily. If you don't have fine tipped scissors to cut all the way to the edge of the binding, you can use an exacto knife there.  
5-After you cut all the way around, pull the excess pages over to the binding and they should tear right off.
  
6-Now trace around the pumpkin shape and cut through a few more pages. Tip: cut slightly inside the pencil mark, or your pumpkin will keep getting bigger. Yep, I learned that the hard way.   
7-Keep tracing and cutting until you have all the pages done.  
8-Now put a thin strip of glue on the very edge. I'm the impatient type, so I used hot glue.
  
9-Now bring that back page around and attach it to the hot glue, keeping the outside edges as even as possible. Then add a stip of hot glue to that page, and glue the next page to it, just on the inside edges. I sure hope that makes sense.  
10-When you stand your pumpkin up, it will probably look something like this:  
11-Don't panic! It just needs to be "fluffed". Just go around pulling the pages apart and arranging them how you want them. If I had a space where the pages just refused to come together, I added a little hot glue right at the inside seam. When you are done, it should look more like this. It's OK that there are some spaces. We'll fix them later.  
12- At this point I decided my pumpkin needed a little color. I could have inked all the edges with my orange ink pad. But I knew that would take awhile. So I turned to my best friend Krylon. Spray paint that is. Yep, you can totally spray paint book pages. Just use a very light touch, you don't want it drenched or anything. One light spritz is all you need.  
13-Now it's time to add the stem. I just used a stick from my yard. If you have any stubborn pages, now you can bend them to your will. Bwaahaha! I used a bunch of hot glue, then forced the pages where I wanted them and held the stem in place till the glue dried. Voila!  
14-Next I tied a ribbon around the stem. Not only does it look cute and add some color, but it hides all the gobs of hot glue. Yay!  
And just because I love it so, here is another shot of it sitting on my entry table.
 

Thursday, September 6, 2012

DIY: Upcycled T-Shirt Belt

We love all the ways that people have come up with to upcycle old t-shirts.  This tutorial from Delia Create's blog is no exception! She even shows you how to use this technique to make a headband as well. So, check her out!

It's pretty easy. The part that takes the most time is the braiding really.

To start you just cut four strips of T-shirt. I cut mine 2.5 inches wide.

Pin the ends together and hold it down with a can or a book.


 Now braid. This is a four strand braid. I like that it makes it a little thicker and belt like.


And this is what it looks like after several rounds.

When you are done braiding knot the end.


 Now sew the ends.


You want one end sewn just once so you can wrap it around the D-rings and sew it there a couple of times. It is quite thick so it can be tricky.


For the other end sew it several times.


I didn't have matching thread for the orange but I did for the green. It makes it look a bit nicer.

And that's it!