Showing posts with label handmade. Show all posts

Wednesday, January 9, 2013

DIY: Valentine's Day Mantel

So, it is that time of 2013 when all the stores remove any last remnants of Christmas and New Year's items and start overloading on pink and red Valentine's Day jazz!  We are getting in the spirit to with this great mantel decoration idea from My Blessed Life.

We think that this would be easily adaptable to an office / cube space if you feel like making your work spot more interesting.

We hope that you find this as inspiring as we did and gets you into the mood for pink and red EVERYWHERE!


I love the layered simplicity of how the mantel turned out.  I kept the background {old window and vintage ceiling tile} that I used for my Christmas mantel and I switched out the printer’s drawer for another one that is a bit lighter. My hubs and I dug out the V-day decor out from last year and I had a blast making it work on the mantel!


I love my DIY “Be Mine” Topiary from last year.  I also used my Ruffled Satin Heart Wreaths and little balls.


Are you tired of seeing aqua insulators in just about every mantel I decorate? Ahem. I love ‘em, so they aren’t going away anytime soon. :) My Burlap Valentine’s Wreath from last year adds a fabulous texture to the mantel. The white vases with pink tulips make me smile because they are simple and calm.


An old cigar box and salvaged piece of trim {from Southern Accents} created a perfect stand for my little white vase.  The pink leather flower is part of a boutonniere from our wedding…almost six years ago. Wow.


This yellowing, falling apart framed “art” was a gift to my husband back long before he was my husband.  It is sentimental and I love seeing it every day.  Oh, if you haven’t read our story, it’s a good one!


So pretty!

Sunday, December 30, 2012

DIY: Eggnog Cupcakes with Spiced Rum

Baker's Royale has made a picture look so delicious we wish we could eat two dimensional objects!!  These look unreal.  We know that our frosting will not look this amazing, but if they taste anything remotely like they look we couldn't be happier...
 Eggnog Cupcakes Bakers Royale Eggnog Cupcakes with Spiced Rum  

Makes 24 cupcakes | Preparation: Heat oven to 350 degrees F. Line 2 muffins tins with cupcake liners.
Ingredients:
Cupcakes:
  • 1 1/2 cups self-rising flour
  • 1 1/4 cups all-purpose flour
  • 1 cup (2 sticks) unsalted butter, softened
  • 2 cups sugar
  • 4 large eggs, at room temperature
  • ¾ cup eggnog
  • ¼ cup milk
  • 1 teaspoon vanilla extract
Spice Rum Buttercream:
  • 5 large egg whites
  • 11/2 cup sugar
  • 4 sticks unsalted butter, diced and softened
  • 1/4 teaspoon salt
  • ½ cup spiced rum
Instructions:
To make cupcake:
  1. Measure out flour and set aside.
  2. Add sugar and butter in a bowl and cream on medium speed until fluffy, about 3 minutes. Add eggs in 1 at a time, beating well after each addition. Add the dry ingredients in 3 parts, alternating with the eggnog and vanilla to start. Mix after addition until incorporated-do not overbeat.
  3. Fill cupcake liners about 3/4 full and bake for 20 to 25 minutes. Transfer cupcakes from tins to cooling rack. Allow cupcakes to cool completely before frosting.
To make Spice Rum Buttercream:
  1. Combine egg whites and sugar in a bowl placed over simmering water. Bring mixture to 160 degrees F while whisking constantly.
  2. Transfer mixture to stand mixer bowl, fitted with a whisk attachment and beat on medium  high speed (speed 8 on a KitchenAid stand mixer) until mixture cools and doubles in volume and forms stiff peaks; about 10-12 minutes).
  3. Add butter in one piece at a time, mixing to incorporate after each addition. The mixture may appear clumpy and almost curdled looking at first-this is normal. Keep mixing and it will become even and smooth again.
  4. Add salt and spiced rum and mix to combine.


Saturday, December 29, 2012

DIY: Balloon False Ceiling

Wants and Wishes blog has a fantastic last minute idea for that New Year's Eve party!  If you've been debating how to jazz up the home for the festivities - here you go!!  Visit them for more ideas.
 

 1. Blow up all of the balloons you would like to use. I wanted a variety of colors of balloons so I used 2 different colors of purple, 3 different blues and silver. I think it turned out really well to have the mix of colors.
2. Roughly arrange the colors the way you would like them, this will help when your tying them together that you don't have all the same blues together, but a even mix of colors. (Note I used almost double the amount of silver balloons since I have different shades of blues & purple balloons).
3. Tie them together with string or curly ribbon. Don't tie them too close as they need a lithe room in between. I tie them together so you have 2 rows of balloons- one hanging on the right then one on the left.
Here is a picture with one strand hung up so you can see how full one strand can be. You can add as many strands of balloons you need to create the depth of your area.

Sunday, December 23, 2012

DIY: Marbled Glass Ornaments

Has the panic mode set in with Christmas only two days away?  Having a holiday party and need a few more ornaments to make everything perfect?  We have just the tutorial for you!  These wonderful marbled ornaments are so easy you can whip them up in a few minutes and in any color theme you want!  This tutorial comes from Save On Crafts and we can't wait to give them a shot.

DIY  Paint Clear Glass Ornament  Balls
How to make Marvelous Hand Painted Ornaments with Clear Glass Balls.

Create Marvelous Ornaments™ with Delta Ceramcoat® Acrylic Paints!
It's hard to believe that these luxuriant ornaments are so very easy to create. All ages can enjoy the fun of making elegant swirls of Ceramcoat Acrylic Paints inside of clear ornament balls. Just pour in your favorite colors and swirl away. metallic!
MATERIALS

Delta Ceramcoat® Acrylic Paints
  • 3 or 4 colors
Other Supplies:
  • Paper cups or empty egg cartons
INSTRUCTIONS

  1. Remove hanger and cap from the ornament. Rinse inside of ornament with alcohol. Let dry thoroughly. Start with one color of Ceramcoat® paint. Squeeze just a small amount of the first color into the ornament so it runs down the side (see photo A). Rotate the ornament and squeeze a little more paint down the side in another area until you've added about three or four lines of paint with only a dime-size amount of paint pooling at the bottom of the ornament.
  2. Add the next color, squeezing out a small amount of paint in between the places where you added the first color (see photo B). Continue to add one or two more colors in the same fashion.
  3. Rest the ornament on its side for approximately five minutes. (Place it to rest in the ornament box it came in, an egg carton or a paper cup for easy handling.) Rotate and tilt the ornament a quarter turn every five to ten minutes until the paint covers the entire inside of the ornament. Pour out excess paint. Then continue to rotate it every few hours over the next day. This helps the paint to coat the ornament evenly. The color will continue to move and change with each turn. When the desired effect has been achieved, drain out any remaining excess paint. It may take up to four days to dry completely (a hair dryer will speed drying time). Replace hanger and cap when dry. If desired, decorate with ribbon and hang on tree.
Other creative variations:
  • For horizontal marbling: coat ornament with your choice of colors and let the ornament dry on its side, rotating one side to another, avoiding an upright position.
  • For vertical marbling: coat ornament with your choice of colors as in steps 1 and 2 and prop ball upside down in a paper cup to drain. Let dry.
  • For variegated, irregular marbling: drop in one color of paint, swirl, then add another color. Continue adding or repeating colors and swirling until the entire ball is coated on the inside. Follow step 3.
Important Notes:
Use Ceramcoat paint only-other brands of paint may not be compatible! Also, if paint pulls away from glass, add more paint after original paint dries.
All you need are
Clear Glass Ornaments and Acrylic Paints!
 
Here's what you need to do:
1. Remove hanger and cap from the ornament. Rinse inside of ornament with a mixture of 1 part vinegar, 3 parts water before adding paint. Let dry. Start with one color of Ceramcoat paint. Squeeze just a small amount of the first color into the ornament so it runs down the side. Rotate the ornament and squeeze a little more paint down the side in another area until you've added about three or four lines of paint with only a dime-size amount of paint pooling at the bottom of the ornament.
2. Add the next color, squeezing out a small amount of paint in between the places where you added the first color. Continue to add one or two more colors in the same fashion.
3. Rest the ornament on its side for approximately five minutes. (Place it to rest in the ornament box it came in, an egg carton or a paper cup for easy handling.) Rotate and tilt the ornament a quarter turn every five to ten minutes until the paint covers the entire inside of the ornament. Pour out excess paint. Then continue to rotate it every few hours over the next day. This helps the paint to coat the ornament evenly. Drain out any remaining excess paint. It may take up to four days to dry completely.

Saturday, December 22, 2012

DIY: Anthropologie Inspired Snow Globes

Zomoc.com has a wonderfully easy DIY - there aren't really any instructions, but these look pretty self explanatory!  We could see us whipping up a few of these wonderful gifts for far less than what Anthropologie is charging for them....

Inspired Snow Globes Tutorial

Tuesday, December 18, 2012

DIY: Santa Belt Napkin Rings

http://crafts.kaboose.com/swf/santas-belly-napkin-ring-christmas-craft-photo-350x255-aformaro-07_rdax_65.jpgKaboose's blog has these adorable (and crazy easy to make) Santa belt napkin rings that would be ideal for your holiday table!  Wouldn't you just love to sit down to these cuties at your table?  We think that they are very whimsical and fun!  


What you'll need:


  • Cardboard tube
  • 1 sheet each of red, white, and black felt 
  • Gold chenille stem
  • Scissors
  • White craft glue

How to make it:


  1. Cut cardboard tube into 1-1/2-inch segments.
  2. Place one piece of the tube onto the red felt and cut the felt just slightly wider than the tube. Wrap the felt around the tube and trim off the excess, leaving enough for a small overlap. Glue the red felt around the cardboard tube. (See photo.)
  3. Cut a strip of black felt, about 1/2-inch wide, and glue it around the red tube, lining up the seams. (See photo.)
  4. Cut two strips of white felt, about 1/4-inch wide and glue them around the outside of the red felt, overlapping the edge a little.
  5. Cut a 3-inch piece of gold chenille and bend it into a square for the buckle. Glue the buckle to the black felt, be sure that the seam is on the opposite side. Let everything dry completely. (See photo.)

Tips:


  1. These can also be made with construction paper or craft foam.
  2. Instead of gold chenille, you can use gold glitter glue, but you will need to take into account the drying time needed.
  3. These will look just as good on fancy napkins as they will on rolled up paper towels!

Sunday, December 2, 2012

DIY: Winter Mobile

We are obsessed with Dollar Store Craft's blog and how they always make the cutest and more elegant things with such inexpensive supplies.  Here is a great Winter Mobile for your home!  Be sure to give their blog a read!
mobile-garage
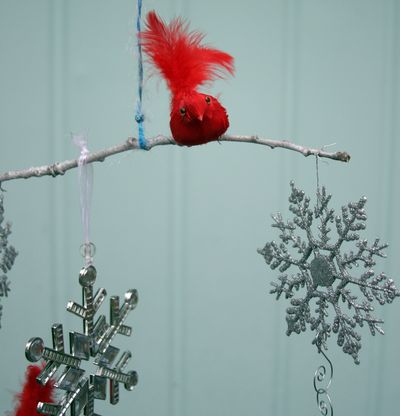
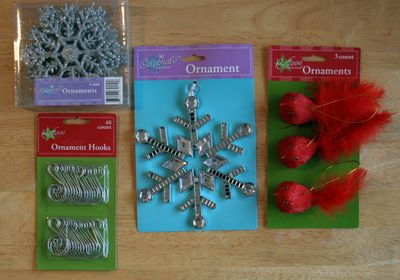
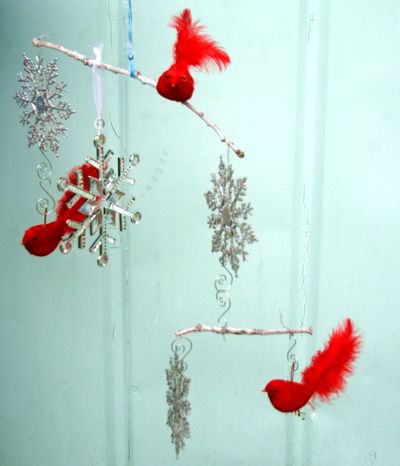
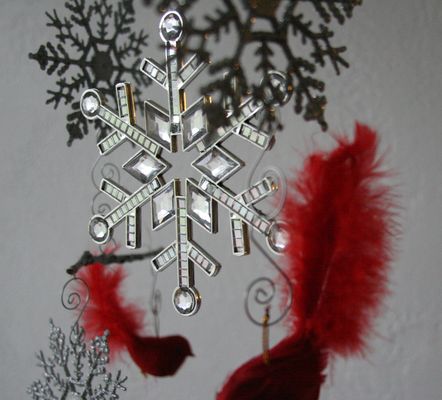
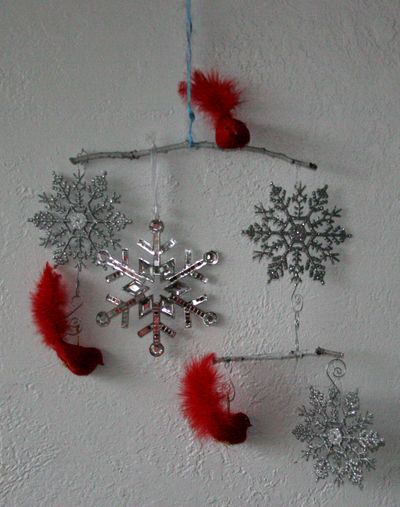
The dollar store has so many cute ornaments this year. I picked up some shiny snowflakes and pretty red birds at the store, found some branches outside, and strung them together for a wintry mobile. You can use pretty much anything on your mobile, so pick your favorite things, attach them to a string and start making one!
mobile-supplies
Project Materials:
  • Assorted ornaments, $3 or on hand
  • Swirly ornament hooks (optional), $1
  • Wire, on hand (I used the wire that came attached to the red birds)
  • Sticks, dowels, or other things to make up the backbone of your mobile, on hand
  • Spray paint (optional), on hand or $1
Total: FREE and up (I spent $4)
mobile-branches
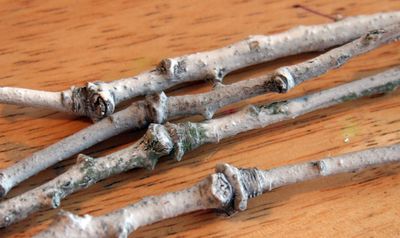
I used oak branches from my yard because I have a ton of them. I spray-painted them with a light coat of white to make them look sort of like birch branches (more wintry!). My oak branches were pretty straight, but they have pretty big knots on them which hurts the balancing process (because the knots kept me from putting things precisely where I wanted to -- strings would slide off a knot). Choosing the smoothest sticks you can find is a good idea!
mobile-sat
Balancing the Mobile:
Balancing the mobile is sort of a process of trial and error, but it's all about balance. The easiest route is to make sure the mobile has equal items on each side and hang them symmetrically. You will get the quickest results by planning a symmetrical mobile.
mobile-snowflake2
If you choose to ignore this advice and opt to make an asymmetrical mobile, here are some tips:
  • I like to think of my mobile like one of those big doctor's scales that has the heavy weights that you move from slot to slot to adjust until you get the bar to balance just perfectly. You will have to do a lot of slight adjustments to get your mobile to balance correctly.
  • I also like to think of my mobile like a teeter-totter (or seesaw): You know how they have three slots at the fulcrum so you can adjust them to compensate if one rider is heavier than the other? You can do that with your mobile by adjusting where the center attachment is located on your stick. Slide it closer to heavier items to help tip the balance in favor of lighter items.
  • You can also slide items closer to the end of the stick to help them act heavier (or closer to the center of the stick to help them act lighter).
  • It helps to have an ornament near the center of a stick (see my rhinestone snowflake) because you can move it to adjust the weight distribution.
  • Use a piece of wire to attach your components to the sticks because they won't slide around very much, making it easier to adjust the balance.
  • Items should float freely and not bump into each other.
  • Expect to have a lot of trial and error when building your mobile!
mobile-straight


Thursday, November 29, 2012

DIY: 10 Minute Santa Ornament

The Long Thread's blog is helping us keep to our overall theme of simple projects that are quick and wonderful!  Be sure to check out their blog.

santa-ornament
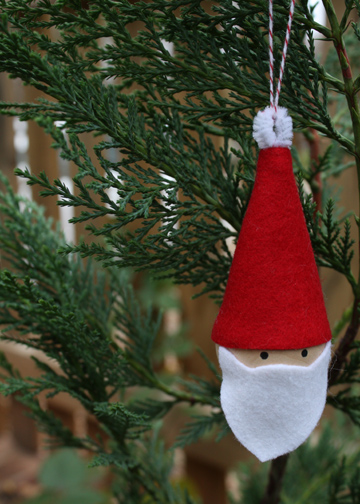
Ten minutes. Really. This is sort of a variation on the elf skittles that I posted about last week. But even easier. I think these would make cute additions to gifts for family, friends or teachers. The kids can help make these if you skip the glue gun and use regular school glue. You  could sign them on the back and add the year.  You could use even smaller wooden balls to make teeny tiny Santas. Or you can take it a step further and make a little body with chenille stems, a larger ball for the belly and beads for the arms and legs.
Supplies:
  • wooden ball (1 1/2″ diameter)
  • red and white felt scraps
  • black acrylic paint
  • white chenille stem (cut to 2″)
  • twine
  • glue gun
santa-ornament-instructions
  1. Cut out the hat and beard from felt according to this template.
  2. Bend the end of your chenille stem and cut to 2″.
  3. Insert the chenille stem in the top of the hat felt and sew, right sides together, using a scant 1/4″ seam allowance. Turn right sides out and poke out the tip with a blunt tool.
  4. Place a couple of drops of glue on the inside rim of the hat and fit onto the wooden ball. Glue the beard on as well, just meeting the hat at the corners.
  5. Draw eyes with a pencil and then paint them on with black acrylic paint.
  6. Loop twine through the chenille stem and tie in a knot. Trim off the ends and put a tiny drop of glue to hold the knot in place just at the chenille stem. All done!

Friday, November 23, 2012

DIY: Burlap Bubble Wreath Tutorial

Today's Fabulous Finds - Tomorrow's Treasure's blog is really amazing at taking step by step pictures and explaining everything she does no matter how seemingly small.  This makes it incredibly easy to duplicate her stunning results!!

Supplies Needed

1-10" foam wreath
(check your dollar store)

1 1/4 -1 1/2 yds. burlap, or other fabric

@100 pins with large heads
(You can use small headed pins for fabrics with a tighter weave. 
I used my old sewing pins and then bought a new package to replace them, now I have new pins for sewing.)

How to Make A Burlap Bubble Wreath


I used a white pin in the pictures to show where you will hold the fabric with your thumb and index finger when folding it.  You don't need to pin it until step five.

1. Cut your fabric into 4" x 4" squares (or close to that).   I cut one square first to make sure it was the size that I wanted and then used it as a guide to cut the rest of the squares.  

Cut the fabric into 4" strips and then cut each strip into 4" squares.  The squares don't need to be measured and cut precisely if you don't want to take the time, but should all be cut pretty close to the same size. 

2.  Fold the square in half to form a triangle.  Take the right hand corner (pinch one layer of the fabric on the very tip) and bring it to the front.  Line up the corners.

3.  Take the left hand corner (pinch one layer of fabric on the very tip) and take it to the back.  Line up the corners.

4.  All four corners should be lined up at the bottom.  It should look like a bubble now.

5.  Pin through all four layers of fabric.

6.  Pin the 'bubbles' to the wreath.  Pin one bubble on and then place the next one close to it so that it hides the pin on the one that you just added.  The bubbles should be just close enough so you don't see any of the foam wreath or the pins.


This pic of the back will give you a better idea of how it all goes together.  You'll want to bring the bubbles around the edge just far enough so when the wreath is against the glass/wall the green doesn't show from the side.  (You can cover the back with fabric first if you'd like.)

To give you an idea of how many it will take, I used just over 90 burlap squares for this wreath.


Thursday, November 22, 2012

DIY: Pumpkin Pie Potpourri

la99191_1002_potpouri.jpgThanks to Martha Stewart - who knows the most amazing ways to jazz up any home decor - we are featuring this wonderfully simple DIY on pumpkin pie potpourri.  It's so easy it's almost ridiculous - almost!

Plus now is the perfect time to cut into those pumpkins and they won't spoil!


Use a pumpkin incense burner to suggest the cozy scent of pie just out of the oven. Cut off the pumpkin's top and scrape out the innards; carve round vents with an apple corer. Rub cinnamon or pumpkin-pie spices onto the lid, or push cloves into it. With a lighted tealight candle inside, the pumpkin will give off a lovely fragrance for about six hours.

Wednesday, November 21, 2012

DIY: Yarn Balls

Abernathy Crafts made such an easy yarn wrapped ball tutorial, we know this is just perfect for those left over pieces of yarn from crochet projects!  So easy, but soooo pretty.  We LOVE it.  

Check them out for more!
yarn balls 5
I didn’t know what else to call them.  They’re balls, wrapped in yarn.  Yarn balls.  I know, it’s silly.  But if you’d like to know how to make some to add some pretty silliness to your space, I’ve got a tutorial for you.
yarn balls
Materials needed:

  • Styrofoam balls (any size will do)
  • Wooden skewers
  • Craft glue
  • Yarn
Before I started on this project, I read on Pinterest that you can dye your skewers using food coloring.  So I tried it.  I filled a glass baking dish with water and several drops of food coloring.  Then I soaked the skewers overnight.  The next day I discovered that it didn’t work.  So then I added the entire bottle of food coloring.  That did the trick.  So apparently it does work but you just have to use a ridiculous amount of food coloring for the wood to soak up. 

yarn balls 2

So, start by shoving the skewers lovingly into the Styrofoam balls.  Pointed end in works best.
yarn balls 3

Starting at the bottom around the stick, spread some glue and begin wrapping the yarn around in a spiral.
banner 2

Keep gluing and wrapping the yarn around until you get to the top.
yarn balls 6

Monday, November 19, 2012

DIY: Plastic Animal Topped Glass Jars

These would make the cutest party favors or decoration for a room!  So easy to make there are only a few lines of instructions from Sweet Paul's blog.  Be sure to check their site out for more DIY!
Jars009


I saw this idea a while back somewhere online and though it was so cool.
I wanted to give it a try.
All you need is some jars with lids, small plastic animals, superglue and spray paint.
Glue the animals to the lid with superglue and spray the whole lid with paint.
Let it dry and you have the cutest jars ever.
Have a great weekend all.
Jars013

Wednesday, November 14, 2012

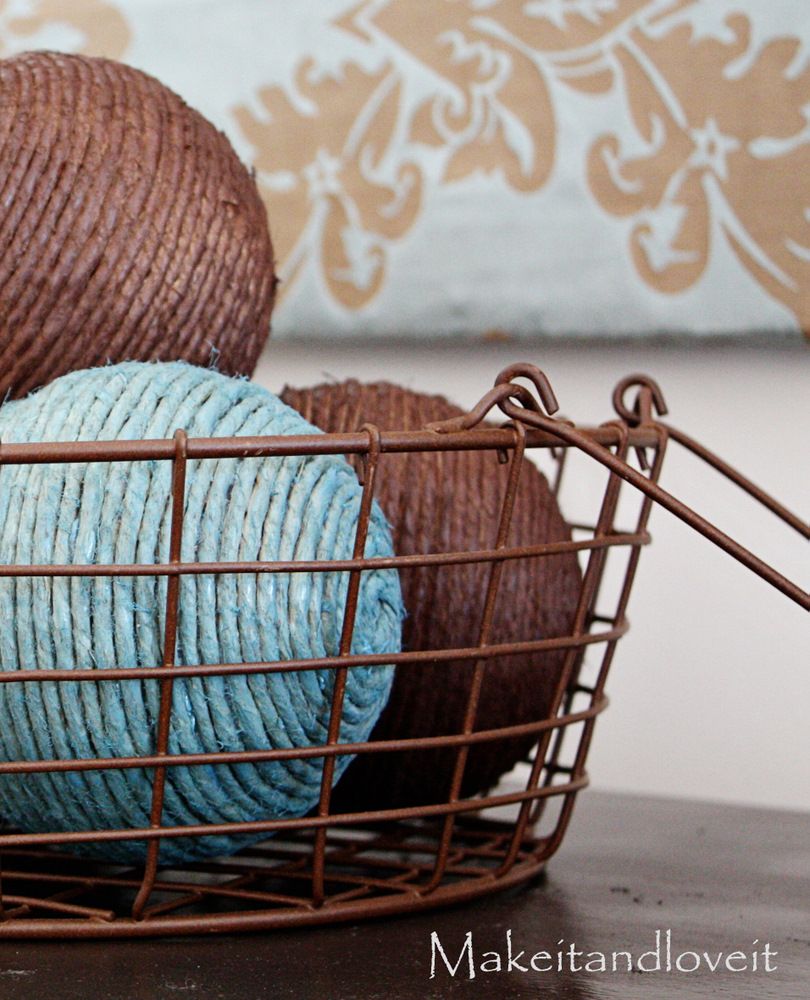
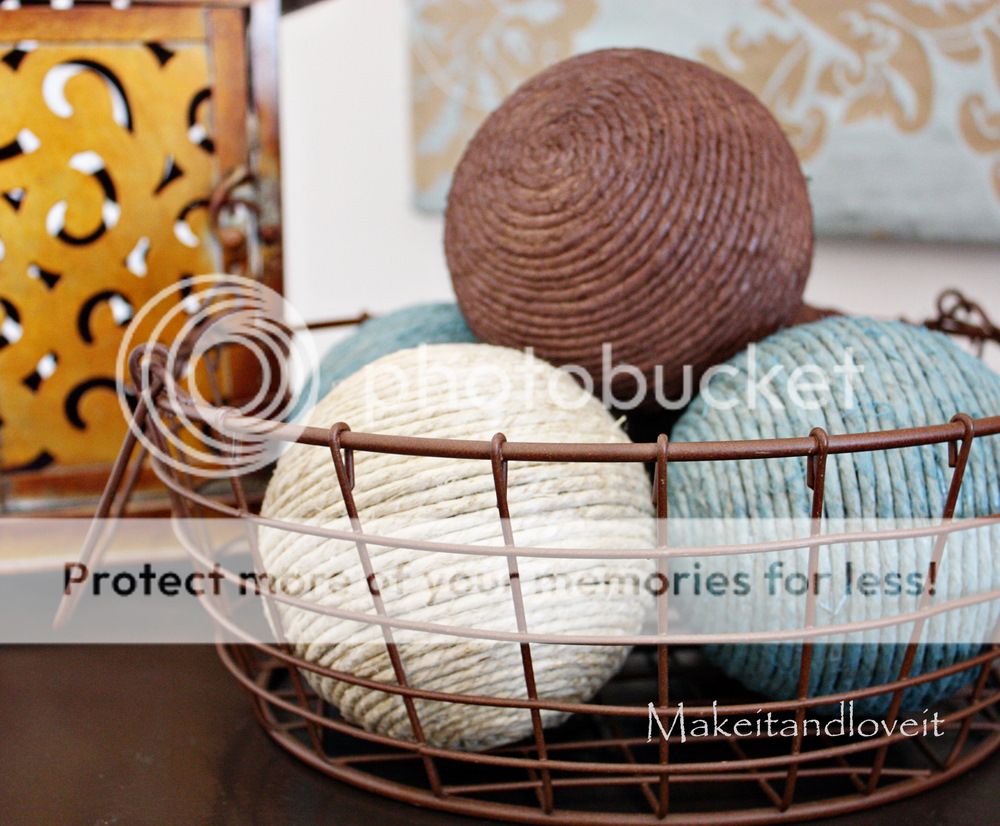
DIY: Hemp Ball Accents

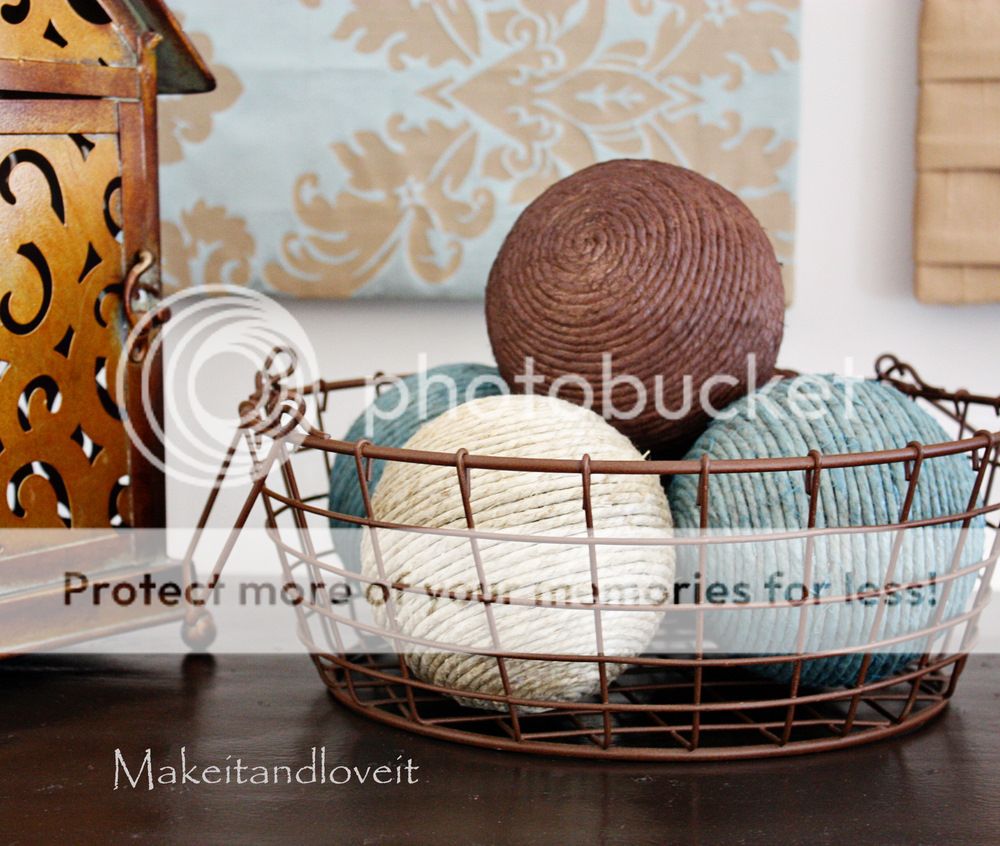
We love these and think that they have an incredibly earthy feel to them, even when painted in fun and bright colors.  You could easily whip up a batch of these for every season!

Check out Make it and Love it's Blog for more!

Nice and tightly wound with hemp cording.
All snug in one place.
How I did it?
I found some thick hemp cording at Wal-Mart in the craft section……or maybe it was with the jewelry supplies. I also found 4 inch styrofoam balls there as well.
I started by smashing one end of the cord into the styrofoam ball, nice and flush with the surface of the ball………..so that I wouldn’t have a lump after I started winding.
Do you see from the side that it’s pretty flat against the ball?
Anyway, then I used a hot glue gun to start winding the cord around itself.
Then added more glue as I went, and winded more and more cord, flush against the ball. (Place your glue right on the styrofoam ball, up against the edge of the cording.)
I kept winding, only using a little glue at a time (maybe 4 or 5 inch narrow line of glue on the ball, right next to the cording), and then pressed the cord nice and tight to the ball. Sometimes I had to smash what I had, against the ball, just to keep a nice contoured spherical shape…..
(See, how the first end of the cord is almost completely hidden on the right but there is no bump above from it being there?)
I kept winding, and kept it pretty tight. And made sure to keep the rows nice a close together.
And then at the end, I wound up the last little bit without glue to see how much I would need, then snipped off the end.
But make sure to have enough to tuck the little end piece under.
And then glue and wind the last bit down. Smoosh it firmly in place to keep a nice symmetrical shape.
Then I used spray paint to customize the color of cording on some of them. This is a great way to match already existing decor.
And left one plain.
Then tossed them all into that wire basket up on my entertainment center. Now my eye isn’t always drawn to that empty basket.
Ahhhh…….