Showing posts with label holiday. Show all posts

Wednesday, January 30, 2013

DIY: Gumball Candy Dish

Who doesn't love candy?  We certainly love candy and that makes this Gumball Candy Dish from Wrapcandy Crafts right up our alley!


Materials:
1 (one) 4″ Terra Cotta Pot
2 (two) 4″ Terra Cotta Saucers
1 (one) Bubble Bowl...Found at Walmart sku# 3100927117
1 (one) Wooden Ball – 1 1/4″
1 (one) E-6000 GLUE  
1 (one) Spray Can Clear Gloss ( Triple Thick – Rustoleum , your choice )
Acrylic Paint

 
Assembly:
1. Paint Both Terra Cotta pot and saucers –and knob- let dry overnight..
( if you were going to add a graphic and/or face plate , you would do this after the paint has dried overnight )
** Note – Face Plate directions below **
2. Place Terra Cotta Pot upside down…apply E6000 to the bottom rim of the pot..
apply Saucer-  let dry OVERNIGHT.

Add Wooden Ball to Saucer number 2, with the E6000 (let dry overnight)

4. Add lid to top of Bubble Bowl
 
FACEPLATE:
The face plate size is pretty much up to you… I use the dimensions either
2 1/4 x 2 1/4″… choice is yours…

Monday, January 28, 2013

DIY: Plantable Paper

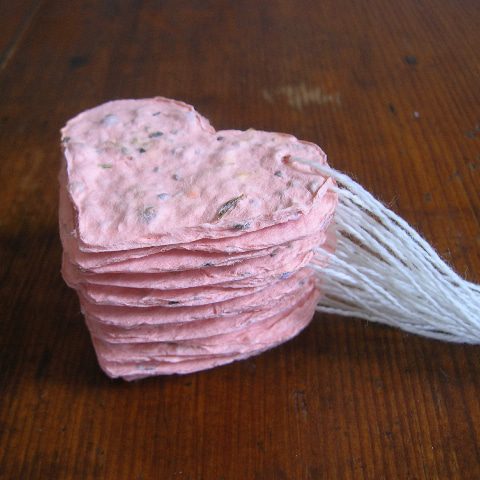
Hill City Bride has a wonderful DIY that incorporates plantable paper and Valentine's Day tags / cards!  We love the eco-friendliness of this idea and also how adorable these little hearts are - so head on over to their blog for more!!
To make your paper, gather everything you will need: a blender, a packet of seeds, a heart-shaped cookie cutter, paper scraps and a mold. A mold is a piece of professional papermaking equipment: a screen is pulled very taught across a wooden frame. You can make your own with an old picture frame without the glass and some screen from the hardware store (you can find directions on the internet) or you can buy them through papermaking suppliers. A mold must have a very tight screen so that there are no sags where water might puddle and create uneven thickness in your handmade paper.
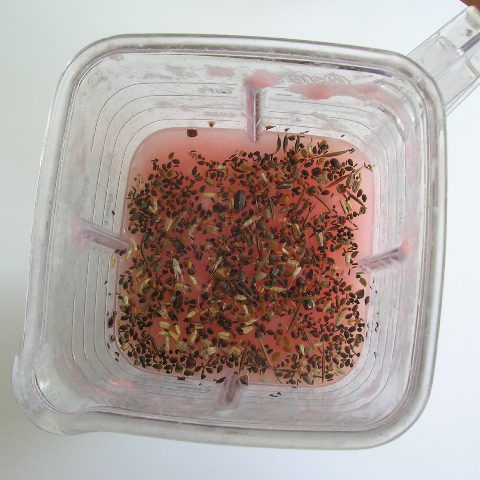
Begin by tearing your paper scraps into small pieces. Make sure to remove any staples, plastic windows from envelopes and any other non-paper materials. Soak them briefly in water to soften the paper so that your blender motor doesn’t have to work too hard. (Make sure to use a blender that is dedicated to papermaking. Because paper is made with chemicals, you will want to buy an inexpensive blender at a yard sale that will never be used for food preparation.) Toss the scraps into a blender with some water and pulverize. You can make a fine pulp or keep the paper in smaller chunks. Once you are happy with the consistency, add a handful of seeds to the blender, and give it a quick pulse to blend the seeds throughout.
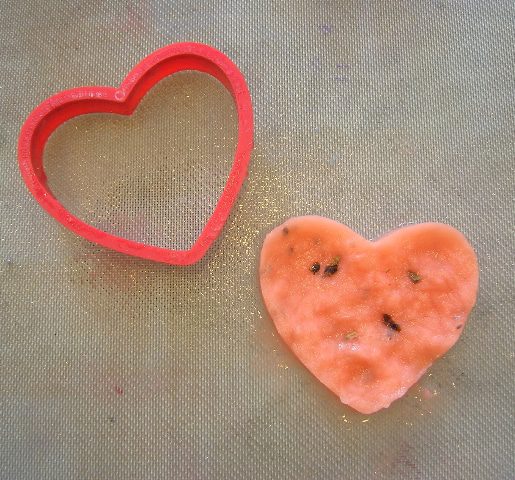
Place your cookie cutter on top of the screen, and place in a sink. Slowly pour the pulp into the cookie cutter, using your finger to push the pulp into an even layer as the water drains into the sink. When most of the water has drained off, lift the cookie cutter, move to another part of the screen and repeat. When your screen is full, place the screen in a warm place or outside in the sun until dry. As the paper dries, the individual fibers will start to lock together and get stronger. To dry the paper more quickly and make a stronger paper, put another piece of screen on top of the heart and press the water out with a sponge. Once dry, lift the paper off the screen, punch a hole in it and thread a piece of string through the hole.
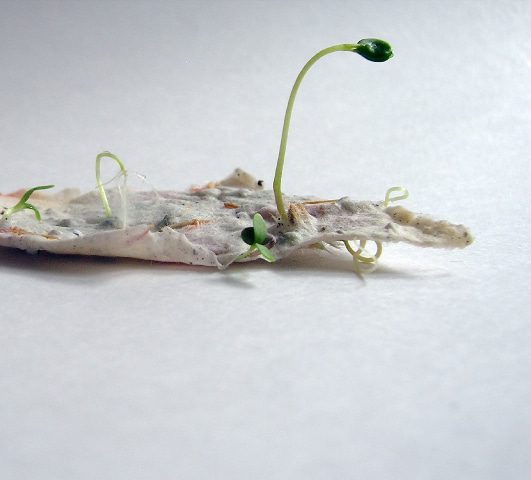
Remember to give your guests directions on how to plant their paper: place the paper into raked ground, cover with a quarter inch of soil then water and keep moist until germination, about 6 to 8 weeks. Take a look at the last photo to see seedlings popping out of some white plantable paper!
I love this idea, and the little seedlings bursting through with life convince me that this indeed is a darling little project. If you love the thought of doing something “green” for your wedding, but you do not want to tackle a project, be sure to visit Pulp Art and check out what have for your wedding day! They make place cards and rectangle hang tags in addition to the heart shaped ones featured today. Thank you again, Pulp Art, for inspiring us to make some plantable paper of our own!

Tuesday, January 15, 2013

DIY: Felt Bird Sachets

These are ridiculously cute!  We can see these being a year round craft - but why not bust them out for Valentine's Day since they are adorned with heart wings??  Check out Positively Splendid's blog for more DIY fun!


Supplies:
Bird Sachet Template {{click here to download}}
Felt in assorted colors (the brighter the better!)
Coordinating embroidery thread
Embroidery needle
Buttons
Cotton batting
Dryer sheets
To begin, print and cut out your templates and use them to cut out your felt pieces: 2 bird bodies and 1 heart wing for each sachet you are making.

Monday, January 14, 2013

DIY: Valentine's Mirror

The 36th Avenue has an adorable mirror DIY that would make for the perfect home decor and / or kid's project depending on how decorative you want to get with it!


My plan was a little bit different in the beginning since I was aiming for some type of cool frame.
This is what I used. An IKEA mirror-frame that I already had,
 DecoArt Paint, glue gun and Valentine’s plastic necklaces. 


TUTORIAL

1

The first thing I did was paint the frame in white.

{ TIP: I always use a garbage bag to protect my table,
then when I’m done I throw the craft mess away inside of it. }


2
♥♥

After a few coats of paint I added one light coat of Silver Glamour Dust from DecoArt.
I love this stuff because you get to see the white through it under the silver glitter dust.
So pretty!


While the glue gun heated up I took the time to cut a bunch of necklaces that
I found over at Big Lots. I bet the Dollar Store will have something similar.


To get the right size all I did was to put the necklaces on top
and cut it in each corner.


I ended with this…


3
♥♥♥

The last step was to glue it!
I wish the picture could show how much the silver dust actually shines…

Saturday, January 12, 2013

DIY: Valentine's Containers

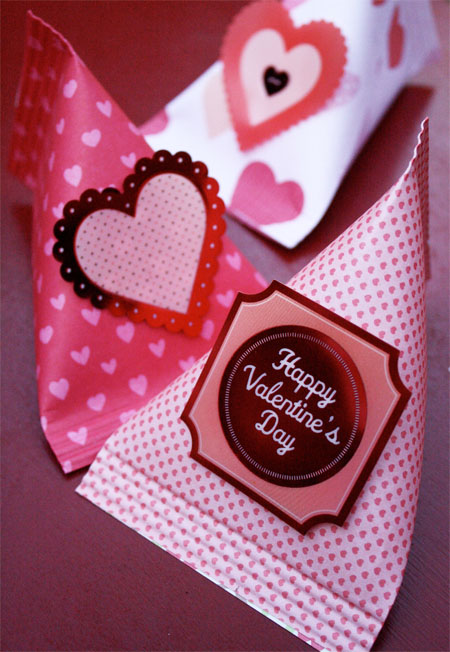
Are you having a Valentine's Day party or are you looking to give out some fun favors for a school / work / church event?  Skip to My Lou's blog has some wonderful DIY containers that are just adorable.  We walk by those paper book packs at Michael's all the time and wonder what we can do with that much holiday paper...now we know!!

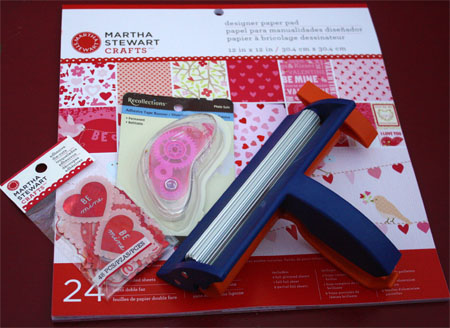
I have been making them for years, but with all the new printed papers and embellishments it is a new quick an easy craft. I found everything I needed at Michael’s Arts & Crafts. Look for heavyweight paper or cardstock {loving this pad from Martha Stewart} for these containers, cute embellishments, adhesive tape runner and a Fiskars paper crimper.
 
These containers can be made any size.  I cut paper 4.25″ X 5.5″ (roughly cutting an 8 1/2 X 11 sheet of paper in half).
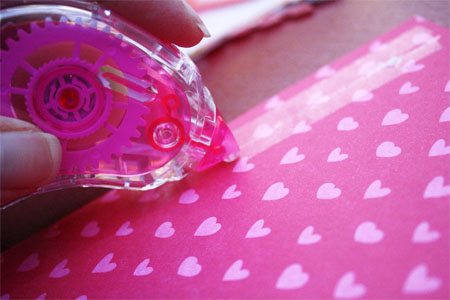
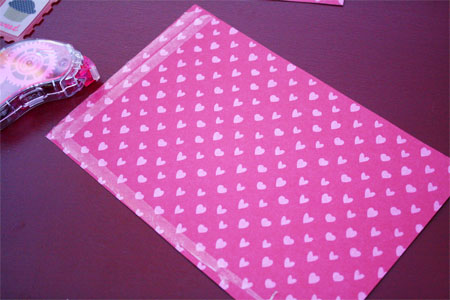
With a tape runner put two rows of tape on one edge. Glue stick or Double Sided tape can also be used. Be generous with the adhesive!
 
Put  the adhesive tape runner {my favorite} along the end and one side of the paper on the wrong side.
 
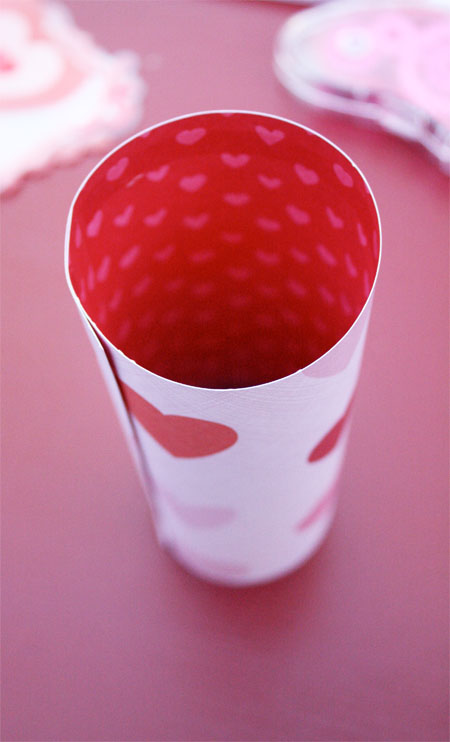
Roll paper into a tube, overlapping the edge about 1 inch.
 
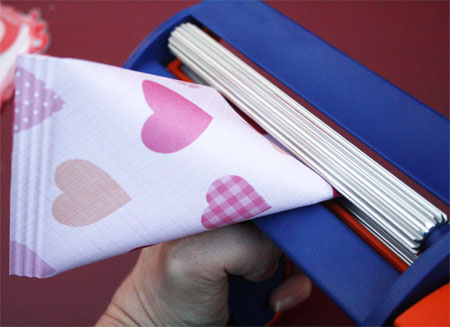
Pinch the edge with the adhesive closed. Place the closed end in the paper crimper. Turn crimper about three to four times.
 
Fill container with goodies. Place adhesive on the inside edge  of the other end. Press end together in the opposite direction. Crimp close.
 
It works best if the seam is off center.
 
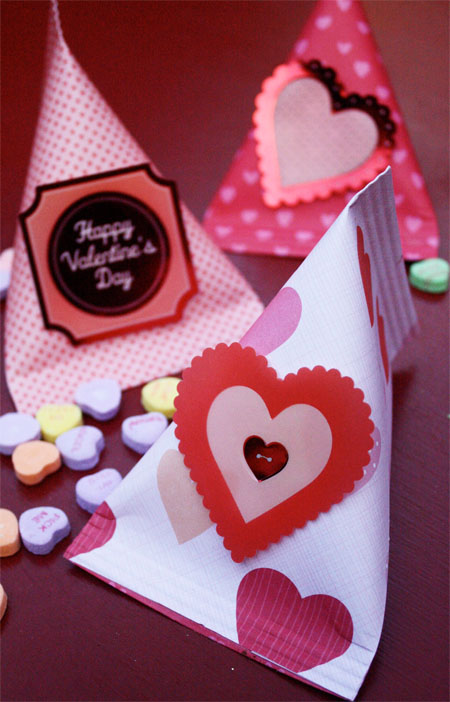
Attach embellishments to the containers.  These make a fun containers to hold yummy goodies for your special Valentine!

Wednesday, January 9, 2013

DIY: Valentine's Day Mantel

So, it is that time of 2013 when all the stores remove any last remnants of Christmas and New Year's items and start overloading on pink and red Valentine's Day jazz!  We are getting in the spirit to with this great mantel decoration idea from My Blessed Life.

We think that this would be easily adaptable to an office / cube space if you feel like making your work spot more interesting.

We hope that you find this as inspiring as we did and gets you into the mood for pink and red EVERYWHERE!


I love the layered simplicity of how the mantel turned out.  I kept the background {old window and vintage ceiling tile} that I used for my Christmas mantel and I switched out the printer’s drawer for another one that is a bit lighter. My hubs and I dug out the V-day decor out from last year and I had a blast making it work on the mantel!


I love my DIY “Be Mine” Topiary from last year.  I also used my Ruffled Satin Heart Wreaths and little balls.


Are you tired of seeing aqua insulators in just about every mantel I decorate? Ahem. I love ‘em, so they aren’t going away anytime soon. :) My Burlap Valentine’s Wreath from last year adds a fabulous texture to the mantel. The white vases with pink tulips make me smile because they are simple and calm.


An old cigar box and salvaged piece of trim {from Southern Accents} created a perfect stand for my little white vase.  The pink leather flower is part of a boutonniere from our wedding…almost six years ago. Wow.


This yellowing, falling apart framed “art” was a gift to my husband back long before he was my husband.  It is sentimental and I love seeing it every day.  Oh, if you haven’t read our story, it’s a good one!


So pretty!

Wednesday, December 26, 2012

DIY: Black and Gold New Years Eve Party Hats

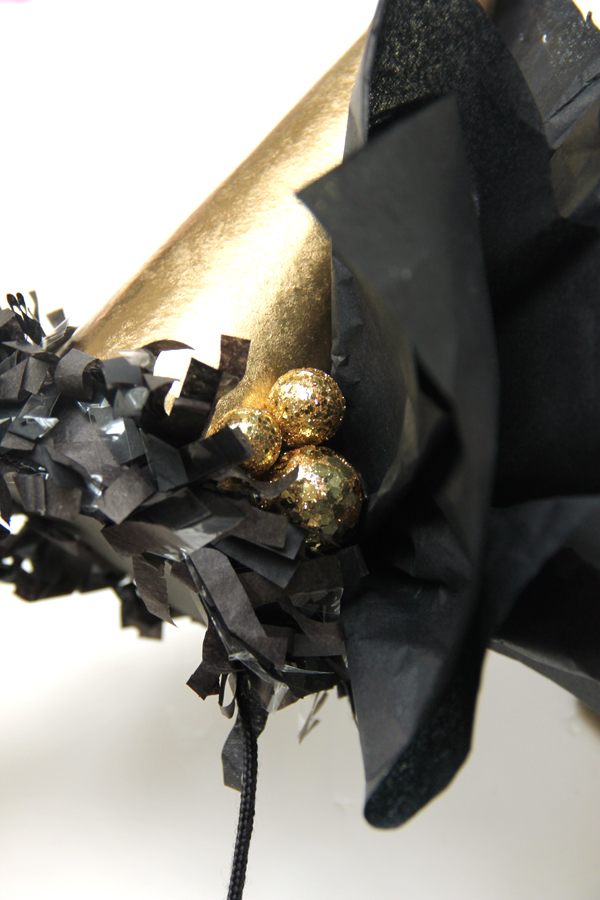
We love these party hats from Studio DIY's website, especially since they are black and gold (UCF colors - and we have knights in the family)!  They look so simple, it's kinda ridiculous and marvelous all at the same time!!  So, get on it.  ;)

DIY New Years Eve Party Hats | Studio DIY
DIY New Year's Eve Party Hats | Studio DIY
Supply List:
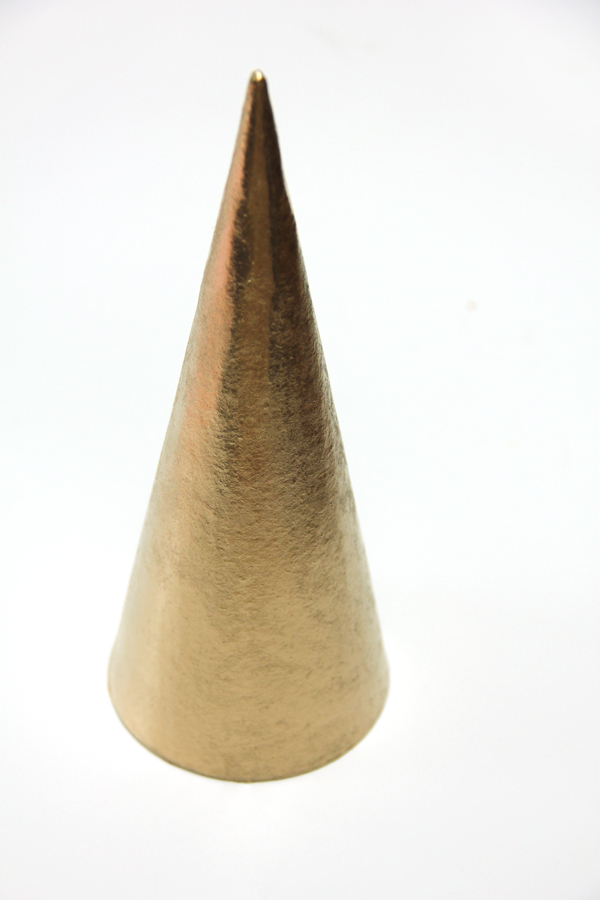
Paper Mache Cone  
Black Tissue Paper
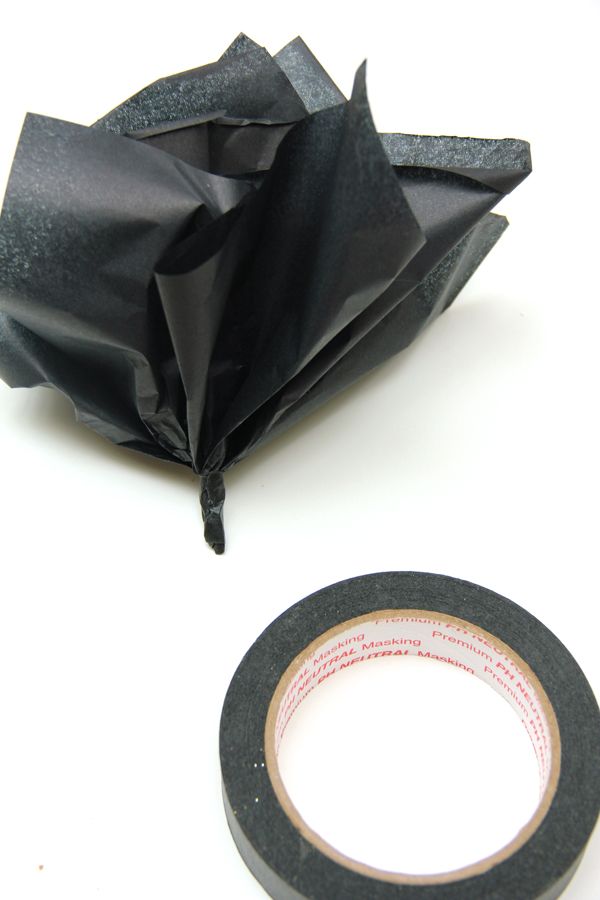
Black Tape
Hot Glue
Black Cardstock
Black Fringe Trim
Headband
Gold Filler Balls or Other Trimming (Optional)
To Make:
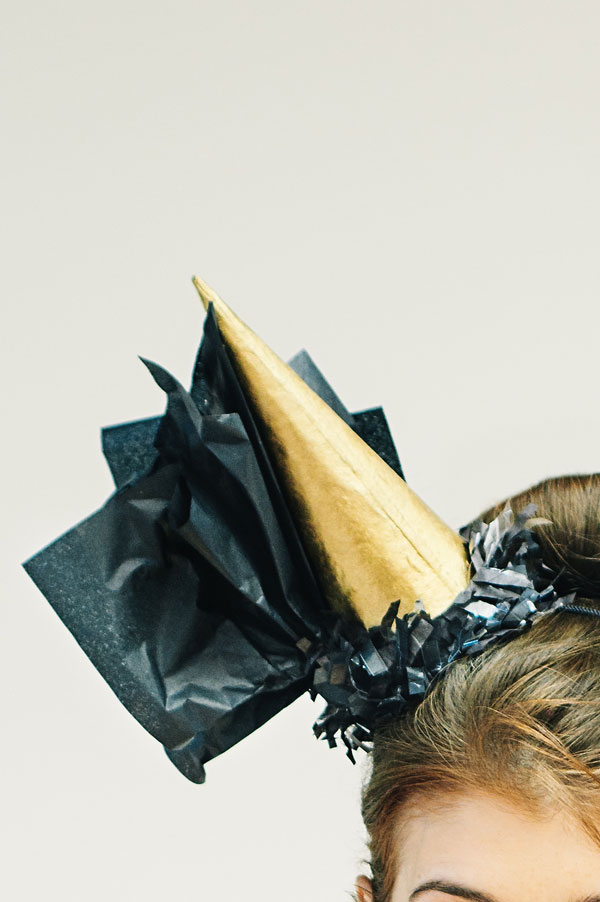
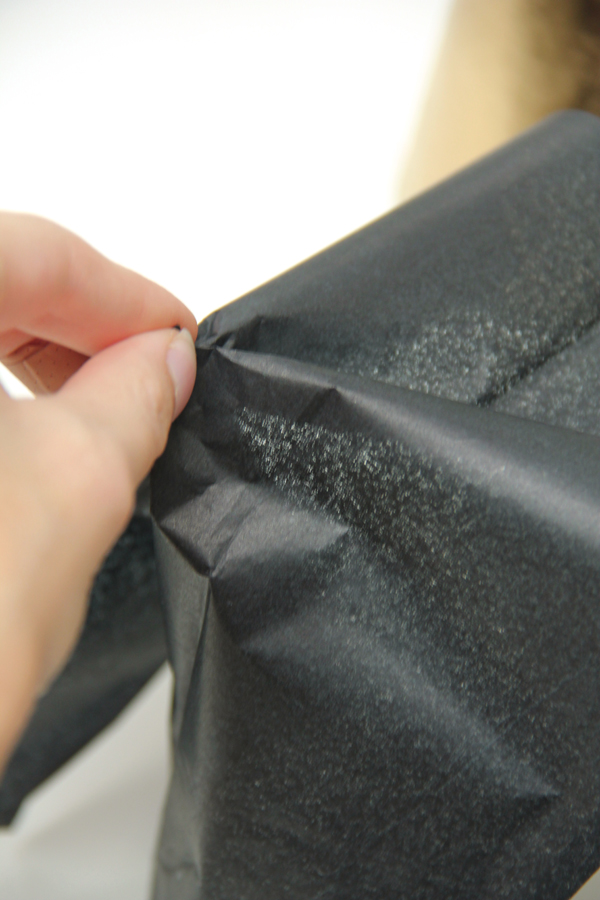
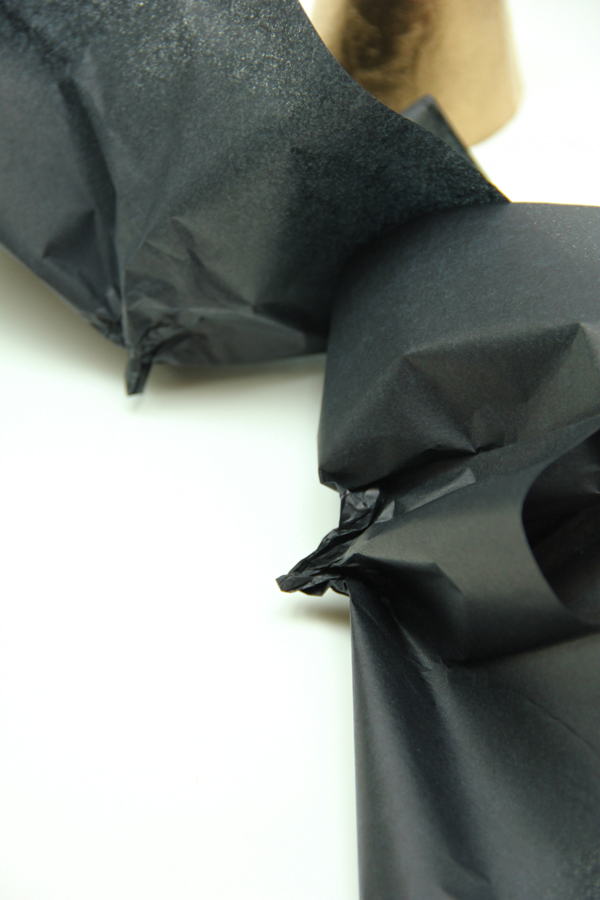
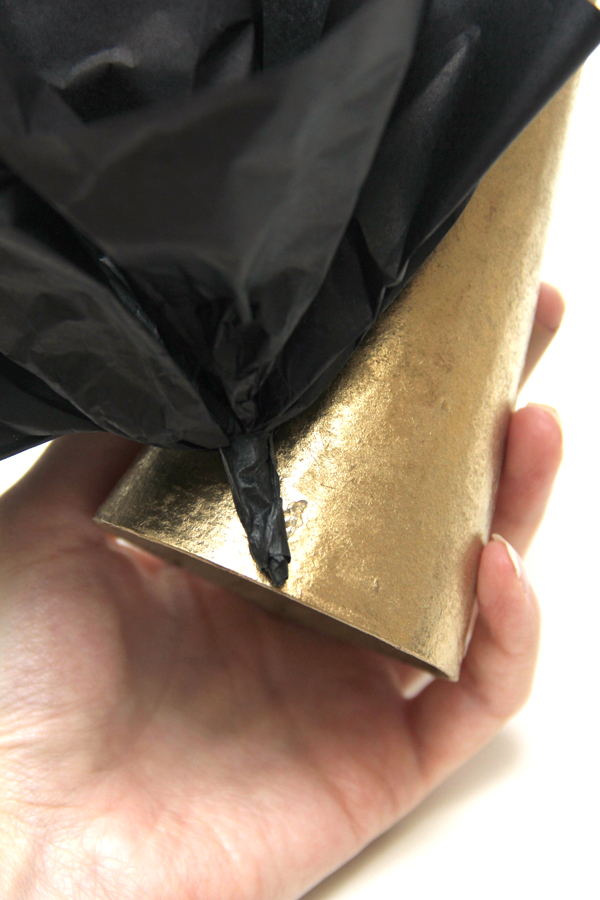
Spray paint your paper mache cone gold and let dry. Meanwhile, cut your tissue paper into five inch squares. You’ll need two for each party hat. Grab one square in the middle and pinch it, then twist so it keeps its shape slightly. Repeat with a second square.
DIY New Year's Eve Party Hats | Studio DIY DIY New Year's Eve Party Hats | Studio DIY
Hold your two squares together at the twisted bases and wrap black tape around them to secure.
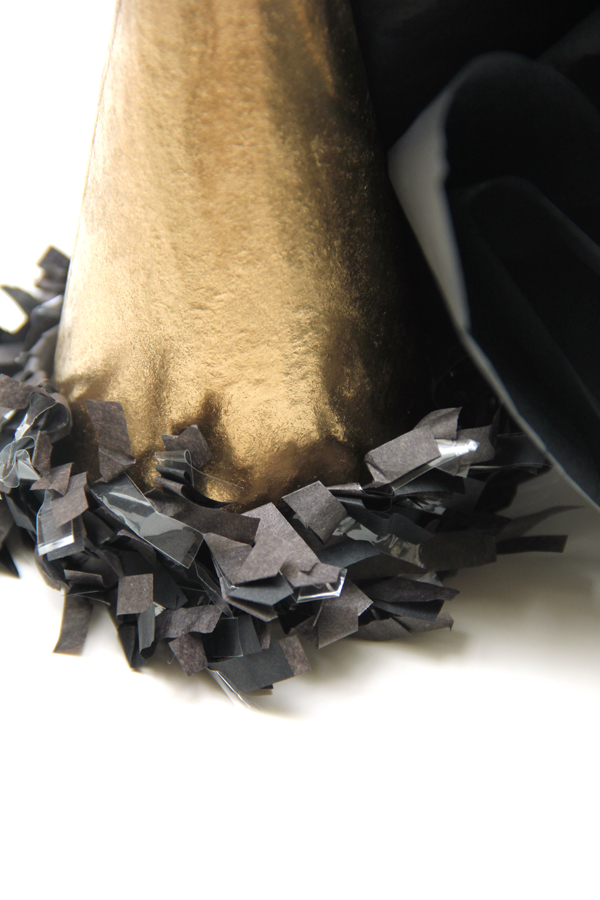
Hot glue your tissue poof to your paper mache cone. Add some fringe trim around the bottom of the cone, covering the base of your poof you just added.
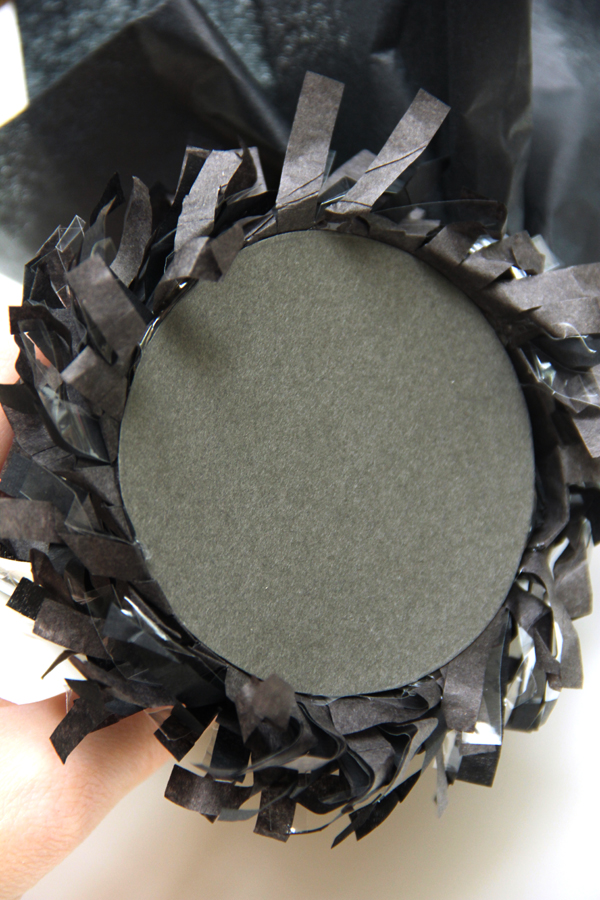
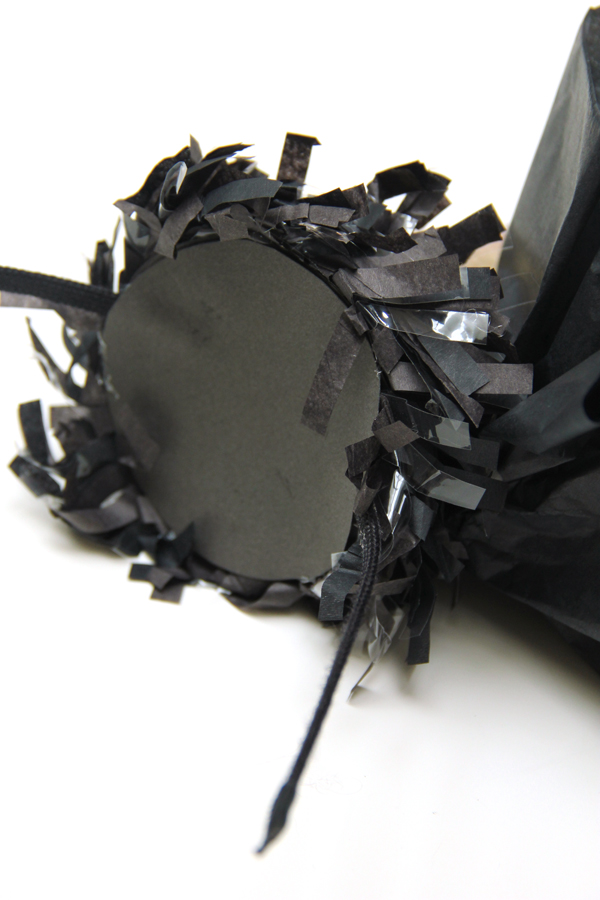
Cut out two circles from your cardstock the width of your cone’s base. Hot glue one to the base of the hat. Now sandwich your headband in between the cone and the other cardstock circle and secure with hot glue.
Add some fun gold fillers or beads if you’d like, or leave it plain. As you can see, I did both!
DIY New Year's Eve Party Hats | Studio DIY

Sunday, December 23, 2012

DIY: Marbled Glass Ornaments

Has the panic mode set in with Christmas only two days away?  Having a holiday party and need a few more ornaments to make everything perfect?  We have just the tutorial for you!  These wonderful marbled ornaments are so easy you can whip them up in a few minutes and in any color theme you want!  This tutorial comes from Save On Crafts and we can't wait to give them a shot.

DIY  Paint Clear Glass Ornament  Balls
How to make Marvelous Hand Painted Ornaments with Clear Glass Balls.

Create Marvelous Ornaments™ with Delta Ceramcoat® Acrylic Paints!
It's hard to believe that these luxuriant ornaments are so very easy to create. All ages can enjoy the fun of making elegant swirls of Ceramcoat Acrylic Paints inside of clear ornament balls. Just pour in your favorite colors and swirl away. metallic!
MATERIALS

Delta Ceramcoat® Acrylic Paints
  • 3 or 4 colors
Other Supplies:
  • Paper cups or empty egg cartons
INSTRUCTIONS

  1. Remove hanger and cap from the ornament. Rinse inside of ornament with alcohol. Let dry thoroughly. Start with one color of Ceramcoat® paint. Squeeze just a small amount of the first color into the ornament so it runs down the side (see photo A). Rotate the ornament and squeeze a little more paint down the side in another area until you've added about three or four lines of paint with only a dime-size amount of paint pooling at the bottom of the ornament.
  2. Add the next color, squeezing out a small amount of paint in between the places where you added the first color (see photo B). Continue to add one or two more colors in the same fashion.
  3. Rest the ornament on its side for approximately five minutes. (Place it to rest in the ornament box it came in, an egg carton or a paper cup for easy handling.) Rotate and tilt the ornament a quarter turn every five to ten minutes until the paint covers the entire inside of the ornament. Pour out excess paint. Then continue to rotate it every few hours over the next day. This helps the paint to coat the ornament evenly. The color will continue to move and change with each turn. When the desired effect has been achieved, drain out any remaining excess paint. It may take up to four days to dry completely (a hair dryer will speed drying time). Replace hanger and cap when dry. If desired, decorate with ribbon and hang on tree.
Other creative variations:
  • For horizontal marbling: coat ornament with your choice of colors and let the ornament dry on its side, rotating one side to another, avoiding an upright position.
  • For vertical marbling: coat ornament with your choice of colors as in steps 1 and 2 and prop ball upside down in a paper cup to drain. Let dry.
  • For variegated, irregular marbling: drop in one color of paint, swirl, then add another color. Continue adding or repeating colors and swirling until the entire ball is coated on the inside. Follow step 3.
Important Notes:
Use Ceramcoat paint only-other brands of paint may not be compatible! Also, if paint pulls away from glass, add more paint after original paint dries.
All you need are
Clear Glass Ornaments and Acrylic Paints!
 
Here's what you need to do:
1. Remove hanger and cap from the ornament. Rinse inside of ornament with a mixture of 1 part vinegar, 3 parts water before adding paint. Let dry. Start with one color of Ceramcoat paint. Squeeze just a small amount of the first color into the ornament so it runs down the side. Rotate the ornament and squeeze a little more paint down the side in another area until you've added about three or four lines of paint with only a dime-size amount of paint pooling at the bottom of the ornament.
2. Add the next color, squeezing out a small amount of paint in between the places where you added the first color. Continue to add one or two more colors in the same fashion.
3. Rest the ornament on its side for approximately five minutes. (Place it to rest in the ornament box it came in, an egg carton or a paper cup for easy handling.) Rotate and tilt the ornament a quarter turn every five to ten minutes until the paint covers the entire inside of the ornament. Pour out excess paint. Then continue to rotate it every few hours over the next day. This helps the paint to coat the ornament evenly. Drain out any remaining excess paint. It may take up to four days to dry completely.