Showing posts with label customized. Show all posts

Thursday, December 13, 2012

DIY: Embellish a Plastic Storage Container

Make and Takes blog has a great embellishing tutorial for those $1 containers you can find at most stores.  We love the idea of using all of our various ribbon pieces to make these pretty!!
Supplies for Ribbon Container:
  • Ribbon: 3 – 3ft long pieces or 1 long 9ft piece, any color
  • plastic basket with holes – mine was from the good ol’ Dollar store
Take your cut ribbon and start at the top, weaving through each hole. Make sure to leave at least 4-5 inches at the outer end to tie into a bow when it’s done. I chose to do three colors of ribbon, one for each level of holes on the container. But you can easily use one long piece of ribbon for the whole thing.
Weave the ribbon all throughout the container. Once the ribbon has gone through each hole, tie the two ends together in a bow. My son made one for his room to hold his CDs. He liked threading his green (always the color green) ribbon through the holes, making sure not to miss one.
These are easy to create and would make great gifts for anyone needing a container. I’m thinking teacher gifts!

Monday, November 5, 2012

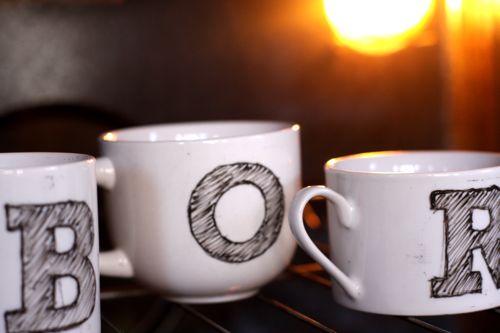
DIY: Monogram Mugs

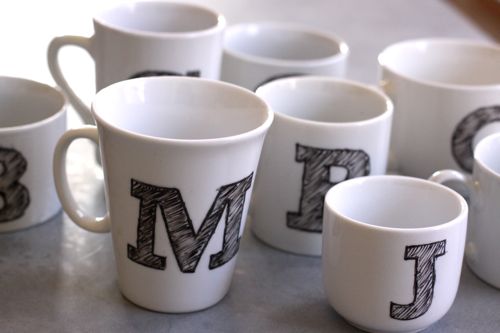
Design Mom's blog has taken the look of the Anthropologie mugs and shifted them into a homemade tutorial that looks just gorgeous!  Who doesn't enjoy the idea of taking an expensive item that they want and making it into a cheap DIY!  Whoo!

DIY monogram mug

It’s a very doable project. Inexpensive. Eco-friendly. And family-friendly too — these mugs are dishwasher safe. I can’t wait to tell you all about it.

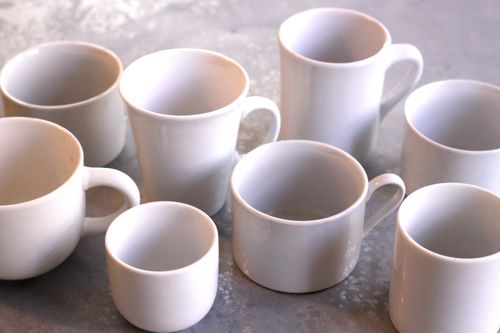
1) We started with a trip to Goodwill, where we collected 8 plain white mugs. Enough for the entire family. There was even a little one without a handle that we thought would be perfect for baby food for June. Mugs were 50 cents each and we had dozens and dozens to choose from.
DIY monogram mug
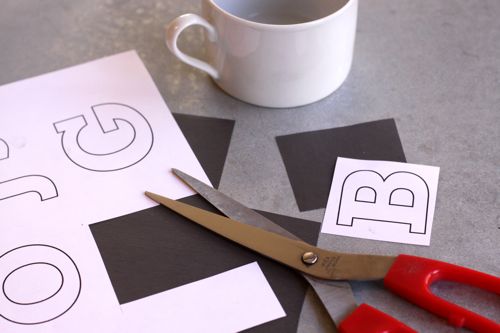
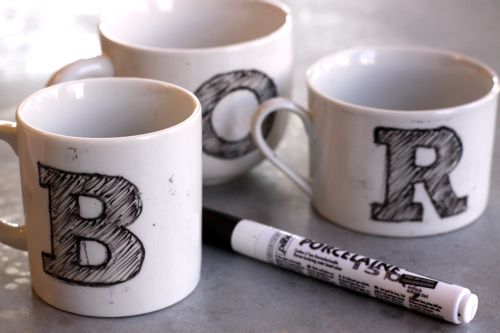
2) Then we gathered supplies. Scissors, pen, tape, graphite transfer paper, Black Pebeo Porcelaine Pen in Fine Point ($4 at Michaels, also available here) and a print out with the family’s initials.
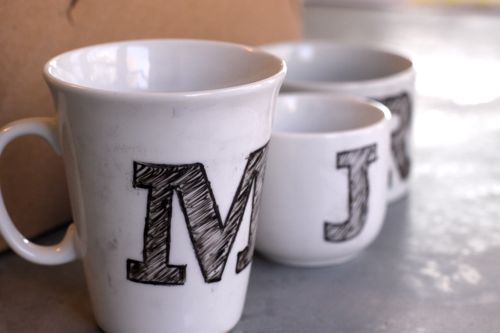
For the font, I had something very specific in mind. I love the look of this Sketch Block Font and had it mentally filed away as the sort of thing a kid could replicate well — because it’s inherently imperfect. For this project, it worked like a charm! Since we were adding our own sketchiness, I started with a similar, but non-sketchy Rockwell font. Look for any slab-serif font (with names like Egyptian or Glypha) and they should work equally well.

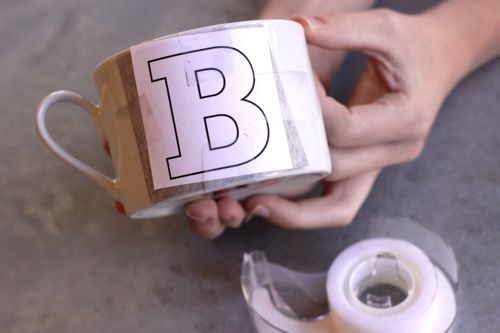
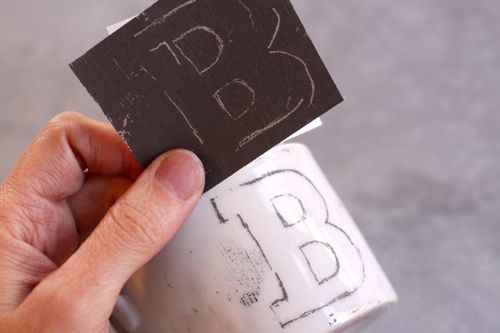
3) Cut out an initial and a piece of transfer paper. Tape the initial and the transfer paper (dark side down) to the mug.
DIY monogram mugDIY monogram mug
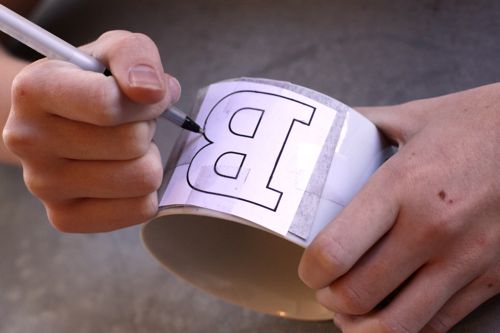
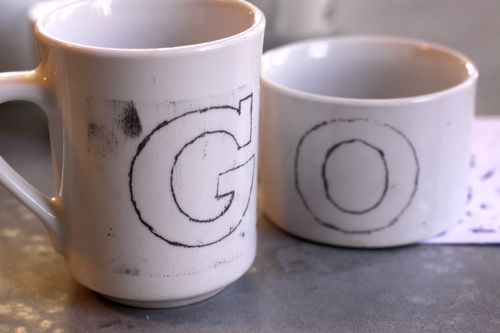
4) Trace the initial. Any pen or pencil will work and you’ll want to experiment with different pressures to see what’s best. You’ll just need a light outline. If you want, you can make your own transfer paper by rubbing a graphite pencil all over a sheet of plain paper.
DIY monogram mugDIY monogram mugDIY monogram mug
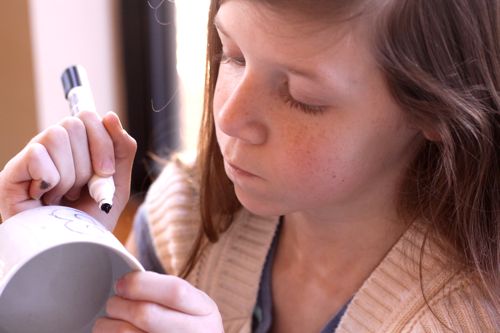
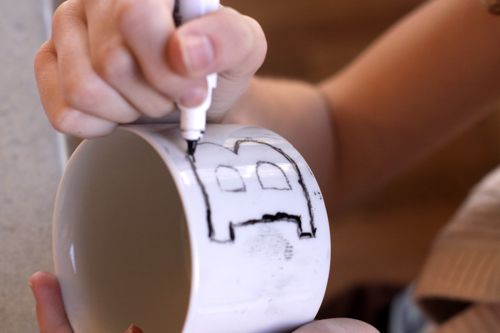
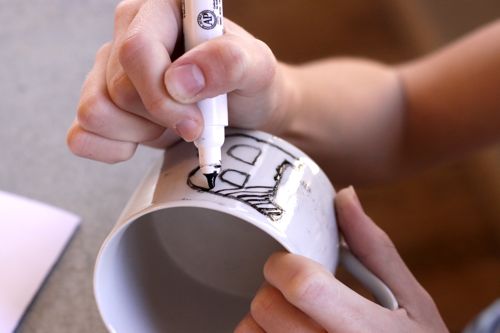
5) Take your Porcelaine pen and trace over the lines of the initial. Get the edges nice and thick then fill in with diagonal sketchy strokes. A few notes:
- The sketchy strokes look best if they’re all one direction.
- The pen didn’t produce very smooth lines for us — which was fine because of the sketchy nature of the lettering. But later, I tried a red Porcelaine pen and produced very smooth strokes. So, I’m thinking my black pen was an old, dried out one. Who knows? This was my first experience with Porcelaine, so I’m not sure.
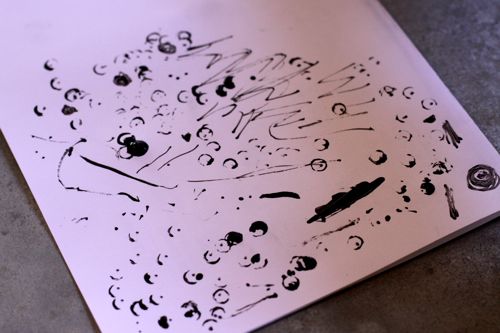
- It helped to have a blank paper handy where we could test the paint pen.
- We definitely got better at it as we practiced. So plan on it. Until it’s baked, the paint will scrub right off in soap and water. We redid mugs at least 4 times.

DIY monogram mugDIY monogram mug
6) Once the lettering is done, let the mugs sit for 24 hours. Then bake them at 300 degrees for 35 minutes. It’s fine to bake them with graphite residue. The graphite will wipe right off even after they’re done baking.
DIY monogram mugDIY monogram mugDIY monogram mug
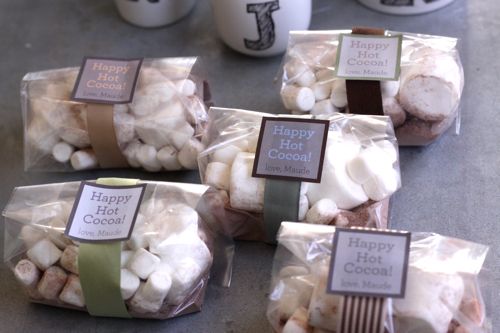
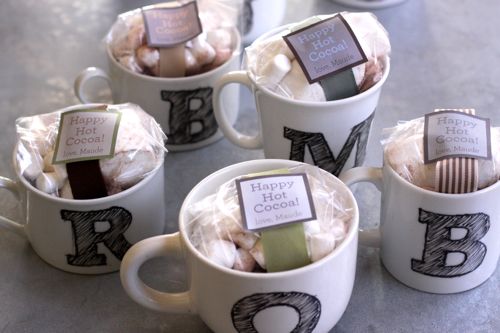
7) And that’s it! Once they’re baked, they’re done. We pulled them from the oven, wiped them up and they were ready to go. For fun, we filled cellophane bags with hot cocoa mix and marshmallows and put them in the mugs.
DIY monogram mug hot cocoa packagingDIY monogram mug

Saturday, November 3, 2012

DIY: Embellished Resin Rings

We love Mod Podge, and are actually obsessed with Mod Podge DIYs.  We think it was made just for us since it's easy to use, quick drying, and pretty fail proof (which we have put to the test).  

Thanks to Tatertots and Jello for helping to keep our addition alive with this wonderful resin ring DIY!! 

Hey Jelloheads!  That’s totally what a follower of Jen’s is called, and I am one too.  It’s Amy from Mod Podge Rocks – your guest host today.
If you don’t know me, I blog about Mod Podge and everything that you can do with it.  I also love the color blue, garden gnomes and pugs.  In my spare time I’m writing a book (that Jen is going to be in!) and I’m training for a 1/2 marathon.  Nuts?  Maybe.  Loveable?  I hope so.
Jen has been obsessed with Mod Podge Dimensional Magic lately, and I can’t blame her.  It’s completely awesome.  I made these rings, one of my favorite (and easiest) Dimensional Magic projects, and I’m going to share with you the three step tutorial. 
YES, it’s that easy.  

T
hey are so inexpensive, you can use existing supplies that you have and they make great gifts.  Here we go.
Supply list:
Ring blanks – purchased at Michaels
Mod Podge Dimensional Magic
Martha Stewart Microbeads – shown in Peridot and Blue Topaz
Embellishments – I used Making Memories Deco Brads – Shimmer and With Love Flower Brads
Keep in mind that if you don’t have the microbeads, you can use paper – just cut it to fit and stick it down in there with Mod Podge.  Okay, so here we go.
Get some ring blanks from your local craft store.  They are pretty inexpensive.
Find a place to secure your ring blank and add a thin layer of Dimensional Magic to the bottom.  Note – never shake your Dimensional Magic bottle.  It adds bubbles.
Shake some beads into the Dimensional Magic.  Let it dry and then dump off excess beads.  If you haven’t filled the ring blank, repeat (you can layer Dimensional Magic).
Add another layer of Dimensional Magic on top of your beads and then stick in the embellishment.  Let dry in a warm place (NOT under a fan) for several hours.  You’re done!  Repeat with as many rings as possible.

Friday, November 2, 2012

DIY: Quick and Easy Felt Magnets

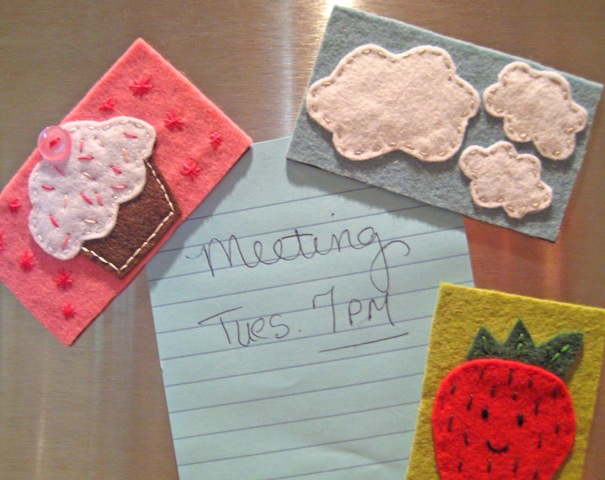
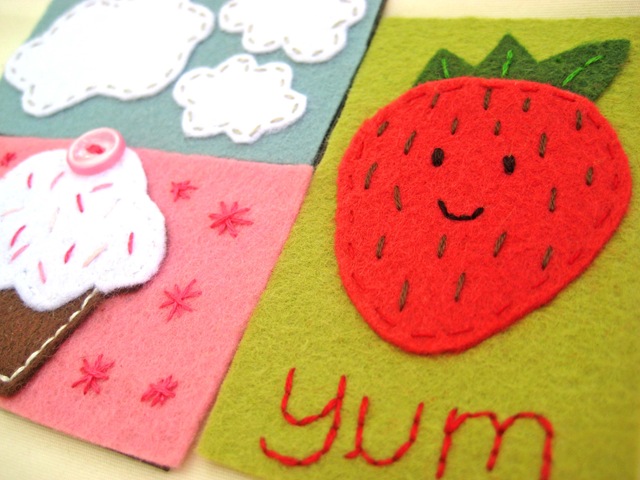
Everything Etsy is a ridiculously cute blog with great DIY projects you need to see.  We especially love this one showing how to make quick and easy DIY magnets in a variety of designs.  Go grab some felt and start making (this would make some awesome stocking stuffers...)!

felt magnets 3
Felt Magnets are a sweet and simple project…perfect for Summer Camps and sleepovers, or while you’re enjoying a little afternoon coffee break.   It’s no surprise to see another felt project on my blog, I’m sure. I love felt!
Here’s how I put together these fun little magnets…
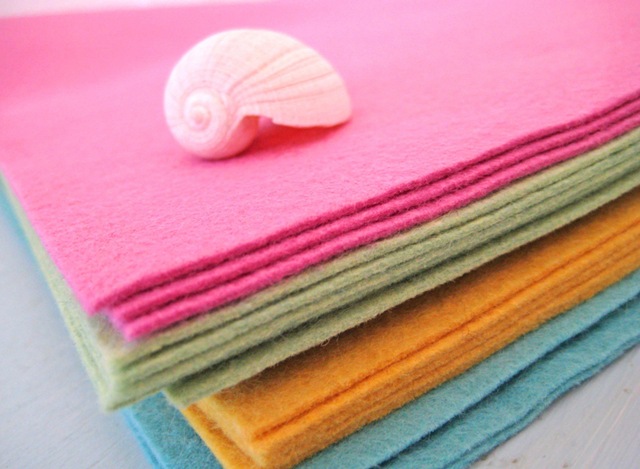
5263041100_e2180f1ccb_b
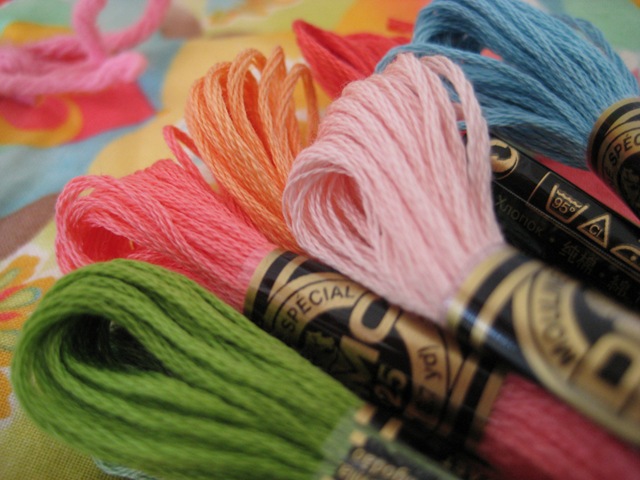
Gather up a selection of beautiful felt for inspiration.  This is all wool felt…I love the colors!
5185403041_1a5f0d157c_b (1)
Bring out you collection of embroidery floss…more pretty colors!
felt magnets 5
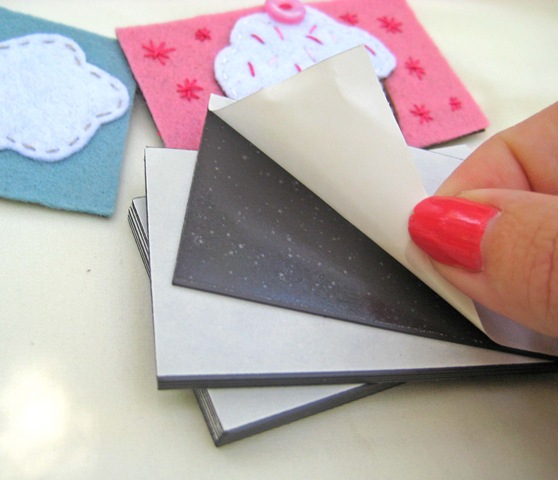
You can find these business card magnets at your local office supply or craft store.  Just peel off the back and use it as a template for your background felt.
felt magnets 4
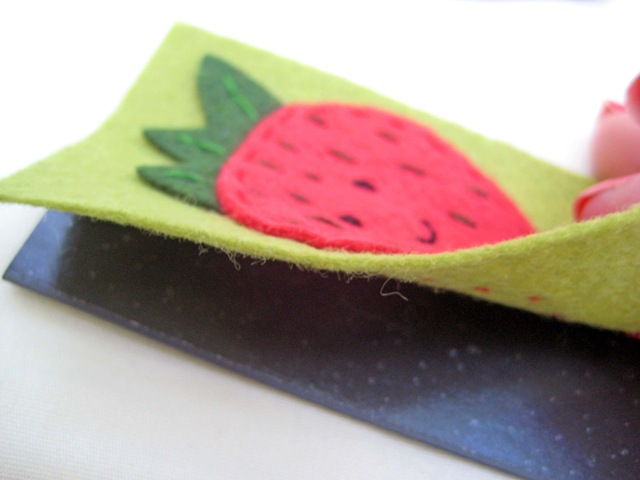
Cut you rectangle out and stitch a sweet little something on it.  Then carefully line up your felt creation and stick it to your magnet.  How easy is that?
felt magnets 1
Quick and easy felt projects never fail to make me smile!
I’m planning to make a few more to keep on hand for gifts.  Tie a few together with some pretty ribbon and you’re sure to make someone’s day.
felt magnets 6

Wednesday, October 31, 2012

DIY: Chalkboard Necklace

Henry Happened blog is great for easy, quick, and inexpensive DIY tutorials!  We particularly like this one that shows how to make a chalkboard necklace.  This is a great accessory because you can change the way it looks based on your mood!

Check out their blog for more quick jewelry DIY!

chalkboard necklace diy - finished!

What you’ll need:
  • Rust-oleum specialty Chalk Board spray
  • a bezel pendant (you could find one at your local bead store or even purchase one through Etsy…this or this would do nicely)
  • finished chain
  • a scrap of satin ribbon
  • glue (I highly recommend a tube of E6000, it is inexpensive, amazingly strong and long lasting!)
  • painter’s tape
  • newspaper
  • basic white chalk
chalkboard necklace diy - supply roundup
STEP 1:  Using the painter’s tape, tape your pendant down onto your newspaper being careful to cover any areas you don’t want “chalk boarded” with the tape.
STEP 2:  In a well ventilated area (i.e. outside) apply 2-3 light coats of “Chalk Board” spray to the exposed surface of the pendant (wait approximately 3-4 minuets between coats).  Let dry.
chalkboard necklace diy - taping & chalk spray application
STEP 3:  Once the “Chalk Board” finish has had time to thoroughly dry (a couple of hours or so should be suffice), carefully remove the protective painter’s tape from the pendant.
chalkboard necklace diy - removing the painters tape
chalkboard necklace diy - fchalkboard application applied and dried!
STEP 4:  Tie a bow with your ribbon.  Trim ends to desired length.
chalkboard necklace diy - making the ribbon bow
chalkboard necklace diy - trimming the bow
STEP 5:  Using your glue, secure bow to top of pendant.
chalkboard necklace diy - attaching the bow
STEP 6:  Attached pendant to chain.
chalkboard necklace diy - pre message (a blank slate)
STEP 7:  Using your chalk write the message of your choice onto the pendant (using the edge of a brand new piece of chalk will help you write small and clearly).
chalkboard necklace diy - finished!
STEP 8:  If you are giving as a gift, place pendant and a piece of chalk into a gift bag (I chose an organza gift bag with a bit of a shimmer in a fun, bright color).
chalkboard necklace diy - finished!
Voila, a sweet chalkboard necklace!
chalkboard necklace diy - finished & modeled