Showing posts with label craft. Show all posts

Wednesday, August 14, 2013

It's Autumn!! Let's Craft to Celebrate!

Sorry I have been MIA for a few months.  We moved across the country and it's been a tad hectic!  On that note - today's post is a nod to the coming of AUTUMN!  I absolutely love this time of year.  The warmth of colors and the depth of beauty in the changing of the leaves and the way the cool breeze starts to calm the hot summer nights...breathtaking!

This craft idea comes from the amazing creators of Midwest Living and it's all about making decorations for the autumn holiday.  They have 32 awesome ideas that are easy and cheap to do!

This is our favorite of the bunch - ghostly gourds!  How adorable are these guys???  Great for the little ones, too!

Grab some fun looking gourds from the grocery store, some white and black paint, and perhaps some twine for hanging these bad boys (or set them on your mantel - no twine required)!

You have the idea - so go and do!  Send me pics of your ghostly adventures!  I plan to do this tutorial on my YouTube channel, so if you want to watch head on over that way here in the next week or so and the video should be up and running.

Tuesday, January 29, 2013

DIY: Wood and Felt Arrows

"Today's Assignment: Be Inspired" is a wonderful blog with tons and tons of fun ideas.  We especially love these arrow that could make for a stunning center piece or hanging mobile!

Here’s a sweet little project that your little crafters can make for Valentine’s Day.
Make some simple Valentine Cupid’s arrows out of items on hand like twigs and felt. Use craft glue to adhere the felt arrow heads and feathers to the twig. 

Add Baker's Twine or even attach a sweet message. For little crafters who are too young for twigs, you can use straws instead of twigs.

Wednesday, January 16, 2013

DIY: "Love" Yarn Letters

Thanks to My Sister's Suitcase we now have a new yarn letter DIY to add to our list!  This is a great tutorial that really shows you how to go above and beyond with letter wrapping so that each side looks perfect and the yarn is going in the right directions from every view line.

Be sure to check out their blog for more fun ideas!


Thanks for all your sweet comments on my Valentine's Day Mantel! I'm back today to share my tutorial for the LOVE yarn letters I created. I had never tried wrapping anything in yarn {other than a wreath}, so I had a few trial and errors along the way :) I'm going to share the technique that ended up working the best and fastest for me.

Start with your letters... mine are 8" hollow cardboard letters. I found them at JoAnn's for $1.99 each, but I'm sure you could find something similar at any craft store. I used 3 different colors of yarn because I wanted to create an "ombre" effect, but I think they would look just as cute in one color if you have some yarn you need to use up :) {I will say, after using a pretty thin yarn I think next time I would try something a little thicker. It would take less wrapping and might give it a more textured look.}

The trick to wrapping these letters is the number of surfaces that have to be covered. You can't simply wrap in one direction and cover the front, back, and all the edges. On a few of my edges {ends of the letters} I ended up using a technique where I glued the yarn instead of wrapping. I tried both ways, and this ended up being much faster. You need to figure out which edges need the "glue" method and do those first. Here's how I did it:


1. E was the hardest letter so I figured I'd show you that one :)

2. Loop your yarn into 2" segments, then cut the loops with scissors to create several small pieces of yarn.

3. Take 6-8 pieces of yarn at a time and group them together. {Make sure your glue gun is ready!}

4. Apply a generous amount of hot glue on the edge of you letter - enough to cover the width of your 8 pieces of yarn - a little less than 1 inch. Place the yarn on the glue and press down quickly. Make sure the pieces are nice and snuggled together so you get a tightly wrapped look :)

5. Once the top has been glued down, the ends of the yarn will be sticking out. Just trim them evenly, leaving enough room to glue them down on the sides.

6. You only need to cover the edge to the point where the actual wrapping will begin. {See, I only went about 2 inches in on the top and bottom of the E.} Here's a view of the top:


Now you are going to start wrapping!


7. For the letter E, you will need to wrap each of the 3 "arms" first, in a vertical direction. Wrap each section separately, and secure the ends of the yarn on the back of the letter with a drop of hot glue {or tape, if you don't want to burn your fingers like I did!}

8. Once all 3 sections have been wrapped vertically, you will start at the top of the letter and wrap in the other direction - horizontally :) Do you like my arrows? This will cover the long section of the E, as well as the remaining exposed edges. Just make sure if you are using different colors that you switch your yarn accordingly :)

9. Finally you're done! I'm going to be honest, it probably took me at least an hour to complete each letter. I'm not exactly sure because I was working on them random times during the day and night {whenever my kids let me!} So I dragged out the process for several days before I finished :) But if you had one night to completely devote to the project, you could definitely bang it out.

Here is how I made the transition between colors to create the "ombre" effect:


Tuesday, January 15, 2013

DIY: Felt Bird Sachets

These are ridiculously cute!  We can see these being a year round craft - but why not bust them out for Valentine's Day since they are adorned with heart wings??  Check out Positively Splendid's blog for more DIY fun!


Supplies:
Bird Sachet Template {{click here to download}}
Felt in assorted colors (the brighter the better!)
Coordinating embroidery thread
Embroidery needle
Buttons
Cotton batting
Dryer sheets
To begin, print and cut out your templates and use them to cut out your felt pieces: 2 bird bodies and 1 heart wing for each sachet you are making.

Saturday, January 12, 2013

DIY: Valentine's Containers

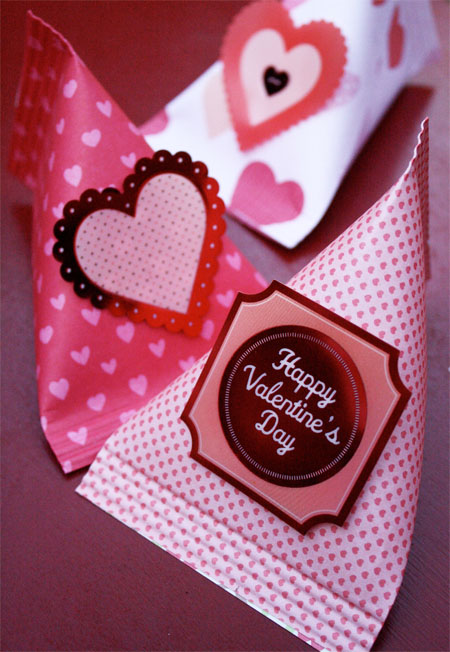
Are you having a Valentine's Day party or are you looking to give out some fun favors for a school / work / church event?  Skip to My Lou's blog has some wonderful DIY containers that are just adorable.  We walk by those paper book packs at Michael's all the time and wonder what we can do with that much holiday paper...now we know!!

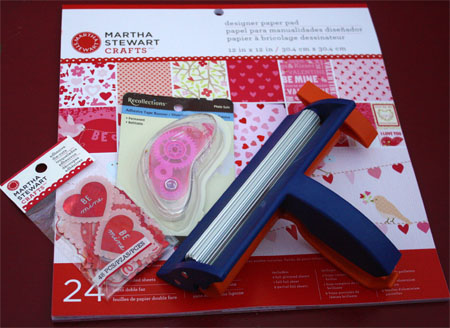
I have been making them for years, but with all the new printed papers and embellishments it is a new quick an easy craft. I found everything I needed at Michael’s Arts & Crafts. Look for heavyweight paper or cardstock {loving this pad from Martha Stewart} for these containers, cute embellishments, adhesive tape runner and a Fiskars paper crimper.
 
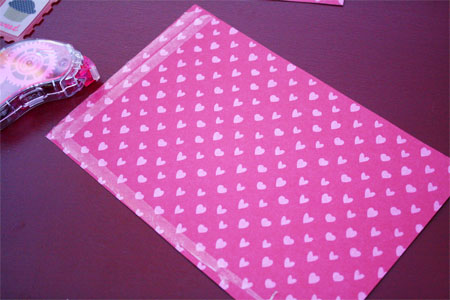
These containers can be made any size.  I cut paper 4.25″ X 5.5″ (roughly cutting an 8 1/2 X 11 sheet of paper in half).
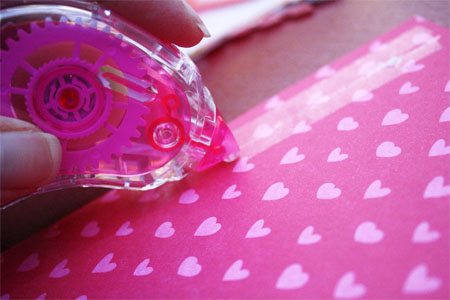
With a tape runner put two rows of tape on one edge. Glue stick or Double Sided tape can also be used. Be generous with the adhesive!
 
Put  the adhesive tape runner {my favorite} along the end and one side of the paper on the wrong side.
 
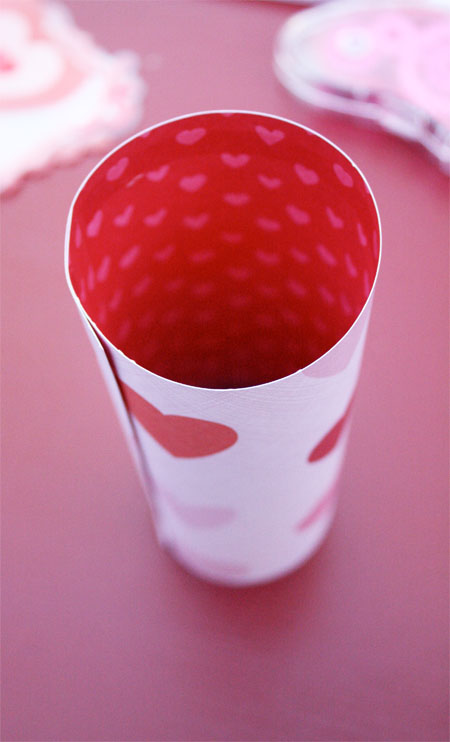
Roll paper into a tube, overlapping the edge about 1 inch.
 
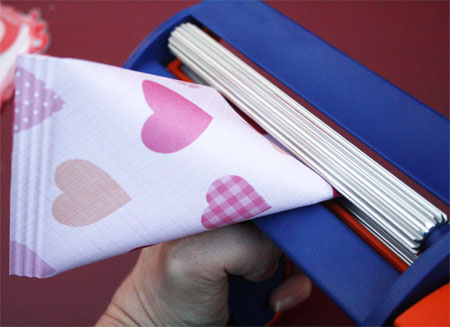
Pinch the edge with the adhesive closed. Place the closed end in the paper crimper. Turn crimper about three to four times.
 
Fill container with goodies. Place adhesive on the inside edge  of the other end. Press end together in the opposite direction. Crimp close.
 
It works best if the seam is off center.
 
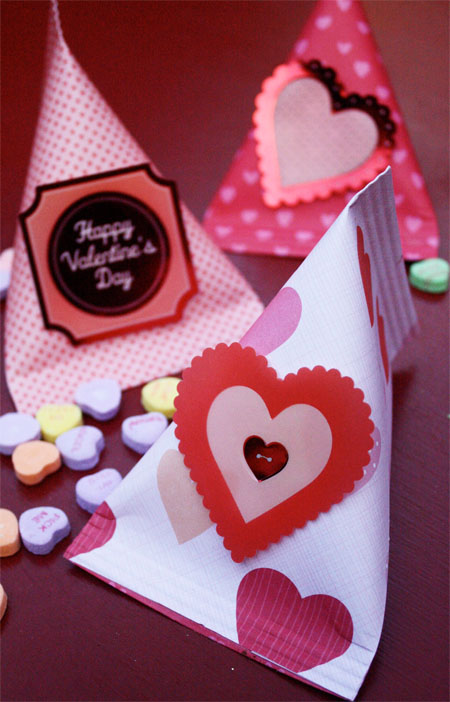
Attach embellishments to the containers.  These make a fun containers to hold yummy goodies for your special Valentine!

Thursday, January 10, 2013

DIY: Felt Heart Garland

Oopsey Daisy is an absolutely adorable blog that helps us stay on track with our Valentine's Day themed crafts.  We are closing in with only 35 days to go until the big day filled with hearts, dinner, champagne, and stuffed animals.  Speaking of hearts - this felt heart garland couldn't be any sweeter. 


You can make your own with some scraps on hand!

Let's get started!


I started with the felt.   I secretly wanted to use all wool felt, but my frugal conscience got the best of me.  So I purchased the red and mustard wool felt, and I had the other colors on hand.  I LOVE the color scheme!  The mustard and turquoise were fun and unexpected pops of color.


Then I sat down and just started cutting out a whole lot of hearts!  I didn't use a pattern--just used the old traditional method of folding the fabric over to achieve a symmetrical heart.  I think I cut out about 90 hearts total.


It was 12:30 AM, and I couldn't thread the yearn through the needle for the life of me.  Finally I tried this trick of taping the end with masking tape. Duh!  It worked perfectly.


I knotted the end of the yarn to prevent fraying and then started stitching!


I made sure that I had plenty of excess yarn so I could sew as long of a garland as possible.  (I didn't want to have to thread that needle any more times than completely necessary!)


I wanted to be unpredictable, so I didn't repeat the colors in any certain pattern.  Crazy, I know!!


I just knotted the very end of the yarn, and started draping!

So what do you think?


Saturday, December 22, 2012

DIY: Anthropologie Inspired Snow Globes

Zomoc.com has a wonderfully easy DIY - there aren't really any instructions, but these look pretty self explanatory!  We could see us whipping up a few of these wonderful gifts for far less than what Anthropologie is charging for them....

Inspired Snow Globes Tutorial

Thursday, December 20, 2012

DIY: Make Bows into Pom Poms

Here is another fantastic DIY from Martha Stewart's website.  If you still haven't been on her webpage - what are you waiting for??  It is full of wonderful craft ideas for any time of year.  We are so close to the holiday, but there is definitely still time to whip up a few easy DIYs for decorations and gift wrapping!!

la100429_1203_cuttinght.jpg

Wednesday, December 19, 2012

DIY: Kraft Wrapping Paper Stamping


Sugar Bee Crafts has a TON of wonderful ways to wrap up all those Christmas gifts you have been buying up for family and friends.  If you want a wonderful and unique way to wrap up your stuff - check them out!!

We especially LOVE this stamping on kraft paper idea!!

DIY Wrapping Paper Tutorial via The Thinking Closet


Sunday, December 16, 2012

DIY: Ribbon Christmas Trees

Whipper Berry has kept it simple, but stunning!  We love her tutorial on making these great ribbon trees!  We can totally see these being a year round home decor project.

Ribbon Trees
Instead of folding the ribbon in half (picture on left), I looped it around (picture on right).
p_100576310_1-              ribbon-no-image
First I spray painted my Paper Mache cones black. Then I cut black and white stitched grosgrain ribbon into pieces ranging from 2.5 –4 inches. I started with the longer pieces at the bottom. After looping the ribbon, I secured each piece with hot glue, and finished row by row, shortening the ribbon lengths as I got higher.
Ribbon Trees 018
On one tree I alternated colors every row, and on the other I alternated each piece.
Ribbon Trees 024-
I finished the top with a bit more ribbon wrapped around the tip.
Ribbon Trees 013
Now I have two beautiful trees that go perfectly with my new décor!

Saturday, December 15, 2012

DIY: Cone Santa Hats

Thrifty Decor Chick took her Stein Mart inspiration to a whole new level!  These wonderful Santa hats look just like the ones from the store and we think they'd look awesome in our foyer...hmmm!

close
I saw some cute Santa hat/suit decor things in Stein Mart a couple months ago and Tweeted about them, saying I could totally make them for cheaper. Well, I decided to go for it, yes. I. did. I started with three foam cones, in different sizes:
009
I got them all for about $10. I think I used a coupon on the largest. If you can catch them on sale, you could spend even less!
I found red velvet at Hob Lob for less than $5 – I only got 22 inches (the width is 54”) and didn’t even use all of that. I figured out the size by rolling the cones and then cutting the fabric:
010 014
I hot glued the fabric down the back and then on the bottom and top to secure the ends:
012
I almost used sparkly red felt, but went with the velvet to the get look I really wanted. Either would be adorable and the felt would be even cheaper!
Then, I got four inches of vinyl (that looks like leather) to make the “belt.” This was less than $2 and I didn’t even need four inches…I only ended up making it 2.5 inches wide:
018
Again, just with some hot glue, I wrapped it around and secured it. Then, the fun part – the fur. I got some fluffy stuff in the ribbon section at Joann’s to use for this:
019 023
Isn’t it adorable? It looks like Santa’s beard! I’m dying.
For the buckle, I found a package of little square crystals. This package had 52 and I used most of them. I figured out the size and shape I wanted before I hot glued them on:
028027
A fluffy puff ball on top, and it was done. And I squealed! I did!:
042
030
I wasn’t happy with the old Christmas candles I had in this tray (which was a $1.99 tray I got at Goodwill and spray painted white) and I hadn’t even spray painted the bottom of it well enough yet, so I just filled it in with some Dollar Store ornaments: 052
My favorite part is the blingy buckle!:
046 047
What do you think? The Stein Mart version is on the left, mine on the right:
photo053
(Mine are looking a little pink in this pic, but they are a deep red.)
Stein Mart had three sizes – I think about $9, $15 and $20 each. My three cost about $25 total. (And I had fun making them!)