Showing posts with label custom. Show all posts

Sunday, February 3, 2013

DIY: Mini Cake Stand

Having a Spring / Easter / ANY party?  Love cake stand DIYsShaken Together's blog has an absolutely adorable mini cake stand that we don't think they could have made easier if they had tried!  We love the simplicity, but the beauty of this project.  

Be sure to head to their blog for more info and more DIY!

I purchased two inexpensive sets of solid colored dishes - one granny smith apple green and one black - inverted the cereal bowls, attached the dinner plates with scrapbooking glue dots (super sticky and easily removed) and my cake plates were born!! 
Here they are in action - sorry, this was the first picture I could find without digging out my CD of hundreds of pictures! 

We made chocolate and vanilla cupcakes with home made buttercream and offered chocolate jimmies, green sugar, coconut and mini chocolate chips ... it was a hit!
 
These would be sweet made with thrift store finds for a Mothers' Day tea, heritage dishes for an anniversary party or fun brightly colored mix & match plates and bowls for your kiddo's birthday party ... use the coffee mugs and salad/dessert plates for smaller cake stands with a little more quirky character :)  The best part is that they can be whipped up in a pinch and stored easily!
Hope you were inspired to {try this}!  And hope you want to hang around a while!  There are lots of ways to follow along ... check out my side bar.  I'm hosting a weekly Pinterest link party, too - scroll up to the top to stop by this week's party!  And I'll be sharing the amazing brownie recipe pictured above in the very near future ... you definitely don't want to miss it!
Photobucket

Saturday, February 2, 2013

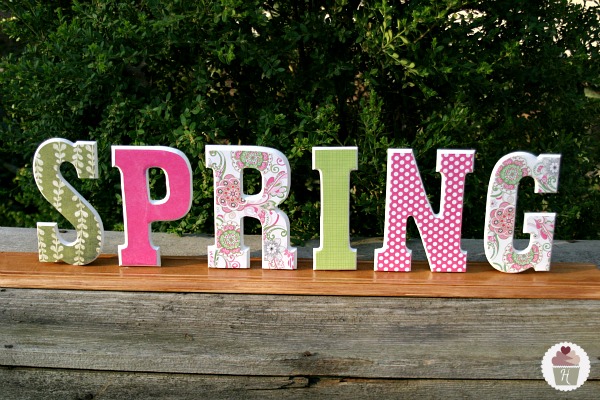
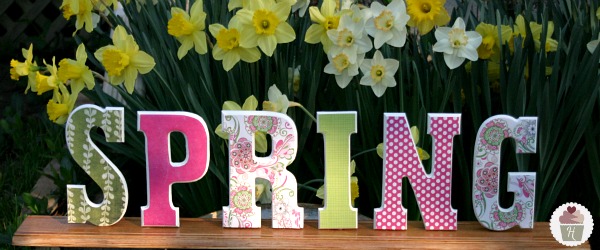
DIY: "Spring" Letters

So spring is just around the corner and we cannot wait.  Hoosier Homemade's blog has just the DIY project to get us going on spring related projects so we can be ready to roll!

This one is a "Spring" decor idea that brings color and happiness to any room!  Be sure to check out their blog for more DIY.

I just love how it turned out! Doug did an AMAZING job on it…don’t you think?
The concept for the scrapbook paper being applied to the wood is similar to the St. Patrick’s Day Door Hanging we made, but the letters were a little curved on the edge, so Doug had to cut out the paper before applying it to the wood. It was a little more time consuming, but well worth it.
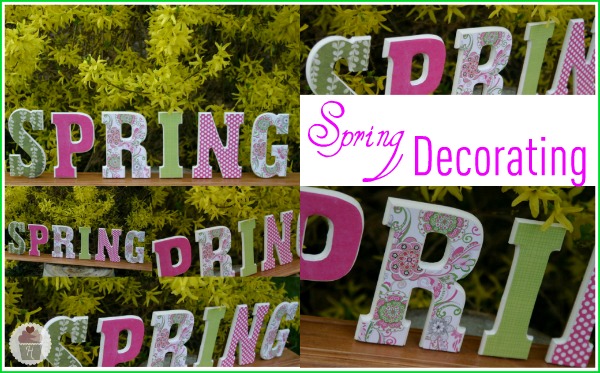
And we couldn’t help but take pictures outside in the beautiful Spring weather we have!
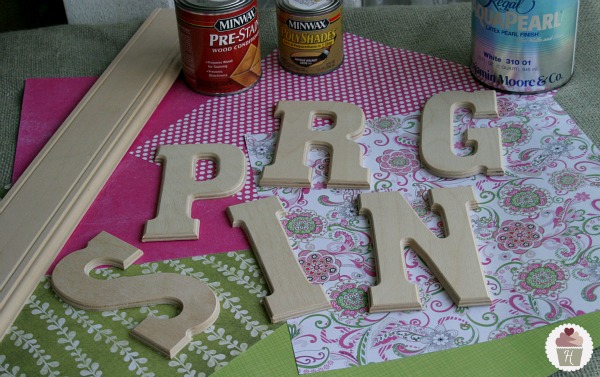
Let’s gather our supplies…
Spring Craft Supplies:
  • Wood – We used a piece of baseboard from our local molding outlet (length will depend on how many letters)
  • Letters
  • Scrapbook paper
  • White paint for the edges of the letters
  • Pre-stain and stain for the wood
  • Spray adhesive to apply paper {not pictured}
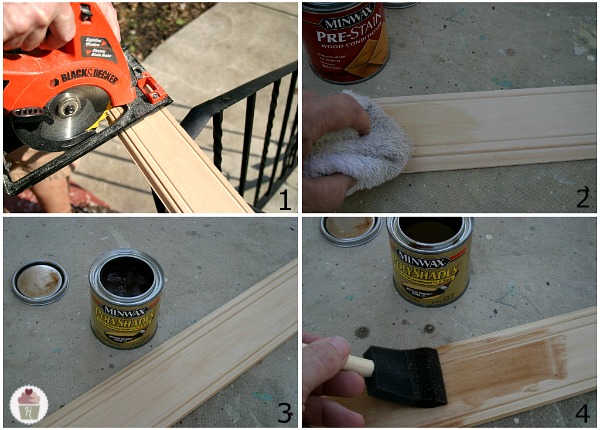
Wood Preparation:
  1. Cut your wood to length. Doug cut this piece, 5 inches longer than what we needed, leaving 2 1/2 inches on each end.
  2. Using a rag, apply the pre-stain. Pre-stain is needed when staining soft or porous types of wood to prevent the finish from being blotchy.
  3. Let sit 15-20 minutes to allow to soak in, wipe off any excess.
  4. Apply stain evenly with a foam brush and allow to sit for 5-10 minutes depending how dark you want the final product to be, carefully wipe and excess stain off. {We used a combination stain/polyurethane product to speed up the process}
Letter Preparation:
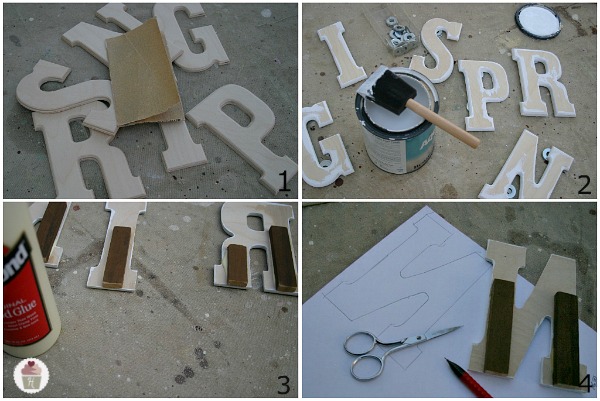
  1. Slightly sand the edges of the letters with 180 grit or finer sand paper. {the higher the number the finer the grit}
  2. Paint the edges (2 coats) we used a satin latex that we had on our shelf {the washers are just to keep the letters up off the drop cloth}
  3. Glue a small block of wood to the back side of the letters to give more area to glue to base.
  4. Trace the letter onto the back of the scrapbook paper and cut out
Decorating the Letters:
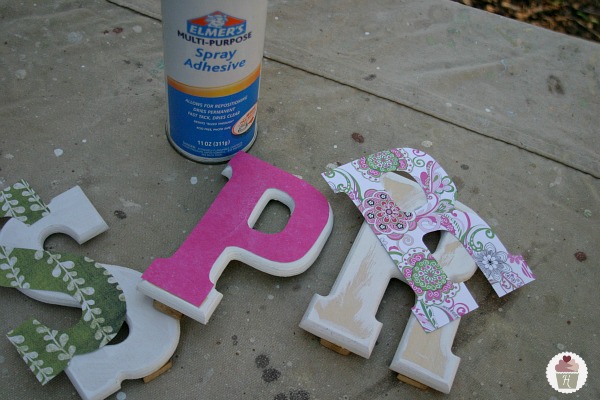
  • Spray the back side of the paper with adhesive and carefully adhere to the wood letters
  • To attach the letters to the wood, use a hot glue gun {note: Doug tried wood glue and even super glue, but the glue gun worked the best}

Wednesday, January 16, 2013

DIY: "Love" Yarn Letters

Thanks to My Sister's Suitcase we now have a new yarn letter DIY to add to our list!  This is a great tutorial that really shows you how to go above and beyond with letter wrapping so that each side looks perfect and the yarn is going in the right directions from every view line.

Be sure to check out their blog for more fun ideas!


Thanks for all your sweet comments on my Valentine's Day Mantel! I'm back today to share my tutorial for the LOVE yarn letters I created. I had never tried wrapping anything in yarn {other than a wreath}, so I had a few trial and errors along the way :) I'm going to share the technique that ended up working the best and fastest for me.

Start with your letters... mine are 8" hollow cardboard letters. I found them at JoAnn's for $1.99 each, but I'm sure you could find something similar at any craft store. I used 3 different colors of yarn because I wanted to create an "ombre" effect, but I think they would look just as cute in one color if you have some yarn you need to use up :) {I will say, after using a pretty thin yarn I think next time I would try something a little thicker. It would take less wrapping and might give it a more textured look.}

The trick to wrapping these letters is the number of surfaces that have to be covered. You can't simply wrap in one direction and cover the front, back, and all the edges. On a few of my edges {ends of the letters} I ended up using a technique where I glued the yarn instead of wrapping. I tried both ways, and this ended up being much faster. You need to figure out which edges need the "glue" method and do those first. Here's how I did it:


1. E was the hardest letter so I figured I'd show you that one :)

2. Loop your yarn into 2" segments, then cut the loops with scissors to create several small pieces of yarn.

3. Take 6-8 pieces of yarn at a time and group them together. {Make sure your glue gun is ready!}

4. Apply a generous amount of hot glue on the edge of you letter - enough to cover the width of your 8 pieces of yarn - a little less than 1 inch. Place the yarn on the glue and press down quickly. Make sure the pieces are nice and snuggled together so you get a tightly wrapped look :)

5. Once the top has been glued down, the ends of the yarn will be sticking out. Just trim them evenly, leaving enough room to glue them down on the sides.

6. You only need to cover the edge to the point where the actual wrapping will begin. {See, I only went about 2 inches in on the top and bottom of the E.} Here's a view of the top:


Now you are going to start wrapping!


7. For the letter E, you will need to wrap each of the 3 "arms" first, in a vertical direction. Wrap each section separately, and secure the ends of the yarn on the back of the letter with a drop of hot glue {or tape, if you don't want to burn your fingers like I did!}

8. Once all 3 sections have been wrapped vertically, you will start at the top of the letter and wrap in the other direction - horizontally :) Do you like my arrows? This will cover the long section of the E, as well as the remaining exposed edges. Just make sure if you are using different colors that you switch your yarn accordingly :)

9. Finally you're done! I'm going to be honest, it probably took me at least an hour to complete each letter. I'm not exactly sure because I was working on them random times during the day and night {whenever my kids let me!} So I dragged out the process for several days before I finished :) But if you had one night to completely devote to the project, you could definitely bang it out.

Here is how I made the transition between colors to create the "ombre" effect:


Saturday, January 12, 2013

DIY: Valentine's Containers

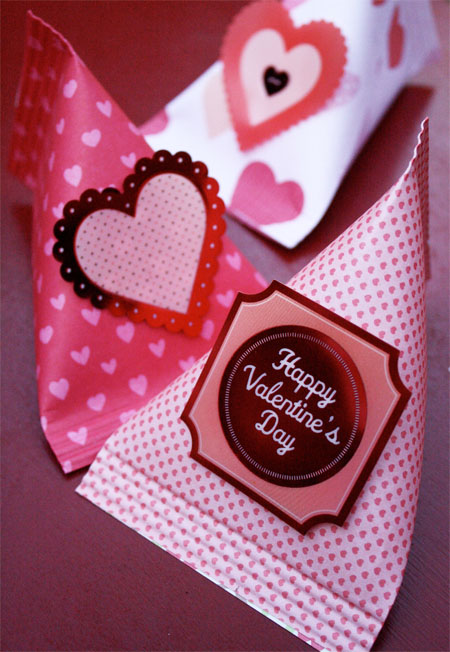
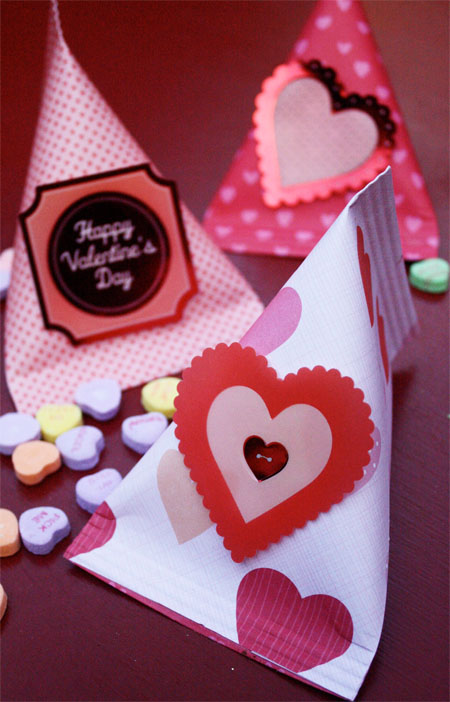
Are you having a Valentine's Day party or are you looking to give out some fun favors for a school / work / church event?  Skip to My Lou's blog has some wonderful DIY containers that are just adorable.  We walk by those paper book packs at Michael's all the time and wonder what we can do with that much holiday paper...now we know!!

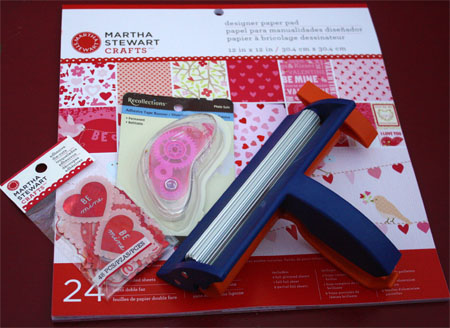
I have been making them for years, but with all the new printed papers and embellishments it is a new quick an easy craft. I found everything I needed at Michael’s Arts & Crafts. Look for heavyweight paper or cardstock {loving this pad from Martha Stewart} for these containers, cute embellishments, adhesive tape runner and a Fiskars paper crimper.
 
These containers can be made any size.  I cut paper 4.25″ X 5.5″ (roughly cutting an 8 1/2 X 11 sheet of paper in half).
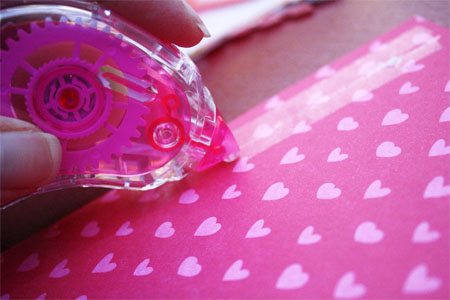
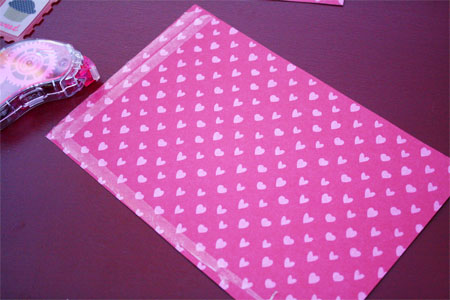
With a tape runner put two rows of tape on one edge. Glue stick or Double Sided tape can also be used. Be generous with the adhesive!
 
Put  the adhesive tape runner {my favorite} along the end and one side of the paper on the wrong side.
 
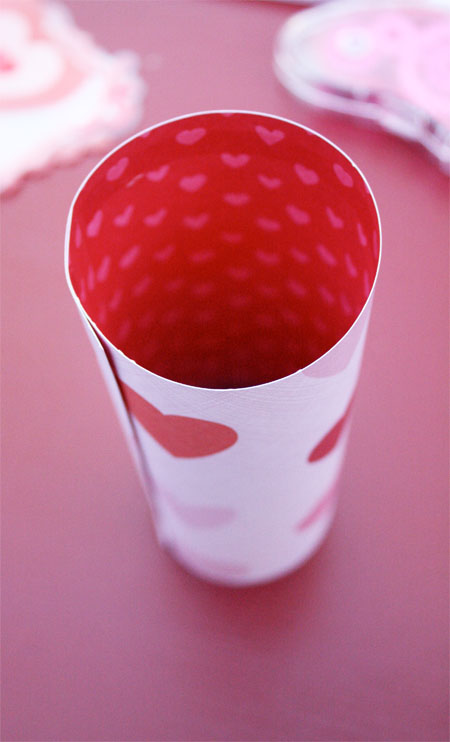
Roll paper into a tube, overlapping the edge about 1 inch.
 
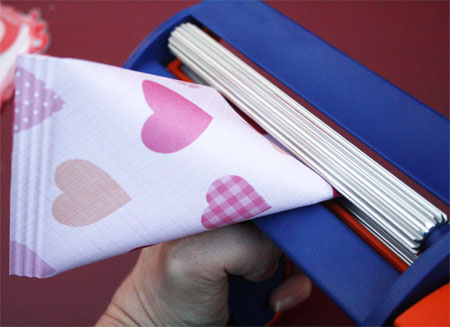
Pinch the edge with the adhesive closed. Place the closed end in the paper crimper. Turn crimper about three to four times.
 
Fill container with goodies. Place adhesive on the inside edge  of the other end. Press end together in the opposite direction. Crimp close.
 
It works best if the seam is off center.
 
Attach embellishments to the containers.  These make a fun containers to hold yummy goodies for your special Valentine!

Friday, January 11, 2013

DIY: Valentine's Day Wrapping Paper

Thirty Handmade Days has a very fun paper design that they are sharing with the rest of us!  Head on over to their blog for some fancy pants paper!


At Christmas my genius friend Jaimee posted some beautiful wrapping paper.  I LOVED the idea and decided to make some for Valentine’s day.  I honestly ADORE the results and am working on more projects similar to this.

I made one traditional subway art type of wrapping paper.  And then I had a little fun with another sheet.  I made paper that had lyrics from what Josh and I call “Date Me” songs.  These are songs that we hear and immediately think of each other and when we were dating (14 yrs ago!).  Most of the time it’s when I’m listening to 90′s on 9.  ;) Try really hard not to laugh at the lyrics because most of them are not mushy!
Follow Me on Pinterest

Saturday, December 15, 2012

DIY: Cone Santa Hats

Thrifty Decor Chick took her Stein Mart inspiration to a whole new level!  These wonderful Santa hats look just like the ones from the store and we think they'd look awesome in our foyer...hmmm!

close
I saw some cute Santa hat/suit decor things in Stein Mart a couple months ago and Tweeted about them, saying I could totally make them for cheaper. Well, I decided to go for it, yes. I. did. I started with three foam cones, in different sizes:
009
I got them all for about $10. I think I used a coupon on the largest. If you can catch them on sale, you could spend even less!
I found red velvet at Hob Lob for less than $5 – I only got 22 inches (the width is 54”) and didn’t even use all of that. I figured out the size by rolling the cones and then cutting the fabric:
010 014
I hot glued the fabric down the back and then on the bottom and top to secure the ends:
012
I almost used sparkly red felt, but went with the velvet to the get look I really wanted. Either would be adorable and the felt would be even cheaper!
Then, I got four inches of vinyl (that looks like leather) to make the “belt.” This was less than $2 and I didn’t even need four inches…I only ended up making it 2.5 inches wide:
018
Again, just with some hot glue, I wrapped it around and secured it. Then, the fun part – the fur. I got some fluffy stuff in the ribbon section at Joann’s to use for this:
019 023
Isn’t it adorable? It looks like Santa’s beard! I’m dying.
For the buckle, I found a package of little square crystals. This package had 52 and I used most of them. I figured out the size and shape I wanted before I hot glued them on:
028027
A fluffy puff ball on top, and it was done. And I squealed! I did!:
042
030
I wasn’t happy with the old Christmas candles I had in this tray (which was a $1.99 tray I got at Goodwill and spray painted white) and I hadn’t even spray painted the bottom of it well enough yet, so I just filled it in with some Dollar Store ornaments: 052
My favorite part is the blingy buckle!:
046 047
What do you think? The Stein Mart version is on the left, mine on the right:
photo053
(Mine are looking a little pink in this pic, but they are a deep red.)
Stein Mart had three sizes – I think about $9, $15 and $20 each. My three cost about $25 total. (And I had fun making them!)

Thursday, December 13, 2012

DIY: Embellish a Plastic Storage Container

Make and Takes blog has a great embellishing tutorial for those $1 containers you can find at most stores.  We love the idea of using all of our various ribbon pieces to make these pretty!!
Supplies for Ribbon Container:
  • Ribbon: 3 – 3ft long pieces or 1 long 9ft piece, any color
  • plastic basket with holes – mine was from the good ol’ Dollar store
Take your cut ribbon and start at the top, weaving through each hole. Make sure to leave at least 4-5 inches at the outer end to tie into a bow when it’s done. I chose to do three colors of ribbon, one for each level of holes on the container. But you can easily use one long piece of ribbon for the whole thing.
Weave the ribbon all throughout the container. Once the ribbon has gone through each hole, tie the two ends together in a bow. My son made one for his room to hold his CDs. He liked threading his green (always the color green) ribbon through the holes, making sure not to miss one.
These are easy to create and would make great gifts for anyone needing a container. I’m thinking teacher gifts!