Showing posts with label cupcakes. Show all posts

Sunday, December 30, 2012

DIY: Eggnog Cupcakes with Spiced Rum

Baker's Royale has made a picture look so delicious we wish we could eat two dimensional objects!!  These look unreal.  We know that our frosting will not look this amazing, but if they taste anything remotely like they look we couldn't be happier...
 Eggnog Cupcakes Bakers Royale Eggnog Cupcakes with Spiced Rum  

Makes 24 cupcakes | Preparation: Heat oven to 350 degrees F. Line 2 muffins tins with cupcake liners.
Ingredients:
Cupcakes:
  • 1 1/2 cups self-rising flour
  • 1 1/4 cups all-purpose flour
  • 1 cup (2 sticks) unsalted butter, softened
  • 2 cups sugar
  • 4 large eggs, at room temperature
  • ¾ cup eggnog
  • ¼ cup milk
  • 1 teaspoon vanilla extract
Spice Rum Buttercream:
  • 5 large egg whites
  • 11/2 cup sugar
  • 4 sticks unsalted butter, diced and softened
  • 1/4 teaspoon salt
  • ½ cup spiced rum
Instructions:
To make cupcake:
  1. Measure out flour and set aside.
  2. Add sugar and butter in a bowl and cream on medium speed until fluffy, about 3 minutes. Add eggs in 1 at a time, beating well after each addition. Add the dry ingredients in 3 parts, alternating with the eggnog and vanilla to start. Mix after addition until incorporated-do not overbeat.
  3. Fill cupcake liners about 3/4 full and bake for 20 to 25 minutes. Transfer cupcakes from tins to cooling rack. Allow cupcakes to cool completely before frosting.
To make Spice Rum Buttercream:
  1. Combine egg whites and sugar in a bowl placed over simmering water. Bring mixture to 160 degrees F while whisking constantly.
  2. Transfer mixture to stand mixer bowl, fitted with a whisk attachment and beat on medium  high speed (speed 8 on a KitchenAid stand mixer) until mixture cools and doubles in volume and forms stiff peaks; about 10-12 minutes).
  3. Add butter in one piece at a time, mixing to incorporate after each addition. The mixture may appear clumpy and almost curdled looking at first-this is normal. Keep mixing and it will become even and smooth again.
  4. Add salt and spiced rum and mix to combine.


Tuesday, September 11, 2012

DIY: Folded Cupcake Liner Flower

Muffin Tin Mom has captured our hearts with this tutorial that turns everyday cupcake liners into adorable flowers.  We just can't get enough of paper flowers, and these are right on par with that idea.  She has TONS of other tutorials, so check it out!

FEb 17 2012 049
After school when she came home, she wanted to make one of her very own folded cupcake liner flower. So, we did. I was very careful to explain how hot glue works. It was definitely a moment I will never forget as I remember the first time I used a hot glue gun with my mom. We worked together to create her flower, folding the muffin liners around a paper circle and adding a button.

FEb 17 2012 065


Proud of her work.


paper cupcake liner flower


I attached an alligator clip to the back using hot glue, so she could put it in her hair.


folded paper cupcake liner flower


If there was a bonus, it would be that the pack of muffin liners was $1 at Dollar Tree. The clips were around $2.99 at Michaels (without a coupon), so with the items I had on hand, this project was around $2-4.


I cannot take credit for this idea. I was inspired by a several posts:

Saturday, September 1, 2012

DIY: Cupcake Ornaments

Keeping with our holiday theme from yesterday - we believe in prepping for the holiday early so there is less stress - we would love to share this tutorial from Goldiloks: Jacktress of all Trades on how to make Cupcake Ornaments.  They are adorable, easy and cheap! You all should know by now that this makes us love it all the more. =)

These adorable cupcake ornaments were partly inspired by the lovelies over at Bake it Pretty & my fave blog Prudent Baby even made some. I tweeked them slightly and used actual miniature ornaments and white paint ( you guys know I can't leave my paint behind!) Also, I opted to use regular hooks instead of twine or ribbon. You could choose which ever you like better. Ready?
what you'll need:
1. mini cupcake liners
2. painted and glittered/ snow flocked ornaments (simply paint "frosting" and dip it into glitter or fake snow while the paint is still wet)
3. berries (you can buy these from Micheals, about .75)
4. glue gun (excuse the grossness lol)

Now this is SUPER EASY. ready? k.
1. glue the bottom of the ornament to the cupcake liner (I like to glue mine at a slight slant)

2. Snip a few of the berries from their branch, set aside. Apply a tinybit of glue next to the top, and place the "cherry" (berry) on the glue. Let set & dry. 
Your all done! You can either at a ribbon to hang it from or simply use a regular ornament hook. Easy right? Now go make hundreds of them to give away or adorn your tree. ;D

Wednesday, August 15, 2012

DIY: Dollar Store Candle Makeover

We love dollar store shopping, despite its dangerousness since we have ZERO self control in there....

But thanks to Banman Land's blog, we'll have some direction on what we want to buy next time we go!  We love being able to jazz up our dollar store finds, and they've done a wonderful job with these number candles!  So easy, so quick, but so very cute!


Ok, I have revamped a few Dollar Store candles and gotten a lot of questions and comments so I thought I'd talk you all through it.


Here's what Maddie's birthday candle looked like when I bought it.
Kinda predictable.

I grabbed some glittery puff paint
{not to be confused with glitter glue}
I stuck all sorts of cute buttons and tiny rhinestones in the inside of the outline with the puff paint.
{If I hadn't liked the teal outline for my party theme, I would have re-outlined it with my sparkly puff paint)

I let it dry for an hour
{at least}

After it was dry,

I gently stuck a toothpick into the bottom of the candle.


Here's what it looked like when I got finished with it.
{oops, this is BEFORE the toothpick but you can imagine what that would look like, right?}

Monday, August 6, 2012

DIY: Felt Flower Cupcake Toppers

Soooo, we don't really need an excuse to eat cupcakes on the regular, but hey...it doesn't hurt to have an excuse anyways, right?!  It's good to know that The Proper Pinwheel shares our affinity for all things sweet.  This fantastical cupcake tutorial speaks to us in so many ways.

To make your own you’ll need:
  • Felt (9 x 11 inches)
  • Scissors
  • Hot glue gun
  • Toothpicks
Cut 3 x 9 inch strips.
Fold the strips in half lengthwise and cut (starting at the folded side!) 3/4 of the way to the edge.
Repeat the whole way down the strip.
Once it’s all cut, pull the top half to the right 1/4 inch.
Start at the right end and roll it up as tight or as loose as you would like. Use small drops of hot glue to secure it along the way.


Put a little drop of hot glue on one end of a toothpick and stick it inside the flower. Pinch the bottom tight until the glue dries, and you’re done! Stick these little flowers in the tops of your cupcakes and admire the cuteness.

Collapsible Cupcake & Cake Carrier 

Friday, August 3, 2012

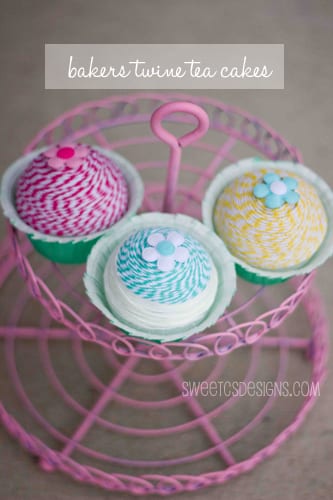
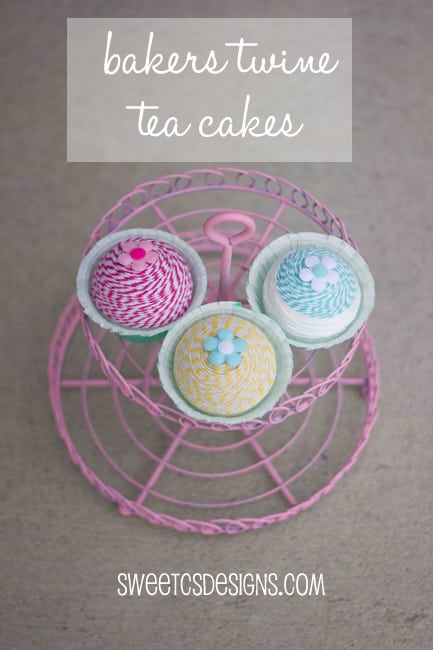
DIY: Bakers Twine Tea Cakes / Cupcakes

Okay, so I realize that this tutorial from Sweet C's Designs is meant for kids, but I want one for me!  These are so beautiful and simple who wouldn't love them??  They look like they take just a few minutes to whip up and we love things that are cute and time friendly.
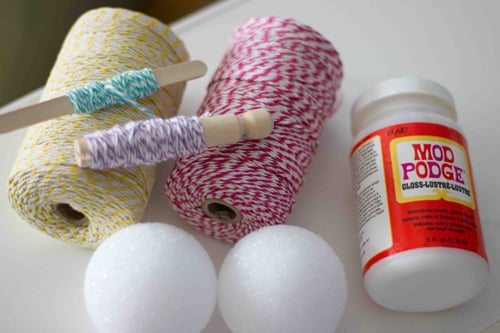
First, you’ll need Styrofoam balls, bakers twine, mod podge, appliques, and cupcake liners/cups.
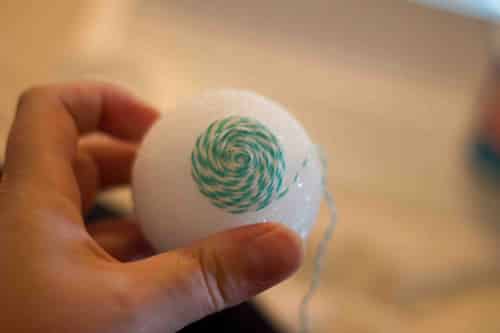
To start your cupcake’s swirl pattern, it is easiest to hold it in your hands, pinching the swirl to stay put as you build it up.
Once it is bigger than a quarter, you can glue your circle of twine to the top of your Styrofoam ball with some mod podge, and continue to wrap the twine in a circular fashion around the ball.

When you’ve wrapped the ball almost all the way down, mod podge the end of the twine to the ball, and add a healthy dollop of mod podge to the bottom of the ball.
Place in cupcake wrapper/cup and let dry.

Saturday, July 14, 2012

DIY: Security Envelope Sparklers

We love these versatile designer sticks from The Ravenna Girls blog!  Make them for cupcake toppers, drink stirrers, appetizers picks, or anything else you can think of!

Sparkler Cupcake Toppers 6 Security Envelope Sparklers
Sparkler Cupcake Toppers 1 Security Envelope Sparklers
All you need is one or two security envelopes, scissors, bamboo skewers (cut down in length) and double sided tape. Glue stick would also work, as would toothpicks if you don’t have skewers around.
Sparkler Cupcake Toppers 21 560x374 Security Envelope Sparklers
Cut down your envelope so you have one large rectangle of pattern to work with, then just cut on the diagonal into long thin triangles. You can also cut along the long length for a little variety.
Sparkler Cupcake Toppers 3 Security Envelope Sparklers
Put some double sided tape or glue on the back side of the paper (the white side). I put about 1/2″ of sticky to get an attachment that held. Then, wrap the full triangle tightly around your skewer or toothpick.
Sparkler Cupcake Toppers 4 Security Envelope Sparklers
Hold in place for 10-15 seconds, then gently unroll the paper and pull it away from the skewer. Voila! A little blue paper “sparkler” for your holiday decor.
Sparkler Cupcake Toppers 5 Security Envelope Sparklers
Play around with the length and size of your triangles for a little varied effect. Then go to town!
Sparkler Cupcake Toppers 7 Security Envelope Sparklers

Thursday, July 12, 2012

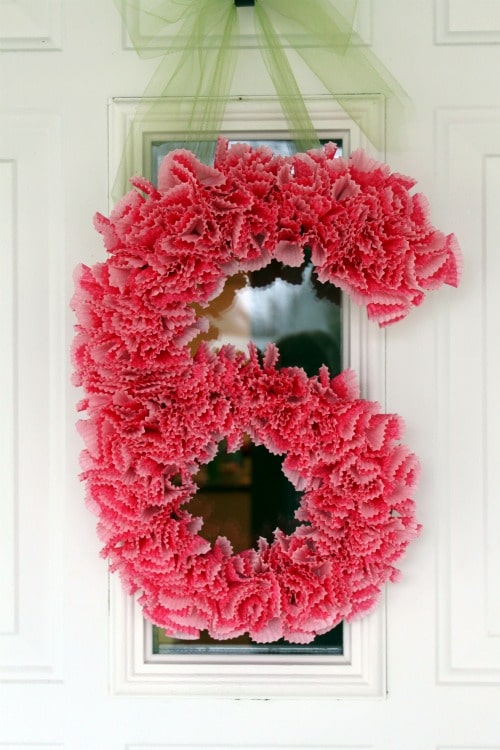
DIY: Cupcake Wrapper Door Number

How fun is this tutorial from All Things Mamma??  You can get cupcake wrappers from Michaels for pretty cheap, and there are so many fun ways to revamp this idea it's almost mind boggling!  Almost... ;)

cupcake wrapper number


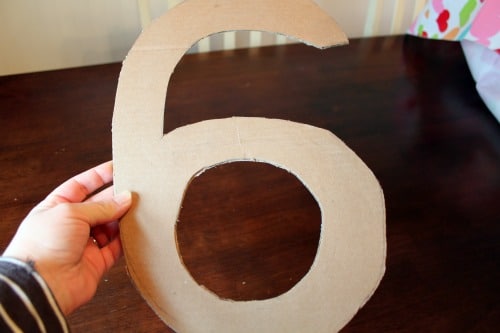
First, take a piece of cardboard and using a pencil draw the number or letter you’d like to use.  Next, using an Exacto knife or scissors, cut out your number or letter.

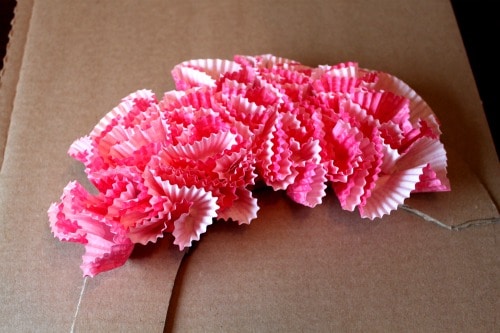
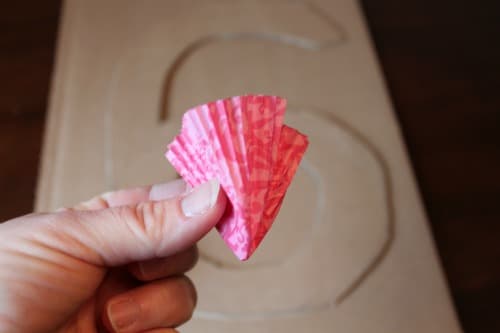
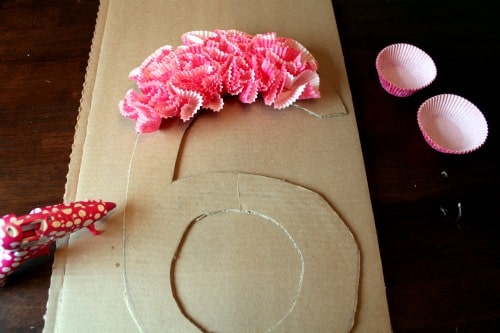
Take cupcake wrappers (Meri Meri Owl & Daisy Bake Cups, Set of 48) and gather them together at the bottom, like in the form of a flower.  Use a dot of hot glue and glue it onto the cardboard.  Hold for a few seconds to hold in place.

Work in small sections around your cardboard so that the glue has time to harden a firm up.

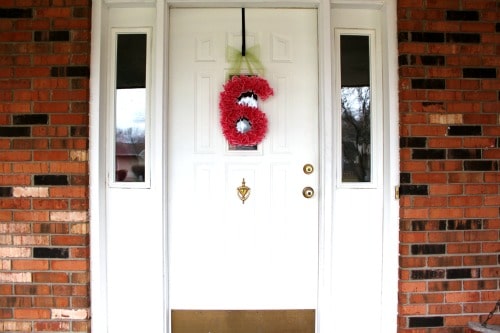
After you’ve filled the entire space, use tulle or ribbon and glue onto the back of your number and tie a bow and hang up! That’s it!
cupcake wrapper door number


Wednesday, June 27, 2012

DIY Ruffled Ice Cream Cones

Adorable and great for just about any party you could ever want to have!  Check out Icing Designs blog for more fun tutorials!
 Materials:
2 1/2" styrofoam balls
1 1/2 yards of lightweight cotton fabric
Sewing machine or needle and thread
Hot glue gun/glue
Glue
Scrapbook paper
Cone templatea
Polyester stuffing
Ribbon
Pins

Cut fabric into strips about 44" long x 1.5 " wide using pinking shears. Sew down the middle of the strip, ruffling fabric as you go with sewing machine. You can also ruffle the fabric by hand if you do not have a sewing machine. Your finished ruffle should be 8" long. You could also use pre-ruffled fabric or ruffle trim if you do not want to make your own!

Trace cone template onto your paper and cut out. Glue edges to make cone shape. I recommend not using hot glue for this step since you need a bit of extra time to get the edges together just right. Fill your cone with stuffing to help hold the shape.


Cut a circle roughly 8" in diameter out of your fabric. Wrap the fabric around the ball and hot glue to bottom, gathering as you go. Do not worry about how the bottom looks, it will be hidden inside your cone.


Place hot glue around inside edge of your cone and stick the covered styrofoam inside. Hot glue your ruffle around the top of the cone, twisting as you go around. Be sure to glue it to both the paper and the styrofoam ball. If you would like to hang the cones, cut ribbon to desired length and use a pin or hot glue to secure it to your ice cream!


Thursday, June 21, 2012

DIY Pinwheel Cupcake Toppers

We can see 100 uses for these!  Who doesn't love pinwheels?  You could adjust this same idea for place card holders, hand made cards, larger toy versions, home decor...have fun!

Bertie's Bakery has a whole section on DIY and Freebies...so check 'em out!

PinWheelTopper-3
PinWheelTopper

Step 1:
Cut out 2”x2” squares of what ever color double sided paper you want! (Double sided paper just means paper that is going to have either color or designs on either side, instead of just white…unless that’s what you want of course!)
Step1
Step 2:
Cut diagonal lines starting from each corner going into the center about 1”. You do not need to flip over the paper, I just wanted to show you my two sided paper!
Step2
Step 3:
Now fold the first corner (A) into the center of the square. Don’t crease this fold, just kind of bend it so it holds its shape. Do this to each “A” corner on the squares.
Step2a
This is what your squares should look like once you have molded/folded each of the A corners inwards.Step3
Step 4:
Now take each pinwheel and cut a small slit in the bottom of one of your folds. This only has to be big enough to slide a toothpick through. I like doing it this way because it hides the toothpick and glue, and it just looks a little bit cleaner. If you do not have a blade to do this with, no worries we can just glue the toothpick to the back. 
Step4
Step 5:
Open up all of your folds and slide the toothpick through your newly made slit. Hot glue toothpick to the center of the square.
Step5
Step 6:
Using little dabs of hot glue start re-folding in each “A” corner and folding them there until the glue has cooled and the fold is now permanent.
Step7
Keep going all the way around.
Step8
Step 7:
Once all the corners are folded in and glued, add one more dab of hot glue and adorn the pinwheel with any thing you like. I used fake pearls that I had saved from an old necklace I used to love! But you could use buttons, pompoms, or even paper circles from the left over paper.
Step9
See wasn’t that easy?
PinWheelTopper-7