Showing posts with label on a budget. Show all posts

Sunday, December 23, 2012

DIY: Marbled Glass Ornaments

Has the panic mode set in with Christmas only two days away?  Having a holiday party and need a few more ornaments to make everything perfect?  We have just the tutorial for you!  These wonderful marbled ornaments are so easy you can whip them up in a few minutes and in any color theme you want!  This tutorial comes from Save On Crafts and we can't wait to give them a shot.

DIY  Paint Clear Glass Ornament  Balls
How to make Marvelous Hand Painted Ornaments with Clear Glass Balls.

Create Marvelous Ornaments™ with Delta Ceramcoat® Acrylic Paints!
It's hard to believe that these luxuriant ornaments are so very easy to create. All ages can enjoy the fun of making elegant swirls of Ceramcoat Acrylic Paints inside of clear ornament balls. Just pour in your favorite colors and swirl away. metallic!
MATERIALS

Delta Ceramcoat® Acrylic Paints
  • 3 or 4 colors
Other Supplies:
  • Paper cups or empty egg cartons
INSTRUCTIONS

  1. Remove hanger and cap from the ornament. Rinse inside of ornament with alcohol. Let dry thoroughly. Start with one color of Ceramcoat® paint. Squeeze just a small amount of the first color into the ornament so it runs down the side (see photo A). Rotate the ornament and squeeze a little more paint down the side in another area until you've added about three or four lines of paint with only a dime-size amount of paint pooling at the bottom of the ornament.
  2. Add the next color, squeezing out a small amount of paint in between the places where you added the first color (see photo B). Continue to add one or two more colors in the same fashion.
  3. Rest the ornament on its side for approximately five minutes. (Place it to rest in the ornament box it came in, an egg carton or a paper cup for easy handling.) Rotate and tilt the ornament a quarter turn every five to ten minutes until the paint covers the entire inside of the ornament. Pour out excess paint. Then continue to rotate it every few hours over the next day. This helps the paint to coat the ornament evenly. The color will continue to move and change with each turn. When the desired effect has been achieved, drain out any remaining excess paint. It may take up to four days to dry completely (a hair dryer will speed drying time). Replace hanger and cap when dry. If desired, decorate with ribbon and hang on tree.
Other creative variations:
  • For horizontal marbling: coat ornament with your choice of colors and let the ornament dry on its side, rotating one side to another, avoiding an upright position.
  • For vertical marbling: coat ornament with your choice of colors as in steps 1 and 2 and prop ball upside down in a paper cup to drain. Let dry.
  • For variegated, irregular marbling: drop in one color of paint, swirl, then add another color. Continue adding or repeating colors and swirling until the entire ball is coated on the inside. Follow step 3.
Important Notes:
Use Ceramcoat paint only-other brands of paint may not be compatible! Also, if paint pulls away from glass, add more paint after original paint dries.
All you need are
Clear Glass Ornaments and Acrylic Paints!
 
Here's what you need to do:
1. Remove hanger and cap from the ornament. Rinse inside of ornament with a mixture of 1 part vinegar, 3 parts water before adding paint. Let dry. Start with one color of Ceramcoat paint. Squeeze just a small amount of the first color into the ornament so it runs down the side. Rotate the ornament and squeeze a little more paint down the side in another area until you've added about three or four lines of paint with only a dime-size amount of paint pooling at the bottom of the ornament.
2. Add the next color, squeezing out a small amount of paint in between the places where you added the first color. Continue to add one or two more colors in the same fashion.
3. Rest the ornament on its side for approximately five minutes. (Place it to rest in the ornament box it came in, an egg carton or a paper cup for easy handling.) Rotate and tilt the ornament a quarter turn every five to ten minutes until the paint covers the entire inside of the ornament. Pour out excess paint. Then continue to rotate it every few hours over the next day. This helps the paint to coat the ornament evenly. Drain out any remaining excess paint. It may take up to four days to dry completely.

Saturday, July 28, 2012

DIY: Packthread Wrapped Vase

A wonderful upcycle tutorial from Sheepy Me!

Supplies:
1.) Double Sided Tape
2.) Packthread
3.) Scissors
4.) A used bottle!


Tuesday, July 24, 2012

DIY: FABRIC WALL POCKET TUTORIAL

Abernathy Crafts has taken a whole new twist on making fabric wall art by making it not only aesthetic but also functional!  This is quick, easy and financially friendly.  Just the way we like our crafts!

fabric wall pocket 8
Here’s another no-sew project for you!  This is super simple and will add color and organization to your space.  Read on for the quick and easy tutorial.

The tutorial I’m about to show you is completely no-sew, but you could easily modify it with a few straight stitches for a more personalized or practical end product.
fabric wall pocket 1

Materials needed:
  • Embroidery hoop (any size)
  • Fabric (2 coordinating)

fabric wall pocket 2

Lay out your background fabric over your inner embroidery hoop.

fabric wall pocket 3

Lay your pocket fabric, folded in half, over the background fabric.  You can place it half way in the middle, higher or lower, depending on what you plan to put in the pocket.  Just make sure there is enough excess fabric to hang over the edges of the embroidery hoop.

fabric wall pocket 4

Slip on the outer hoop and tighten.  Gently tug the fabric around the edges to make it taut inside of the hoop.  This is the part where you make sure you are happy with the placement of your pocket or how the print on your fabric is situated.  If not, do it over again, this is a very forgiving project.  If you’d like, you can add a couple vertical stitches down the pocket for pencils or one in the middle to divide the pocket into two.  This, of course, would be done before you place the fabric in the hoop.  When you are satisfied with it you can cut the excess fabric or tuck it behind the hoop.  Be sure to tighten your hoop real tight so that the fabric doesn’t slip out.

So that’s it!  Quick, huh?  And so easy, not to mention clever.  And since there is no glue involved, you could easily change out the fabric whenever your mood calls for it!

Sunday, July 15, 2012

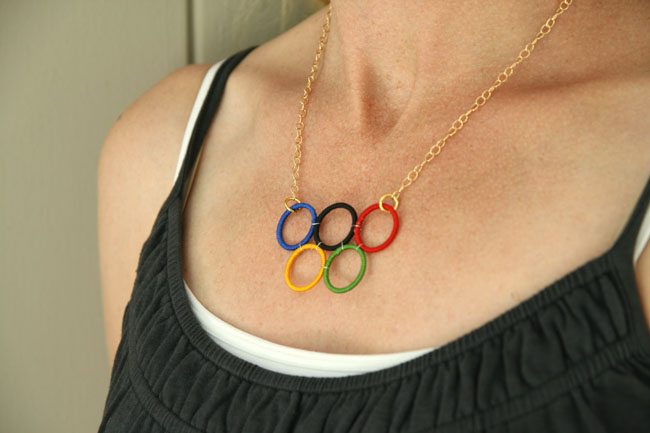
DIY: OIympic Necklace

What a great fashion accessory from Remarkably Domestic's blog for the upcoming Olympic Games!  This idea is also easily adjustable to make fashion jewelry for anything!  You know you can't wait to get this started....

We’re starting to get a little excited about the Olympics over here. We aren’t a big sports family, but RD Husband has one sister who was an athlete in the Olympics in 1988 and another who has coached Olympic teams. So we have a soft spot for the games.
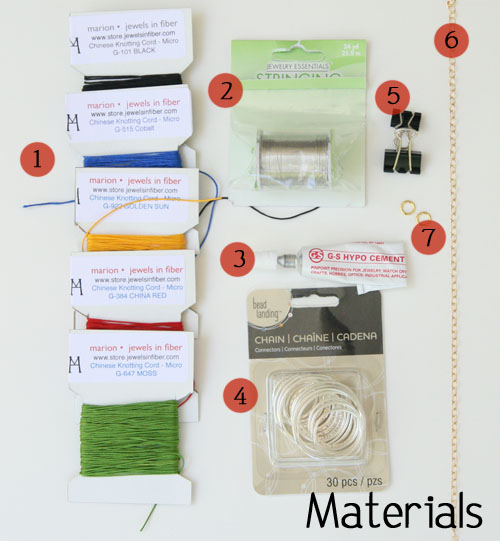
This necklace is easy and inexpensive to make. Here’s what you’ll need.
  1. Cord in 5 different colors: red, green, yellow, blue, and black. I used Chinese knotting cord in micro size G, which I ordered from here. You could also use crochet thread, embroidery thread, or embroidery floss, all of which are readily available at craft stores.
  2. 26 Gauge Wire
  3. G-S Hypo Cement, or another strong jewelry-type glue. Michaels carries Aleene’s or E-6000, which both should work.
  4. 5 rings (I actually bought a cheap Claire’s Accessories necklace and took it apart, but you can find these at Michaels in different sizes, too).
  5. A few binder clips
  6. Chain in desired length. I used about 17″, divided into two lengths of 8.5″. You could get something simple and inexpensive like this, or check out a jewelry supplier like Rio Grande or Fire Mountain Gems.
  7. Two jump rings and one clasp. (The clasp isn’t pictured. Sorry!)
Most, if not all, of these things can be found at Michaels or JoAnn Fabric.
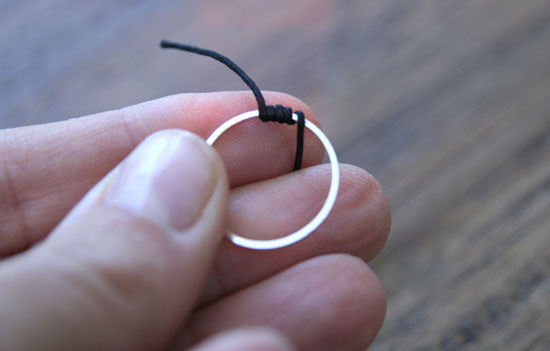
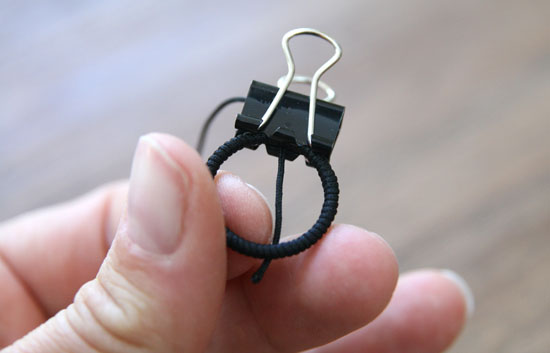
First step is covering your rings in the cord. You want to attach the cord with glue at the beginning, wrapping it a few times around.
Secure it by clipping a small binder clip over it and let it dry for about 15 minutes. You can prep all your rings this way, and by the time you are done with the last one, the first one should be dry enough to work with.
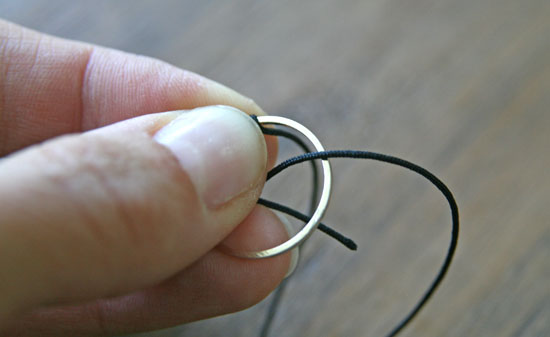
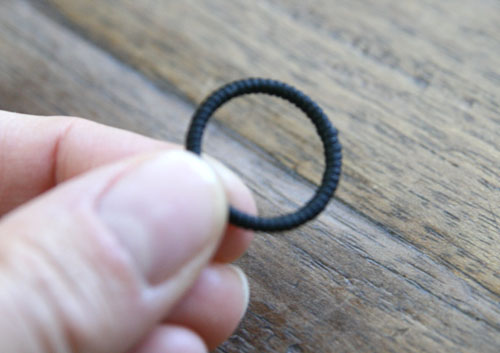
Now, wrap the cord around the ring, keeping it tight and each coil snug against the previous one. You don’t want to see any metal through the wrapping.
In order to keep the right tension, you’ll need to hold the parts you’ve already wrapped tightly while you wrap more.
Stop wrapping with about a quarter of an inch or so left to go.
Now, place more jewelry glue on the exposed metal, and then continue wrapping until you have covered the ring. Don’t worry about the long ends of the cord just yet. Secure this section with your binder clip and let it dry.
You’ll do this for each ring in each different color cord. Once they’ve dried (I let mine sit overnight just to be certain), you can clip the cords close to the ring. I chose a side I wanted to be the “back” and clipped them both on that side, so the edges wouldn’t show. Although if you’ve glued enough, the edges will sort of blend together with the ring.
Sorry for the blurry photo!
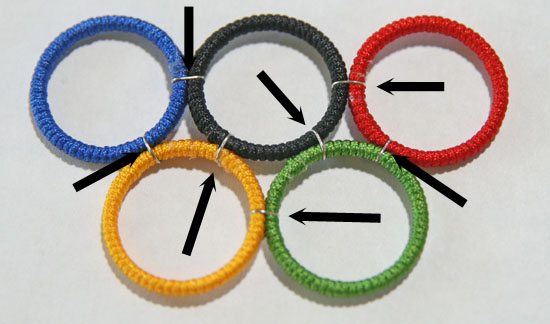
Once you have all your rings, it’s time to lay them out in the correct pattern. Check online and look at images to get your order correct. Then, you are going to start wiring them together.
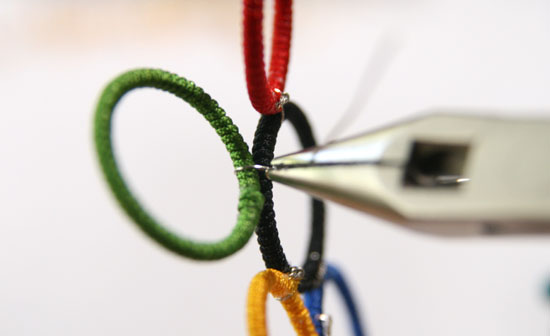
Cut a small length of wire, about 3″ long, and place it over one of the connections between rings.
Turn to the back, and twist the two wires together, like twist ties. You can use your fingers, or if you have needle nose pliers, those work well, too.
You’ll twist until the connected wires are about 1/4″ long, and then snip the wires off. Fold them under and towards the rings so that they don’t stick out, but keep them hidden in the back.
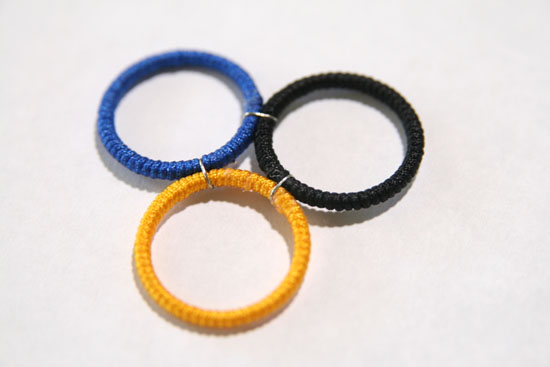
Once you get a few together, it’ll look like this:
Make sure you are wiring them tightly together so that they keep their shape.
You’ll want to make attachments at all these points:

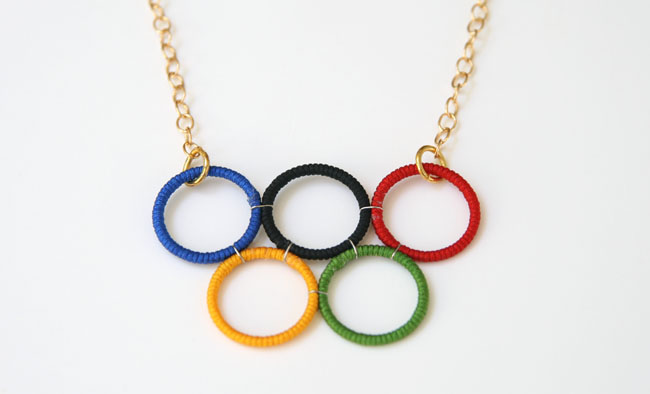
When you’re done, it’ll look like this:
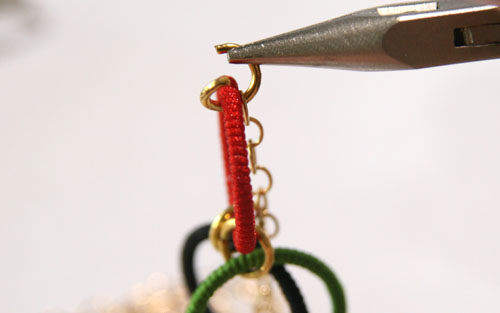
Then, you just need to attach the chain with the jump rings to the blue and red circles.
Attach your clasp, and your necklace is done!

Wednesday, June 27, 2012

DIY Ruffled Ice Cream Cones

Adorable and great for just about any party you could ever want to have!  Check out Icing Designs blog for more fun tutorials!
 Materials:
2 1/2" styrofoam balls
1 1/2 yards of lightweight cotton fabric
Sewing machine or needle and thread
Hot glue gun/glue
Glue
Scrapbook paper
Cone templatea
Polyester stuffing
Ribbon
Pins

Cut fabric into strips about 44" long x 1.5 " wide using pinking shears. Sew down the middle of the strip, ruffling fabric as you go with sewing machine. You can also ruffle the fabric by hand if you do not have a sewing machine. Your finished ruffle should be 8" long. You could also use pre-ruffled fabric or ruffle trim if you do not want to make your own!


Trace cone template onto your paper and cut out. Glue edges to make cone shape. I recommend not using hot glue for this step since you need a bit of extra time to get the edges together just right. Fill your cone with stuffing to help hold the shape.


Cut a circle roughly 8" in diameter out of your fabric. Wrap the fabric around the ball and hot glue to bottom, gathering as you go. Do not worry about how the bottom looks, it will be hidden inside your cone.


Place hot glue around inside edge of your cone and stick the covered styrofoam inside. Hot glue your ruffle around the top of the cone, twisting as you go around. Be sure to glue it to both the paper and the styrofoam ball. If you would like to hang the cones, cut ribbon to desired length and use a pin or hot glue to secure it to your ice cream!


Tuesday, June 26, 2012

DIY Paper Plate Basket Tutorial


The following directions are based on the craft from Martha Stewart. The tutorial on her site said to hold the basket together with a rubber band. I think that would be cute, but I love love love washi tape so I decided to use that. You can use either method, if you find another way to hold the basket together, please let me know.


1. You will need the following supplies: white paper plates (1 plate per basket), scissors, paper edger scissors (I used my pinking shears), a ruler, pencil, washi tape or rubber bands, and 4 paper clips.


2. Using the paper edger scissors or pinking shears, trim about 1/4″ off of the circumference of the plate.


3. Flip the plate over so the front side is facing down. Use the pencil and ruler to make a 9-section grid. Try your best to make the center square in the center of the plate. If you want you can measure it.


4. Use the regular scissors to cut a slit along every other vertical line. Stop cutting where the vertical line intersects with the center square.


5. Fold one side at a time up to form the “basket”. Use one paper clip to hold each side together as you assemble the basket.


6. Use washi tape and wrap it around the basket and then remove the paper clips. If you are using rubber bands, simple wrap the rubber bands around the basket. And you’re done! Now fill them up with summer treats!