Showing posts with label flowers. Show all posts

Sunday, November 4, 2012

DIY: Chrysanthemum Paper Flowers

Cherished Bliss' blog tutorial on chrysanthemum paper flowers that we plan to try the minute we get home.  We love paper flowers in every variety.  Just think - you can make them whatever color / pattern you want, you can change them anytime, and they never die!  We love making them out of recycled paper as well!
Paper Flower Tutorial
Don’t you just love these colors? This is pretty easy to make. Your kids might even love to make this with you, it’s pretty easy!
chrysanthemum Flower tutorial
{What you need}
- 2 pieces of scrapbook paper
- scissors
- glue
- paper circle cut out
{Steps}

chrysanthemum collage steps
one. cut out a bunch of strips I started with the bottom yellow layer of strips at 3 1/2” x 1/2” but this depends on the size of the flower you want. Then fold it in half and glue the ends together. The first layer of pink strips are 3” long and the inner pink strips are 2 1/2” long.
two. Start gluing your paper strips around your paper circle cut out. Mine was approx. 1 1/2” in diameter.
three. Keep going around with your different layers by filling the next layer in the spaces of the previous layer. I did two layers of the yellow, two layers of the pink, and then I filled in a few gaps with the pink in a 3rd layer of the pink (but this is only necessary if you fill you have a few gaps).
four. Add your center. For my center I took another 1 1/2” circle and cut it into a spiral then wrapped it around tight and glued it down in the center. You could also add buttons, rhinestone, or whatever suits your project
There you have it. A beautiful paper flower for embellishing all kind of projects!
Flower Close Up chrysanthemum
chrysanthemum paper flower
chrysanthemum paper flower 2

Thursday, September 20, 2012

DIY: Upcycled Bottlecap Flowers

A Bird in the Hand's blog has given us an idea on how to upcycle our bottle caps into something wonderful.  We have been looking for a way to upcycle our bottle caps and this may be just the thing.

Be sure to check out their blog for more fun DIY!


Now, here's a step-by-step tutorial.  First I collected my materials.  I used bottle caps (I used 20 in mine), a tin can lid, a chopstick, and glue (I started with super glue but switched to epoxy b/c some weren't holding).

From there, I started bending my bottle caps into the shape of flower petals.  The basic idea was inspired by a previous Iron Craft project where I had created a felt flower.  I used my pliers and just started bending until I got the shape I wanted. 

For me, the easiest way to do it was to grab the rim of the bottle cap and pull it down to flatten it.  Then I would bend in the two sides.  Finally, I would bend down the top.  My first few petals looked like blobs of metal so it takes a little trial-and-error.

As I went, I laid my petals out on the tin can lid to determine how many I would need.  I did two layers of petals, but you can switch it up and do more if you like.

Next I glued on the petals.  I did the entire outside row first and then switched to the second layer.  Like I mentioned above, I tried using super glue but found that some of my petals weren't holding so I switched to epoxy.

Finally, I added one more bottle cap in the center.  Now you have a finished flower!

From there, I attached a chopstick by gluing it onto the can lid in between two of the petals.  This allowed me to turn it into a garden stake.  But there are lots of other possibilities.  You could paint it, add leaves (maybe cut from soda cans?), turn it into a pin, etc. 

Tuesday, September 11, 2012

DIY: Folded Cupcake Liner Flower

Muffin Tin Mom has captured our hearts with this tutorial that turns everyday cupcake liners into adorable flowers.  We just can't get enough of paper flowers, and these are right on par with that idea.  She has TONS of other tutorials, so check it out!

FEb 17 2012 049
After school when she came home, she wanted to make one of her very own folded cupcake liner flower. So, we did. I was very careful to explain how hot glue works. It was definitely a moment I will never forget as I remember the first time I used a hot glue gun with my mom. We worked together to create her flower, folding the muffin liners around a paper circle and adding a button.

FEb 17 2012 065


Proud of her work.


paper cupcake liner flower


I attached an alligator clip to the back using hot glue, so she could put it in her hair.


folded paper cupcake liner flower


If there was a bonus, it would be that the pack of muffin liners was $1 at Dollar Tree. The clips were around $2.99 at Michaels (without a coupon), so with the items I had on hand, this project was around $2-4.


I cannot take credit for this idea. I was inspired by a several posts:

Friday, August 31, 2012

DIY: Felt Poinsettia Hair Clip

Projectville has a fantastic tutorial that we found just in time for the upcoming holiday season!  This stunning Poinsettia Hair Clip would be the perfect accessory for any wardrobe in the winter time and beyond.  Not to mention she is stunning herself...


Here's what you'll need:

• felt
• yarn
• scissors
• hot glue gun
• glue sticks for said gun
• hair clip (optional)


Follow the picture tutorial and pattern. The larger circle in the pattern is used to glue all the petals to. Start with the biggest petals around the outside, then medium sized, then smallest in the middle. The smaller circle is for after you glue the top of your clip to the flower. Open the clip, glue it to the back of the flower, then glue the small circle over the top of the open clip to clean up the look. Tah dah!

Thursday, August 16, 2012

DIY: Rolled Paper Flowers

We admit it - we are in love with paper flowers.  We want so badly to try our hand at this one, but just haven't had the time with all of our other projects!!  We will get on this one though after being so inspired by Jones Design Company's blog, we feel that we just might die if we don't try this since they make it look so simple...what do you think??

rolled flowers
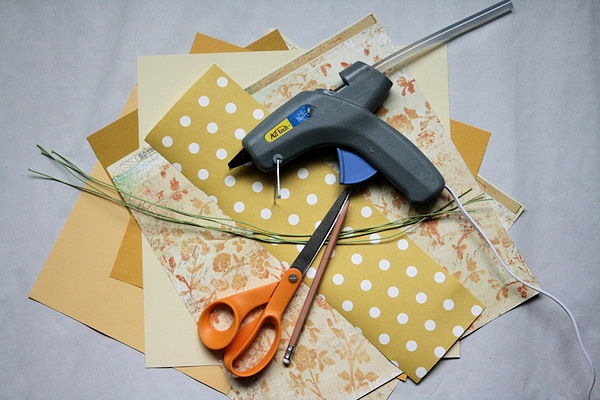
Here’s what you’ll need:
IMG_0769
:: paper {either cover or text weight}
:: florist wire
:: scissors, pencil, glue gun
STEP ONE: cut irregular circle
cut
This circle is approximately 8 inches, but you can do any size you wish.
cut 2
STEP TWO: cut spiral
cut spiral
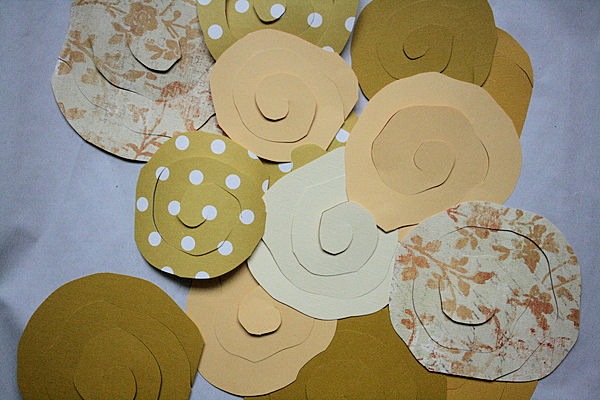
Start at the outside edge and cut in a spiral fashion to the center.
spiral
I like a sort of bumpy shape so that the petals end up a bit irregular
spiral 2
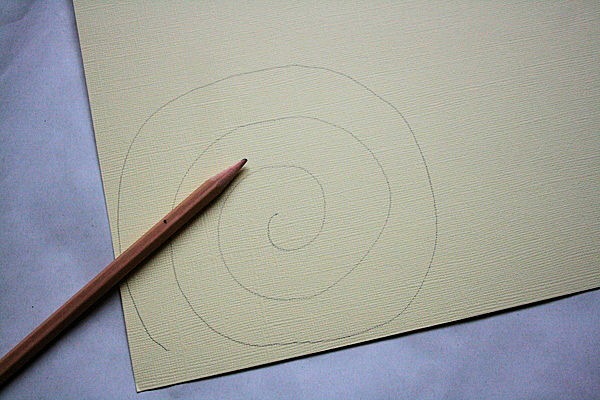
If you aren’t so sure about your cutting skills, feel free to draw your spiral before cutting. I did this one with a straight edge, but you could make it bumpy as well.
IMG_0787
To add a little interest to my bouquet, I used a variety of yellow scrapbook papers {my favorite is that yellow dot}
IMG_0800
STEP THREE: roll your blossom
start rolling
start at the outside edge and coil tightly
roll
rolling
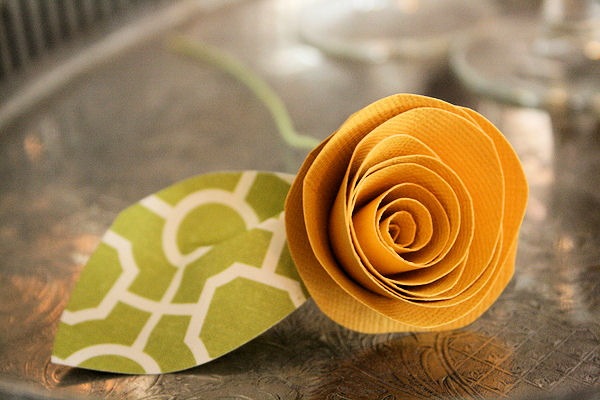
Continue rolling until you get to the center. You’ll have a tightly coiled rosette.
rolled
STEP FOUR: release coil
open
And your flower grows.
STEP FIVE: glue together
glue
Add a glob of glue to the center and press to adhere the coiled paper
press
TO MAKE A LEAF:
cut a leaf shape out of green paper
leaf
Fold in an accordion-style fold
fold leaf
and adhere with a dab of hot glue.
glue leaf
TO ADD A WIRE STEM:
Cut a piece of floral wire to desired size {mine are about 6 inches} and bend a small piece at a 90 angle.
wire
Glue wire to the bottom of the flower.
glue wire
Then attach the leaf to cover the wire.
glue leaf
IMG_0845
When grouped together, you have a very sweet bouquet of wilt-less blossoms.
bouquet
flowers
sweet bouquet
I also tried these with sheet music.
sheet music
And attached to a wreath form covered in linen.
music flowers
Aren’t those the cutest paper rosettes? Start rolling …

Wednesday, August 15, 2012

DIY: Paper Flower Key Holder

Don't tell - but we may in fact be in love with Mr. Mark Montano...okay, maybe just in love with his Paper Flower Key Holder, but either way...love is in the air!  Be sure to check him out here!
 
Paper Flower Key Holder
Difficulty rating: Beginner

If you need a quick 'just because' gift for someone, this is it! It’s simple to make, couldn’t be less expensive and we can all use one. I for one am always losing my keys and this, by far, is the easiest way for me to keep track of them.
 
Here’s how:
1. Cut out a circle in the cardboard that is a bit larger than a quarter.
step2
2. Cut your wire hanger in a section that is about 10î long.
3. Bend it like you see in the photo. It should have a hook and an area where you can glue it down. Each end should have a tiny loop. The tiny loop at the top is for the nail.
step3
4. Hot glue the wire on top of the circle of cardboard.
step1
5. Cut out 6 layers of book pages in a flower pattern provided using straight edge scissors and pinking shears so that your flower has texture.
step4
6. Staple the layers together in the middle in an X (this is my big flower making secret)
step5
7. Fold up the top layer to cover the staples and continue folding up the layers to make your flower come to life.
8. Lightly spray with the Krylon Clear Coat and let dry.
9. Give it several more coats of the Krylon Clear Coat but only a little at a time. Do this until the flower is nice and sturdy.
10. Hot glue the flower on top of the wire and disk and hang it with a nail.