Showing posts with label baby decor. Show all posts

Wednesday, August 8, 2012

DIY: Bubble Blowing Wall Art Project

52 Weeks Project has an unbelievable blog filled with fun!  We just adore this bubble blowing art project they've come up with...and how amazing would this look in your own home?  We have seen bubbles at the dollar store and same goes for the jar.  Watercolors are pretty inexpensive at Michael's or Joann's if you use a coupon!

Get a watercolor pad here!

Time: 1 hour
Materials:  watercolors, watercolor paper, bubbles, jars
 

Friday, August 3, 2012

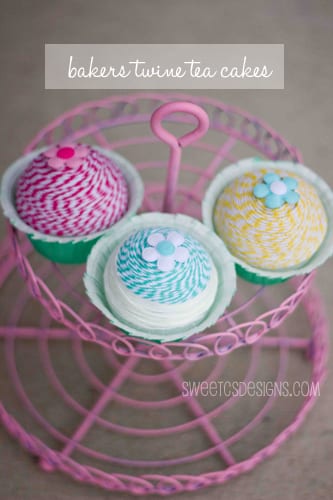
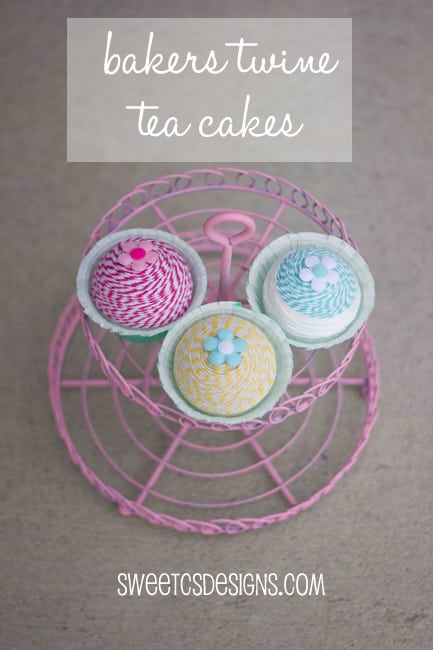
DIY: Bakers Twine Tea Cakes / Cupcakes
Okay, so I realize that this tutorial from Sweet C's Designs is meant for kids, but I want one for me!  These are so beautiful and simple who wouldn't love them??  They look like they take just a few minutes to whip up and we love things that are cute and time friendly.
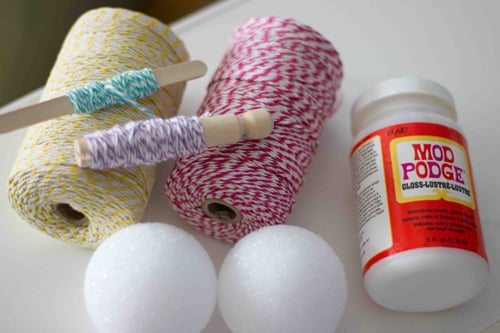
First, you’ll need Styrofoam balls, bakers twine, mod podge, appliques, and cupcake liners/cups.
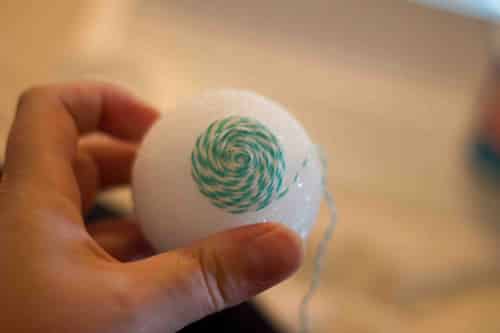
To start your cupcake’s swirl pattern, it is easiest to hold it in your hands, pinching the swirl to stay put as you build it up.
Once it is bigger than a quarter, you can glue your circle of twine to the top of your Styrofoam ball with some mod podge, and continue to wrap the twine in a circular fashion around the ball.

When you’ve wrapped the ball almost all the way down, mod podge the end of the twine to the ball, and add a healthy dollop of mod podge to the bottom of the ball.
Place in cupcake wrapper/cup and let dry.

Wednesday, August 1, 2012

DIY: Scallop Wall Art

I love my 1" circle punch and am always seeking new and fun ways to use it - so "You are my Fave"'s blog is ideal for my crafting desires!  Check out their blog and see what other DIYs you fall in love with and want to try!

DSC_0570
To make your own, you’ll need:
- thin pieces of wood
(the kind I use is called an MDF handy panel, and if you bat your eyes the men at Home Depot will cut it to whatever size you ask)
-colorful cardstock
-a circle puncher
-glue
DSC_0415
Punch lots of circles from your colorful cardstock.
DSC_0418
Then, mark your piece of wood along the edge at half the size of your circles. For example, my circles were two inches, so I made one inch marks along each side. Then connect the dots and make lines across the wood to guide you.
DSC_0420
Using your lines to guide each row, get to gluing! DSC_0422
Let each rows of circles hang on top of the row below – that creates your scallops.DSC_0526

Monday, July 30, 2012

DIY: Felt Bead Necklace

We admit that we have wanted to try a felting project forever now!  This seems like the perfect catalyst to begin a new crafting obsession!  This wonderful and straight forward tutorial from Dans le Townhouse should make you feel inspired, too!


Basically, felting a ball is super simple.  Start with a wool roving and tear it apart like you would cotton candy.  Add a bit of dish soap, a bit of water, roughly shape it into a ball and then start rolling it between your palms like you would a piece of clay.  Rinse it in hot water, then cold, to "shock" the fibres into felting (you continue doing this throughout the rolling process).  It will feel like it won't work, then it will start to felt.  Trust me.  Add increasing pressure as your felt ball becomes firmer and when it is nice and firm, set it aside to dry for a day or two.  Remember your finished ball will be smaller and denser than the rough ball you created when the roving was dry.  Once my beads were dry, I simply strung them with some heavy duty beading thread and the sharpest needle I could find.  You can fuss with a clasp or just tie a knot and slip it over your head.   

Wool Roving

Wool roving pulled apart and ready to shape
How NOT to create a felted ball - squoosh too hard in the beginning

Lay out the beads as you work to get a sense of the pattern. 
 

Tuesday, July 24, 2012

DIY: FABRIC WALL POCKET TUTORIAL

Abernathy Crafts has taken a whole new twist on making fabric wall art by making it not only aesthetic but also functional!  This is quick, easy and financially friendly.  Just the way we like our crafts!

fabric wall pocket 8
Here’s another no-sew project for you!  This is super simple and will add color and organization to your space.  Read on for the quick and easy tutorial.

The tutorial I’m about to show you is completely no-sew, but you could easily modify it with a few straight stitches for a more personalized or practical end product.
fabric wall pocket 1

Materials needed:
  • Embroidery hoop (any size)
  • Fabric (2 coordinating)

fabric wall pocket 2

Lay out your background fabric over your inner embroidery hoop.

fabric wall pocket 3

Lay your pocket fabric, folded in half, over the background fabric.  You can place it half way in the middle, higher or lower, depending on what you plan to put in the pocket.  Just make sure there is enough excess fabric to hang over the edges of the embroidery hoop.

fabric wall pocket 4

Slip on the outer hoop and tighten.  Gently tug the fabric around the edges to make it taut inside of the hoop.  This is the part where you make sure you are happy with the placement of your pocket or how the print on your fabric is situated.  If not, do it over again, this is a very forgiving project.  If you’d like, you can add a couple vertical stitches down the pocket for pencils or one in the middle to divide the pocket into two.  This, of course, would be done before you place the fabric in the hoop.  When you are satisfied with it you can cut the excess fabric or tuck it behind the hoop.  Be sure to tighten your hoop real tight so that the fabric doesn’t slip out.

So that’s it!  Quick, huh?  And so easy, not to mention clever.  And since there is no glue involved, you could easily change out the fabric whenever your mood calls for it!

Wednesday, July 18, 2012

DIY: Crepe Paper Pom Poms

While we realize that the Fourth of July has passed, we feel that this tutorial is so easy and fun it's good to be used year round!  100 Directions shows you how to whip this up in a jiff, and imagine how cute this would look at a baby shower, wedding table, anniversary celebration (gold for the 50 year!), or anything really...maybe we'll just decorate the house in fun summer color just because we can!  What about you...do you love them like we do??

Paper pom pom decor

Materials you need:
  • Crepe paper streamers
  • Ribbon
  • Cardboard
  • Scissors

Step by step instructions to make patriotic pom pom decorations:

  1. Cut cardboard into a rectangle approximately 3″ x 6″. The size of this piece is directly related to how big or small your pom poms can be.
  2. Layer the colors of paper you want to use and wrap around the cardboard at least 7 times. The more you wrap, the thicker your pom pom.
  3. Slide the wrapped paper off the cardboard and tie a ribbon around the middle. Be careful to not tie to tightly to prevent tearing the paper. This ribbon can be used to hang your pom poms later, so make it long enough to tie and hang.
  4. Cut the edges of the paper, first cut the end of the loop and then cut toward the ribbon in strips.
  5. Carefully fluffy the pom pom pieces by gently pulling and moving them around until you get the desired look.
Patriotic crepe paper pom pom tutorial
make patriotic paper pom poms to decorate with

Thursday, July 12, 2012

DIY: Cupcake Wrapper Door Number

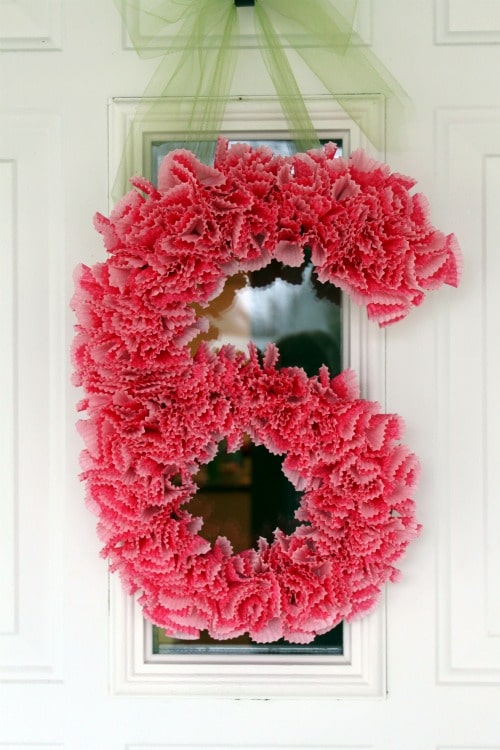
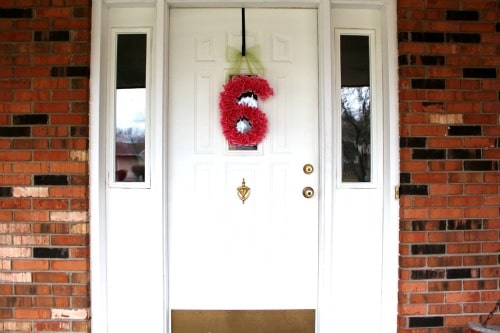
How fun is this tutorial from All Things Mamma??  You can get cupcake wrappers from Michaels for pretty cheap, and there are so many fun ways to revamp this idea it's almost mind boggling!  Almost... ;)

cupcake wrapper number


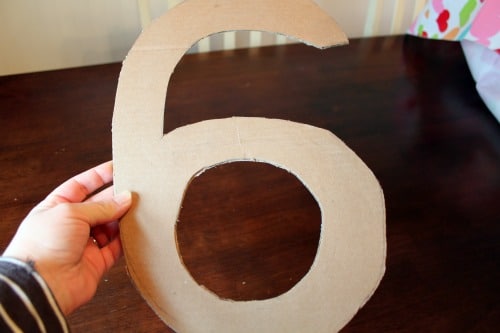
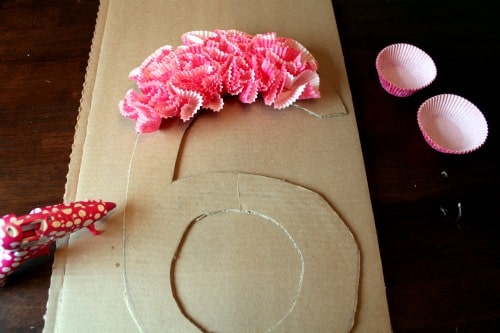
First, take a piece of cardboard and using a pencil draw the number or letter you’d like to use.  Next, using an Exacto knife or scissors, cut out your number or letter.

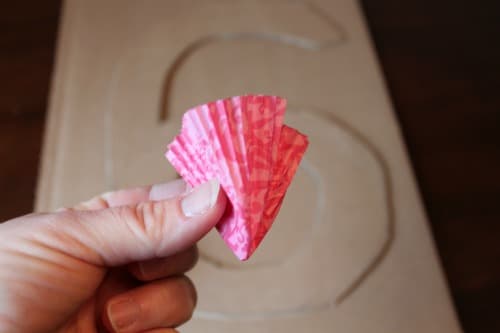
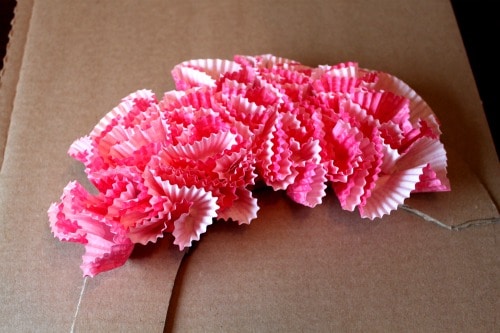
Take cupcake wrappers (Meri Meri Owl & Daisy Bake Cups, Set of 48) and gather them together at the bottom, like in the form of a flower.  Use a dot of hot glue and glue it onto the cardboard.  Hold for a few seconds to hold in place.

Work in small sections around your cardboard so that the glue has time to harden a firm up.

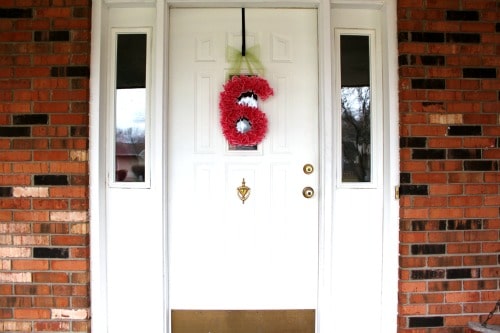
After you’ve filled the entire space, use tulle or ribbon and glue onto the back of your number and tie a bow and hang up! That’s it!
cupcake wrapper door number


Tuesday, July 10, 2012

DIY Butterfly Rice Tosser by Posh Paperie + Jackie Wonders

Check out Posh Paperie for this fantastic tutorial on how to make Butterfly Rice Tossers!  Super cute, and super easy - we can think of other ways to use these great paper wrappers, can you??

Photography By / Jackie Wonders
Design By / Posh Paperie
Photography By / Jackie Wonders
Design By / Posh Paperie
Supplies needed to make these pretty, pretty Rice Tossers:
Butterflies (found at a craft store)
Cardstock: different colors and patterns (thinner works best!)
Photocopy of “Tags”
Hole Punch
Red Tape
Scissors
Photography By / Jackie Wonders
Design By / Posh Paperie
Photography By / Jackie Wonders
Design By / Posh Paperie
Photography By / Jackie Wonders
Design By / Posh Paperie
Photography By / Jackie Wonders
Design By / Posh Paperie
Photography By / Jackie Wonders
Design By / Posh Paperie
Photography By / Jackie Wonders
Design By / Posh Paperie
Photography By / Jackie Wonders
Design By / Posh Paperie

Friday, June 29, 2012

Home Work - The TP Flower Project

Fantastic Tutorial from Imperfectly Perfect!  We love the fact that this project is easy, free, and using recycled products!

Then I took that entire pile of rolls, folded them, and cut them into thin strips

Next step was to create flower like shapes that connect to each other


Now that I had a general design, it was time to glue each flower. Every 5 petals were glued together to form a flower. I used cloths pins to hold them together while the glue dried


I decided to paint some of the flowers light blue (using the left-over paint from our blue line project), and then leave the rest of the flowers in their natural look


Now that the flowers were all glued and painted, all that was left to do was to glue the flowers to each other and create a flowing connected design


My someone and I decided to hang it on the wall next to our TV. As always, my someone was in charge of the hammer while I was in charge of the photo taking...