"A Thrifty Mom" has an AMAZING tutorial that we cannot wait to get our own hands crafting on. Fun, easy, good for kids, cheap (if not free)...what is not to love? Go to her site for the full tutorial, but here is a sneak peek of her fantastical craftiness.
A site for all of my own DIY project successes and failures and for posting all of the amazing tutorials and projects I find as I go - while staying on a budget and keeping as much money in my pocket as possible!
Showing posts with label beginner. Show all posts
Friday, August 16, 2013
Sunday, February 3, 2013
DIY: Mini Cake Stand
Having a Spring / Easter / ANY party? Love cake stand DIYs? Shaken Together's blog has an absolutely adorable mini cake stand that we don't think they could have made easier if they had tried! We love the simplicity, but the beauty of this project.
Be sure to head to their blog for more info and more DIY!
I purchased two inexpensive sets of
solid colored dishes - one granny smith apple green and one
black - inverted the cereal bowls, attached the dinner plates with
scrapbooking glue dots (super sticky and easily removed) and my cake
plates were born!!
Here they are in action - sorry, this was the first picture I could find without digging out my CD of hundreds of pictures!
We made chocolate and vanilla cupcakes with home made buttercream and offered chocolate jimmies, green sugar, coconut and mini chocolate chips ... it was a hit!
These
would be sweet made with thrift store finds for a Mothers' Day tea,
heritage dishes for an anniversary party or fun brightly colored mix
& match plates and bowls for your kiddo's birthday party ... use the
coffee mugs and salad/dessert plates for smaller cake stands with a
little more quirky character :) The best part is that they can be
whipped up in a pinch and stored easily!
Hope you were inspired to {try this}! And hope you want to hang around a while! There are lots of ways to follow along ... check out my side bar. I'm hosting a weekly Pinterest link party, too - scroll up to the top to stop by this week's party! And I'll be sharing the amazing brownie recipe pictured above in the very near future ... you definitely don't want to miss it!
Labels:
2013,
beginner,
cake,
cake stand,
center piece,
cupcake,
custom,
decor,
decoration,
DIY,
do it yourself,
easy,
favor,
how to,
howto,
party,
spring,
tutorial,
wedding,
weddings
Saturday, February 2, 2013
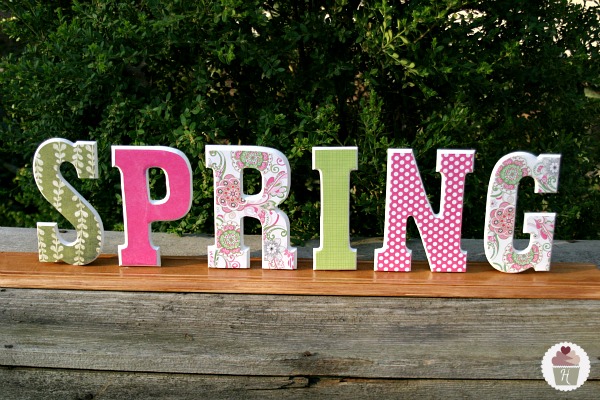
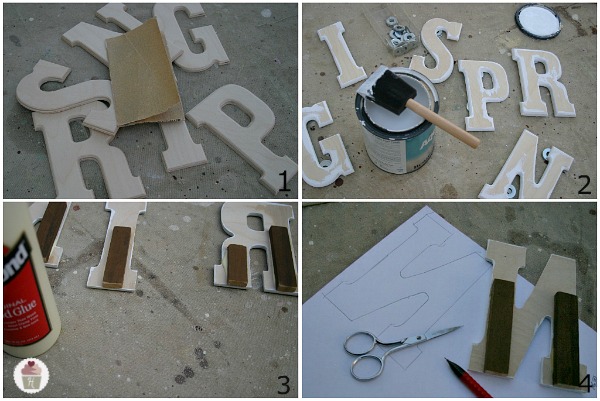
DIY: "Spring" Letters
So spring is just around the corner and we cannot wait. Hoosier Homemade's blog has just the DIY project to get us going on spring related projects so we can be ready to roll!
This one is a "Spring" decor idea that brings color and happiness to any room! Be sure to check out their blog for more DIY.
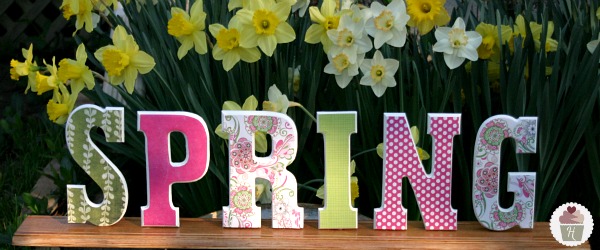
I just love how it turned out! Doug did an AMAZING job on it…don’t you think?
The concept for the scrapbook paper being applied to the wood is similar to the St. Patrick’s Day Door Hanging
we made, but the letters were a little curved on the edge, so Doug had
to cut out the paper before applying it to the wood. It was a little
more time consuming, but well worth it.
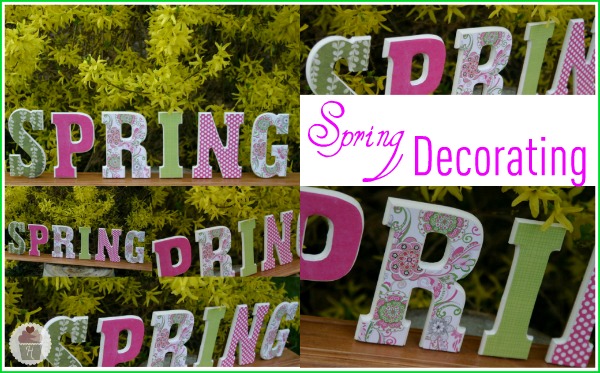
And we couldn’t help but take pictures outside in the beautiful Spring weather we have!
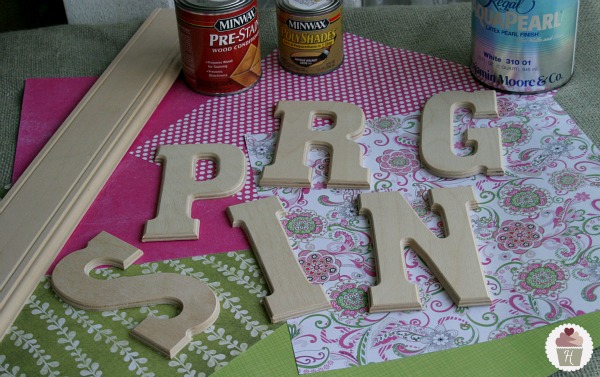
Let’s gather our supplies…
Spring Craft Supplies:
- Wood – We used a piece of baseboard from our local molding outlet (length will depend on how many letters)
- Letters
- Scrapbook paper
- White paint for the edges of the letters
- Pre-stain and stain for the wood
- Spray adhesive to apply paper {not pictured}
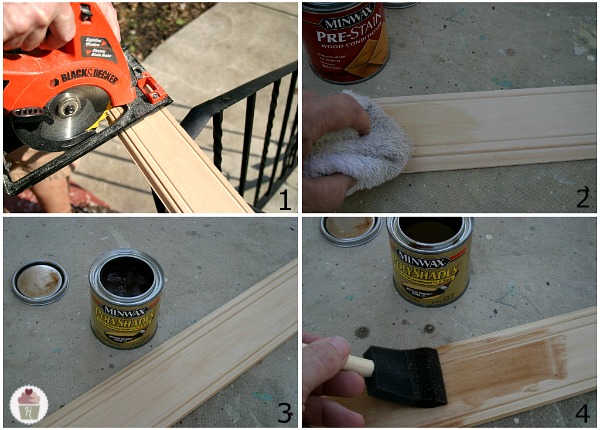
Wood Preparation:
- Cut your wood to length. Doug cut this piece, 5 inches longer than what we needed, leaving 2 1/2 inches on each end.
- Using a rag, apply the pre-stain. Pre-stain is needed when staining soft or porous types of wood to prevent the finish from being blotchy.
- Let sit 15-20 minutes to allow to soak in, wipe off any excess.
- Apply stain evenly with a foam brush and allow to sit for 5-10 minutes depending how dark you want the final product to be, carefully wipe and excess stain off. {We used a combination stain/polyurethane product to speed up the process}
Letter Preparation:
- Slightly sand the edges of the letters with 180 grit or finer sand paper. {the higher the number the finer the grit}
- Paint the edges (2 coats) we used a satin latex that we had on our shelf {the washers are just to keep the letters up off the drop cloth}
- Glue a small block of wood to the back side of the letters to give more area to glue to base.
- Trace the letter onto the back of the scrapbook paper and cut out
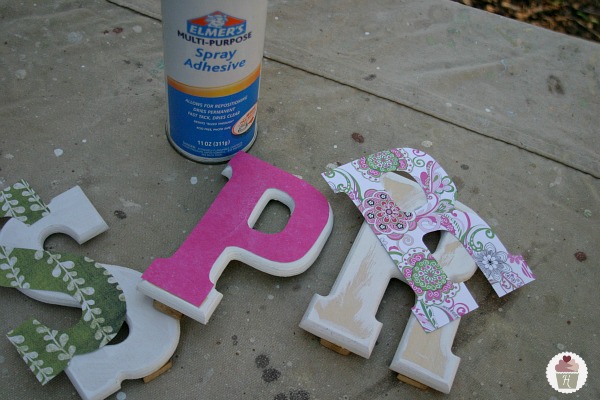
Decorating the Letters:
- Spray the back side of the paper with adhesive and carefully adhere to the wood letters
- To attach the letters to the wood, use a hot glue gun {note: Doug tried wood glue and even super glue, but the glue gun worked the best}
Labels:
2013,
beginner,
colorful,
custom,
decor,
decoration,
DIY,
do it yourself,
dollar,
dollar store,
easy,
how to,
howto,
lesson,
letters,
spring,
tutorial,
unique,
upcycle,
wall letters
Thursday, January 10, 2013
DIY: Felt Heart Garland
Oopsey Daisy is an absolutely adorable blog that helps us stay on track with our Valentine's Day themed crafts. We are closing in with only 35 days to go until the big day filled with hearts, dinner, champagne, and stuffed animals. Speaking of hearts - this felt heart garland couldn't be any sweeter.
You can make your own with some scraps on hand!
Let's get started!
I started with the felt. I secretly
wanted to use all wool felt, but my frugal conscience got the best of
me. So I purchased the red and mustard wool felt, and I had the other
colors on hand. I LOVE the color scheme! The mustard and turquoise
were fun and unexpected pops of color.
Then I sat down and just started cutting
out a whole lot of hearts! I didn't use a pattern--just used the old
traditional method of folding the fabric over to achieve a symmetrical
heart. I think I cut out about 90 hearts total.
It was 12:30 AM, and I couldn't thread
the yearn through the needle for the life of me. Finally I tried this
trick of taping the end with masking tape. Duh! It worked perfectly.
I knotted the end of the yarn to prevent fraying and then started stitching!
I made sure that I had plenty of excess
yarn so I could sew as long of a garland as possible. (I didn't want to
have to thread that needle any more times than completely necessary!)
I wanted to be unpredictable, so I didn't repeat the colors in any certain pattern. Crazy, I know!!
I just knotted the very end of the yarn, and started draping!
So what do you think?
Labels:
beginner,
craft,
decor,
decoration,
DIY,
do it yourself,
dollar,
easy,
felt,
felt crafting,
garland,
heart,
hearts,
mantel,
office,
recycle,
tutorial,
upcycle,
valentine,
valentine's day
Saturday, December 29, 2012
DIY: Balloon False Ceiling
Wants and Wishes blog has a fantastic last minute idea for that New Year's Eve party! If you've been debating how to jazz up the home for the festivities - here you go!! Visit them for more ideas.
1. Blow up all of the balloons you would like to use. I wanted a
variety of colors of balloons so I used 2 different colors of purple, 3
different blues and silver. I think it turned out really well to have
the mix of colors.
2. Roughly arrange the colors the way you would like them, this will
help when your tying them together that you don't have all the same
blues together, but a even mix of colors. (Note I used almost double the
amount of silver balloons since I have different shades of blues &
purple balloons).
3. Tie them together with string or curly ribbon. Don't tie them too
close as they need a lithe room in between. I tie them together so you
have 2 rows of balloons- one hanging on the right then one on the left.
Here is a picture with one strand hung up so you can see how full one
strand can be. You can add as many strands of balloons you need to
create the depth of your area.
Labels:
accents,
accessories,
adult,
anthropologie,
apartment,
balloon,
balloons,
beginner,
DIY,
do it yourself,
easy,
handmade,
homemade,
new year,
new years,
party,
party ideas,
tutorial,
upcycle
Friday, December 28, 2012
DIY: New Year's Eve Confetti!
Head on over to "Homework: Today's Assignment: Be Inspired"'s website for this awesome DIY New Year's Eve confetti! This is so easy to whip up and would make for a great last minute party idea. The only problem? Vacuuming it all up!
Labels:
beginner,
confetti,
confetti ideas,
DIY,
do it yourself,
dollar,
dollar store,
make,
new year,
new years,
new years eve,
paper crafts,
party,
party ideas,
tutorial,
unique,
upcycle
Thursday, December 27, 2012
DIY: Gold Dipped Glasses
Having a New Year's Eve party? These gold dipped glasses would make the perfect edition to any party night! These come to you from Momtastics' blog - so go check her out!
Supplies:
- Mettalic gold spray paint
- Masking tape
- Newspaper
- Wine glasses
Wash wine glasses thoroughly. Wrap tape around the base of the wine
glass leaving the area exposed you want to paint gold. Cover the rest of
the glass with paper
I taped up the sides too to be extra cautious
Spray from a good distance, at least 1 1/2 feet to get a nice even coat.
Labels:
beginner,
DIY,
do it yourself,
dollar store,
glass,
glasses,
ideas,
new year,
new years,
new years eve,
paint,
party,
party ideas,
tutorial,
unique,
upcycle,
wine,
wine glasses
Saturday, December 22, 2012
DIY: Anthropologie Inspired Snow Globes
Zomoc.com has a wonderfully easy DIY - there aren't really any instructions, but these look pretty self explanatory! We could see us whipping up a few of these wonderful gifts for far less than what Anthropologie is charging for them....

Labels:
accents,
accessories,
adult,
anthropologie,
beauty,
beginner,
budget,
craft,
DIY,
do it yourself,
easy,
globe,
handmade,
homemade,
snow,
snow globe,
snowmen,
table,
table decor,
tutorial
Saturday, December 1, 2012
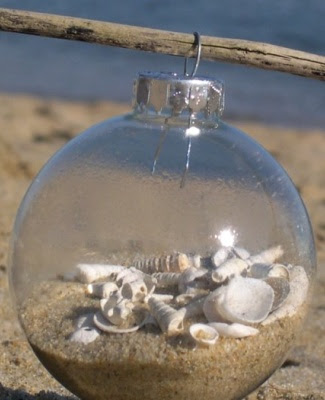
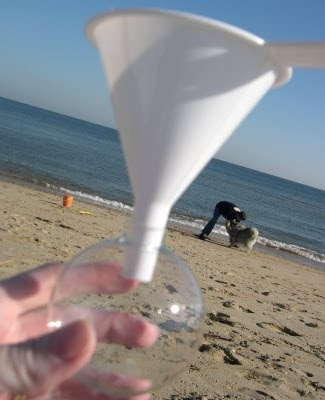
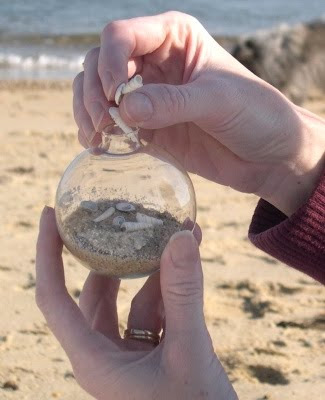
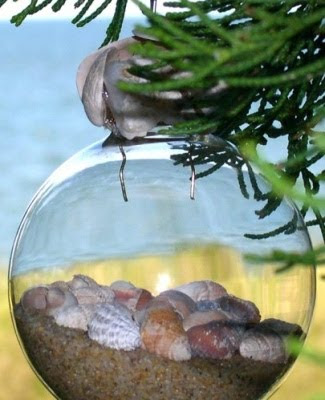
DIY: Beach Themed Ornaments
Since it's the beginning of December and the real count down to Christmas time - we decided to do TWO DIYs today. Earlier we did Glitter Trees, which are awesome, so check them out. And now, we bring you a DIY from Completely Coastal showing a step by step for beachy ornaments! Why not bring the beach feel into the cold weather season?
Labels:
autumn,
beach,
beginner,
christmas,
christmas tree,
december,
decor,
decoration,
DIY,
do it yourself,
dollar store,
fall,
holiday,
holidays,
homemade,
ornament,
ornaments,
tree
Sunday, November 11, 2012
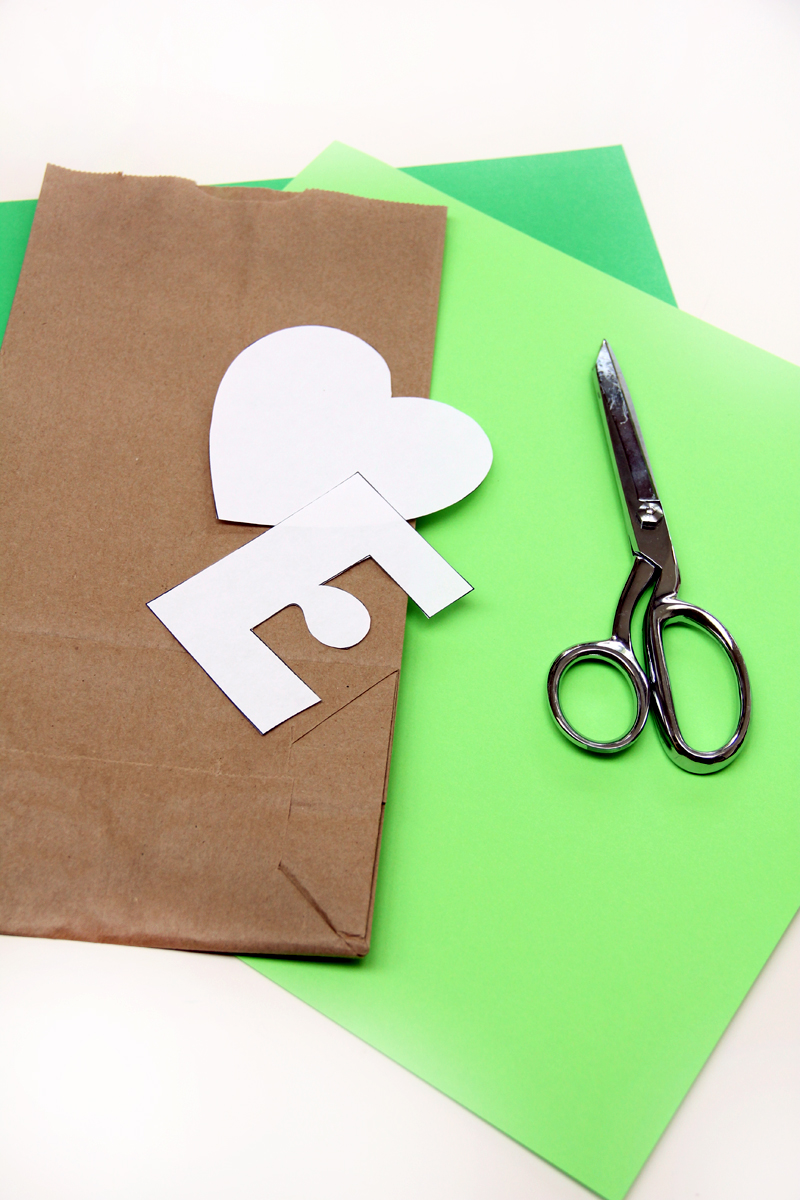
DIY: Colorful Lunch Bag Cutouts
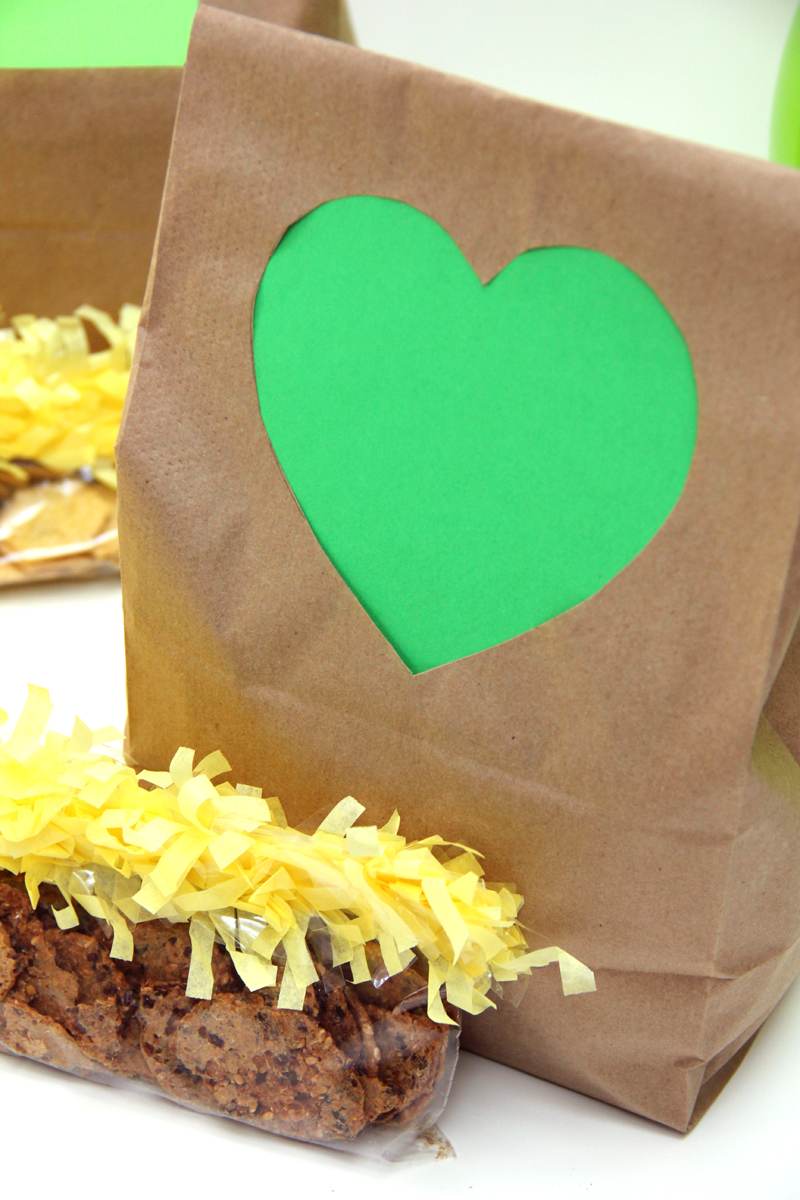
We are taking a brief hiatus from ornament DIYs today to show you a great project from Studio DIY's blog! Be sure to check them out. These lunch bags would be great for a pick me up during a long school day!
Supply List:
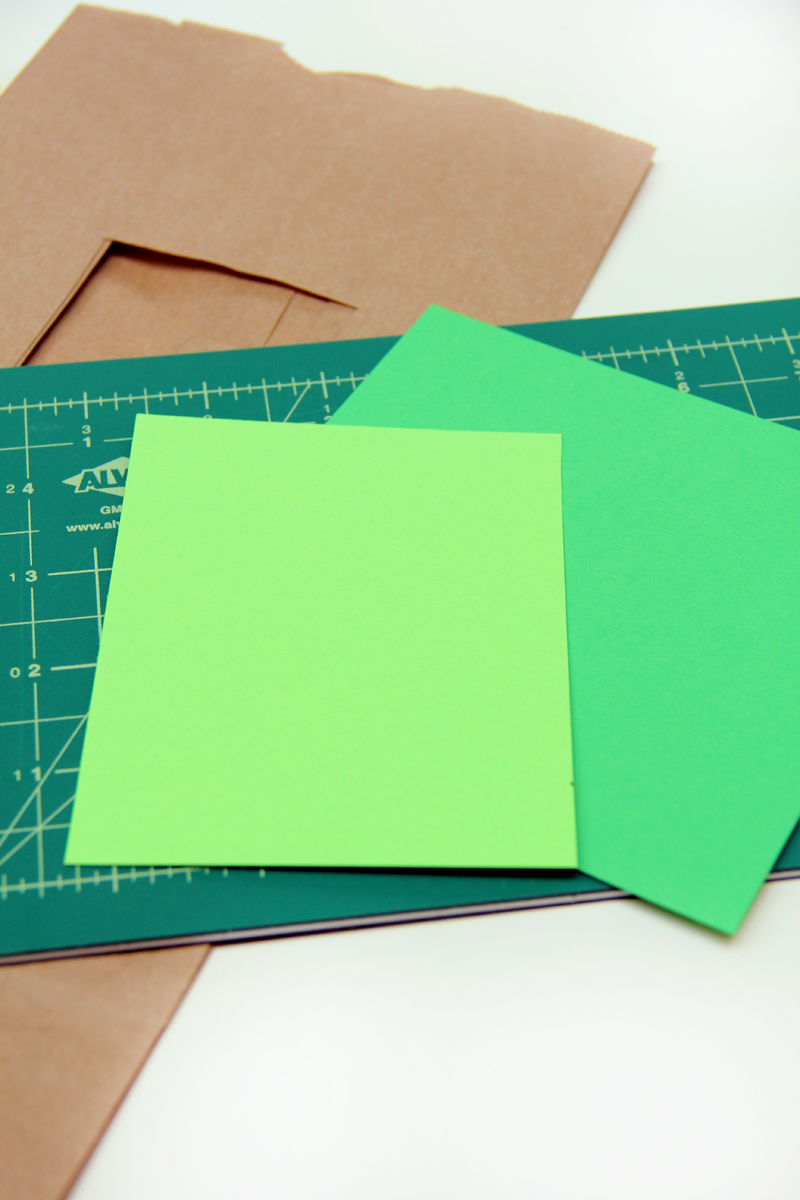
Brown Paper Lunch Bags
Letter or Shape Templates (Print out large letters from your computer, or free hand it!)
Pencil
Scissors (x-acto knife helps too!)
Colored Card stock
Tape and/or Glue
Letter or Shape Templates (Print out large letters from your computer, or free hand it!)
Pencil
Scissors (x-acto knife helps too!)
Colored Card stock
Tape and/or Glue
To Make:
Trace
your shape onto your lunch bag. Make sure to leave enough room at the
top so you can fold the bag over (I’d do mine even lower next time).
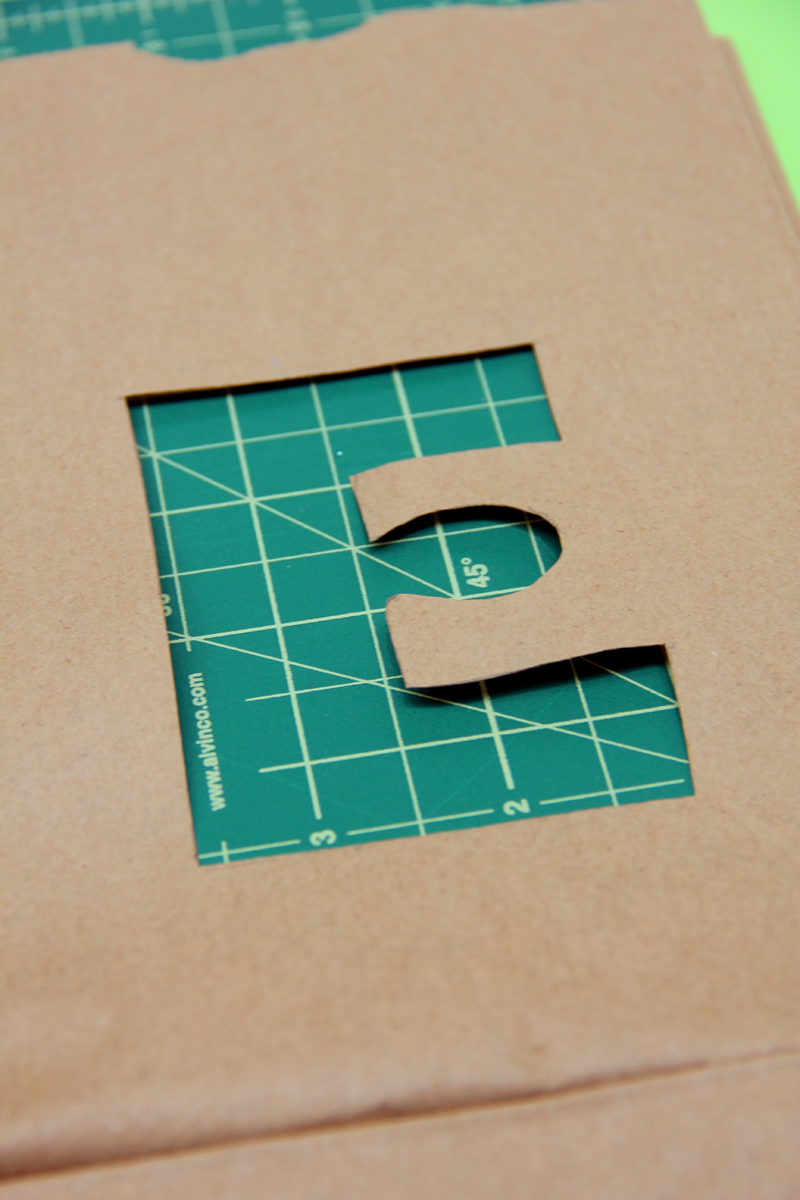
Cut
out your shape, I did this with an x-acto and put a small cutting board
inside the bag to prevent cutting through both sides. You could easily
do this with scissors too. Then cut a rectangle of colored paper, just
big enough to cover your entire cut out.
Tape
and/or glue your paper inside the bag behind your cut out. I taped mine
first, then added glue (you can do this with a tooth pick or small glue
stick) to seal down the loose edges.
Labels:
accessory,
bag,
beginner,
brown bags,
cheap,
easy,
fast,
for kids,
kids,
kids crafts,
lunch,
lunch bags,
paper,
paper bags,
quick,
school,
school projects,
tutorial,
upcycle
Tuesday, October 2, 2012
DIY: Halloween Tin Can Luminaries
Jolly Mom's blog has a very easy to follow DIY that features tin can luminaries. There is still plenty of time to whip up these guys to line your steps or driveway. Ideal for a party!
Head on over to her blog for even more DIY!
What You'll Need:
* Sharpie or marker in the same color as your paint
* Clean empty tin cans {I like to use the big coffee cans, any size will work}
* Hammer and large nail or awl
* Paint
* Paint brush
* Candles
Instructions
Fill the tin can with water and place it in the freezer. When the water in the can is frozen, remove the can from the freezer.
Using the marker, draw whatever image or word onto the tin can. You can freehand or print a design from the internet and then trace it onto the tin can. Keep the design simple though. Design Ideas: outline of a cat, a bat, a witch's hat, words like Boo or Happy Halloween.
Place the tin can on a folded towel. This will help brace the tin can and reduce the impact of punching the holes with the hammer.
Then, use the hammer and awl {or nail} nail to puncture the design in the can.
When you're done punching the holes, place the can under hot, running water to melt the ice.
Also, since water expands as it freezes, the bottom of your can will probably not be level. If not, then turn the can over, cover with a towel, and hammer down the edges until the bottom of the can is level.
Paint the tin can using either spray paint or acrylic paint. Once the the paint is dry, you'll probably have to go back with a toothpick and poke some of the holes through on the can since the paint can clog them up.
Place a candle inside the can and enjoy!
NOTE: You can also puncture one hole on either side of the tin can, attach a piece of wire, and then hang the luminaries as well!
Head on over to her blog for even more DIY!
What You'll Need:
* Sharpie or marker in the same color as your paint
* Clean empty tin cans {I like to use the big coffee cans, any size will work}
* Hammer and large nail or awl
* Paint
* Paint brush
* Candles
Instructions
Fill the tin can with water and place it in the freezer. When the water in the can is frozen, remove the can from the freezer.
Using the marker, draw whatever image or word onto the tin can. You can freehand or print a design from the internet and then trace it onto the tin can. Keep the design simple though. Design Ideas: outline of a cat, a bat, a witch's hat, words like Boo or Happy Halloween.
Place the tin can on a folded towel. This will help brace the tin can and reduce the impact of punching the holes with the hammer.
Then, use the hammer and awl {or nail} nail to puncture the design in the can.
When you're done punching the holes, place the can under hot, running water to melt the ice.
Also, since water expands as it freezes, the bottom of your can will probably not be level. If not, then turn the can over, cover with a towel, and hammer down the edges until the bottom of the can is level.
Paint the tin can using either spray paint or acrylic paint. Once the the paint is dry, you'll probably have to go back with a toothpick and poke some of the holes through on the can since the paint can clog them up.
Place a candle inside the can and enjoy!
NOTE: You can also puncture one hole on either side of the tin can, attach a piece of wire, and then hang the luminaries as well!
Labels:
autumn,
beginner,
candle,
candle holder,
candles,
decor,
decoration,
DIY,
do it yourself,
fall,
halloween,
halloween crafts,
holiday,
luminaries,
luminary,
outdoor,
party
Subscribe to:
Posts (Atom)