Showing posts with label inexpensive. Show all posts

Sunday, December 2, 2012

DIY: Winter Mobile

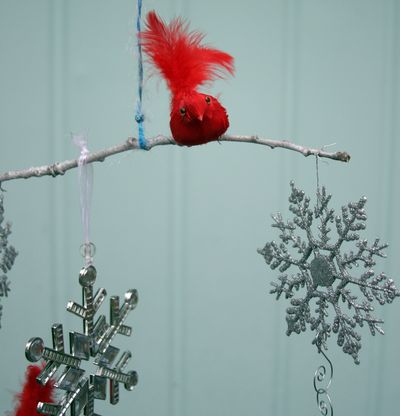
We are obsessed with Dollar Store Craft's blog and how they always make the cutest and more elegant things with such inexpensive supplies.  Here is a great Winter Mobile for your home!  Be sure to give their blog a read!
mobile-garage
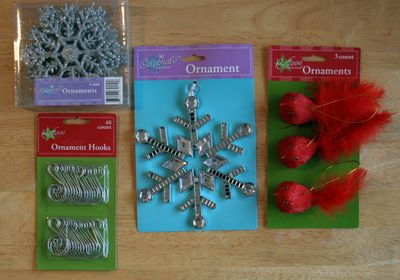
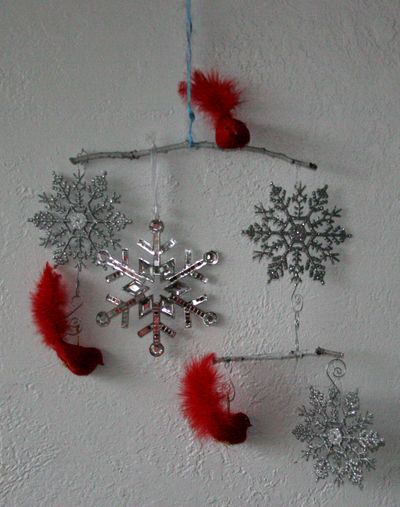
The dollar store has so many cute ornaments this year. I picked up some shiny snowflakes and pretty red birds at the store, found some branches outside, and strung them together for a wintry mobile. You can use pretty much anything on your mobile, so pick your favorite things, attach them to a string and start making one!
mobile-supplies
Project Materials:
  • Assorted ornaments, $3 or on hand
  • Swirly ornament hooks (optional), $1
  • Wire, on hand (I used the wire that came attached to the red birds)
  • Sticks, dowels, or other things to make up the backbone of your mobile, on hand
  • Spray paint (optional), on hand or $1
Total: FREE and up (I spent $4)
mobile-branches
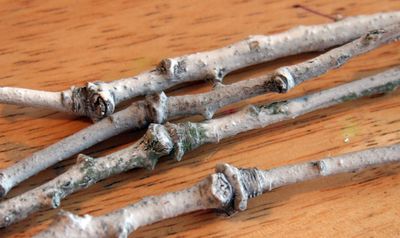
I used oak branches from my yard because I have a ton of them. I spray-painted them with a light coat of white to make them look sort of like birch branches (more wintry!). My oak branches were pretty straight, but they have pretty big knots on them which hurts the balancing process (because the knots kept me from putting things precisely where I wanted to -- strings would slide off a knot). Choosing the smoothest sticks you can find is a good idea!
mobile-sat
Balancing the Mobile:
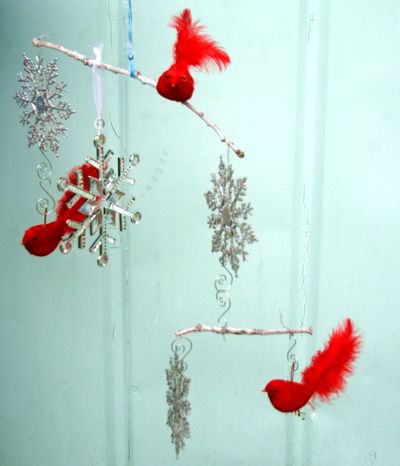
Balancing the mobile is sort of a process of trial and error, but it's all about balance. The easiest route is to make sure the mobile has equal items on each side and hang them symmetrically. You will get the quickest results by planning a symmetrical mobile.
mobile-snowflake2
If you choose to ignore this advice and opt to make an asymmetrical mobile, here are some tips:
  • I like to think of my mobile like one of those big doctor's scales that has the heavy weights that you move from slot to slot to adjust until you get the bar to balance just perfectly. You will have to do a lot of slight adjustments to get your mobile to balance correctly.
  • I also like to think of my mobile like a teeter-totter (or seesaw): You know how they have three slots at the fulcrum so you can adjust them to compensate if one rider is heavier than the other? You can do that with your mobile by adjusting where the center attachment is located on your stick. Slide it closer to heavier items to help tip the balance in favor of lighter items.
  • You can also slide items closer to the end of the stick to help them act heavier (or closer to the center of the stick to help them act lighter).
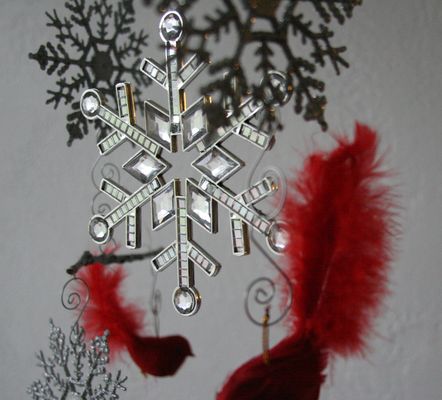
  • It helps to have an ornament near the center of a stick (see my rhinestone snowflake) because you can move it to adjust the weight distribution.
  • Use a piece of wire to attach your components to the sticks because they won't slide around very much, making it easier to adjust the balance.
  • Items should float freely and not bump into each other.
  • Expect to have a lot of trial and error when building your mobile!
mobile-straight


Thursday, September 6, 2012

DIY: Upcycled T-Shirt Belt

We love all the ways that people have come up with to upcycle old t-shirts.  This tutorial from Delia Create's blog is no exception! She even shows you how to use this technique to make a headband as well. So, check her out!

It's pretty easy. The part that takes the most time is the braiding really.

To start you just cut four strips of T-shirt. I cut mine 2.5 inches wide.

Pin the ends together and hold it down with a can or a book.


 Now braid. This is a four strand braid. I like that it makes it a little thicker and belt like.


And this is what it looks like after several rounds.

When you are done braiding knot the end.


 Now sew the ends.


You want one end sewn just once so you can wrap it around the D-rings and sew it there a couple of times. It is quite thick so it can be tricky.


For the other end sew it several times.


I didn't have matching thread for the orange but I did for the green. It makes it look a bit nicer.

And that's it!


Tuesday, September 4, 2012

DIY: Animal Bookends

We read all the time - we actually have so many books that it has gotten pretty ridiculous...so this book end tutorial is wonderful for us!  Perhaps we could find it in our hearts to get rid of two or three books to make space for these to sit on the shelf??

Thanks to Hi Sugarplum's blog we just might get motivated to donate a few books just to have these bad boys on display.

100_7066

.....Plastic elephants from the dollar bin! I found these at the Target Danger Dollar Zone for $1 each, and the spray paint I already owned (duh). As for the rocks, you can find them in the garden department of the hardware store, on walks in park, or stone yards. I happen to have a stone yard nearby (kind of random, right?!), so I grabbed my 'Rattlesnake Rocks' (that's really what they're called) there. The poor guys were so confused by my request, they just let me wander around and take whatever scraps I wanted.
100_7048
I originally planned to use stone tiles as the bases, but they were too small and not heavy enough to hold the weight of books.

I didn't love the tusks, so I trimmed them off with scissors, then gave each animal a few light coats of spray paint. I wanted the rocks to sit straight, so I filed the bottoms down using our concrete driveway. A dot of super glue to the bottom of each foot adheres the plastic to the stone.
bookend collage

Here are the mighty elephants now!
100_7069

100_7082

100_7071

Saturday, September 1, 2012

DIY: Cupcake Ornaments

Keeping with our holiday theme from yesterday - we believe in prepping for the holiday early so there is less stress - we would love to share this tutorial from Goldiloks: Jacktress of all Trades on how to make Cupcake Ornaments.  They are adorable, easy and cheap! You all should know by now that this makes us love it all the more. =)

These adorable cupcake ornaments were partly inspired by the lovelies over at Bake it Pretty & my fave blog Prudent Baby even made some. I tweeked them slightly and used actual miniature ornaments and white paint ( you guys know I can't leave my paint behind!) Also, I opted to use regular hooks instead of twine or ribbon. You could choose which ever you like better. Ready?
what you'll need:
1. mini cupcake liners
2. painted and glittered/ snow flocked ornaments (simply paint "frosting" and dip it into glitter or fake snow while the paint is still wet)
3. berries (you can buy these from Micheals, about .75)
4. glue gun (excuse the grossness lol)

Now this is SUPER EASY. ready? k.
1. glue the bottom of the ornament to the cupcake liner (I like to glue mine at a slight slant)

2. Snip a few of the berries from their branch, set aside. Apply a tinybit of glue next to the top, and place the "cherry" (berry) on the glue. Let set & dry. 
Your all done! You can either at a ribbon to hang it from or simply use a regular ornament hook. Easy right? Now go make hundreds of them to give away or adorn your tree. ;D
Friday, August 31, 2012

DIY: Felt Poinsettia Hair Clip

Projectville has a fantastic tutorial that we found just in time for the upcoming holiday season!  This stunning Poinsettia Hair Clip would be the perfect accessory for any wardrobe in the winter time and beyond.  Not to mention she is stunning herself...


Here's what you'll need:

• felt
• yarn
• scissors
• hot glue gun
• glue sticks for said gun
• hair clip (optional)


Follow the picture tutorial and pattern. The larger circle in the pattern is used to glue all the petals to. Start with the biggest petals around the outside, then medium sized, then smallest in the middle. The smaller circle is for after you glue the top of your clip to the flower. Open the clip, glue it to the back of the flower, then glue the small circle over the top of the open clip to clean up the look. Tah dah!

Saturday, August 18, 2012

DIY: Paper Blossoms Hydrangea Pomander

Fancy Pants Wedding's blog has an unbelievably fantastic tutorial that could not be easier - we don't think that this is just for weddings either!  This could be great for home decor, gifts for friends, a house warming gift, holiday decor....you name it!

This cute little pomander is a super easy, super fun DIY wedding project brought to us by the fabulous Stephanie with Paper Garden.  Paper Garden is my favorite rubber stamp, paper and gift store in Sacramento.
These hydrangea balls could be used at a bridal shower or maybe a casual backyard wedding.  For the wedding they could decorate the aisle ends, be carried by your flower girl or stack a few in a cute basket or tin and use as a centerpiece.

Supplies:
  • Yellow Marvy flower paper punch
  • Blue Marvy flower paper punch
  • pearl headed straight pins
  • styrofoam ball (size depends on how big you want your finished pomander)
  • card stock in desired color
  • Multi-setting glue gun
  • Glue sticks
Optional:
  • green florist tape
  • wooden dowel
  • 3 yards of ribbon

Punch a variety of large and small flowers from your chosen card stock.  You can also use more than one color.
Place the pearl headed pin through the paper flower and push into the styrofoam ball.
Continue adding flowers to the ball, varying the sizes of the flowers and  overlapping the blossoms so you are covering all of the styrofoam.
If added security is desired, add a small dab of hot glue, set your glue gun for stun, I mean low heat, under the flower. If you are using the hydrangea ball as a flower girl pomander I highly suggest the extra strength of gluing the flowers into place.

To make hydrangea ball into a hanging pomander:
Take 1.5 feet of ribbon and make one large loop, knotting the ends.  Pin the loop into the pomander and using your glue gun on low heat setting, throughly glue the ribbon loop into place.  Allow the glue to dry before moving your pomander.
Make a multi looped bow and glue it over where your ribbon handle meets the pomander.

How to make hydrangea ball into a flower:
Wrap the wooden dowel in green florist tape

Insert wooden dowel into the styrofoam ball and glue into place.

Thursday, August 16, 2012

DIY: Rolled Paper Flowers

We admit it - we are in love with paper flowers.  We want so badly to try our hand at this one, but just haven't had the time with all of our other projects!!  We will get on this one though after being so inspired by Jones Design Company's blog, we feel that we just might die if we don't try this since they make it look so simple...what do you think??

rolled flowers
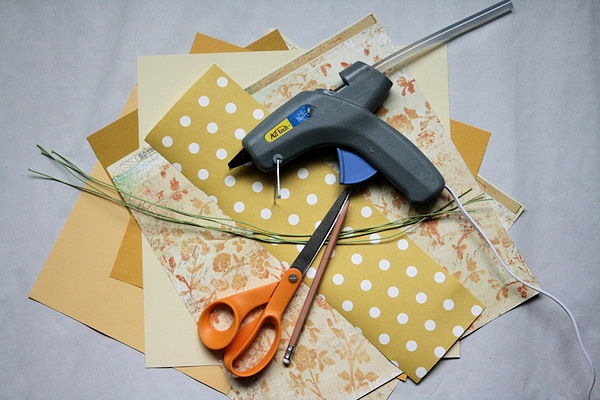
Here’s what you’ll need:
IMG_0769
:: paper {either cover or text weight}
:: florist wire
:: scissors, pencil, glue gun
STEP ONE: cut irregular circle
cut
This circle is approximately 8 inches, but you can do any size you wish.
cut 2
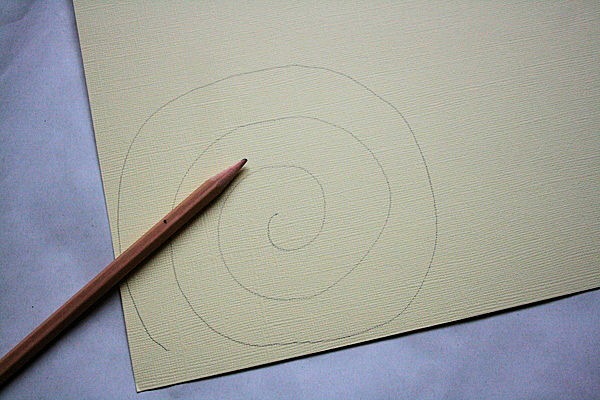
STEP TWO: cut spiral
cut spiral
Start at the outside edge and cut in a spiral fashion to the center.
spiral
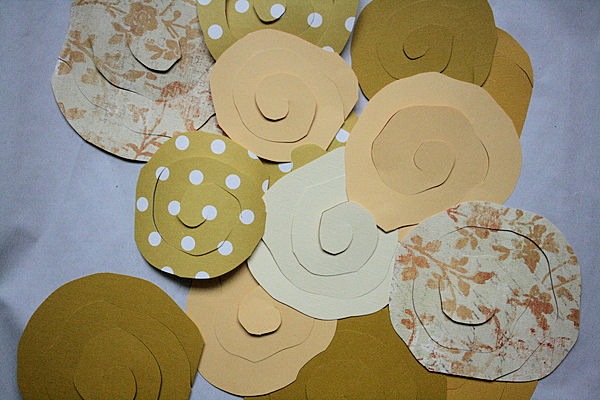
I like a sort of bumpy shape so that the petals end up a bit irregular
spiral 2
If you aren’t so sure about your cutting skills, feel free to draw your spiral before cutting. I did this one with a straight edge, but you could make it bumpy as well.
IMG_0787
To add a little interest to my bouquet, I used a variety of yellow scrapbook papers {my favorite is that yellow dot}
IMG_0800
STEP THREE: roll your blossom
start rolling
start at the outside edge and coil tightly
roll
rolling
Continue rolling until you get to the center. You’ll have a tightly coiled rosette.
rolled
STEP FOUR: release coil
open
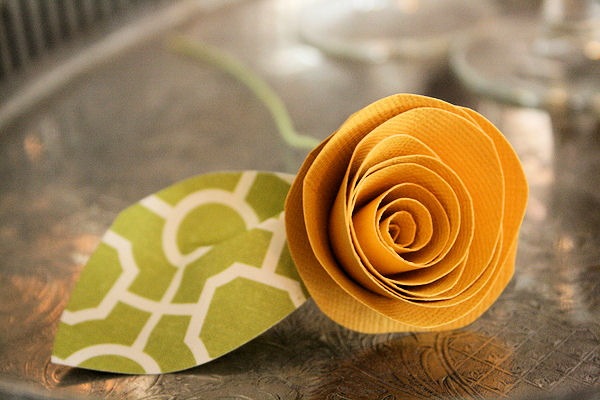
And your flower grows.
STEP FIVE: glue together
glue
Add a glob of glue to the center and press to adhere the coiled paper
press
TO MAKE A LEAF:
cut a leaf shape out of green paper
leaf
Fold in an accordion-style fold
fold leaf
and adhere with a dab of hot glue.
glue leaf
TO ADD A WIRE STEM:
Cut a piece of floral wire to desired size {mine are about 6 inches} and bend a small piece at a 90 angle.
wire
Glue wire to the bottom of the flower.
glue wire
Then attach the leaf to cover the wire.
glue leaf
IMG_0845
When grouped together, you have a very sweet bouquet of wilt-less blossoms.
bouquet
flowers
sweet bouquet
I also tried these with sheet music.
sheet music
And attached to a wreath form covered in linen.
music flowers
Aren’t those the cutest paper rosettes? Start rolling …