Showing posts with label budget. Show all posts

Saturday, January 12, 2013

DIY: Valentine's Containers

Are you having a Valentine's Day party or are you looking to give out some fun favors for a school / work / church event?  Skip to My Lou's blog has some wonderful DIY containers that are just adorable.  We walk by those paper book packs at Michael's all the time and wonder what we can do with that much holiday paper...now we know!!

I have been making them for years, but with all the new printed papers and embellishments it is a new quick an easy craft. I found everything I needed at Michael’s Arts & Crafts. Look for heavyweight paper or cardstock {loving this pad from Martha Stewart} for these containers, cute embellishments, adhesive tape runner and a Fiskars paper crimper.
 
These containers can be made any size.  I cut paper 4.25″ X 5.5″ (roughly cutting an 8 1/2 X 11 sheet of paper in half).
With a tape runner put two rows of tape on one edge. Glue stick or Double Sided tape can also be used. Be generous with the adhesive!
 
Put  the adhesive tape runner {my favorite} along the end and one side of the paper on the wrong side.
 
Roll paper into a tube, overlapping the edge about 1 inch.
 
Pinch the edge with the adhesive closed. Place the closed end in the paper crimper. Turn crimper about three to four times.
 
Fill container with goodies. Place adhesive on the inside edge  of the other end. Press end together in the opposite direction. Crimp close.
 
It works best if the seam is off center.
 
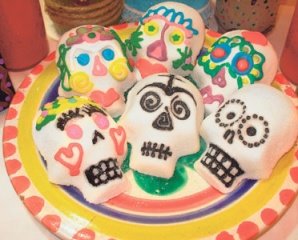
Attach embellishments to the containers.  These make a fun containers to hold yummy goodies for your special Valentine!

Sunday, December 30, 2012

DIY: Eggnog Cupcakes with Spiced Rum

Baker's Royale has made a picture look so delicious we wish we could eat two dimensional objects!!  These look unreal.  We know that our frosting will not look this amazing, but if they taste anything remotely like they look we couldn't be happier...
 Eggnog Cupcakes Bakers Royale Eggnog Cupcakes with Spiced Rum  

Makes 24 cupcakes | Preparation: Heat oven to 350 degrees F. Line 2 muffins tins with cupcake liners.
Ingredients:
Cupcakes:
  • 1 1/2 cups self-rising flour
  • 1 1/4 cups all-purpose flour
  • 1 cup (2 sticks) unsalted butter, softened
  • 2 cups sugar
  • 4 large eggs, at room temperature
  • ¾ cup eggnog
  • ¼ cup milk
  • 1 teaspoon vanilla extract
Spice Rum Buttercream:
  • 5 large egg whites
  • 11/2 cup sugar
  • 4 sticks unsalted butter, diced and softened
  • 1/4 teaspoon salt
  • ½ cup spiced rum
Instructions:
To make cupcake:
  1. Measure out flour and set aside.
  2. Add sugar and butter in a bowl and cream on medium speed until fluffy, about 3 minutes. Add eggs in 1 at a time, beating well after each addition. Add the dry ingredients in 3 parts, alternating with the eggnog and vanilla to start. Mix after addition until incorporated-do not overbeat.
  3. Fill cupcake liners about 3/4 full and bake for 20 to 25 minutes. Transfer cupcakes from tins to cooling rack. Allow cupcakes to cool completely before frosting.
To make Spice Rum Buttercream:
  1. Combine egg whites and sugar in a bowl placed over simmering water. Bring mixture to 160 degrees F while whisking constantly.
  2. Transfer mixture to stand mixer bowl, fitted with a whisk attachment and beat on medium  high speed (speed 8 on a KitchenAid stand mixer) until mixture cools and doubles in volume and forms stiff peaks; about 10-12 minutes).
  3. Add butter in one piece at a time, mixing to incorporate after each addition. The mixture may appear clumpy and almost curdled looking at first-this is normal. Keep mixing and it will become even and smooth again.
  4. Add salt and spiced rum and mix to combine.


Saturday, December 22, 2012

DIY: Anthropologie Inspired Snow Globes

Zomoc.com has a wonderfully easy DIY - there aren't really any instructions, but these look pretty self explanatory!  We could see us whipping up a few of these wonderful gifts for far less than what Anthropologie is charging for them....

Inspired Snow Globes Tutorial

Thursday, December 20, 2012

DIY: Make Bows into Pom Poms

Here is another fantastic DIY from Martha Stewart's website.  If you still haven't been on her webpage - what are you waiting for??  It is full of wonderful craft ideas for any time of year.  We are so close to the holiday, but there is definitely still time to whip up a few easy DIYs for decorations and gift wrapping!!

la100429_1203_cuttinght.jpg

Wednesday, December 12, 2012

DIY: Ornament Party!

So, now that we have done several DIY Ornament Tutorials, you can have an Ornament Party!  We can't wait to get together with friends and sit at the table and make ornaments!  Ring in the holidays with your own craft party.

Here is a the link to all of these fantastic DIY Ornaments below - and be sure to check out all of our DIY ornaments from earlier this month!  We will definitely be doing more, but this should be more than enough inspiration to get you moving in the holiday direction.

boxwood kissing ball finalwhite glitter starblue peace ornamentblue glass on branchesterrarium

Wednesday, November 21, 2012

DIY: Yarn Balls

Abernathy Crafts made such an easy yarn wrapped ball tutorial, we know this is just perfect for those left over pieces of yarn from crochet projects!  So easy, but soooo pretty.  We LOVE it.  

Check them out for more!
yarn balls 5
I didn’t know what else to call them.  They’re balls, wrapped in yarn.  Yarn balls.  I know, it’s silly.  But if you’d like to know how to make some to add some pretty silliness to your space, I’ve got a tutorial for you.
yarn balls
Materials needed:

  • Styrofoam balls (any size will do)
  • Wooden skewers
  • Craft glue
  • Yarn
Before I started on this project, I read on Pinterest that you can dye your skewers using food coloring.  So I tried it.  I filled a glass baking dish with water and several drops of food coloring.  Then I soaked the skewers overnight.  The next day I discovered that it didn’t work.  So then I added the entire bottle of food coloring.  That did the trick.  So apparently it does work but you just have to use a ridiculous amount of food coloring for the wood to soak up. 

yarn balls 2

So, start by shoving the skewers lovingly into the Styrofoam balls.  Pointed end in works best.
yarn balls 3

Starting at the bottom around the stick, spread some glue and begin wrapping the yarn around in a spiral.
banner 2

Keep gluing and wrapping the yarn around until you get to the top.
yarn balls 6

Sunday, November 18, 2012

DIY: Pencil Holder Using an Upcycled Can

Hello Inspirations by D's blog has a great upcycle DIY for those metal cans you get your veggies or other groceries in.  We love this and think it'd make a great gift for someone that loves crafts (ex. YOU!). 
Hi everyone!  Today I'm sharing a tutorial on how to make your own pencil holder
with a recycled can.  Are you ready?  Here we go...
First you will need these items:


* A recycled soup or bean can (cleaned)

*Scrapbook paper, wall paper
or gift wrap paper
* Scissors or other cutting device
* Spray adhesive or mod podge
*Clear tape
This is what I did...

I purchased scrapbook paper which runs about 50 to 60 cents a sheet.
I grabbed a soup sized can from the recycling bin.
I Removed the wrap from the can.
I Cleaned the can with soap and water and set it to air dry.
I measured the original can wrap against the scrapbook paper with a ruler.
Made marks with a pencil and erased later.
Once I had my measurements, started cutting the paper.
I Wrapped the paper around the can, to keep it sturdy,
I took a small piece of tape and taped down one end of the sheet of a paper on the can,
then wrapped the sheet of paper around the can and sealed it with clear tape, you can use mod podge.
Hello new pencil holder and it holds magnets too!!
Be creative!!  You can add extra decor by using buttons, ribbons and other decorative items.

Saturday, November 17, 2012

DIY: T-shirt Pom Poms

Lebenslus Tiger's blog is a fun DIY site for a litany of crafts!  We love t-shirt crafts and this one is definitely one we'll be doing.  Don't fret if you were hoping for another ornament tutorial today - we'll be doing two blogs today (the next one being an ornament tutorial)!  Check out their blog for more fun DIY if you need even more!


Don't they look like hundreds of little rosebuds bound together?
I did them traditionally with two cut out cardboard discs and gave them a little haircut afterwards...

Friday, October 26, 2012

DIY: Pinhole Cards

The Proper Pinwheel has a great idea for homemade cards.  If you love to add your own personal touch to the cards you give people, this idea is just perfect for you!  You could even jazz up a store card with this method!  

Check out their blog for more paper crafting diy!
When I think back, most of my favorite crafts were learned in grade school. Using crayons over watercolor, making art from paper towels, and nap time. Those are some of my fave elementary memories. One of the best skills I learned (and I still use it to this day!), is pricking paper with a pin and creating stationery. So fun. And so easy!
Pinhole stationary has to be one of the best ways to dress up some regular old paper. The font choices are endless, and you can make it as big or as small as you want! Read below for the refresher!
To make your own you’ll need:
  1. cardstock in assorted colors
  2. scissors
  3. tape
  4. safety pin
  5. mirrored image or text
To mirror your text, copy from Word and paste into Paint. Right-click ”Image” and select “Rotate or Flip” and flip yo’ message horizontally. Easy as pie, I tell you. Tape the words to the inside of your card and start pricking with a pin. Outline the text with the pin. Don’t poke holes all over the place. It’s not as pretty looking. Trust me.
Watch some TV while you poke all of the little holes. I did this while watching The Graduate. I don’t know why I thought I would like that movie. I clearly didn’t remember how strange it was. Finish pricking/poking, remove the tape and paper, and…
Bada-bing.
Play around with a few fonts and see what you like! They look pretty cool when held up to the light.

Friday, October 19, 2012

DIY: Ghost Decoration

Everyday is a Crafting Day's (we couldn't agree more) blog has a wonderful ghost DIY decoration tutorial.  How fun is this thing??

Here's what you need...
1 Liter Pop Bottle,
Starch,
Cheese Cloth,
Old Towel,
Scrap piece of felt,
Styrofoam ball (the white kind works better.)
Scissor,
Hair dyer (optional)
Wire (not pictured)
 First thing you are going to do is cover your working area with your towel. The starch is easily washed out of a towel but it gets messy if you don't cover up your area.
Then make you ghost form. I just shove the styrofoam ball on top of the bottle. (if you are using a green floral ball cover it with plastic wrap or something so you don't get green fuzzies on your cheese cloth.)
I also use some wire to make arms...
Next, lay the cheese cloth over your ghost form. Spray it down with starch. I like to use a spray bottle so I can control how my starch I use. The more starch the stiffer your ghost. 
Next you can use a hair dryer to help make the drying time faster. Since I live in AZ I just use the sun. :)  
Once it is completely dry, pull it off of your form and glue on some felt eyes.  

Monday, October 1, 2012

DIY: Edible Sugar Skulls

Let's kick off the beginning October with a great DIY for Edible Sugar Skulls from Dollar Store Crafts.  We are hoping that we can find this ice cube skull tray at the Dollar Tree or perhaps, Target!  Head to Dollar Store Craft's blog for a video tutorial on this one as well!

 Making edible skulls is cheap, and so easy even a preschooler can do it. I made a batch of them, and after I was done, my 4 year-old used leftover sugar mixture to make a skull all by himself with no help from me. 

This project works with any mold, so think beyond the skulls!
Project Materials:
  • 1 cup granulated white sugar, on hand
  • 2 teaspoons water, on hand
  • Silicone ice cube mold (skull shaped), $1
  • Piece of cardboard or cookie sheet, on hand
Total: $1
Put 1 cup of granulated white sugar in a mixing bowl. Make an indentation in the middle of the sugar and add 2 teaspoons (yes, the itty bitty ones!) of water to it. Squish the mixture with your fingers for about one minute until completely incorporated. Make sure there are no lumps of dry sugar. When it's mixed, it should feel like wet sand.
Fill the molds with sugar and pack tightly. Level top off with a flat spatula or scraper.
Put a cookie sheet or piece of cardboard on top of the mold, then turn over and unmold the skulls immediately.
Let the skulls dry 5 hours or overnight, or put them in a 200° F oven for 5-10 minutes to help them dry more quickly. When they're dry, you can decorate them.