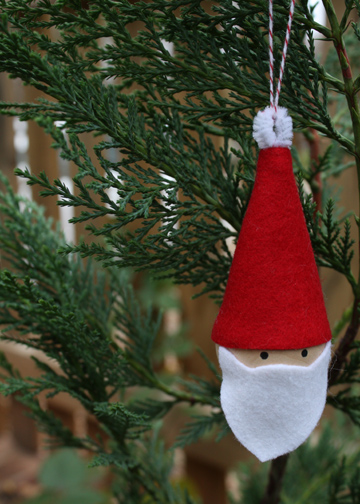
"A Thrifty Mom" has an AMAZING tutorial that we cannot wait to get our own hands crafting on. Fun, easy, good for kids, cheap (if not free)...what is not to love? Go to her site for the full tutorial, but here is a sneak peek of her fantastical craftiness.
A site for all of my own DIY project successes and failures and for posting all of the amazing tutorials and projects I find as I go - while staying on a budget and keeping as much money in my pocket as possible!
Showing posts with label accents. Show all posts
Friday, August 16, 2013
Monday, December 31, 2012
DIY: Three Easy New Year's Eve Party Favors
Free People's Blog has three wonderful last minute party favor ideas for those of you procrastinators out there (like me). These look fun and easy to make and definitely have the ability to be ready to go in a short amount of time.
Confetti Cones
This gold acrylic paint is my jam – it looks like liquid gold! It’s made by Reeves and I can’t get enough of it.
I painted a piece of card stock with the gold paint, and to make the
confetti I did it the old fashioned way – I used a hole punch and a
stack of multicolored post-it notes!
Roll the gold paper into a cone, fill it with confetti, and voila! An
adorable confetti cone. Make a bunch of them and place them on a table
for your guests to pick up and toss at midnight!
Mustache Photo Props
I also love the idea of making little props for photos – especially if you have a photo booth at your party! I used my mustache stamp from a while back and stamped a few on card stock and then just cut them out and glued them to coffee stirrers!
Party Hats
You can also use the gold-painted card stock to make party hats! I
added some gold glitter to the bottom for some extra sparkle. Roll your
hat into a cone shape and attach a string so it can be worn.
Stick a confetti cone and mustache in a diy glitter champagne flute and you’ve got some seriously adorable New Year’s Eve party favors!
Source: 3 Easy New Year’s Eve Party Favors | Free People Blog http://blog.freepeople.com/2012/12/3-easy-years-eve-party-favors/#ixzz2GGPJPhvM
Sunday, December 30, 2012
DIY: Eggnog Cupcakes with Spiced Rum
Baker's Royale has made a picture look so delicious we wish we could eat two dimensional objects!! These look unreal. We know that our frosting will not look this amazing, but if they taste anything remotely like they look we couldn't be happier...
Makes 24 cupcakes | Preparation: Heat oven to 350 degrees F. Line 2 muffins tins with cupcake liners.
Ingredients:
Cupcakes:
- 1 1/2 cups self-rising flour
- 1 1/4 cups all-purpose flour
- 1 cup (2 sticks) unsalted butter, softened
- 2 cups sugar
- 4 large eggs, at room temperature
- ¾ cup eggnog
- ¼ cup milk
- 1 teaspoon vanilla extract
Spice Rum Buttercream:
- 5 large egg whites
- 11/2 cup sugar
- 4 sticks unsalted butter, diced and softened
- 1/4 teaspoon salt
- ½ cup spiced rum
Instructions:
To make cupcake:
- Measure out flour and set aside.
- Add sugar and butter in a bowl and cream on medium speed until fluffy, about 3 minutes. Add eggs in 1 at a time, beating well after each addition. Add the dry ingredients in 3 parts, alternating with the eggnog and vanilla to start. Mix after addition until incorporated-do not overbeat.
- Fill cupcake liners about 3/4 full and bake for 20 to 25 minutes. Transfer cupcakes from tins to cooling rack. Allow cupcakes to cool completely before frosting.
To make Spice Rum Buttercream:
- Combine egg whites and sugar in a bowl placed over simmering water. Bring mixture to 160 degrees F while whisking constantly.
- Transfer mixture to stand mixer bowl, fitted with a whisk attachment and beat on medium high speed (speed 8 on a KitchenAid stand mixer) until mixture cools and doubles in volume and forms stiff peaks; about 10-12 minutes).
- Add butter in one piece at a time, mixing to incorporate after each addition. The mixture may appear clumpy and almost curdled looking at first-this is normal. Keep mixing and it will become even and smooth again.
- Add salt and spiced rum and mix to combine.
Saturday, December 29, 2012
DIY: Balloon False Ceiling
Wants and Wishes blog has a fantastic last minute idea for that New Year's Eve party! If you've been debating how to jazz up the home for the festivities - here you go!! Visit them for more ideas.
1. Blow up all of the balloons you would like to use. I wanted a
variety of colors of balloons so I used 2 different colors of purple, 3
different blues and silver. I think it turned out really well to have
the mix of colors.
2. Roughly arrange the colors the way you would like them, this will
help when your tying them together that you don't have all the same
blues together, but a even mix of colors. (Note I used almost double the
amount of silver balloons since I have different shades of blues &
purple balloons).
3. Tie them together with string or curly ribbon. Don't tie them too
close as they need a lithe room in between. I tie them together so you
have 2 rows of balloons- one hanging on the right then one on the left.
Here is a picture with one strand hung up so you can see how full one
strand can be. You can add as many strands of balloons you need to
create the depth of your area.
Labels:
accents,
accessories,
adult,
anthropologie,
apartment,
balloon,
balloons,
beginner,
DIY,
do it yourself,
easy,
handmade,
homemade,
new year,
new years,
party,
party ideas,
tutorial,
upcycle
Saturday, December 22, 2012
DIY: Anthropologie Inspired Snow Globes
Zomoc.com has a wonderfully easy DIY - there aren't really any instructions, but these look pretty self explanatory! We could see us whipping up a few of these wonderful gifts for far less than what Anthropologie is charging for them....

Labels:
accents,
accessories,
adult,
anthropologie,
beauty,
beginner,
budget,
craft,
DIY,
do it yourself,
easy,
globe,
handmade,
homemade,
snow,
snow globe,
snowmen,
table,
table decor,
tutorial
Thursday, December 20, 2012
DIY: Make Bows into Pom Poms
Here is another fantastic DIY from Martha Stewart's website. If you still haven't been on her webpage - what are you waiting for?? It is full of wonderful craft ideas for any time of year. We are so close to the holiday, but there is definitely still time to whip up a few easy DIYs for decorations and gift wrapping!!
Tuesday, December 18, 2012
DIY: Santa Belt Napkin Rings
What you'll need:
- Cardboard tube
- 1 sheet each of red, white, and black felt
- Gold chenille stem
- Scissors
- White craft glue
How to make it:
- Cut cardboard tube into 1-1/2-inch segments.
- Place one piece of the tube onto the red felt and cut the felt just slightly wider than the tube. Wrap the felt around the tube and trim off the excess, leaving enough for a small overlap. Glue the red felt around the cardboard tube. (See photo.)
- Cut a strip of black felt, about 1/2-inch wide, and glue it around the red tube, lining up the seams. (See photo.)
- Cut two strips of white felt, about 1/4-inch wide and glue them around the outside of the red felt, overlapping the edge a little.
- Cut a 3-inch piece of gold chenille and bend it into a square for the buckle. Glue the buckle to the black felt, be sure that the seam is on the opposite side. Let everything dry completely. (See photo.)
Tips:
- These can also be made with construction paper or craft foam.
- Instead of gold chenille, you can use gold glitter glue, but you will need to take into account the drying time needed.
- These will look just as good on fancy napkins as they will on rolled up paper towels!
Labels:
accents,
accessories,
decor,
decoration,
handmade,
holiday,
holidays,
home,
home decor,
homemade,
napkin,
rings,
santa,
santa belt,
season,
snowmen,
table,
table decor,
tutorial,
upcycle
Sunday, December 16, 2012
DIY: Ribbon Christmas Trees
Whipper Berry has kept it simple, but stunning! We love her tutorial on making these great ribbon trees! We can totally see these being a year round home decor project.
Instead of folding the ribbon in half (picture on left), I looped it around (picture on right).
First
I spray painted my Paper Mache cones black. Then I cut black and white
stitched grosgrain ribbon into pieces ranging from 2.5 –4 inches. I
started with the longer pieces at the bottom. After looping the ribbon, I
secured each piece with hot glue, and finished row by row, shortening
the ribbon lengths as I got higher.
On one tree I alternated colors every row, and on the other I alternated each piece.
I finished the top with a bit more ribbon wrapped around the tip.
Now I have two beautiful trees that go perfectly with my new décor!
Labels:
accents,
accessories,
autumn,
christmas,
christmas tree,
craft,
decor,
decoration,
DIY,
do it yourself,
environment friendly,
home decor,
homemade,
howto,
ornament,
ribbon,
thanksgiving,
tree,
tutorial
Saturday, December 15, 2012
DIY: Cone Santa Hats
Thrifty Decor Chick took her Stein Mart inspiration to a whole new level! These wonderful Santa hats look just like the ones from the store and we think they'd look awesome in our foyer...hmmm!
I saw some cute Santa hat/suit decor things in Stein Mart a couple months ago and Tweeted about them, saying I could totally make them for cheaper. Well, I decided to go for it, yes. I. did. I started with three foam cones, in different sizes:
I got them all for about $10. I think I used a coupon on the largest. If you can catch them on sale, you could spend even less!
I
found red velvet at Hob Lob for less than $5 – I only got 22 inches
(the width is 54”) and didn’t even use all of that. I figured out the
size by rolling the cones and then cutting the fabric:
I hot glued the fabric down the back and then on the bottom and top to secure the ends:
I
almost used sparkly red felt, but went with the velvet to the get look I
really wanted. Either would be adorable and the felt would be even
cheaper!
Then, I got four inches of vinyl (that looks like
leather) to make the “belt.” This was less than $2 and I didn’t even
need four inches…I only ended up making it 2.5 inches wide:
Again,
just with some hot glue, I wrapped it around and secured it. Then, the
fun part – the fur. I got some fluffy stuff in the ribbon section at
Joann’s to use for this:
Isn’t it adorable? It looks like Santa’s beard! I’m dying.
For
the buckle, I found a package of little square crystals. This package
had 52 and I used most of them. I figured out the size and shape I
wanted before I hot glued them on:
A fluffy puff ball on top, and it was done. And I squealed! I did!:
I
wasn’t happy with the old Christmas candles I had in this tray (which
was a $1.99 tray I got at Goodwill and spray painted white) and I hadn’t
even spray painted the bottom of it well enough yet, so I just filled
it in with some Dollar Store ornaments: 
My favorite part is the blingy buckle!:
What do you think? The Stein Mart version is on the left, mine on the right:
(Mine are looking a little pink in this pic, but they are a deep red.)
Stein Mart had three sizes – I think about $9, $15 and $20 each. My three cost about $25 total. (And I had fun making them!)
Labels:
accents,
accessories,
center piece,
craft,
custom,
decor,
decoration,
DIY,
do it yourself,
dollar store,
family time,
hats,
holiday,
homemade,
office,
party,
santa,
santa hats,
tutorial,
upcycle
Friday, December 14, 2012
DIY: Christmas Present Topiary
That Village House has a wonderful idea for decorating either the inside of your house or outside of your house with a large topiary! We could totally see this being made in a mini version using dowels and smaller boxes as a great center piece for a table!
I started with 3 different sized boxes...9, 12 & 14 inch cubes.
I
used an ice pick to punch holes in each of them so that I could run a
rebar through them. (It's easier to do the holes first, before getting
them all wrapped & pretty.) For the smaller boxes, I slightly
off-centered my holes, so that the boxes would tilt on each other.
Then I wrapped them and made bows for each.
Tip: Keep your wrapping paper pattern running the same direction.
Tip #2: Before you poke holes through the paper, put a little tape on it. It will help the paper from ripping.
I
also made sure my seams were right down the middle of the boxes so that
the ribbon would cover them up. And I used double-sided tape to hold
the ribbon and bows in place. I'd love to take credit for these tidbits,
but again, I straight up copied this idea!!
Thursday, November 29, 2012
DIY: 10 Minute Santa Ornament
The Long Thread's blog is helping us keep to our overall theme of simple projects that are quick and wonderful! Be sure to check out their blog.
Ten minutes. Really. This is sort of a variation on the elf skittles
that I posted about last week. But even easier. I think these would
make cute additions to gifts for family, friends or teachers. The kids
can help make these if you skip the glue gun and use regular school
glue. You could sign them on the back and add the year. You could use
even smaller wooden balls to make teeny tiny Santas. Or you can take it a
step further and make a little body with chenille stems, a larger ball
for the belly and beads for the arms and legs.
Supplies:
- wooden ball (1 1/2″ diameter)
- red and white felt scraps
- black acrylic paint
- white chenille stem (cut to 2″)
- twine
- glue gun
- Cut out the hat and beard from felt according to this template.
- Bend the end of your chenille stem and cut to 2″.
- Insert the chenille stem in the top of the hat felt and sew, right sides together, using a scant 1/4″ seam allowance. Turn right sides out and poke out the tip with a blunt tool.
- Place a couple of drops of glue on the inside rim of the hat and fit onto the wooden ball. Glue the beard on as well, just meeting the hat at the corners.
- Draw eyes with a pencil and then paint them on with black acrylic paint.
- Loop twine through the chenille stem and tie in a knot. Trim off the ends and put a tiny drop of glue to hold the knot in place just at the chenille stem. All done!
Labels:
accents,
christmas,
christmas tree,
craft,
custom,
december,
decor,
decoration,
DIY,
do it yourself,
dollar store,
felt,
handmade,
holiday,
howto,
ornament,
ornaments,
tutorial,
winter,
wreath
Subscribe to:
Posts (Atom)