Showing posts with label lesson. Show all posts

Saturday, February 2, 2013

DIY: "Spring" Letters

So spring is just around the corner and we cannot wait.  Hoosier Homemade's blog has just the DIY project to get us going on spring related projects so we can be ready to roll!

This one is a "Spring" decor idea that brings color and happiness to any room!  Be sure to check out their blog for more DIY.
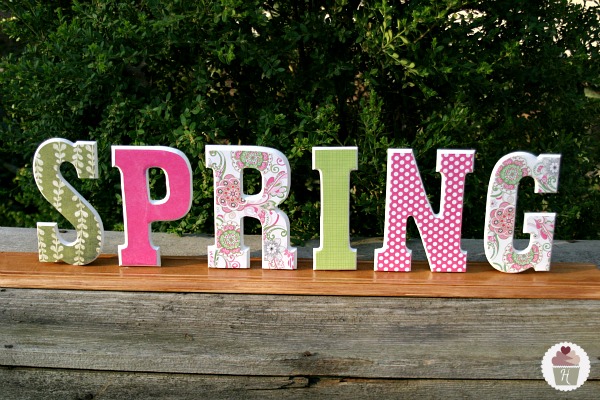
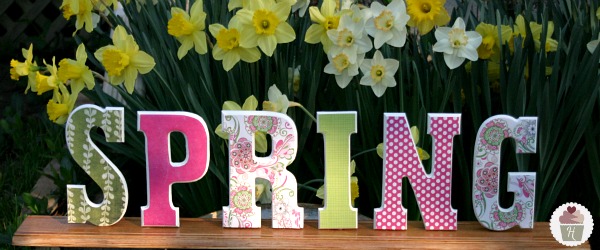
I just love how it turned out! Doug did an AMAZING job on it…don’t you think?
The concept for the scrapbook paper being applied to the wood is similar to the St. Patrick’s Day Door Hanging we made, but the letters were a little curved on the edge, so Doug had to cut out the paper before applying it to the wood. It was a little more time consuming, but well worth it.
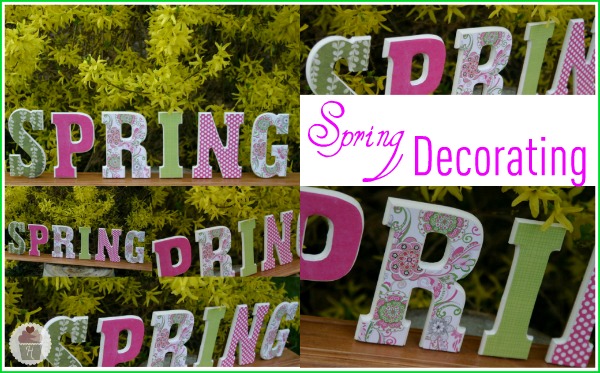
And we couldn’t help but take pictures outside in the beautiful Spring weather we have!
Let’s gather our supplies…
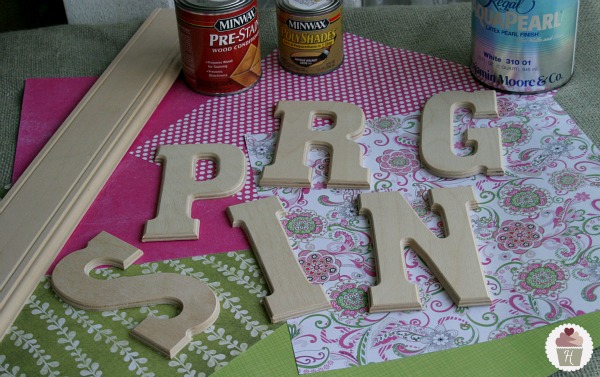
Spring Craft Supplies:
  • Wood – We used a piece of baseboard from our local molding outlet (length will depend on how many letters)
  • Letters
  • Scrapbook paper
  • White paint for the edges of the letters
  • Pre-stain and stain for the wood
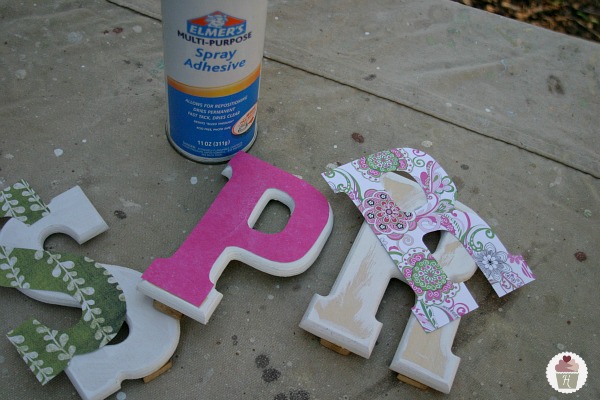
  • Spray adhesive to apply paper {not pictured}
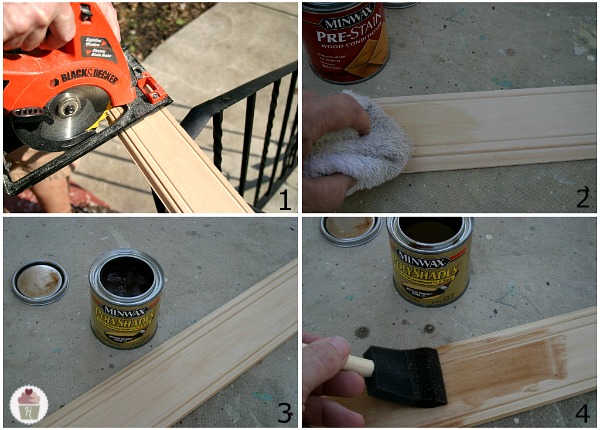
Wood Preparation:
  1. Cut your wood to length. Doug cut this piece, 5 inches longer than what we needed, leaving 2 1/2 inches on each end.
  2. Using a rag, apply the pre-stain. Pre-stain is needed when staining soft or porous types of wood to prevent the finish from being blotchy.
  3. Let sit 15-20 minutes to allow to soak in, wipe off any excess.
  4. Apply stain evenly with a foam brush and allow to sit for 5-10 minutes depending how dark you want the final product to be, carefully wipe and excess stain off. {We used a combination stain/polyurethane product to speed up the process}
Letter Preparation:
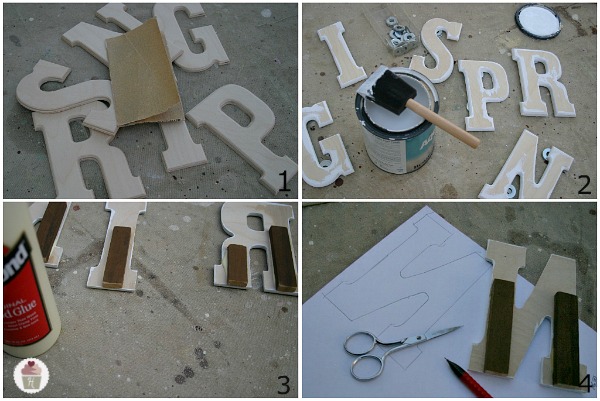
  1. Slightly sand the edges of the letters with 180 grit or finer sand paper. {the higher the number the finer the grit}
  2. Paint the edges (2 coats) we used a satin latex that we had on our shelf {the washers are just to keep the letters up off the drop cloth}
  3. Glue a small block of wood to the back side of the letters to give more area to glue to base.
  4. Trace the letter onto the back of the scrapbook paper and cut out
Decorating the Letters:
  • Spray the back side of the paper with adhesive and carefully adhere to the wood letters
  • To attach the letters to the wood, use a hot glue gun {note: Doug tried wood glue and even super glue, but the glue gun worked the best}
Monday, July 23, 2012

DIY: Shabby Fabric Flower Tutorial

Thanks to Ali Foster Patterns, this tutorial for how to add some jazziness to anything is just a little fabric away!

Fabric Flower Tutorial
Step 1: Cut out circles of fabric.  The number of circles you cut and the size just depends on the size of the flower you are making.  My circles are about 2.5″ in diameter.  You can use something circular for a template (like a cup) or you can just cut them without a template at all.  They don’t have to be exact.
Fabric Flower Petals

Step 2:   Take one circle of fabric and fold it from the center as shown in the picture. There is no exact way to fold it.
Fabric Flower Tutorial
Fabric Flower

Step 3: Using you needle and thread, stitch the center of the “petal” to your  fabric. Make sure you go through all the folds so you keep the shape. 
Stitch Through Petal
flower5

Step 4: Continue stitching your petals around until you get your desired look.
Shabby Fabric Flower Tutorial
flower10
 How to Make a Fabric Flower
Pretty easy, right?  For  a different look, try cutting squares of fabric instead of circles.

Monday, July 9, 2012

T-Shirt “Yarn” Tutorial

Thanks to Gracious Rain's blog we now know how to make T-Shirt Yarn!  Go forth and make beautiful things with it and who us what ya got! 

Oh, yeah…it’s cotton “yarn” made from a spiral cut T-shirt.
does everyone on earth have a huge pile of orphan T-shirts that nobody wears, but they can’t seem to part with…
or is it just me?
So let’s get real green and do something useful with some of them…shall we?
Start with a regular t-shirt that has lived a good life…no guilt now. It’s going on to a better place…really.
Cut off the bottom hem.
Now cut the top off just under the sleeves…
so you have a tube of fabric.
Fold it nearly in half, leaving the under side sticking out about an inch.
Now cut from right to left all the way up to and just past the top fabric, but leave the one inch margin of the lower fabric uncut. Repeat about 1 inch apart. Now unfold the fabric…
it should look like this.
The easiest way for you to hold the fabric and cut it into one continuous strip is to slide your arm through the two layers of fabric 1 inch uncut margin running along the top of your arm. I drew dotted lines  showing where you’ll cut your fabric–but you don’t need to draw the lines. You’ll be amazed at how fast you can figure this out and it’s really fun too, and for some reason deeply satisfying.
If you need more instructions click HERE for a sweet little diagram and bag pattern.
When you’re finished cutting, you’ll have one long, long, strip of fabric. Are you ready to make it more “yarn” like? Here goes!
Going down the entire length of your fabric, take a hold of it by one end and gently stretch it. It will magically curl up and behave it’s self just like it should. Very obedient stuff, I tell you.
Next, roll it into a ball and think of the stuff you can knit or crochet or weave with it. I’ve seen trivets, handbags and rugs…

Thursday, July 5, 2012

DIY $220 Bracelet for $5

For this cheap, fun and easy bracelet / necklace from Henry Happened's Blog you’ll need:
  • 3 yards of silk ribbon cord. I got mine (purple, of course) at JoAnn’s in the trim section.
  • 2 dozen 8mm gold beads.
Cut the ribbon into 3 equal lengths. Standard bracelet size is 7 inches so you’ll want it about 29 inches long in order to wrap 4 times.
Start by braiding about 6 inches of ribbon and then secure the end with a rubber band. Anchor the end with something heavy to hold in it place.
Start braiding in the beads by feeding the ball onto the middle strand and then tightly braiding the other two strands around it. Don’t pull too hard though or the beads will have a tendency to pop out as you go.
Continue feeding beads onto the middle strand until you run out (I had about 25) or until there’s about 6 inches of ribbon left.
Finish with another 6 inches or so of braiding. Then clamp the ends with ribbon fasteners or just tie it in a knot.
It looks great as a bracelet or a necklace!

Sunday, June 24, 2012

DIY: Glass Bottle Makeover

We LOVE this remodeled bottle from Turnstyle Vogue's blog.  Head their way to check out all their tips and tricks to creating this masterpiece yourself!!IMG_5525 IMG_5525
IMG_5522


Although I removed the label from the top, the wording on this bottle is actually raised lettering that could not be removed.  However, sanding the bottle worked perfectly.


After I cleaned it up, I sprayed it with a metallic bronze spray paint.


IMG_5523
I then started to work away with ASCP in Provence. This shows the first coat but I ended up doing two coats.


IMG_5524


I then got my 80 sanding block and started distressing the raised areas, sanding down to only the metallic paint in some areas and all the way down to the glass in others.


IMG_5527

IMG_5530

IMG_5532


I used dark wax to create a light patina.


I chose to leave the lid metallic, but with the same distressing.


IMG_5526

IMG_5536
I can see a really cool monogram or stencil right in the middle, can’t you?  My daughter really likes this color so she will be taking this home with her.  I’ll let the new owner decide about a stenciled embellishment.