Showing posts with label school projects. Show all posts

Tuesday, January 15, 2013

DIY: Felt Bird Sachets

These are ridiculously cute!  We can see these being a year round craft - but why not bust them out for Valentine's Day since they are adorned with heart wings??  Check out Positively Splendid's blog for more DIY fun!


Supplies:
Bird Sachet Template {{click here to download}}
Felt in assorted colors (the brighter the better!)
Coordinating embroidery thread
Embroidery needle
Buttons
Cotton batting
Dryer sheets
To begin, print and cut out your templates and use them to cut out your felt pieces: 2 bird bodies and 1 heart wing for each sachet you are making.

Sunday, November 11, 2012

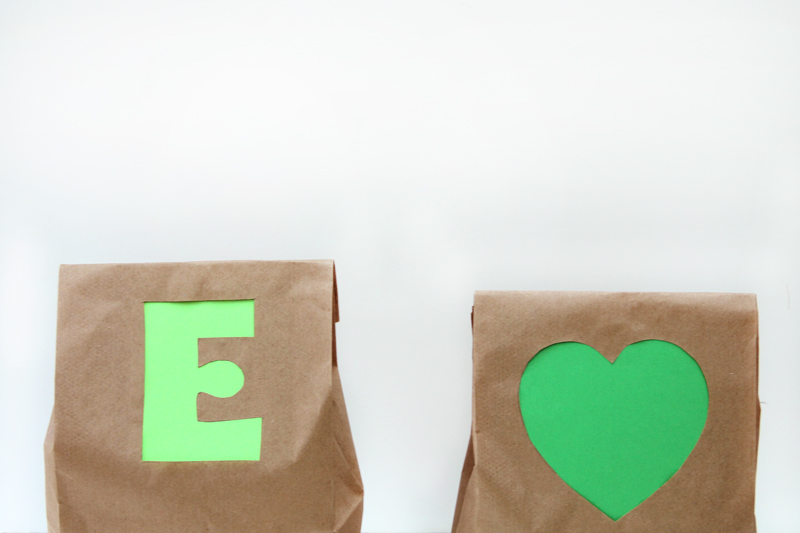
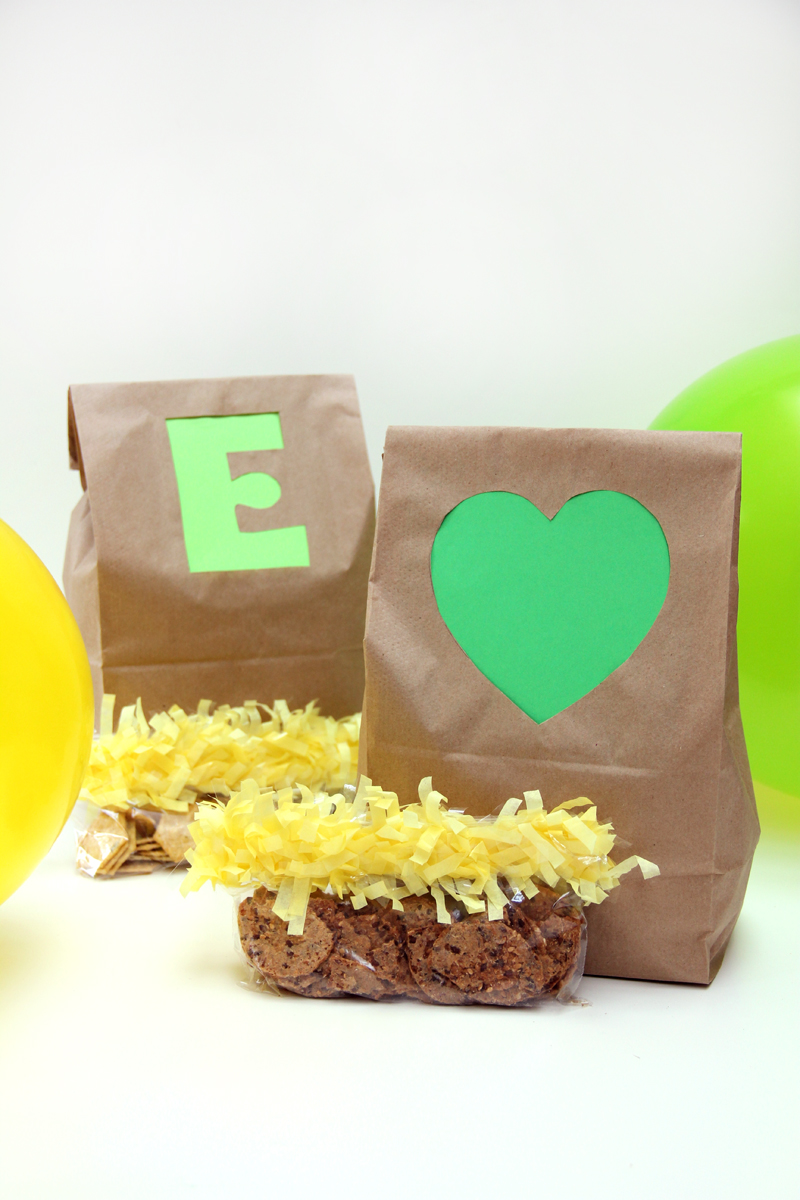
DIY: Colorful Lunch Bag Cutouts

We are taking a brief hiatus from ornament DIYs today to show you a great project from Studio DIY's blog!  Be sure to check them out.  These lunch bags would be great for a pick me up during a long school day!
DIY Back to School Lunch Bags
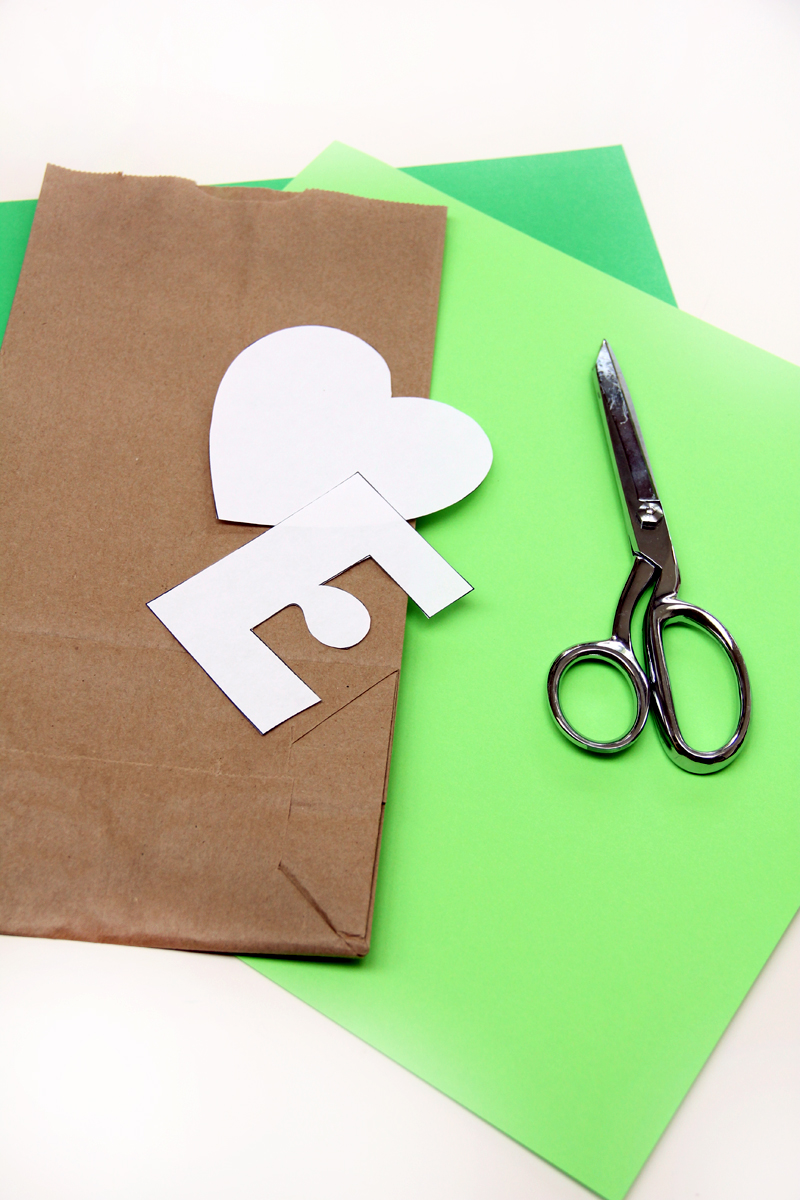
Supply List:
Brown Paper Lunch Bags
Letter or Shape Templates (Print out large letters from your computer, or free hand it!)
Pencil
Scissors (x-acto knife helps too!)
Colored Card stock
Tape and/or Glue
To Make:
Trace your shape onto your lunch bag. Make sure to leave enough room at the top so you can fold the bag over (I’d do mine even lower next time).
Back to School Lunch Bag DIY DIY Back to School Lunch Ideas
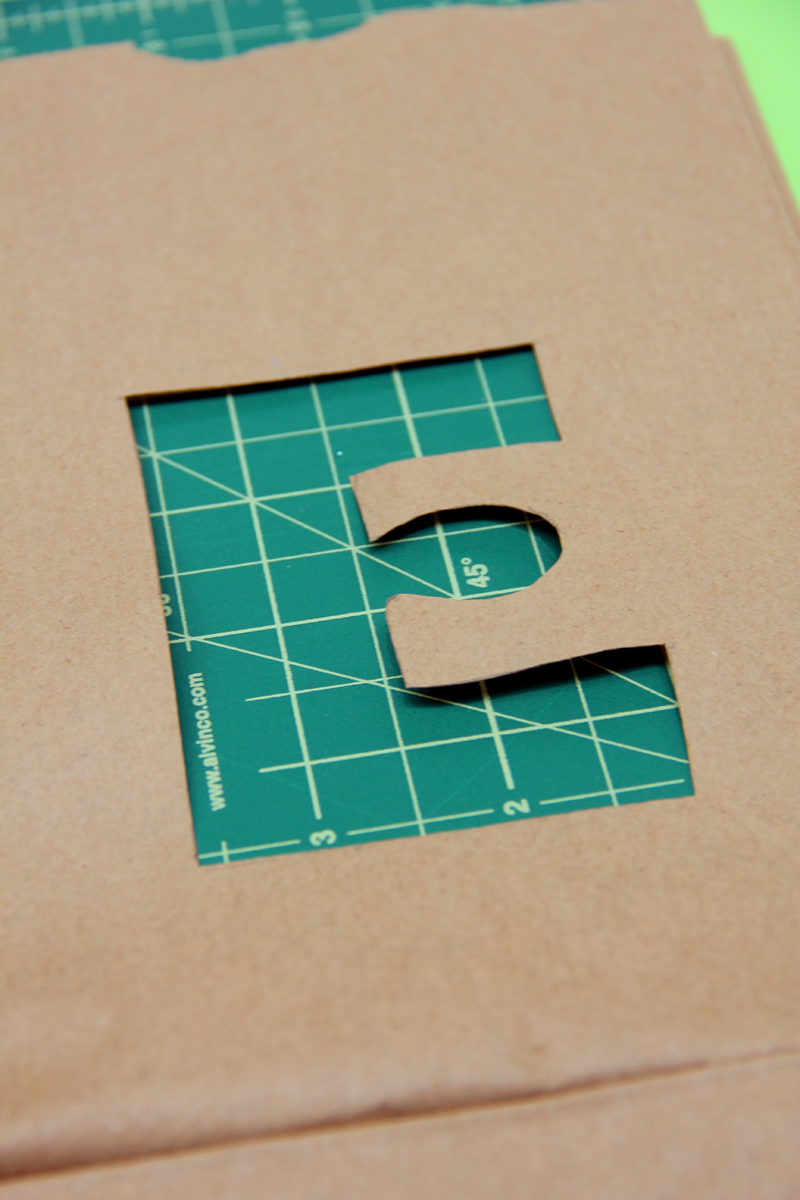
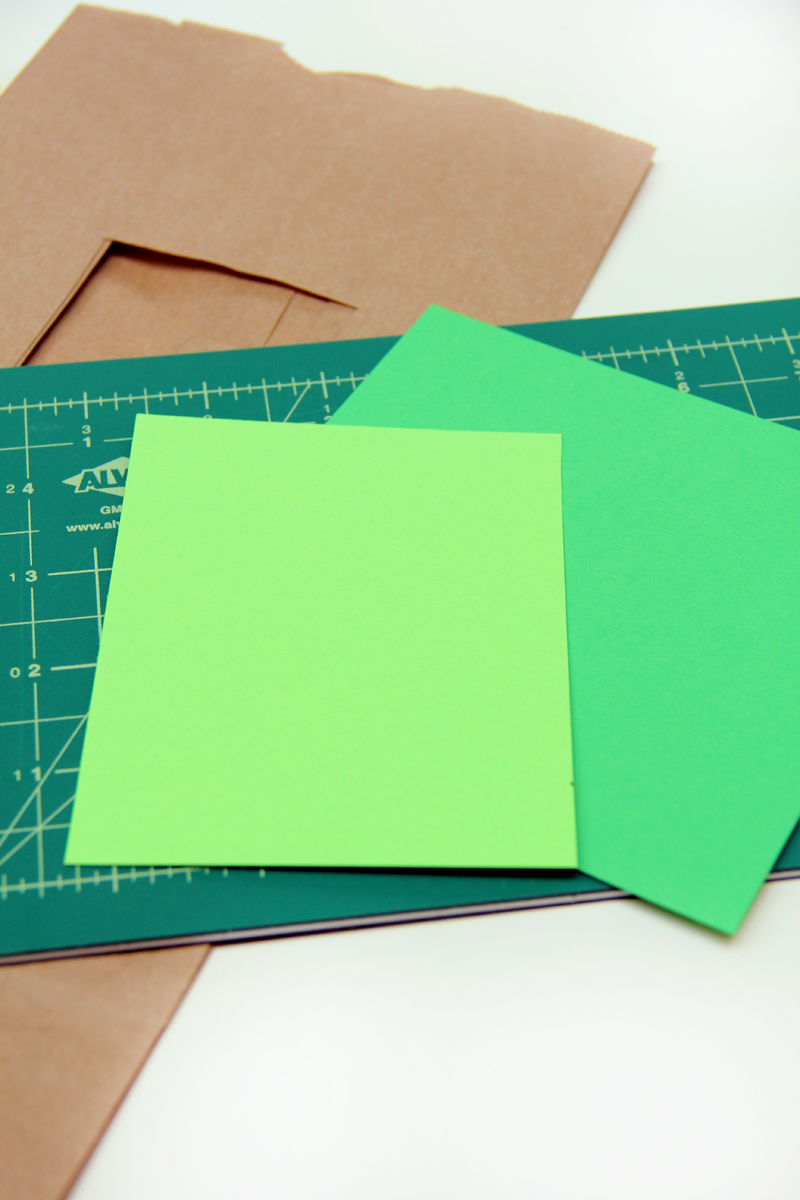
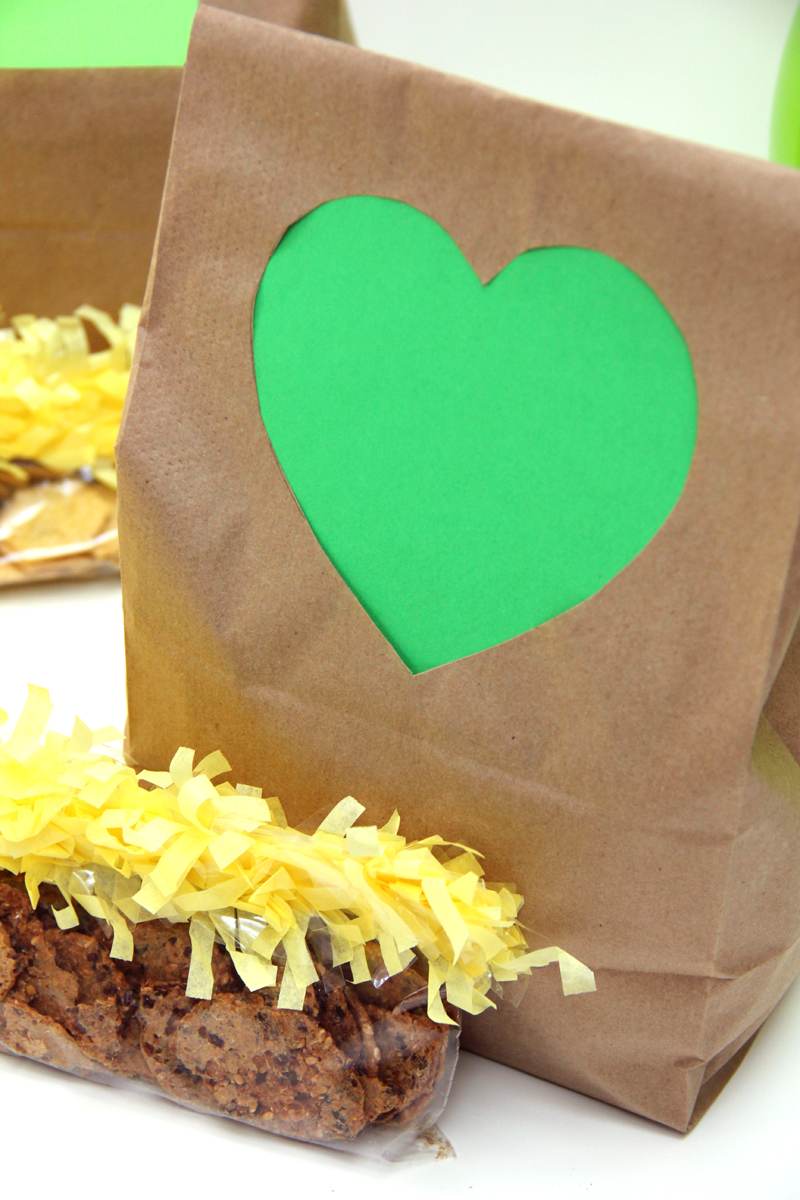
Cut out your shape, I did this with an x-acto and put a small cutting board inside the bag to prevent cutting through both sides. You could easily do this with scissors too. Then cut a rectangle of colored paper, just big enough to cover your entire cut out.
DIY Colorful School Lunch Bags DIY Graphic School Lunch Bags
Tape and/or glue your paper inside the bag behind your cut out. I taped mine first, then added glue (you can do this with a tooth pick or small glue stick) to seal down the loose edges.
DIY Graphic Lunch Bags DIY Colorful Lunch Bags


Wednesday, October 24, 2012

DIY: School Supply Bouquets

Oleander and Palm's blog has a great "back to school" tutorial, that we think would be great anytime for teacher or for your own home!  You could easily whip this up for a teacher on their birthday, or use it as a decoration on your own craft table.  So many things you can do with these, so much fun to be had!

Well, the kids are definitely back in school.  We are starting to get into a bit of a routine.  I like to start the year off with a gift for my kid's teachers.  It's simple Math - Happy Teacher = Happy Students!  Last year I made fresh Apple Scones for the teachers and the year before, I made reuseable coffee cup sleeves.  


This year I thought a flower bouquet would brighten their day.  These we easy to make and really didn't cost too much.  

Supplies:
Pencils (about 32)
Crayons (about 25)
An empty baby food jar
An empty Starbucks Frappacino Bottle
2 rubber bands
Ribbon
Flowers


For the pencil vase, I wrapped an empty frappacino bottle with an elastic band and the inserted the pencils all the same direction.  And for the crayon vase I just used an empty baby food jar.  Then I simply tied a cute ribbon around the rubber band to hide it and then filled them with flowers.

Are your back into a routine with the start of school?  Is that routine welcomed or are you longing for more summer?

Friday, September 14, 2012

DIY: Crayon Wreath

A Bushel and a Peck has given us the perfect idea of what we are going to make for my sister this year for her classroom!  We love this crayon wreath idea, and the instructions spell it all out despite the lack of pictures.

I love wreaths and love all the creative ways to create wreaths for any occasion. I saw this idea out there in blog world and thought what a great Christmas gift for preschool and kindergarten teachers. So, this year Ella's teachers will be getting this cute crayon wreaths for Christmas.

They are super easy to make. All you need is embroidery hoops (one size 12 inches and one 8 or 9 inches). Put the smaller one inside the larger hoop and start places crayons around the hoops to form a circle. I used a few more crayons than the 64 count box. Then I hot glue gunned the crayons to the hoops and tied a ribbon on top to hang the wreath.

I love how they turned out. To present them to the teachers, I bought some large Christmas circle platters and will use those as part of the gift and a way to transport the wreaths carefully.

Wednesday, August 29, 2012

DIY: Pencil Starburst Mirror - Dollar Store Crafts

We love both color variations of this wonderful dollar store craft - we would be hard pressed to pick just one to make...so maybe we'll make both??  This would be a great Christmas / holiday gift for a teacher!

Check out Tatertots and Jello's blog for more cheap and easy DIY!


Tutorial: Penciled Starburst Mirror


You’ll use about 54 pencils, depending on your spacing


Hot glue, stick ‘em on, repeat:)


(The ribbon part is optional)


If your silhouette is behaving, (mine wasn’t), you can use transfer paper to make the placement of the vinyl much easier


Personalize your gift with a cute lil tag…


Tuesday, August 21, 2012

DIY: Muffin Tin Crayons

This tutorial from Kaboose's blog couldn't be easier, more fun, or cheaper!  Three things that we just love in any craft.  

What you'll need:

  • Cupcake/muffin tin
  • Non-toxic broken crayons
  • Vegetable oil
  • toothpick

How to make it:

  1. Preheat the oven to 275 degrees F.
  2. Remove all the paper labels from crayon pieces. (Please check to make sure they are non-toxic crayons.)
  3. Put ¼ teaspoon of vegetable oil into each muffin pan cup, no cup liners needed.
  4. You will use the equivalent of 4 new crayons for each cup. Place broken crayons (no longer than an inch each) into the muffin pan. This will fill the cup about 1/3 full.
  5. Place into the preheated oven and watch carefully, they melt quickly!
  6. Bake crayons for 8 minutes or so.
  7. When the crayons begin to melt, remove them from the oven and stir gently with a toothpick.
  8. Crayon will look “ugly” and the colors may appear blended too much. Don’t worry! They look much better on the other side.
  9. Let the crayons cool completely.
  10. Once cooled, pop the crayons out of the muffin pan by tapping on the backside of the pan. Crayons should fall right out.
 

Tips:

  • If you have any new crayons available, use one as a measuring stick. Lay broken crayon pieces along side of the new crayon to measure out 4 full sized crayons. This is how many you will need for each completed chunky crayon.
  • Be sure to use extreme caution around kitchen utensils and the oven. Always use oven mitts and do not stick you fingers into the melted crayons.
  • If you don’t have any broken crayon pieces, you can buy a large box of cheap crayons at the Dollar Store.

Wednesday, August 8, 2012

DIY: Bubble Blowing Wall Art Project

52 Weeks Project has an unbelievable blog filled with fun!  We just adore this bubble blowing art project they've come up with...and how amazing would this look in your own home?  We have seen bubbles at the dollar store and same goes for the jar.  Watercolors are pretty inexpensive at Michael's or Joann's if you use a coupon!

Get a watercolor pad here!

Time: 1 hour
Materials:  watercolors, watercolor paper, bubbles, jars
 

Tuesday, June 19, 2012

Making Fabric Covered Binders

The Uncluttered Lifestyle has a gorgeous tutorial on how to cover those institutional looking plastic binders with fun and elegant fabric!  Do your own take and shoot us pictures!
Supplies: 
- Fabric (For 4 binders use approx 2 yards)
- Binder
- Spray Adhesive
- Book plates 
 
Cut the fabric to size, leaving a 1/2" to 1" to fold over all the way around.
Cut each corner so there is not a bulge when you fold over on the top and bottom of the binder.
Adhere the fabric to the front first flap. Then close the binder and adhere fabric to the spine, following with the back flap. If you adhere the fabric while the binder is open, the fabric will be too snug when you do try to close it.

It should look something like this. Yes I know my "hem" is uneven but it doesn't matter because...
The next step is to cut a piece of fabric to cover the inside and adhere it. Now it has a finished look when it opened.
Lastly, I applied the book plate.  I think the silver looks gorgeous with the ticking.


Pretty simple, right. Each binder costs a total of $6.50 to make. The most expensive part was the ticking fabric at $6.97/yard. So really, this project could be accomplished for less. But I think the end result is just darling!