Showing posts with label adult. Show all posts

Thursday, January 31, 2013

DIY: You've Been Bugged!

LOVE LOVE LOVE this idea from Jen's Happy Place.  I'm doing this around my office place starting Friday.  What do you guys think??  Head to her blog for more!!


I think everyone will get a kick out of putting the
sign up by their desks that says "Don't BUG me!"
That will really show off our customer service- LOL!

One of the complaints from the boo'ed game in October was that people had to do two treats (and some people went overboard with what they gave), and also we started running out of co-workers to boo. So, I thought I would get it going by bugging two people, but then after that, each person would only have to assemble one treat. Hopefully this will work out better.
Here are my treats that I will secretly place on two of my co-workers' desks today:

This is how they will look when first given . . .


The pink mailbox!

Yep, still obsessed with vinyl! I had so much fun
with the mailboxes I decorated for Christmas gifts (HERE)
that I just couldn't pass up these Target dollar section cuties!

And the classic valentine red mailbox!

I will flip if my recipients win the $1000 a week for life!

This Target sticky note pad is so cheery-
much needed in our boring office! 

And could one ever go wrong with chocolate????

Here are the mailboxes dumped out . . .

Another fun sticky notepad from Target!

Supplies:
  • Cricut Quarter Note cartridge for name lettering (welded on my Gypsy)
  • Cricut Designer's Calendar cartridge for heart
  • Cricut white indoor vinyl
  • Metal mailboxes from the dollar section of Target
  • A rolled up copy of the sheet shown above rubber-banded to mailbox flag (I forgot to add it before I took pics, but I did add valentine ribbon from Michael's and tied it in a pretty bow which covered up the rubber band-Oops!)
  • Love Bug graphic found on the internet HERE
  • GeoSlab703 XBd BT font for headings
  • Kabel Bt BT font for body text
  • DelRay font for "Happy Valentine's Day"
  • Instant lottery tickets
  • Ande's Valentine mint chocolates with sweet thoughts/messages on them
  • Lindt Lindor chocolate truffles
  • Reese's peanut butter chocolate hearts
  • Sticky note pads from Target's dollar section
Hope you enjoyed and are inspired to start something fun like this in your own workplace! Help yourself to the sheet I created. All I ask is that you credit me and leave me a comment that you used it! I would love to see your take on it! :)

I am entering this fun "party-starter" in Decorate to Celebrate's Valentine Party challenge!

Monday, December 31, 2012

DIY: Three Easy New Year's Eve Party Favors

Free People's Blog has three wonderful last minute party favor ideas for those of you procrastinators out there (like me).  These look fun and easy to make and definitely have the ability to be ready to go in a short amount of time.  
Post image for 3 Easy New Year’s Eve Party Favors 
 Confetti Cones
diy new year's eve party favors
This gold acrylic paint is my jam – it looks like liquid gold! It’s made by Reeves and I can’t get enough of it.
diy new year's eve party favors
I painted a piece of card stock with the gold paint, and to make the confetti I did it the old fashioned way – I used a hole punch and a stack of multicolored post-it notes!
diy new year's eve party favors
Roll the gold paper into a cone, fill it with confetti, and voila! An adorable confetti cone. Make a bunch of them and place them on a table for your guests to pick up and toss at midnight!
Mustache Photo Props
diy new year's eve party favors
I also love the idea of making little props for photos – especially if you have a photo booth at your party! I used my mustache stamp from a while back and stamped a few on card stock and then just cut them out and glued them to coffee stirrers!
diy new year's eve party favors
Party Hats
diy new year's eve party favors
You can also use the gold-painted card stock to make party hats! I added some gold glitter to the bottom for some extra sparkle. Roll your hat into a cone shape and attach a string so it can be worn.
diy new year's eve party favors
Stick a confetti cone and mustache in a diy glitter champagne flute and you’ve got some seriously adorable New Year’s Eve party favors!

Saturday, December 29, 2012

DIY: Balloon False Ceiling

Wants and Wishes blog has a fantastic last minute idea for that New Year's Eve party!  If you've been debating how to jazz up the home for the festivities - here you go!!  Visit them for more ideas.
 

 1. Blow up all of the balloons you would like to use. I wanted a variety of colors of balloons so I used 2 different colors of purple, 3 different blues and silver. I think it turned out really well to have the mix of colors.
2. Roughly arrange the colors the way you would like them, this will help when your tying them together that you don't have all the same blues together, but a even mix of colors. (Note I used almost double the amount of silver balloons since I have different shades of blues & purple balloons).
3. Tie them together with string or curly ribbon. Don't tie them too close as they need a lithe room in between. I tie them together so you have 2 rows of balloons- one hanging on the right then one on the left.
Here is a picture with one strand hung up so you can see how full one strand can be. You can add as many strands of balloons you need to create the depth of your area.

Saturday, December 22, 2012

DIY: Anthropologie Inspired Snow Globes

Zomoc.com has a wonderfully easy DIY - there aren't really any instructions, but these look pretty self explanatory!  We could see us whipping up a few of these wonderful gifts for far less than what Anthropologie is charging for them....

Inspired Snow Globes Tutorial

Wednesday, December 12, 2012

DIY: Ornament Party!

So, now that we have done several DIY Ornament Tutorials, you can have an Ornament Party!  We can't wait to get together with friends and sit at the table and make ornaments!  Ring in the holidays with your own craft party.

Here is a the link to all of these fantastic DIY Ornaments below - and be sure to check out all of our DIY ornaments from earlier this month!  We will definitely be doing more, but this should be more than enough inspiration to get you moving in the holiday direction.

boxwood kissing ball finalwhite glitter starblue peace ornamentblue glass on branchesterrarium

Tuesday, December 4, 2012

DIY: Upcycled Felted Ornaments

Here is another wonderful tutorial from Dollar Store Crafts blog!  We love them - you absolutely need to check them out...now.  Go on, you won't regret it.  Then come back here and enjoy the felt ornaments.

I made these tree ornaments from a felted/fulled wool sweater last year and gave them to my family members for their handmade gifts (we try to exchange primarily handmade). You can find wool sweaters by the dozens at thrift stores (although, I admit, they are probably not commonly represented at dollar stores!). Wash in hot water and dry in the dryer to shrink them into fabric that can be cut and sewn and won't unravel. These cute trees are a great way to show off your button stash, too!
Handmade ornaments are also a great gift for co-workers or people who you need to give a token gift to, but who you don't want to spend a lot of money on.

Project Estimate:
  • Wool sweater, $3-5 at thrift store
  • Assorted buttons, on hand
  • Embroidery floss or ribbon for hanging, $1
Total cost: $4 for about a hundred ornaments (if you use the whole sweater to make them)!
To make:
  1. Wash and dry wool sweater to felt it. Repeat if necessary.
  2. Cut tree shapes (triangles) and trunk shapes. I used the contrasting cuff cut in strips for the tree trunks. Use two matching triangles and one trunk piece for each tree.
  3. Sew buttons as desired on front tree triangle piece.
  4. Sandwich tree trunk piece at bottom between front and back tree pieces, and ribbon for hanging at top. Triangle pieces should be placed with right sides facing out. Sew around perimeter of triangle.

Sunday, December 2, 2012

DIY: Winter Mobile

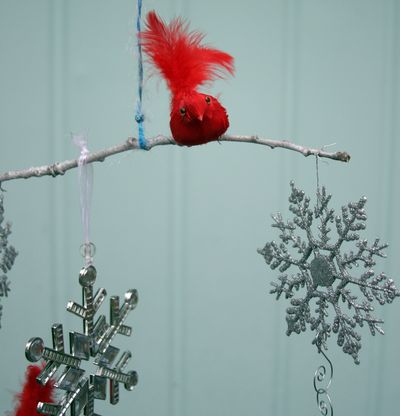
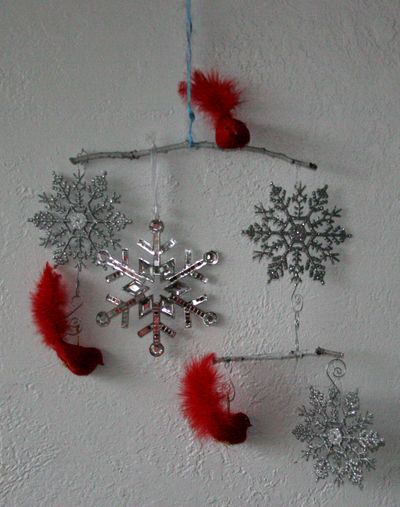
We are obsessed with Dollar Store Craft's blog and how they always make the cutest and more elegant things with such inexpensive supplies.  Here is a great Winter Mobile for your home!  Be sure to give their blog a read!
mobile-garage
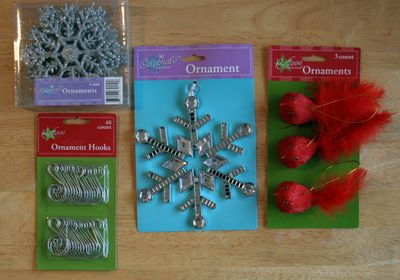
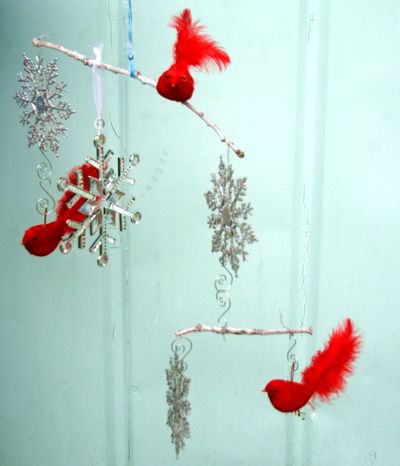
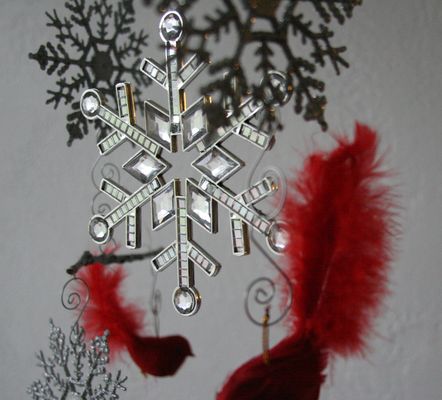
The dollar store has so many cute ornaments this year. I picked up some shiny snowflakes and pretty red birds at the store, found some branches outside, and strung them together for a wintry mobile. You can use pretty much anything on your mobile, so pick your favorite things, attach them to a string and start making one!
mobile-supplies
Project Materials:
  • Assorted ornaments, $3 or on hand
  • Swirly ornament hooks (optional), $1
  • Wire, on hand (I used the wire that came attached to the red birds)
  • Sticks, dowels, or other things to make up the backbone of your mobile, on hand
  • Spray paint (optional), on hand or $1
Total: FREE and up (I spent $4)
mobile-branches
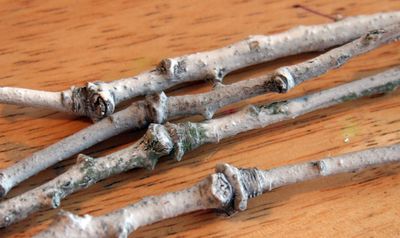
I used oak branches from my yard because I have a ton of them. I spray-painted them with a light coat of white to make them look sort of like birch branches (more wintry!). My oak branches were pretty straight, but they have pretty big knots on them which hurts the balancing process (because the knots kept me from putting things precisely where I wanted to -- strings would slide off a knot). Choosing the smoothest sticks you can find is a good idea!
mobile-sat
Balancing the Mobile:
Balancing the mobile is sort of a process of trial and error, but it's all about balance. The easiest route is to make sure the mobile has equal items on each side and hang them symmetrically. You will get the quickest results by planning a symmetrical mobile.
mobile-snowflake2
If you choose to ignore this advice and opt to make an asymmetrical mobile, here are some tips:
  • I like to think of my mobile like one of those big doctor's scales that has the heavy weights that you move from slot to slot to adjust until you get the bar to balance just perfectly. You will have to do a lot of slight adjustments to get your mobile to balance correctly.
  • I also like to think of my mobile like a teeter-totter (or seesaw): You know how they have three slots at the fulcrum so you can adjust them to compensate if one rider is heavier than the other? You can do that with your mobile by adjusting where the center attachment is located on your stick. Slide it closer to heavier items to help tip the balance in favor of lighter items.
  • You can also slide items closer to the end of the stick to help them act heavier (or closer to the center of the stick to help them act lighter).
  • It helps to have an ornament near the center of a stick (see my rhinestone snowflake) because you can move it to adjust the weight distribution.
  • Use a piece of wire to attach your components to the sticks because they won't slide around very much, making it easier to adjust the balance.
  • Items should float freely and not bump into each other.
  • Expect to have a lot of trial and error when building your mobile!
mobile-straight


Saturday, December 1, 2012

DIY: Glitter Trees

I Heart Nap Time's blog is kicking off the beginning of December with some excellent Glitter Trees that are amazing decor and eye candy.

Check out their page for more holiday DIY!
Here’s what you’ll need:
-3 Styrofoam trees: sizes 15×5, 12×4, and 9×4
-3 small candlesticks (you can find these at just about any thrift store for about 50 cents)
-spray adhesive
-glue: Elmer’s glue for the glitter and a stronger glue like E6000 to glue the tree to the candlestick
-glitter in your favorite 3 colors (we found these awesome colors of glitter at hobby lobby)
-white spray paint
Here’s what you’ll need to do:
- give your tree a good coating of the spray adhesive. you can use the elmers glue for this part, but the spray adhesive covers better and gives a nice smooth finish, plus it’s a lot faster. leave the bottom of the tree undone, this will get glittered at the end.
- once you have your tree coated in glue, cover it completely with glitter. when all 3 trees have been glitterized set them aside to dry.
- next take your 3 candlesticks and give them a couple quick coats of white spray paint. then let those dry completely. 
- now take your E6000 and glue the candlesticks to the trees. it’s best to let them sit overnight. (keep an eye on it though. on one of the trees the glue ate away some of the styrofoam and my tree tilted to the side. so just check on it for the first hour or so.)
-  when everything is completely dry, flip them over and cover the remaining part with glue and glitter. (we used the elmers glue for this part)
- then all you have left to do is decide where to put them!!

Saturday, November 17, 2012

DIY: T-shirt Pom Poms

Lebenslus Tiger's blog is a fun DIY site for a litany of crafts!  We love t-shirt crafts and this one is definitely one we'll be doing.  Don't fret if you were hoping for another ornament tutorial today - we'll be doing two blogs today (the next one being an ornament tutorial)!  Check out their blog for more fun DIY if you need even more!


Don't they look like hundreds of little rosebuds bound together?
I did them traditionally with two cut out cardboard discs and gave them a little haircut afterwards...