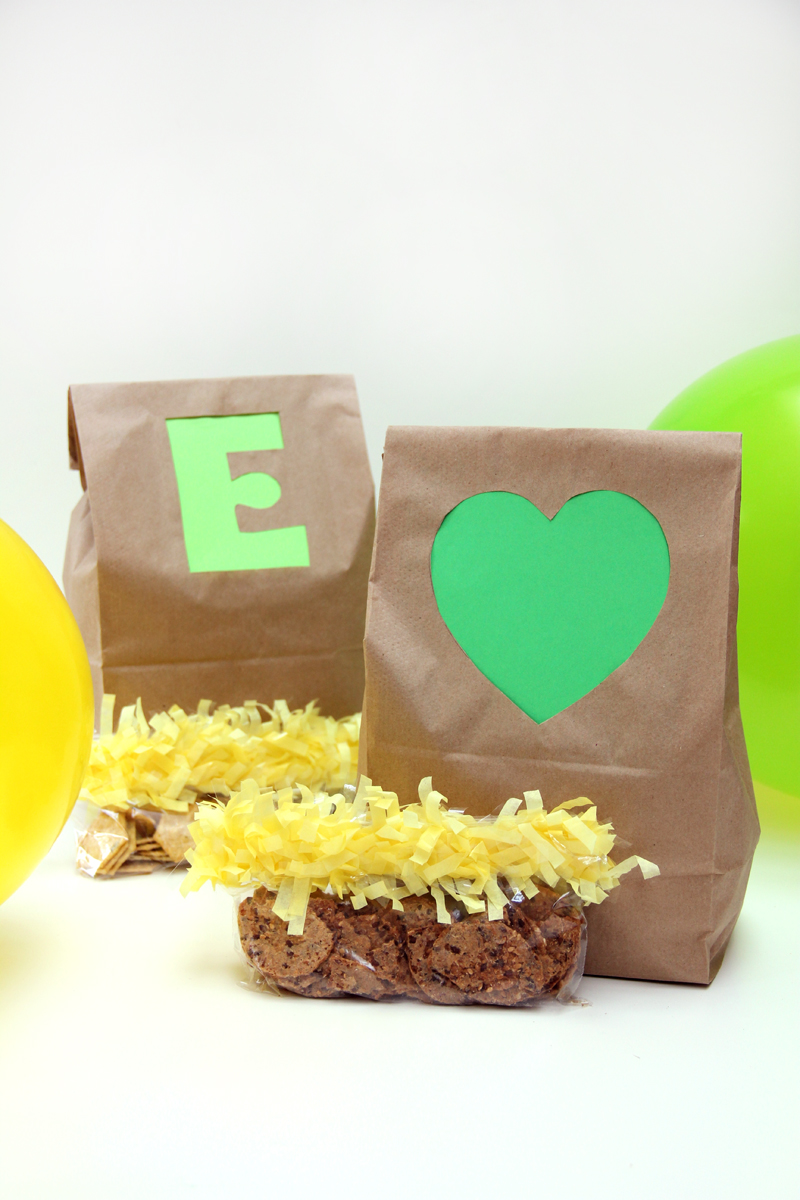
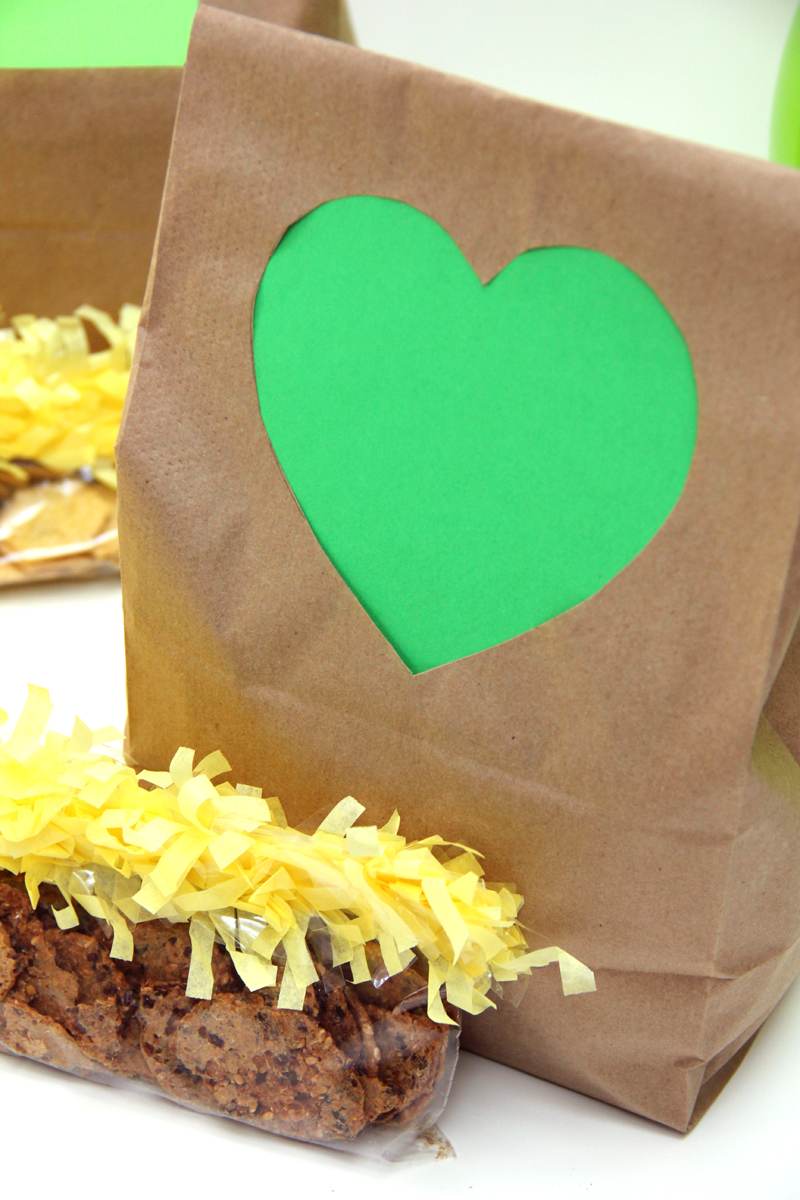
"A Thrifty Mom" has an AMAZING tutorial that we cannot wait to get our own hands crafting on. Fun, easy, good for kids, cheap (if not free)...what is not to love? Go to her site for the full tutorial, but here is a sneak peek of her fantastical craftiness.
A site for all of my own DIY project successes and failures and for posting all of the amazing tutorials and projects I find as I go - while staying on a budget and keeping as much money in my pocket as possible!
Showing posts with label for kids. Show all posts
Friday, August 16, 2013
Sunday, November 11, 2012
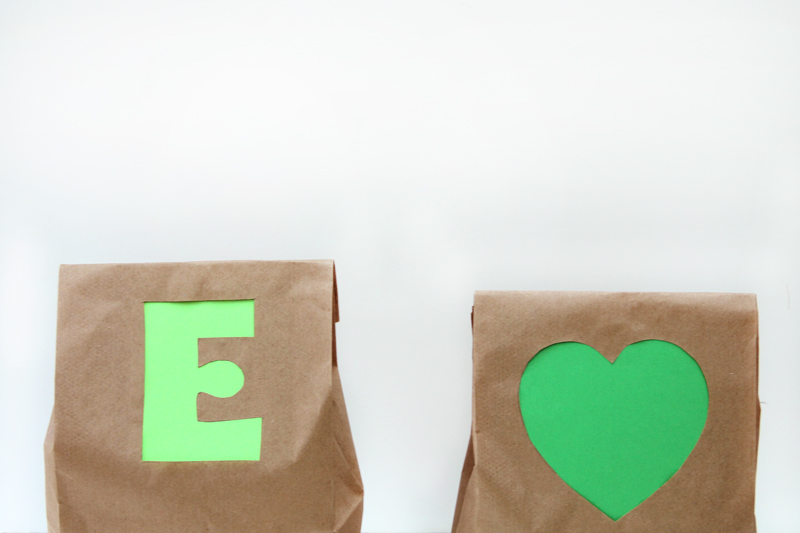
DIY: Colorful Lunch Bag Cutouts
We are taking a brief hiatus from ornament DIYs today to show you a great project from Studio DIY's blog! Be sure to check them out. These lunch bags would be great for a pick me up during a long school day!
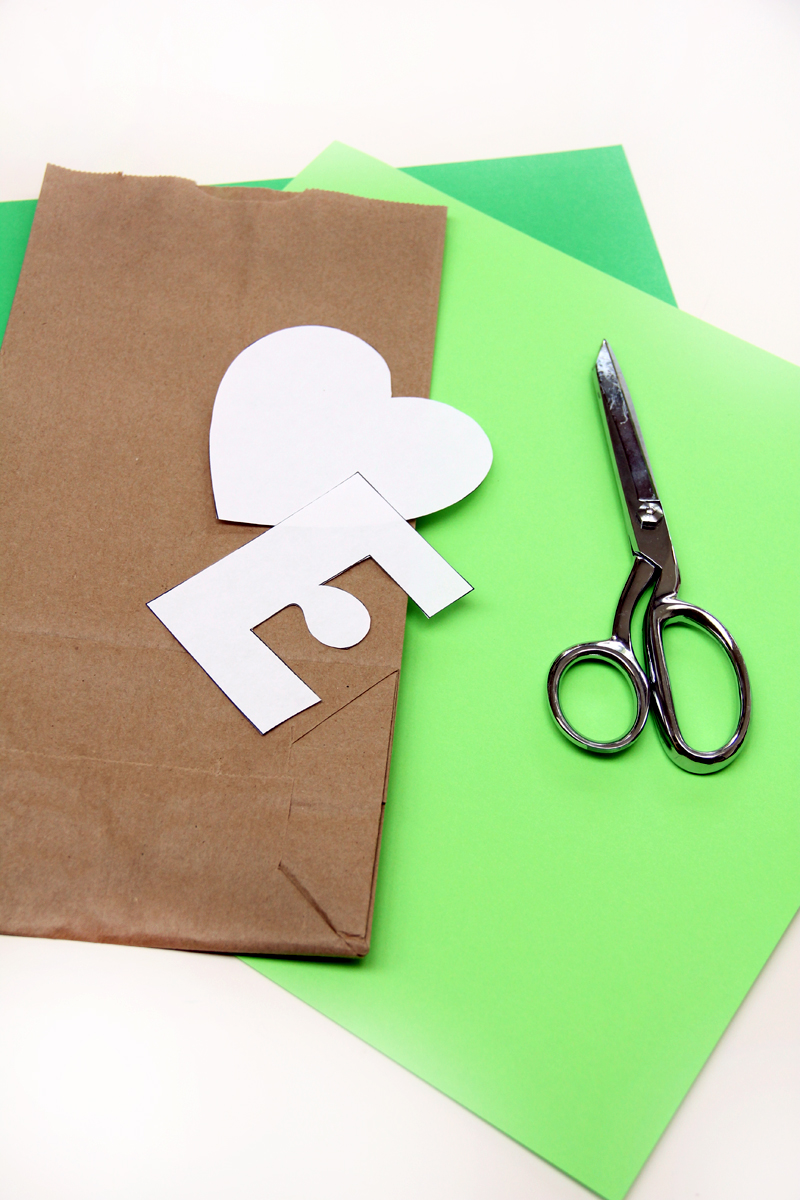
Supply List:
Brown Paper Lunch Bags
Letter or Shape Templates (Print out large letters from your computer, or free hand it!)
Pencil
Scissors (x-acto knife helps too!)
Colored Card stock
Tape and/or Glue
Letter or Shape Templates (Print out large letters from your computer, or free hand it!)
Pencil
Scissors (x-acto knife helps too!)
Colored Card stock
Tape and/or Glue
To Make:
Trace
your shape onto your lunch bag. Make sure to leave enough room at the
top so you can fold the bag over (I’d do mine even lower next time).
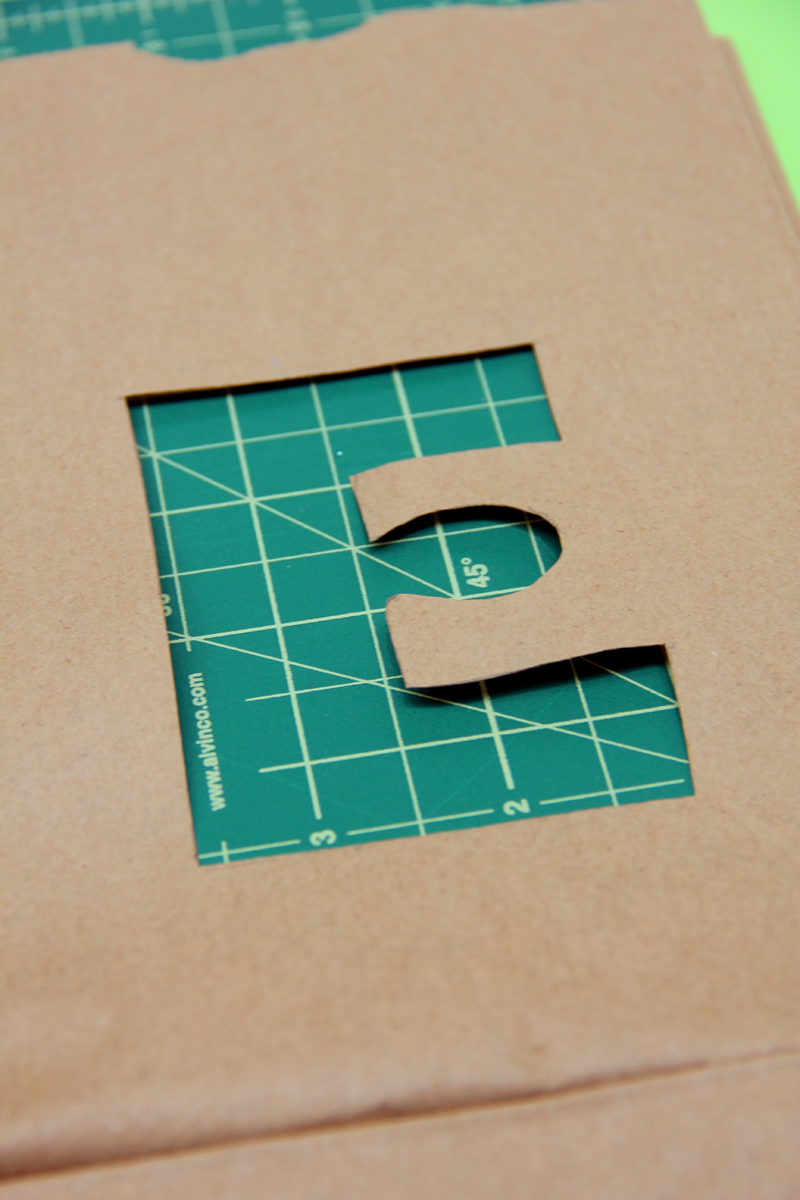
Cut
out your shape, I did this with an x-acto and put a small cutting board
inside the bag to prevent cutting through both sides. You could easily
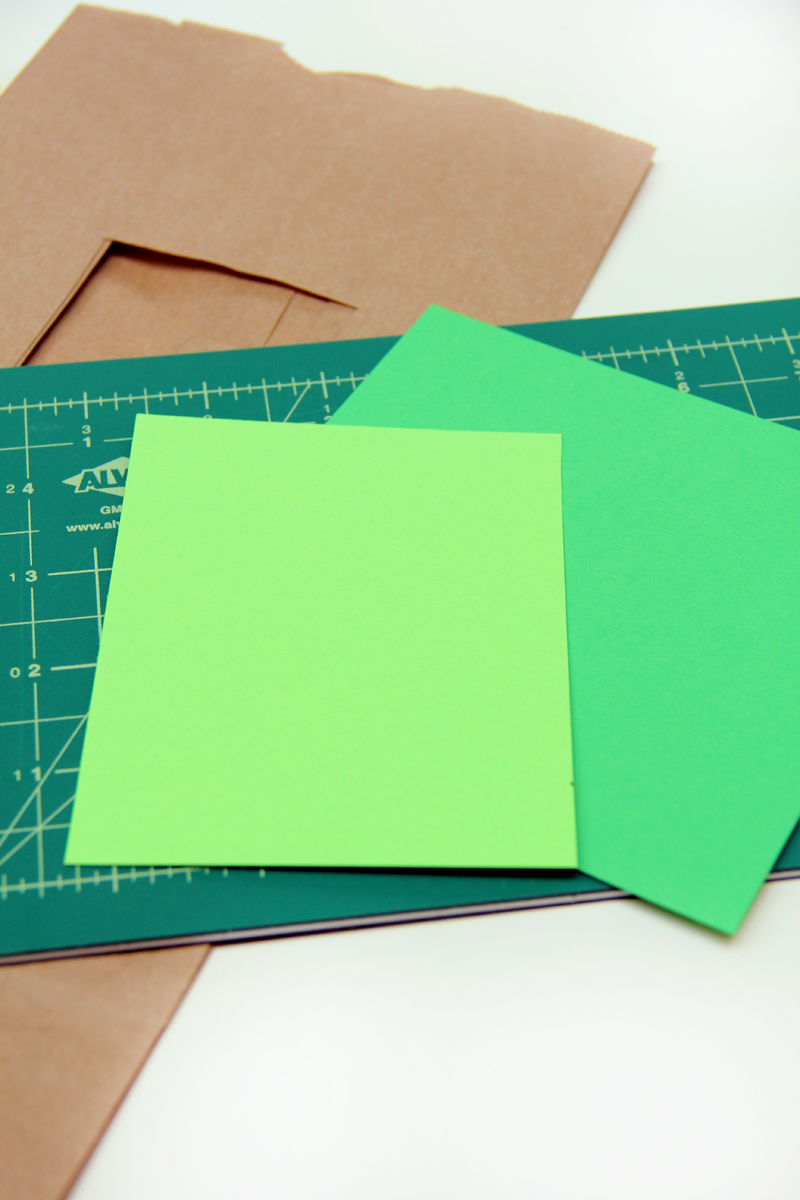
do this with scissors too. Then cut a rectangle of colored paper, just
big enough to cover your entire cut out.
Tape
and/or glue your paper inside the bag behind your cut out. I taped mine
first, then added glue (you can do this with a tooth pick or small glue
stick) to seal down the loose edges.
Labels:
accessory,
bag,
beginner,
brown bags,
cheap,
easy,
fast,
for kids,
kids,
kids crafts,
lunch,
lunch bags,
paper,
paper bags,
quick,
school,
school projects,
tutorial,
upcycle
Saturday, October 13, 2012
DIY: Memory Game
We always have left over scrap paper and we love the idea of being able to upcycle it into a fun game for the niece and nephew! Props to Craftiness is Not Optional for this wonderful idea.
what you'll need:16 wooden squares (i found mine at michael's for 30 cents a pop, and they are 2.5 inches square)
scrapbook paper
mod podge
foam brush
cut paper into squares (2 3/8 inches fit the best) 2 each, of course. it's great to use those scraps up!
spread a thin layer of mod podge on the wood and place the paper onto the glue. press firmly into place.repeat for the other side, using paper that matches.

you can of course put another layer of mod podge on top of the paper, but i opted not to, cause that stuff is messy. then sand the wood for nice smooth edge
Labels:
cheap,
DIY,
do it yourself,
easy,
family,
family time,
for kids,
game,
handmade,
homemade,
kid crafts,
kids,
kids crafts,
memory,
mod podge,
paper crafting,
quick,
upcycle
Tuesday, August 21, 2012
DIY: Muffin Tin Crayons
This tutorial from Kaboose's blog couldn't be easier, more fun, or cheaper! Three things that we just love in any craft.
What you'll need:
- Cupcake/muffin tin
- Non-toxic broken crayons
- Vegetable oil
- toothpick
How to make it:
- Preheat the oven to 275 degrees F.
- Remove all the paper labels from crayon pieces. (Please check to make sure they are non-toxic crayons.)
- Put ¼ teaspoon of vegetable oil into each muffin pan cup, no cup liners needed.
- You will use the equivalent of 4 new crayons for each cup. Place broken crayons (no longer than an inch each) into the muffin pan. This will fill the cup about 1/3 full.
- Place into the preheated oven and watch carefully, they melt quickly!
- Bake crayons for 8 minutes or so.
- When the crayons begin to melt, remove them from the oven and stir gently with a toothpick.
- Crayon will look “ugly” and the colors may appear blended too much. Don’t worry! They look much better on the other side.
- Let the crayons cool completely.
- Once cooled, pop the crayons out of the muffin pan by tapping on the backside of the pan. Crayons should fall right out.
Tips:
- If you have any new crayons available, use one as a measuring stick. Lay broken crayon pieces along side of the new crayon to measure out 4 full sized crayons. This is how many you will need for each completed chunky crayon.
- Be sure to use extreme caution around kitchen utensils and the oven. Always use oven mitts and do not stick you fingers into the melted crayons.
- If you don’t have any broken crayon pieces, you can buy a large box of cheap crayons at the Dollar Store.
Labels:
adult crafts,
back to school,
cheap crafts,
craft,
crayon,
crayons,
creative,
custom,
easy,
for kids,
handmade,
homemade,
kid crafts,
kids,
school,
school projects,
tutorial
Sunday, June 10, 2012
DIY Yarn Wrapped Letters for under $2 each!
On the Homemade by Jill blog, she has a wonderful DIY project that anyone would love, plus it's crazy inexpensive! She has some great ideas, so be sure to check her out here!
I love the yarn-wrapped letter trend that seems to be so popular these
days, but I can be a total cheapskate. So when I went to make some word
art for the kids' playroom, I made my own from scratch.
Instead of buying cardboard letter forms from the craft store, I cut my own out of foam board. To make a template, simply find a font you like in MS Word (or a similar program), and print it out as large as you'd like your letter. I used the font "Rockwell," in bold (not to be confused with "Rockwell Bold", which was a little too chunky for my taste). To get really big letters, you can print out multiple pages or get them blown up at a copy shop.
Then wrap, wrap, wrap your letters in yarn, until they are completely covered. Use dabs of hot glue in the corners and around edges to keep the yarn in place.
As a bonus, the foam board letters are really thin and lightweight, and which helps them hang flat against the wall. I hot glued round picture hangers I had on hand to the back of each letter to hang.
My letters got a lot tidier with practice, so if at first you don't succeed, try, try again. I made this big letter G for our mantel using a thinner yarn and a little more patience.
So far, I've used less than a full piece of foam board and all other materials I've had on hand ... so this project is coming in under $2. Not bad for a bit of DIY decor!
Instead of buying cardboard letter forms from the craft store, I cut my own out of foam board. To make a template, simply find a font you like in MS Word (or a similar program), and print it out as large as you'd like your letter. I used the font "Rockwell," in bold (not to be confused with "Rockwell Bold", which was a little too chunky for my taste). To get really big letters, you can print out multiple pages or get them blown up at a copy shop.
Then wrap, wrap, wrap your letters in yarn, until they are completely covered. Use dabs of hot glue in the corners and around edges to keep the yarn in place.
As a bonus, the foam board letters are really thin and lightweight, and which helps them hang flat against the wall. I hot glued round picture hangers I had on hand to the back of each letter to hang.
My letters got a lot tidier with practice, so if at first you don't succeed, try, try again. I made this big letter G for our mantel using a thinner yarn and a little more patience.
So far, I've used less than a full piece of foam board and all other materials I've had on hand ... so this project is coming in under $2. Not bad for a bit of DIY decor!
Labels:
art,
baby,
baby decor,
budget,
cheap,
DIY,
do it yourself,
for kids,
handmade,
home decor,
homemade,
inexpensive,
kids,
kids room,
wall art,
wall letters,
yarn
Subscribe to:
Posts (Atom)