Showing posts with label spring. Show all posts

Sunday, February 3, 2013

DIY: Mini Cake Stand

Having a Spring / Easter / ANY party?  Love cake stand DIYs?  Shaken Together's blog has an absolutely adorable mini cake stand that we don't think they could have made easier if they had tried!  We love the simplicity, but the beauty of this project.  

Be sure to head to their blog for more info and more DIY!

I purchased two inexpensive sets of solid colored dishes - one granny smith apple green and one black - inverted the cereal bowls, attached the dinner plates with scrapbooking glue dots (super sticky and easily removed) and my cake plates were born!! 
Here they are in action - sorry, this was the first picture I could find without digging out my CD of hundreds of pictures! 

We made chocolate and vanilla cupcakes with home made buttercream and offered chocolate jimmies, green sugar, coconut and mini chocolate chips ... it was a hit!
 
These would be sweet made with thrift store finds for a Mothers' Day tea, heritage dishes for an anniversary party or fun brightly colored mix & match plates and bowls for your kiddo's birthday party ... use the coffee mugs and salad/dessert plates for smaller cake stands with a little more quirky character :)  The best part is that they can be whipped up in a pinch and stored easily!
Hope you were inspired to {try this}!  And hope you want to hang around a while!  There are lots of ways to follow along ... check out my side bar.  I'm hosting a weekly Pinterest link party, too - scroll up to the top to stop by this week's party!  And I'll be sharing the amazing brownie recipe pictured above in the very near future ... you definitely don't want to miss it!
Photobucket

Saturday, February 2, 2013

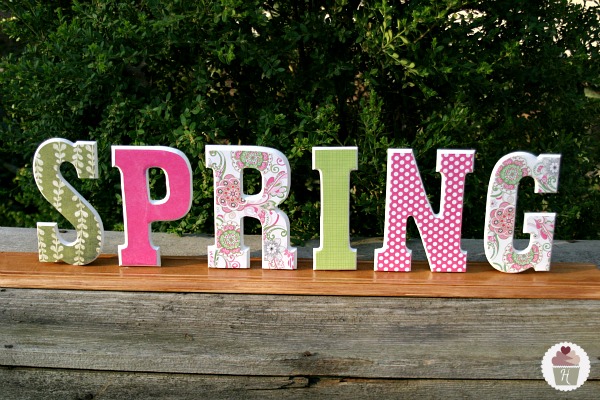
DIY: "Spring" Letters

So spring is just around the corner and we cannot wait.  Hoosier Homemade's blog has just the DIY project to get us going on spring related projects so we can be ready to roll!

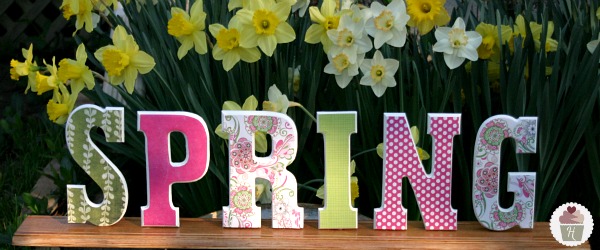
This one is a "Spring" decor idea that brings color and happiness to any room!  Be sure to check out their blog for more DIY.

I just love how it turned out! Doug did an AMAZING job on it…don’t you think?
The concept for the scrapbook paper being applied to the wood is similar to the St. Patrick’s Day Door Hanging we made, but the letters were a little curved on the edge, so Doug had to cut out the paper before applying it to the wood. It was a little more time consuming, but well worth it.
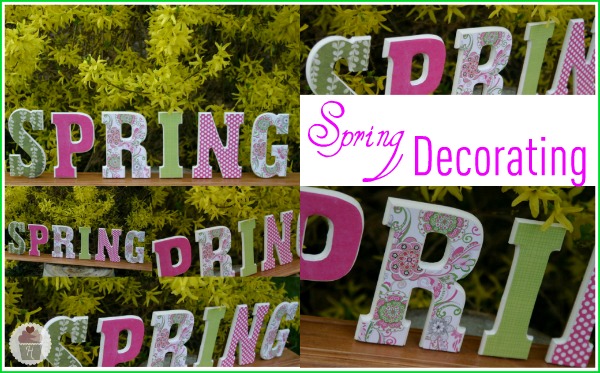
And we couldn’t help but take pictures outside in the beautiful Spring weather we have!
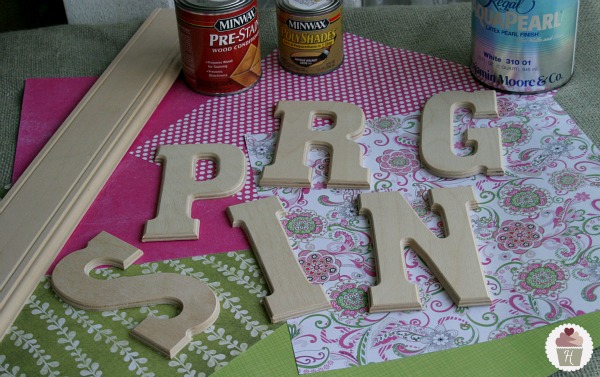
Let’s gather our supplies…
Spring Craft Supplies:
  • Wood – We used a piece of baseboard from our local molding outlet (length will depend on how many letters)
  • Letters
  • Scrapbook paper
  • White paint for the edges of the letters
  • Pre-stain and stain for the wood
  • Spray adhesive to apply paper {not pictured}
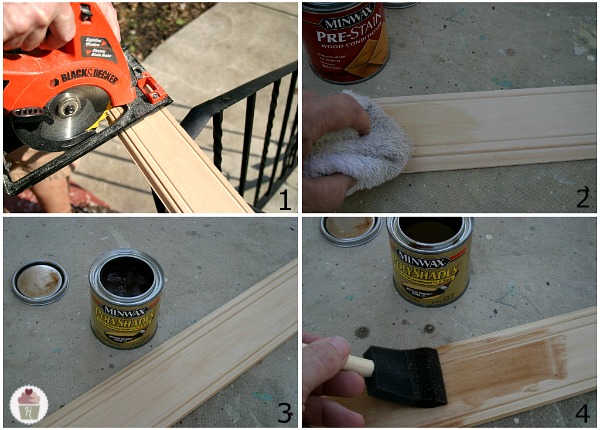
Wood Preparation:
  1. Cut your wood to length. Doug cut this piece, 5 inches longer than what we needed, leaving 2 1/2 inches on each end.
  2. Using a rag, apply the pre-stain. Pre-stain is needed when staining soft or porous types of wood to prevent the finish from being blotchy.
  3. Let sit 15-20 minutes to allow to soak in, wipe off any excess.
  4. Apply stain evenly with a foam brush and allow to sit for 5-10 minutes depending how dark you want the final product to be, carefully wipe and excess stain off. {We used a combination stain/polyurethane product to speed up the process}
Letter Preparation:
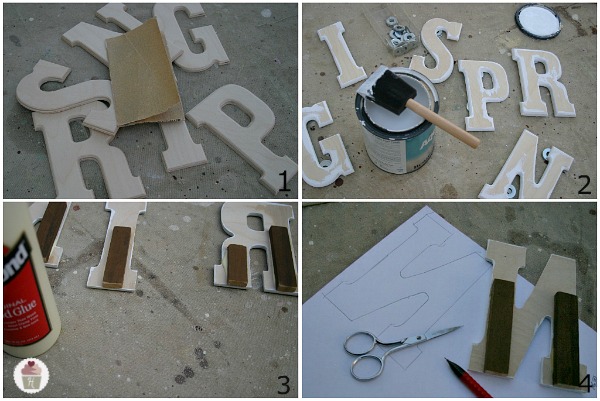
  1. Slightly sand the edges of the letters with 180 grit or finer sand paper. {the higher the number the finer the grit}
  2. Paint the edges (2 coats) we used a satin latex that we had on our shelf {the washers are just to keep the letters up off the drop cloth}
  3. Glue a small block of wood to the back side of the letters to give more area to glue to base.
  4. Trace the letter onto the back of the scrapbook paper and cut out
Decorating the Letters:
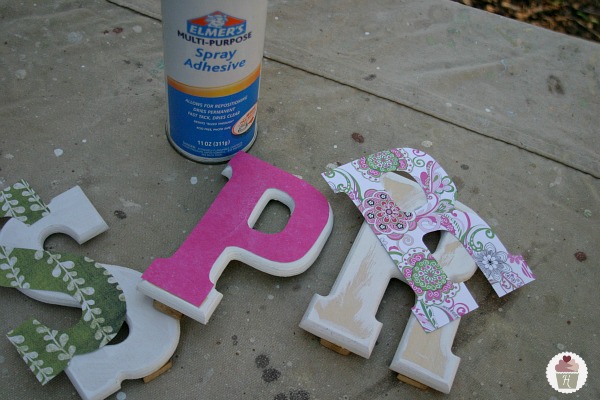
  • Spray the back side of the paper with adhesive and carefully adhere to the wood letters
  • To attach the letters to the wood, use a hot glue gun {note: Doug tried wood glue and even super glue, but the glue gun worked the best}

Thursday, January 31, 2013

DIY: You've Been Bugged!

LOVE LOVE LOVE this idea from Jen's Happy Place.  I'm doing this around my office place starting Friday.  What do you guys think??  Head to her blog for more!!


I think everyone will get a kick out of putting the
sign up by their desks that says "Don't BUG me!"
That will really show off our customer service- LOL!

One of the complaints from the boo'ed game in October was that people had to do two treats (and some people went overboard with what they gave), and also we started running out of co-workers to boo. So, I thought I would get it going by bugging two people, but then after that, each person would only have to assemble one treat. Hopefully this will work out better.
Here are my treats that I will secretly place on two of my co-workers' desks today:

This is how they will look when first given . . .


The pink mailbox!

Yep, still obsessed with vinyl! I had so much fun
with the mailboxes I decorated for Christmas gifts (HERE)
that I just couldn't pass up these Target dollar section cuties!

And the classic valentine red mailbox!

I will flip if my recipients win the $1000 a week for life!

This Target sticky note pad is so cheery-
much needed in our boring office! 

And could one ever go wrong with chocolate????

Here are the mailboxes dumped out . . .

Another fun sticky notepad from Target!

Supplies:
  • Cricut Quarter Note cartridge for name lettering (welded on my Gypsy)
  • Cricut Designer's Calendar cartridge for heart
  • Cricut white indoor vinyl
  • Metal mailboxes from the dollar section of Target
  • A rolled up copy of the sheet shown above rubber-banded to mailbox flag (I forgot to add it before I took pics, but I did add valentine ribbon from Michael's and tied it in a pretty bow which covered up the rubber band-Oops!)
  • Love Bug graphic found on the internet HERE
  • GeoSlab703 XBd BT font for headings
  • Kabel Bt BT font for body text
  • DelRay font for "Happy Valentine's Day"
  • Instant lottery tickets
  • Ande's Valentine mint chocolates with sweet thoughts/messages on them
  • Lindt Lindor chocolate truffles
  • Reese's peanut butter chocolate hearts
  • Sticky note pads from Target's dollar section
Hope you enjoyed and are inspired to start something fun like this in your own workplace! Help yourself to the sheet I created. All I ask is that you credit me and leave me a comment that you used it! I would love to see your take on it! :)

I am entering this fun "party-starter" in Decorate to Celebrate's Valentine Party challenge!