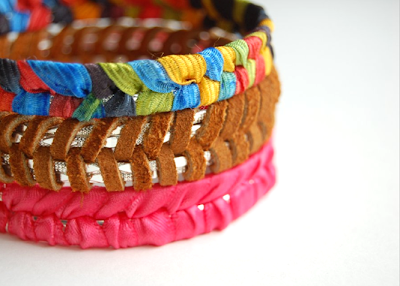
How gorgeous are these? We love, love, love dollar store crafting! Thanks to Studs and Pearls for making this fabulous tutorial.
Supplies:
- 4 thin metal bangles
(or less/more, depending on the thickness of each bracelet and your desired look)
- Measuring tape, scissors, Scotch tape
- Any kind of flat fiber of your choice, such as ribbon or leather cord.
I used this interesting ribbon yarn, Lion Brand Incredible® Yarn in City Lights. (c/o Lion Brand)
- Clear nail polish (optional)
I love the colors of this yarn. So bright and fun.
1) If you're using more than 2 bangles, loosely tape 2 and 2 together.
You'll be working with each pair of bangles separately, wrapping the
yarn around each pair and weaving in between them. The tape will help
hold the bangles together while you do this.
2) Measure and cut about 200 inches of yarn/ribbon/etc. This will
probably be more than enough, but it's always better to have too much
than too little!
3) Insert the yarn through the bangles, positioning it so that there is
an equal amount of yarn on either side. (ie: Fold the yarn in half, and
let the bangles drop to the center of the fold).
To make this easier to follow, start with the same side I did and follow from there. Holding the yarn in place underneath the bangle, take the yarn on the left side and bring it over the left pair of bangles.
To make this easier to follow, start with the same side I did and follow from there. Holding the yarn in place underneath the bangle, take the yarn on the left side and bring it over the left pair of bangles.
4) It may be a little awkward to hold the bracelets at first, but everything will start to take shape as you go along. Take the yarn on the left side, and bring it over the left pair of bangles and under/through the right pair (first photo). Next, take the yarn on the right side and bring it over the right pair of bangles.
5) Bring the right strand under/through the left pair of bangles. This
completes one "weave". Gently pull on the strands to slightly tighten
it. Continue from there, with the left strand going over the left pair
of bangles (as seen in the second photo).
6) This strand will then go under/through the right pair. The right strand will then go over the right pair...
7) ... and under the left pair of bangles. You'll start to see the
"braided" look form, as you can see in the first photo above. Continue
with this same method the entire diameter of the bangles. Left strand
over the left pair, under/through the right pair, right strand over the
right pair, under/through the left pair. Don't forget to pull gently so
that the "braids" stays in place.
8) Whenever you come across the tape, simply remove it and continue braiding.
9) The braided look will start to emerge as you work along the bangles.
Be sure to keep the tightness of your weaving consistent. Between this
method and the type of ribbon yarn I used, I really like how the colors
stood out in this bracelet!
10) Keep working around the bracelet...
Eventually, you'll reach the point where you started.
11) Tie both strands into a tight double or triple knot. Cut away the excess.
12) If you'd like, dot some clear nail polish onto the knot for some extra security.


No comments:
Post a Comment