Childhood 101 has a great craft that includes our favorite thing - upcycling! Everyone has old magazines of some kind laying around and this is the perfect way to do something creative and useful with them.
Check out their blog for more DIY!
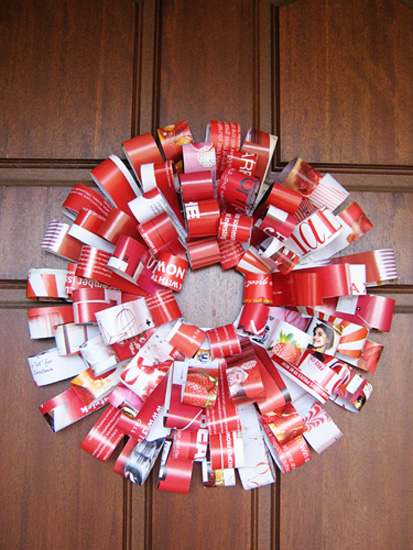
Homemade Magazine Christmas Wreath

First step was to cut lots of strips from the magazine pages. I chose pages that featured predominantly red and white print to match the Christmas theme. Then ruled them into 2cm widths (the width of my ruler) and Immy and I got cutting (though Immy quickly lost interest in this step!)

Then we folded each strip over and stapled it at the bottom to form a petal shape. Unsurprisingly, Immy was back to help with this bit

Before long we had a big pile of red and white magazine ‘petals.’

I recycled a piece of cardboard and traced around a dinner plate and a glass to form the base of our wreath.
 Next,
it was time to start gluing. We used a glue stick and started
arranging our first row of petals about 2 or 3 cms in from the outside
edge of the wreath base.
Next,
it was time to start gluing. We used a glue stick and started
arranging our first row of petals about 2 or 3 cms in from the outside
edge of the wreath base.
We continued pasting petals the whole way round and then began a second row to overlap the first…

…and then we added a third and a fourth row of petals…

…until the whole base was covered. I then stapled a few simple, small curls from the remaining strips of paper to cover the staples of the final row of petals.
We hung our Christmas wreath with double sided tape on our front door to spread a little Christmas cheer and welcome visitors to our home

Oi Stacy,
ReplyDeleteSou brasileira, arquiteta, urbanista, designer de interiores e ambientalista há muito tempo.
Adorei a sua idéia e o seu tutorial, mas adorei ainda mais as lindas mãozinhas trabalhando nele. :-)
Traduzi o seu passo a passo e estou publicando no meu blog e na minha Fan Page, com os seus créditos.
Espero que aprove.
www.facebook.com/bioarquiteturabioconstrucao
http://lecycpicorelli-bioarquitetura.blogspot.com.br
http://twitter.com/bbioarquitetura
Desejo-lhe muito sucesso!!!
Mil beijos