Monday, December 31, 2012

DIY: Three Easy New Year's Eve Party Favors

Free People's Blog has three wonderful last minute party favor ideas for those of you procrastinators out there (like me).  These look fun and easy to make and definitely have the ability to be ready to go in a short amount of time.  
Post image for 3 Easy New Year’s Eve Party Favors 
 Confetti Cones
diy new year's eve party favors
This gold acrylic paint is my jam – it looks like liquid gold! It’s made by Reeves and I can’t get enough of it.
diy new year's eve party favors
I painted a piece of card stock with the gold paint, and to make the 
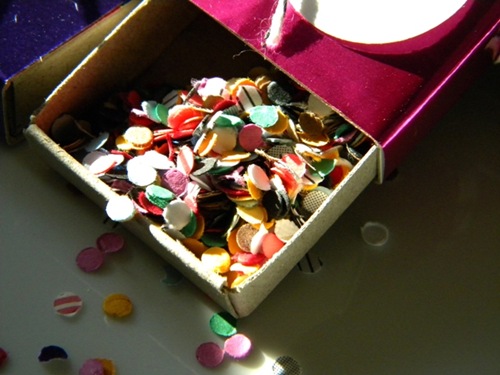
confetti I did it the old fashioned way – I used a hole punch and a stack of multicolored post-it notes!
diy new year's eve party favors
Roll the gold paper into a cone, fill it with confetti, and voila! An adorable confetti cone. Make a bunch of them and place them on a table for your guests to pick up and toss at midnight!
Mustache Photo Props
diy new year's eve party favors
I also love the idea of making little props for photos – especially if you have a photo booth at your party! I used my mustache stamp from a while back and stamped a few on card stock and then just cut them out and glued them to coffee stirrers!
diy new year's eve party favors
Party Hats
diy new year's eve party favors
You can also use the gold-painted card stock to make party hats! I added some gold glitter to the bottom for some extra sparkle. Roll your hat into a cone shape and attach a string so it can be worn.
diy new year's eve party favors
Stick a confetti cone and mustache in a diy glitter champagne flute and you’ve got some seriously adorable New Year’s Eve party favors!

Sunday, December 30, 2012

DIY: Eggnog Cupcakes with Spiced Rum

Baker's Royale has made a picture look so delicious we wish we could eat two dimensional objects!!  These look unreal.  We know that our frosting will not look this amazing, but if they taste anything remotely like they look we couldn't be happier...
 Eggnog Cupcakes Bakers Royale Eggnog Cupcakes with Spiced Rum  

Makes 24 cupcakes | Preparation: Heat oven to 350 degrees F. Line 2 muffins tins with cupcake liners.
Ingredients:
Cupcakes:
  • 1 1/2 cups self-rising flour
  • 1 1/4 cups all-purpose flour
  • 1 cup (2 sticks) unsalted butter, softened
  • 2 cups sugar
  • 4 large eggs, at room temperature
  • ¾ cup eggnog
  • ¼ cup milk
  • 1 teaspoon vanilla extract
Spice Rum Buttercream:
  • 5 large egg whites
  • 11/2 cup sugar
  • 4 sticks unsalted butter, diced and softened
  • 1/4 teaspoon salt
  • ½ cup spiced rum
Instructions:
To make cupcake:
  1. Measure out flour and set aside.
  2. Add sugar and butter in a bowl and cream on medium speed until fluffy, about 3 minutes. Add eggs in 1 at a time, beating well after each addition. Add the dry ingredients in 3 parts, alternating with the eggnog and vanilla to start. Mix after addition until incorporated-do not overbeat.
  3. Fill cupcake liners about 3/4 full and bake for 20 to 25 minutes. Transfer cupcakes from tins to cooling rack. Allow cupcakes to cool completely before frosting.
To make Spice Rum Buttercream:
  1. Combine egg whites and sugar in a bowl placed over simmering water. Bring mixture to 160 degrees F while whisking constantly.
  2. Transfer mixture to stand mixer bowl, fitted with a whisk attachment and beat on medium  high speed (speed 8 on a KitchenAid stand mixer) until mixture cools and doubles in volume and forms stiff peaks; about 10-12 minutes).
  3. Add butter in one piece at a time, mixing to incorporate after each addition. The mixture may appear clumpy and almost curdled looking at first-this is normal. Keep mixing and it will become even and smooth again.
  4. Add salt and spiced rum and mix to combine.


Saturday, December 29, 2012

DIY: Balloon False Ceiling

Wants and Wishes blog has a fantastic last minute idea for that New Year's Eve party!  If you've been debating how to jazz up the home for the festivities - here you go!!  Visit them for more ideas.
 

 1. Blow up all of the balloons you would like to use. I wanted a variety of colors of balloons so I used 2 different colors of purple, 3 different blues and silver. I think it turned out really well to have the mix of colors.
2. Roughly arrange the colors the way you would like them, this will help when your tying them together that you don't have all the same blues together, but a even mix of colors. (Note I used almost double the amount of silver balloons since I have different shades of blues & purple balloons).
3. Tie them together with string or curly ribbon. Don't tie them too close as they need a lithe room in between. I tie them together so you have 2 rows of balloons- one hanging on the right then one on the left.
Here is a picture with one strand hung up so you can see how full one strand can be. You can add as many strands of balloons you need to create the depth of your area.

Friday, December 28, 2012

DIY: New Year's Eve Confetti!

Head on over to "Homework: Today's Assignment: Be Inspired"'s website for this awesome DIY New Year's Eve confetti!  This is so easy to whip up and would make for a great last minute party idea.  The only problem?  Vacuuming it all up!

Thursday, December 27, 2012

DIY: Gold Dipped Glasses

Having a New Year's Eve party?  These gold dipped glasses would make the perfect edition to any party night!  These come to you from Momtastics' blog - so go check her out! 

alt

Supplies:

alt
Wash wine glasses thoroughly. Wrap tape around the base of the wine glass leaving the area exposed you want to paint gold. Cover the rest of the glass with paper
alt
I taped up the sides too to be extra cautious
alt
Spray from a good distance, at least 1 1/2 feet to get a nice even coat.
altDo the same with the other glasses in your set.
alt
DIY: Gold Dipped Holiday Glasses

Wednesday, December 26, 2012

DIY: Black and Gold New Years Eve Party Hats

We love these party hats from Studio DIY's website, especially since they are black and gold (UCF colors - and we have knights in the family)!  They look so simple, it's kinda ridiculous and marvelous all at the same time!!  So, get on it.  ;)

DIY New Years Eve Party Hats | Studio DIY
DIY New Year's Eve Party Hats | Studio DIY
Supply List:
Paper Mache Cone  
Black Tissue Paper
Black Tape
Hot Glue
Black Cardstock
Black Fringe Trim
Headband
Gold Filler Balls or Other Trimming (Optional)
To Make:
Spray paint your paper mache cone gold and let dry. Meanwhile, cut your tissue paper into five inch squares. You’ll need two for each party hat. Grab one square in the middle and pinch it, then twist so it keeps its shape slightly. Repeat with a second square.
DIY New Year's Eve Party Hats | Studio DIY DIY New Year's Eve Party Hats | Studio DIY
Hold your two squares together at the twisted bases and wrap black tape around them to secure.
Hot glue your tissue poof to your paper mache cone. Add some fringe trim around the bottom of the cone, covering the base of your poof you just added.
Cut out two circles from your cardstock the width of your cone’s base. Hot glue one to the base of the hat. Now sandwich your headband in between the cone and the other cardstock circle and secure with hot glue.
Add some fun gold fillers or beads if you’d like, or leave it plain. As you can see, I did both!
DIY New Year's Eve Party Hats | Studio DIY

Sunday, December 23, 2012

DIY: Marbled Glass Ornaments

Has the panic mode set in with Christmas only two days away?  Having a holiday party and need a few more ornaments to make everything perfect?  We have just the tutorial for you!  These wonderful marbled ornaments are so easy you can whip them up in a few minutes and in any color theme you want!  This tutorial comes from Save On Crafts and we can't wait to give them a shot.

DIY  Paint Clear Glass Ornament  Balls
How to make Marvelous Hand Painted Ornaments with Clear Glass Balls.

Create Marvelous Ornaments™ with Delta Ceramcoat® Acrylic Paints!
It's hard to believe that these luxuriant ornaments are so very easy to create. All ages can enjoy the fun of making elegant swirls of Ceramcoat Acrylic Paints inside of clear ornament balls. Just pour in your favorite colors and swirl away. metallic!
MATERIALS

Delta Ceramcoat® Acrylic Paints
  • 3 or 4 colors
Other Supplies:
  • Paper cups or empty egg cartons
INSTRUCTIONS

  1. Remove hanger and cap from the ornament. Rinse inside of ornament with alcohol. Let dry thoroughly. Start with one color of Ceramcoat® paint. Squeeze just a small amount of the first color into the ornament so it runs down the side (see photo A). Rotate the ornament and squeeze a little more paint down the side in another area until you've added about three or four lines of paint with only a dime-size amount of paint pooling at the bottom of the ornament.
  2. Add the next color, squeezing out a small amount of paint in between the places where you added the first color (see photo B). Continue to add one or two more colors in the same fashion.
  3. Rest the ornament on its side for approximately five minutes. (Place it to rest in the ornament box it came in, an egg carton or a paper cup for easy handling.) Rotate and tilt the ornament a quarter turn every five to ten minutes until the paint covers the entire inside of the ornament. Pour out excess paint. Then continue to rotate it every few hours over the next day. This helps the paint to coat the ornament evenly. The color will continue to move and change with each turn. When the desired effect has been achieved, drain out any remaining excess paint. It may take up to four days to dry completely (a hair dryer will speed drying time). Replace hanger and cap when dry. If desired, decorate with ribbon and hang on tree.
Other creative variations:
  • For horizontal marbling: coat ornament with your choice of colors and let the ornament dry on its side, rotating one side to another, avoiding an upright position.
  • For vertical marbling: coat ornament with your choice of colors as in steps 1 and 2 and prop ball upside down in a paper cup to drain. Let dry.
  • For variegated, irregular marbling: drop in one color of paint, swirl, then add another color. Continue adding or repeating colors and swirling until the entire ball is coated on the inside. Follow step 3.
Important Notes:
Use Ceramcoat paint only-other brands of paint may not be compatible! Also, if paint pulls away from glass, add more paint after original paint dries.
All you need are
Clear Glass Ornaments and Acrylic Paints!
 
Here's what you need to do:
1. Remove hanger and cap from the ornament. Rinse inside of ornament with a mixture of 1 part vinegar, 3 parts water before adding paint. Let dry. Start with one color of Ceramcoat paint. Squeeze just a small amount of the first color into the ornament so it runs down the side. Rotate the ornament and squeeze a little more paint down the side in another area until you've added about three or four lines of paint with only a dime-size amount of paint pooling at the bottom of the ornament.
2. Add the next color, squeezing out a small amount of paint in between the places where you added the first color. Continue to add one or two more colors in the same fashion.
3. Rest the ornament on its side for approximately five minutes. (Place it to rest in the ornament box it came in, an egg carton or a paper cup for easy handling.) Rotate and tilt the ornament a quarter turn every five to ten minutes until the paint covers the entire inside of the ornament. Pour out excess paint. Then continue to rotate it every few hours over the next day. This helps the paint to coat the ornament evenly. Drain out any remaining excess paint. It may take up to four days to dry completely.

Saturday, December 22, 2012

DIY: Anthropologie Inspired Snow Globes

Zomoc.com has a wonderfully easy DIY - there aren't really any instructions, but these look pretty self explanatory!  We could see us whipping up a few of these wonderful gifts for far less than what Anthropologie is charging for them....

Inspired Snow Globes Tutorial

Friday, December 21, 2012

DIY: Glittered Chain-Link Holiday Garland

HGTV has a simple, but wonderful idea for those last minute holiday decorations!  We love this easy to make and inexpensive garland idea! 


Materials Needed:

  • 12x12 sheet of gold scrapbook paper (enough for 3 feet of chain)
  • mint-green acrylic paint
  • small bowl for paint
  • 1" Paint Brush
  • pencil or pen
  • Ruler
  • 1"-wide blue painter's tape
  • X-Acto knife
  • hot glue gun and glue sticks

Paint Back of Paper Then Mark Chain Links

Completely cover non-glitter side of gold scrapbook paper with mint acrylic paint. Once paint has fully dried, make inch marks on both edges of paper. Connect marks to create 1-inch stripes.
+

Score Then Bend Paper

Using an X-Acto knife, carefully score (but don't cut) along marks. Make sure not to cut all the way through; cut the paper just enough to make it easy to tear later. Flip paper over and slightly crease at score marks to make them more visible.
+

Tape Off Then Paint Strips

On paper's glittered side, place painter's tape along the center of each scored line (Image 1). Paint exposed paper with mint-green paint. Once paint has dried, carefully remove tape to reveal tone-on-tone pattern (Image 2).

Thursday, December 20, 2012

DIY: Make Bows into Pom Poms

Here is another fantastic DIY from Martha Stewart's website.  If you still haven't been on her webpage - what are you waiting for??  It is full of wonderful craft ideas for any time of year.  We are so close to the holiday, but there is definitely still time to whip up a few easy DIYs for decorations and gift wrapping!!

la100429_1203_cuttinght.jpg