Wednesday, October 31, 2012

DIY: Chalkboard Necklace

Henry Happened blog is great for easy, quick, and inexpensive DIY tutorials!  We particularly like this one that shows how to make a chalkboard necklace.  This is a great accessory because you can change the way it looks based on your mood!

Check out their blog for more quick jewelry DIY!

chalkboard necklace diy - finished!

What you’ll need:
  • Rust-oleum specialty Chalk Board spray
  • a bezel pendant (you could find one at your local bead store or even purchase one through Etsy…this or this would do nicely)
  • finished chain
  • a scrap of satin ribbon
  • glue (I highly recommend a tube of E6000, it is inexpensive, amazingly strong and long lasting!)
  • painter’s tape
  • newspaper
  • basic white chalk
chalkboard necklace diy - supply roundup
STEP 1:  Using the painter’s tape, tape your pendant down onto your newspaper being careful to cover any areas you don’t want “chalk boarded” with the tape.
STEP 2:  In a well ventilated area (i.e. outside) apply 2-3 light coats of “Chalk Board” spray to the exposed surface of the pendant (wait approximately 3-4 minuets between coats).  Let dry.
chalkboard necklace diy - taping & chalk spray application
STEP 3:  Once the “Chalk Board” finish has had time to thoroughly dry (a couple of hours or so should be suffice), carefully remove the protective painter’s tape from the pendant.
chalkboard necklace diy - removing the painters tape
chalkboard necklace diy - fchalkboard application applied and dried!
STEP 4:  Tie a bow with your ribbon.  Trim ends to desired length.
chalkboard necklace diy - making the ribbon bow
chalkboard necklace diy - trimming the bow
STEP 5:  Using your glue, secure bow to top of pendant.
chalkboard necklace diy - attaching the bow
STEP 6:  Attached pendant to chain.
chalkboard necklace diy - pre message (a blank slate)
STEP 7:  Using your chalk write the message of your choice onto the pendant (using the edge of a brand new piece of chalk will help you write small and clearly).
chalkboard necklace diy - finished!
STEP 8:  If you are giving as a gift, place pendant and a piece of chalk into a gift bag (I chose an organza gift bag with a bit of a shimmer in a fun, bright color).
chalkboard necklace diy - finished!
Voila, a sweet chalkboard necklace!
chalkboard necklace diy - finished & modeled

Tuesday, October 30, 2012

DIY: No Sew Legwarmers

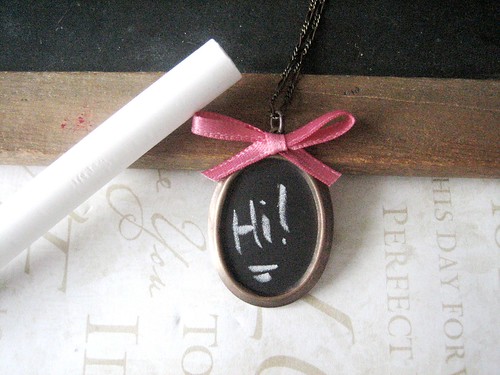
La Vie en Rose apparently knows us all too well.  We are obsessed with our glue gun, and not really big on having to sew things together.  So, thanks to them, we are able to have toasty leg warmers - no sewing required.  Yay!

Glue gun lovers, this one is for you!!
Instead of sewing them, I decided to glue it up this time around so those of you without the desire to stitch can still participate. Of course, you're welcome to sew them if you prefer.
(1) Start it. Cut the sleeves off of an old sweater with a thick ribbed knit, so that it doesn't unravel. I cut these off of John's sweater *months* ago when I did the first post about legwarmers and they still haven't unraveled so I'd say it's safe. The end of the sleeve will be at the top of your knee and the underarm end will go down by your feet.
(2) Cut it. Put them on and see if they're too long. If they are, mark down the right length and cut the excess off. Slit each one down the middle from top to bottom. If you *don't* want your legwarmers to be tapered and instead want them to be straight legged then fold them in half with the two cut ends together and cut the taper off from the TOP to BOTTOM so that they are now straight. 
(3) Ribbon it. Cut ribbon 2 inches longer than the legwarmer and in sections (so the glue doesn't dry), glue the ribbon on using fabric glue sticks in your gun (1/2 inch in from the edge). Tuck the ends over the other side and glue down at each end. 
(4) Connect it. Next, glue the ends back together. Put your glue down on the inside of the ribbon between the ribbon's edge and the edge of your legwarmer slit. Section by section, glue down the other edge. 
(5) Button it. Place your buttons out into the exact way you'd like them and then one at a time, pick them up and glue them on. I like to apply the glue to the edges of the button so that it doesn't show through in the button holes. Be sure that the legwarmers match each other- you don't want one to have buttons going down much further than the other!
(6) Wear it! I liked leaving my ends tapered. I think it looks interesting and different than regular legwarmers when worn with flats. It creates a flare shape. You can also wear them with boots, as pictured below. Forget expensive boot socks!

Monday, October 29, 2012

DIY: Bird Canvas Wall Art

Blue Cricket Design has a great blog on creating your own canvas well art that looks professional and vintage.  We love the way this looks - very coffee house feeling.

Supplies Needed:
Two Canvases
Permanent Marker
Printed Birds to trace
Scissors
Paint, Wallpaper or Vintage pages to create a canvases back ground
Glue or Mod Podge


It’s easy to find images of birds online by doing an image search. Print your images on card stock or mount them on card stock to create a firm template. Cut them out and your ready to go!
To create some fun texture and interest cover your canvas in Scrapbook paper, Paint or Vintage book pages! To adhere any sort of paper mix two parts water to one part school glue or Mod Podge. Paint your paper with your glue mixture and lay smoothly on your canvas. Once the entire canvas is covered let it dry over night before moving onto the next step.
When it’s dried completely lay your two canvases next to each other.
Use a pencil to free hand your tree branches. Be sure to continue your branch from one canvas to the next.
Outline your penciled sketch with your permanent marker.


Color in your branches completely.

Place your bird images on the branches and trace them with a pencil. Remember you can make a bird face the other way by flipping them over!
Color in your birds.
Now we’ll add our details! Draw on leaves and smaller branches and color them in. Lastly you’ll want to color it all in one last time to insure a deep dark silhouette and to cover up any uneven marker strokes.
Hang them side by side and enjoy!

Sunday, October 28, 2012

DIY: Neon Animal Garland

This garland would be ideal for a kids party, or even for a fun 80s theme party!  They are so easy to make you may just want to do it and decorate your house for fun and you'll have Design Happen's blog to thank for it!  Head on over to their blog for more.

DIY Neon Animal Garland - Erin Loechner
Neon animals and garlands are two of today’s hottest trends in the craft/party decor world, so why not combine the two to create a bright and vibrant neon animal garland? Here’s how!:
DIY Neon Animal Garland - Erin Loechner
MATERIALS: I spotted these plastic dinosaurs at the dollar store (my favorite spot for budget crafting!) and then headed to the hardware store for neon spray paint, twine and eyelets (screw eyes).
DIY Neon Animal Garland - Erin Loechner
INSTRUCTIONS: After spray-painting the dinos to my heart’s content we pre-drilled a 1/16 inch hole in the center of their back and inserted screw eyes from the hardware store.
DIY Neon Animal Garland - Erin Loechner
Stringing the garland is a piece of cake, as well – simply route the twine through each hanger and tie to secure (just to keep your dinos from sliding to the center after the garland is hung). I chose to use a natural twine to balance all of that crazy color so the look isn’t far too shocking to match the rest of my office. Luckily, the garland fits right in!

Saturday, October 27, 2012

DIY: FallBook Page Paper Wreath

Design, Dining + Diapers blog has a step-by-step tutorial on how to make these wonderfully gorgeous book page paper fans and put them together into a wreath.  You probably have most of these supplies already in your house! 
book page wreath, diy, fall wreath, paper projects
I started out by cutting a circle out of an old box we had laying around and then covered it with book pages to create the base for the wreath.
book page wreath, diy wreath, paper projects
Then, I made these accordion style flowers out of book pages (each flower has 3 small accordion pieces) and layered the flowers until they covered the entire wreath. I love how layering the flowers gave it some depth.
After the wreath was complete I accessorized it with some old buttons that my grandma recently gave me.
After trying out the wreath in several rooms in the house, I finally found it a home on a shelf in our family room! I’ve been all about big pops of bold color lately so I added some ribbon to top it off. The colors might not be for everyone but it works in this space.

Friday, October 26, 2012

DIY: Pinhole Cards

The Proper Pinwheel has a great idea for homemade cards.  If you love to add your own personal touch to the cards you give people, this idea is just perfect for you!  You could even jazz up a store card with this method!  

Check out their blog for more paper crafting diy!
When I think back, most of my favorite crafts were learned in grade school. Using crayons over watercolor, making art from paper towels, and nap time. Those are some of my fave elementary memories. One of the best skills I learned (and I still use it to this day!), is pricking paper with a pin and creating stationery. So fun. And so easy!
Pinhole stationary has to be one of the best ways to dress up some regular old paper. The font choices are endless, and you can make it as big or as small as you want! Read below for the refresher!
To make your own you’ll need:
  1. cardstock in assorted colors
  2. scissors
  3. tape
  4. safety pin
  5. mirrored image or text
To mirror your text, copy from Word and paste into Paint. Right-click ”Image” and select “Rotate or Flip” and flip yo’ message horizontally. Easy as pie, I tell you. Tape the words to the inside of your card and start pricking with a pin. Outline the text with the pin. Don’t poke holes all over the place. It’s not as pretty looking. Trust me.
Watch some TV while you poke all of the little holes. I did this while watching The Graduate. I don’t know why I thought I would like that movie. I clearly didn’t remember how strange it was. Finish pricking/poking, remove the tape and paper, and…
Bada-bing.
Play around with a few fonts and see what you like! They look pretty cool when held up to the light.