Tuesday, January 29, 2013

DIY: Wood and Felt Arrows

"Today's Assignment: Be Inspired" is a wonderful blog with tons and tons of fun ideas.  We especially love these arrow that could make for a stunning center piece or hanging mobile!

Here’s a sweet little project that your little crafters can make for Valentine’s Day.
Make some simple Valentine Cupid’s arrows out of items on hand like twigs and felt. Use craft glue to adhere the felt arrow heads and feathers to the twig. 

Add Baker's Twine or even attach a sweet message. For little crafters who are too young for twigs, you can use straws instead of twigs.

Monday, January 28, 2013

DIY: Plantable Paper

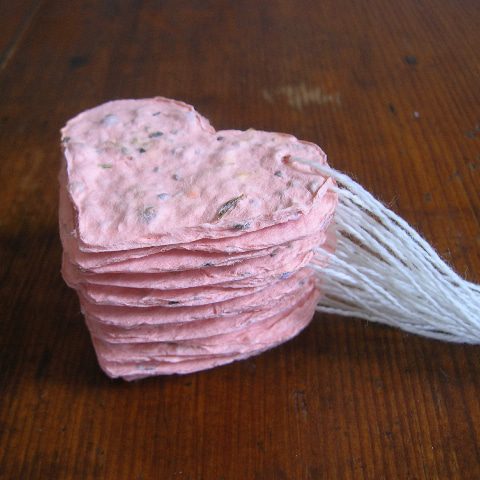
Hill City Bride has a wonderful DIY that incorporates plantable paper and Valentine's Day tags / cards!  We love the eco-friendliness of this idea and also how adorable these little hearts are - so head on over to their blog for more!!
To make your paper, gather everything you will need: a blender, a packet of seeds, a heart-shaped cookie cutter, paper scraps and a mold. A mold is a piece of professional papermaking equipment: a screen is pulled very taught across a wooden frame. You can make your own with an old picture frame without the glass and some screen from the hardware store (you can find directions on the internet) or you can buy them through papermaking suppliers. A mold must have a very tight screen so that there are no sags where water might puddle and create uneven thickness in your handmade paper.
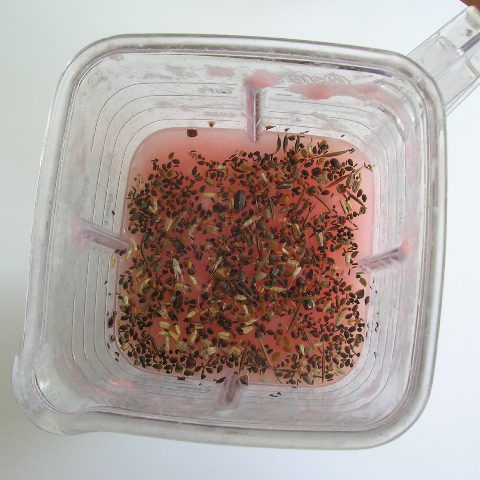
Begin by tearing your paper scraps into small pieces. Make sure to remove any staples, plastic windows from envelopes and any other non-paper materials. Soak them briefly in water to soften the paper so that your blender motor doesn’t have to work too hard. (Make sure to use a blender that is dedicated to papermaking. Because paper is made with chemicals, you will want to buy an inexpensive blender at a yard sale that will never be used for food preparation.) Toss the scraps into a blender with some water and pulverize. You can make a fine pulp or keep the paper in smaller chunks. Once you are happy with the consistency, add a handful of seeds to the blender, and give it a quick pulse to blend the seeds throughout.
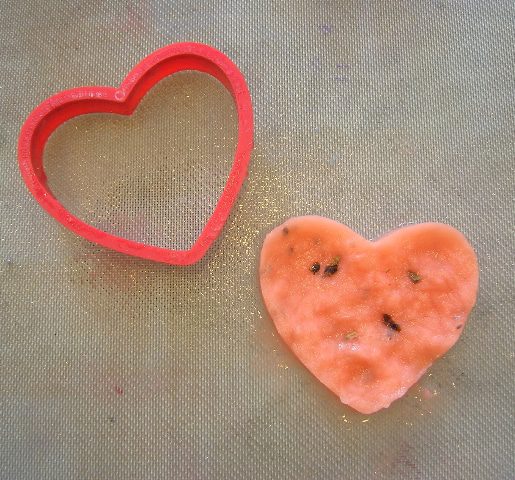
Place your cookie cutter on top of the screen, and place in a sink. Slowly pour the pulp into the cookie cutter, using your finger to push the pulp into an even layer as the water drains into the sink. When most of the water has drained off, lift the cookie cutter, move to another part of the screen and repeat. When your screen is full, place the screen in a warm place or outside in the sun until dry. As the paper dries, the individual fibers will start to lock together and get stronger. To dry the paper more quickly and make a stronger paper, put another piece of screen on top of the heart and press the water out with a sponge. Once dry, lift the paper off the screen, punch a hole in it and thread a piece of string through the hole.
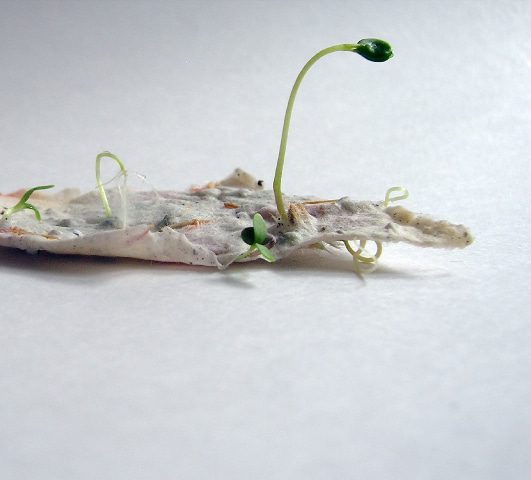
Remember to give your guests directions on how to plant their paper: place the paper into raked ground, cover with a quarter inch of soil then water and keep moist until germination, about 6 to 8 weeks. Take a look at the last photo to see seedlings popping out of some white plantable paper!
I love this idea, and the little seedlings bursting through with life convince me that this indeed is a darling little project. If you love the thought of doing something “green” for your wedding, but you do not want to tackle a project, be sure to visit Pulp Art and check out what have for your wedding day! They make place cards and rectangle hang tags in addition to the heart shaped ones featured today. Thank you again, Pulp Art, for inspiring us to make some plantable paper of our own!

Wednesday, January 16, 2013

DIY: "Love" Yarn Letters

Thanks to My Sister's Suitcase we now have a new yarn letter DIY to add to our list!  This is a great tutorial that really shows you how to go above and beyond with letter wrapping so that each side looks perfect and the yarn is going in the right directions from every view line.

Be sure to check out their blog for more fun ideas!


Thanks for all your sweet comments on my Valentine's Day Mantel! I'm back today to share my tutorial for the LOVE yarn letters I created. I had never tried wrapping anything in yarn {other than a wreath}, so I had a few trial and errors along the way :) I'm going to share the technique that ended up working the best and fastest for me.

Start with your letters... mine are 8" hollow cardboard letters. I found them at JoAnn's for $1.99 each, but I'm sure you could find something similar at any craft store. I used 3 different colors of yarn because I wanted to create an "ombre" effect, but I think they would look just as cute in one color if you have some yarn you need to use up :) {I will say, after using a pretty thin yarn I think next time I would try something a little thicker. It would take less wrapping and might give it a more textured look.}

The trick to wrapping these letters is the number of surfaces that have to be covered. You can't simply wrap in one direction and cover the front, back, and all the edges. On a few of my edges {ends of the letters} I ended up using a technique where I glued the yarn instead of wrapping. I tried both ways, and this ended up being much faster. You need to figure out which edges need the "glue" method and do those first. Here's how I did it:


1. E was the hardest letter so I figured I'd show you that one :)

2. Loop your yarn into 2" segments, then cut the loops with scissors to create several small pieces of yarn.

3. Take 6-8 pieces of yarn at a time and group them together. {Make sure your glue gun is ready!}

4. Apply a generous amount of hot glue on the edge of you letter - enough to cover the width of your 8 pieces of yarn - a little less than 1 inch. Place the yarn on the glue and press down quickly. Make sure the pieces are nice and snuggled together so you get a tightly wrapped look :)

5. Once the top has been glued down, the ends of the yarn will be sticking out. Just trim them evenly, leaving enough room to glue them down on the sides.

6. You only need to cover the edge to the point where the actual wrapping will begin. {See, I only went about 2 inches in on the top and bottom of the E.} Here's a view of the top:


Now you are going to start wrapping!


7. For the letter E, you will need to wrap each of the 3 "arms" first, in a vertical direction. Wrap each section separately, and secure the ends of the yarn on the back of the letter with a drop of hot glue {or tape, if you don't want to burn your fingers like I did!}

8. Once all 3 sections have been wrapped vertically, you will start at the top of the letter and wrap in the other direction - horizontally :) Do you like my arrows? This will cover the long section of the E, as well as the remaining exposed edges. Just make sure if you are using different colors that you switch your yarn accordingly :)

9. Finally you're done! I'm going to be honest, it probably took me at least an hour to complete each letter. I'm not exactly sure because I was working on them random times during the day and night {whenever my kids let me!} So I dragged out the process for several days before I finished :) But if you had one night to completely devote to the project, you could definitely bang it out.

Here is how I made the transition between colors to create the "ombre" effect:


Tuesday, January 15, 2013

DIY: Felt Bird Sachets

These are ridiculously cute!  We can see these being a year round craft - but why not bust them out for Valentine's Day since they are adorned with heart wings??  Check out Positively Splendid's blog for more DIY fun!


Supplies:
Bird Sachet Template {{click here to download}}
Felt in assorted colors (the brighter the better!)
Coordinating embroidery thread
Embroidery needle
Buttons
Cotton batting
Dryer sheets
To begin, print and cut out your templates and use them to cut out your felt pieces: 2 bird bodies and 1 heart wing for each sachet you are making.

Monday, January 14, 2013

DIY: Valentine's Mirror

The 36th Avenue has an adorable mirror DIY that would make for the perfect home decor and / or kid's project depending on how decorative you want to get with it!


My plan was a little bit different in the beginning since I was aiming for some type of cool frame.
This is what I used. An IKEA mirror-frame that I already had,
 DecoArt Paint, glue gun and Valentine’s plastic necklaces. 


TUTORIAL

1

The first thing I did was paint the frame in white.

{ TIP: I always use a garbage bag to protect my table,
then when I’m done I throw the craft mess away inside of it. }


2
♥♥

After a few coats of paint I added one light coat of Silver Glamour Dust from DecoArt.
I love this stuff because you get to see the white through it under the silver glitter dust.
So pretty!


While the glue gun heated up I took the time to cut a bunch of necklaces that
I found over at Big Lots. I bet the Dollar Store will have something similar.


To get the right size all I did was to put the necklaces on top
and cut it in each corner.


I ended with this…


3
♥♥♥

The last step was to glue it!
I wish the picture could show how much the silver dust actually shines…

Sunday, January 13, 2013

DIY: Valentine Sweet Bags!

She's Kinda Crafty is a way fun blog that has some cute sweet bag DIYs.  There are two fun downloads you can use from her blog as well - so be sure to go check it out!


Saturday, January 12, 2013

DIY: Valentine's Containers

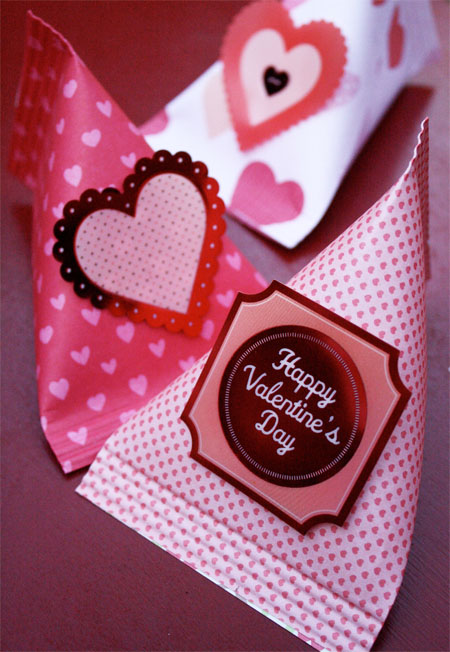
Are you having a Valentine's Day party or are you looking to give out some fun favors for a school / work / church event?  Skip to My Lou's blog has some wonderful DIY containers that are just adorable.  We walk by those paper book packs at Michael's all the time and wonder what we can do with that much holiday paper...now we know!!

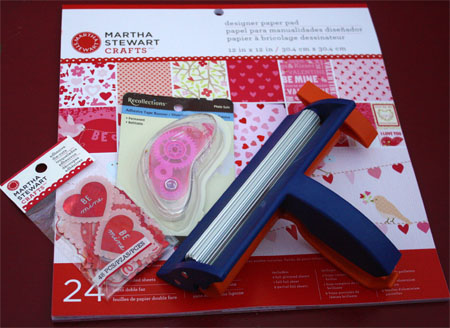
I have been making them for years, but with all the new printed papers and embellishments it is a new quick an easy craft. I found everything I needed at Michael’s Arts & Crafts. Look for heavyweight paper or cardstock {loving this pad from Martha Stewart} for these containers, cute embellishments, adhesive tape runner and a Fiskars paper crimper.
 
These containers can be made any size.  I cut paper 4.25″ X 5.5″ (roughly cutting an 8 1/2 X 11 sheet of paper in half).
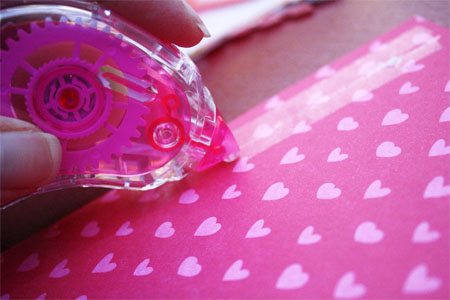
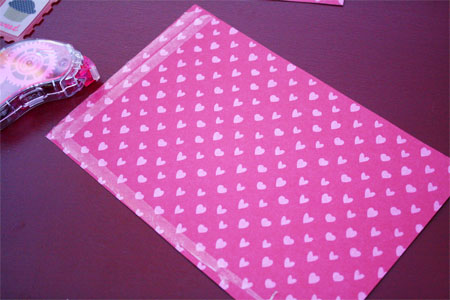
With a tape runner put two rows of tape on one edge. Glue stick or Double Sided tape can also be used. Be generous with the adhesive!
 
Put  the adhesive tape runner {my favorite} along the end and one side of the paper on the wrong side.
 
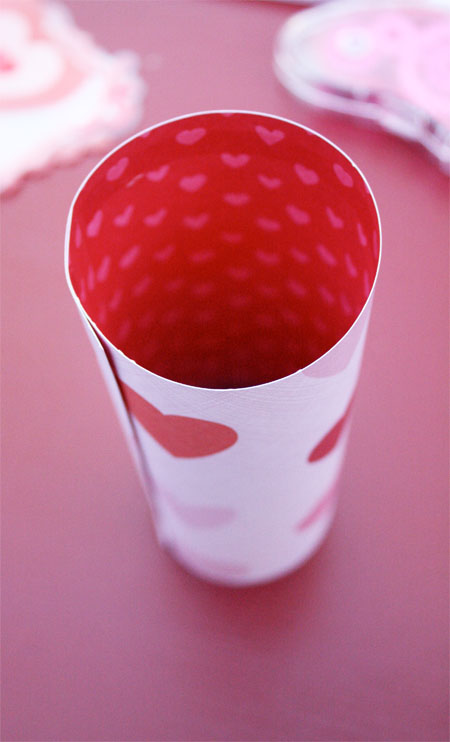
Roll paper into a tube, overlapping the edge about 1 inch.
 
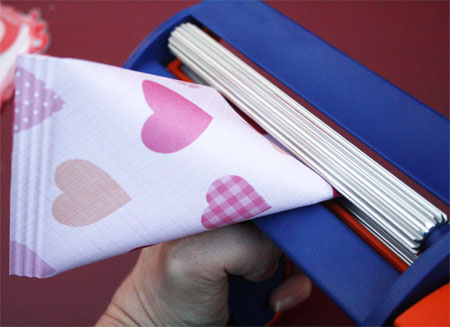
Pinch the edge with the adhesive closed. Place the closed end in the paper crimper. Turn crimper about three to four times.
 
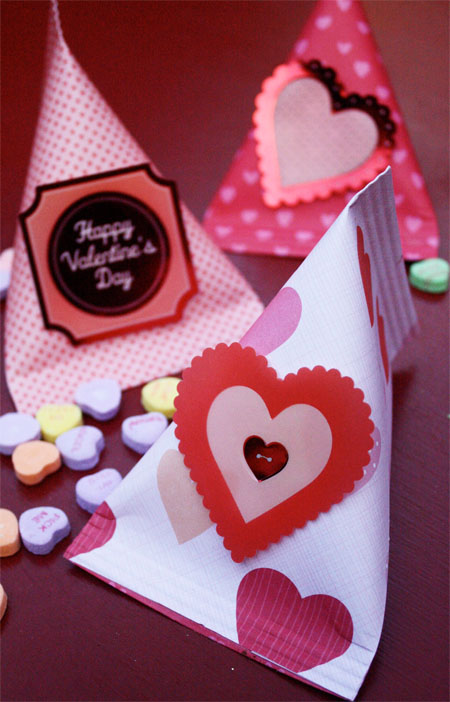
Fill container with goodies. Place adhesive on the inside edge  of the other end. Press end together in the opposite direction. Crimp close.
 
It works best if the seam is off center.
 
Attach embellishments to the containers.  These make a fun containers to hold yummy goodies for your special Valentine!