Showing posts with label ideas. Show all posts

Thursday, January 31, 2013

DIY: You've Been Bugged!

LOVE LOVE LOVE this idea from Jen's Happy Place.  I'm doing this around my office place starting Friday.  What do you guys think??  Head to her blog for more!!


I think everyone will get a kick out of putting the
sign up by their desks that says "Don't BUG me!"
That will really show off our customer service- LOL!

One of the complaints from the boo'ed game in October was that people had to do two treats (and some people went overboard with what they gave), and also we started running out of co-workers to boo. So, I thought I would get it going by bugging two people, but then after that, each person would only have to assemble one treat. Hopefully this will work out better.
Here are my treats that I will secretly place on two of my co-workers' desks today:

This is how they will look when first given . . .


The pink mailbox!

Yep, still obsessed with vinyl! I had so much fun
with the mailboxes I decorated for Christmas gifts (HERE)
that I just couldn't pass up these Target dollar section cuties!

And the classic valentine red mailbox!

I will flip if my recipients win the $1000 a week for life!

This Target sticky note pad is so cheery-
much needed in our boring office! 

And could one ever go wrong with chocolate????

Here are the mailboxes dumped out . . .

Another fun sticky notepad from Target!

Supplies:
  • Cricut Quarter Note cartridge for name lettering (welded on my Gypsy)
  • Cricut Designer's Calendar cartridge for heart
  • Cricut white indoor vinyl
  • Metal mailboxes from the dollar section of Target
  • A rolled up copy of the sheet shown above rubber-banded to mailbox flag (I forgot to add it before I took pics, but I did add valentine ribbon from Michael's and tied it in a pretty bow which covered up the rubber band-Oops!)
  • Love Bug graphic found on the internet HERE
  • GeoSlab703 XBd BT font for headings
  • Kabel Bt BT font for body text
  • DelRay font for "Happy Valentine's Day"
  • Instant lottery tickets
  • Ande's Valentine mint chocolates with sweet thoughts/messages on them
  • Lindt Lindor chocolate truffles
  • Reese's peanut butter chocolate hearts
  • Sticky note pads from Target's dollar section
Hope you enjoyed and are inspired to start something fun like this in your own workplace! Help yourself to the sheet I created. All I ask is that you credit me and leave me a comment that you used it! I would love to see your take on it! :)

I am entering this fun "party-starter" in Decorate to Celebrate's Valentine Party challenge!

Monday, January 28, 2013

DIY: Plantable Paper

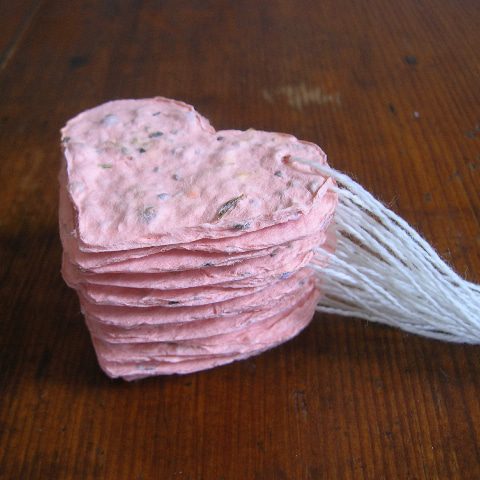
Hill City Bride has a wonderful DIY that incorporates plantable paper and Valentine's Day tags / cards!  We love the eco-friendliness of this idea and also how adorable these little hearts are - so head on over to their blog for more!!
To make your paper, gather everything you will need: a blender, a packet of seeds, a heart-shaped cookie cutter, paper scraps and a mold. A mold is a piece of professional papermaking equipment: a screen is pulled very taught across a wooden frame. You can make your own with an old picture frame without the glass and some screen from the hardware store (you can find directions on the internet) or you can buy them through papermaking suppliers. A mold must have a very tight screen so that there are no sags where water might puddle and create uneven thickness in your handmade paper.
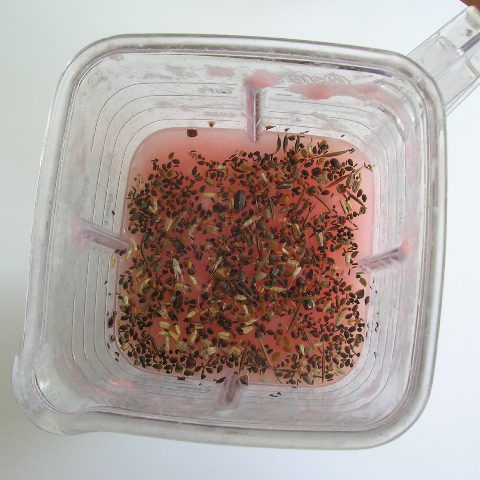
Begin by tearing your paper scraps into small pieces. Make sure to remove any staples, plastic windows from envelopes and any other non-paper materials. Soak them briefly in water to soften the paper so that your blender motor doesn’t have to work too hard. (Make sure to use a blender that is dedicated to papermaking. Because paper is made with chemicals, you will want to buy an inexpensive blender at a yard sale that will never be used for food preparation.) Toss the scraps into a blender with some water and pulverize. You can make a fine pulp or keep the paper in smaller chunks. Once you are happy with the consistency, add a handful of seeds to the blender, and give it a quick pulse to blend the seeds throughout.
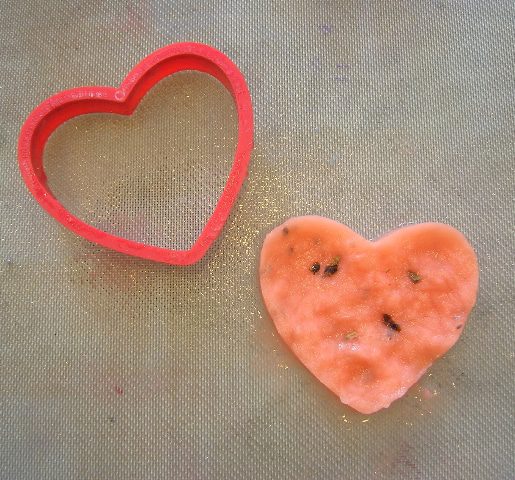
Place your cookie cutter on top of the screen, and place in a sink. Slowly pour the pulp into the cookie cutter, using your finger to push the pulp into an even layer as the water drains into the sink. When most of the water has drained off, lift the cookie cutter, move to another part of the screen and repeat. When your screen is full, place the screen in a warm place or outside in the sun until dry. As the paper dries, the individual fibers will start to lock together and get stronger. To dry the paper more quickly and make a stronger paper, put another piece of screen on top of the heart and press the water out with a sponge. Once dry, lift the paper off the screen, punch a hole in it and thread a piece of string through the hole.
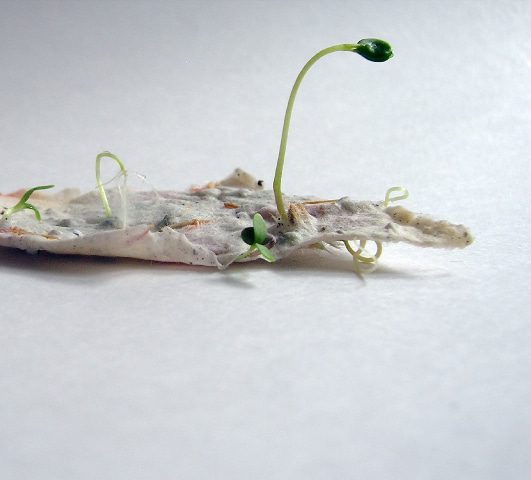
Remember to give your guests directions on how to plant their paper: place the paper into raked ground, cover with a quarter inch of soil then water and keep moist until germination, about 6 to 8 weeks. Take a look at the last photo to see seedlings popping out of some white plantable paper!
I love this idea, and the little seedlings bursting through with life convince me that this indeed is a darling little project. If you love the thought of doing something “green” for your wedding, but you do not want to tackle a project, be sure to visit Pulp Art and check out what have for your wedding day! They make place cards and rectangle hang tags in addition to the heart shaped ones featured today. Thank you again, Pulp Art, for inspiring us to make some plantable paper of our own!

Saturday, January 12, 2013

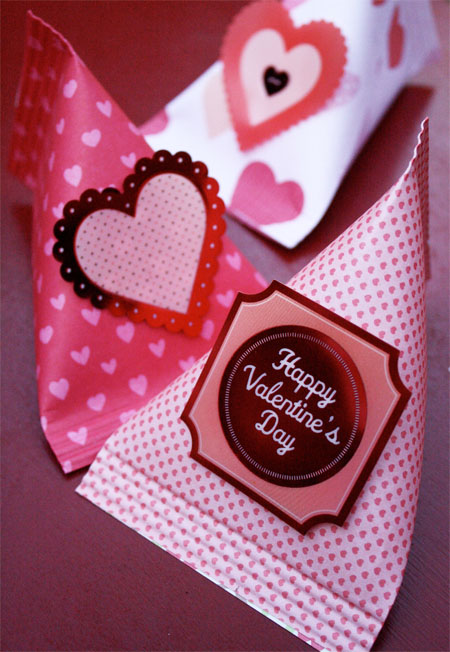
DIY: Valentine's Containers

Are you having a Valentine's Day party or are you looking to give out some fun favors for a school / work / church event?  Skip to My Lou's blog has some wonderful DIY containers that are just adorable.  We walk by those paper book packs at Michael's all the time and wonder what we can do with that much holiday paper...now we know!!

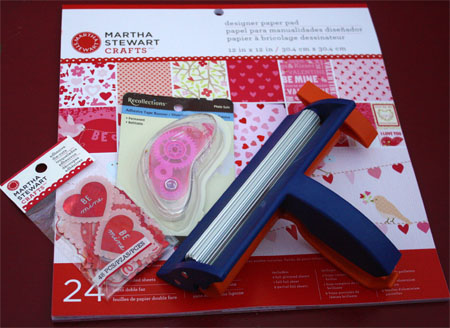
I have been making them for years, but with all the new printed papers and embellishments it is a new quick an easy craft. I found everything I needed at Michael’s Arts & Crafts. Look for heavyweight paper or cardstock {loving this pad from Martha Stewart} for these containers, cute embellishments, adhesive tape runner and a Fiskars paper crimper.
 
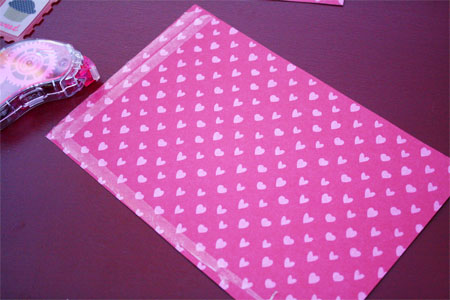
These containers can be made any size.  I cut paper 4.25″ X 5.5″ (roughly cutting an 8 1/2 X 11 sheet of paper in half).
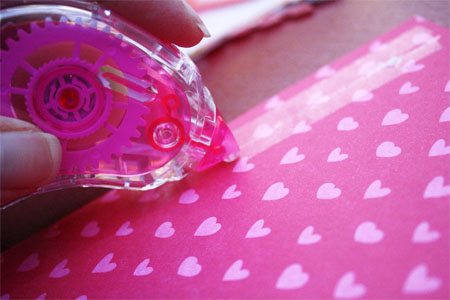
With a tape runner put two rows of tape on one edge. Glue stick or Double Sided tape can also be used. Be generous with the adhesive!
 
Put  the adhesive tape runner {my favorite} along the end and one side of the paper on the wrong side.
 
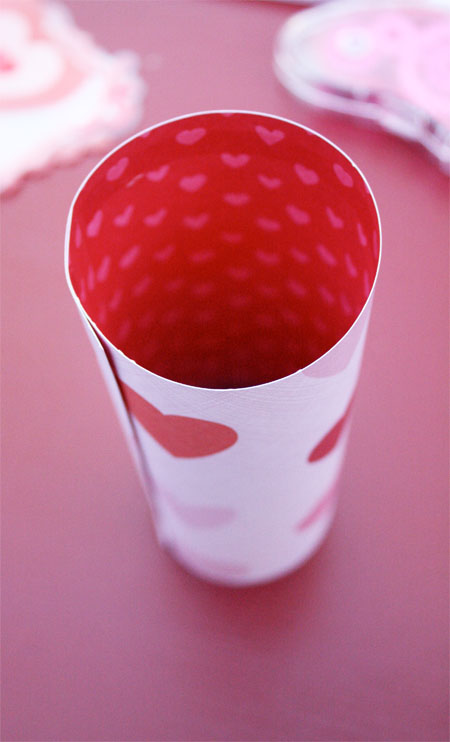
Roll paper into a tube, overlapping the edge about 1 inch.
 
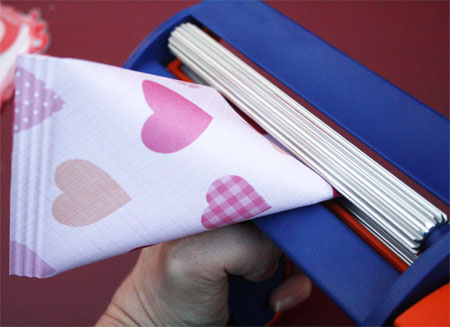
Pinch the edge with the adhesive closed. Place the closed end in the paper crimper. Turn crimper about three to four times.
 
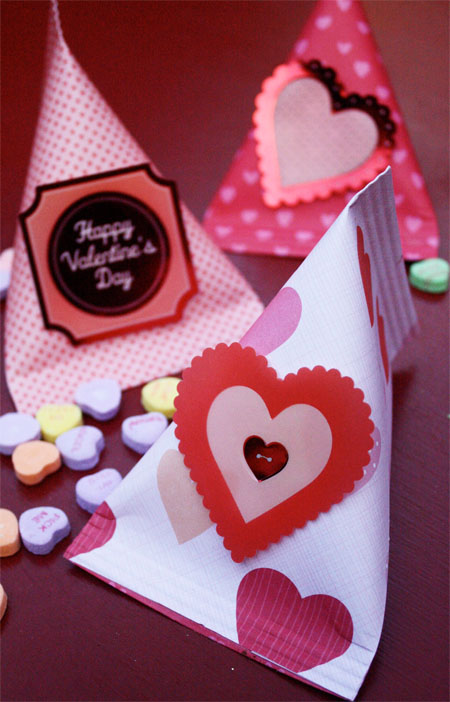
Fill container with goodies. Place adhesive on the inside edge  of the other end. Press end together in the opposite direction. Crimp close.
 
It works best if the seam is off center.
 
Attach embellishments to the containers.  These make a fun containers to hold yummy goodies for your special Valentine!

Thursday, December 27, 2012

DIY: Gold Dipped Glasses

Having a New Year's Eve party?  These gold dipped glasses would make the perfect edition to any party night!  These come to you from Momtastics' blog - so go check her out! 

alt

Supplies:

alt
Wash wine glasses thoroughly. Wrap tape around the base of the wine glass leaving the area exposed you want to paint gold. Cover the rest of the glass with paper
alt
I taped up the sides too to be extra cautious
alt
Spray from a good distance, at least 1 1/2 feet to get a nice even coat.
altDo the same with the other glasses in your set.
alt
DIY: Gold Dipped Holiday Glasses

Saturday, November 3, 2012

DIY: Embellished Resin Rings

We love Mod Podge, and are actually obsessed with Mod Podge DIYs.  We think it was made just for us since it's easy to use, quick drying, and pretty fail proof (which we have put to the test).  

Thanks to Tatertots and Jello for helping to keep our addition alive with this wonderful resin ring DIY!! 

Hey Jelloheads!  That’s totally what a follower of Jen’s is called, and I am one too.  It’s Amy from Mod Podge Rocks – your guest host today.
If you don’t know me, I blog about Mod Podge and everything that you can do with it.  I also love the color blue, garden gnomes and pugs.  In my spare time I’m writing a book (that Jen is going to be in!) and I’m training for a 1/2 marathon.  Nuts?  Maybe.  Loveable?  I hope so.
Jen has been obsessed with Mod Podge Dimensional Magic lately, and I can’t blame her.  It’s completely awesome.  I made these rings, one of my favorite (and easiest) Dimensional Magic projects, and I’m going to share with you the three step tutorial. 
YES, it’s that easy.  

T
hey are so inexpensive, you can use existing supplies that you have and they make great gifts.  Here we go.
Supply list:
Ring blanks – purchased at Michaels
Mod Podge Dimensional Magic
Martha Stewart Microbeads – shown in Peridot and Blue Topaz
Embellishments – I used Making Memories Deco Brads – Shimmer and With Love Flower Brads
Keep in mind that if you don’t have the microbeads, you can use paper – just cut it to fit and stick it down in there with Mod Podge.  Okay, so here we go.
Get some ring blanks from your local craft store.  They are pretty inexpensive.
Find a place to secure your ring blank and add a thin layer of Dimensional Magic to the bottom.  Note – never shake your Dimensional Magic bottle.  It adds bubbles.
Shake some beads into the Dimensional Magic.  Let it dry and then dump off excess beads.  If you haven’t filled the ring blank, repeat (you can layer Dimensional Magic).
Add another layer of Dimensional Magic on top of your beads and then stick in the embellishment.  Let dry in a warm place (NOT under a fan) for several hours.  You’re done!  Repeat with as many rings as possible.