She's Kinda Crafty is a way fun blog that has some cute sweet bag DIYs. There are two fun downloads you can use from her blog as well - so be sure to go check it out!
A site for all of my own DIY project successes and failures and for posting all of the amazing tutorials and projects I find as I go - while staying on a budget and keeping as much money in my pocket as possible!
Showing posts with label parties. Show all posts
Sunday, January 13, 2013
DIY: Valentine Sweet Bags!
Labels:
adults,
candy,
decor,
decoration,
DIY,
do it yourself,
dollar,
dollar store,
favor,
favor box,
favors,
kids,
parties,
party,
sweet,
sweets,
tutorial,
upcycle,
valentine,
valentine's day
Wednesday, December 12, 2012
DIY: Ornament Party!
So, now that we have done several DIY Ornament Tutorials, you can have an Ornament Party! We can't wait to get together with friends and sit at the table and make ornaments! Ring in the holidays with your own craft party.
Here is a the link to all of these fantastic DIY Ornaments below - and be sure to check out all of our DIY ornaments from earlier this month! We will definitely be doing more, but this should be more than enough inspiration to get you moving in the holiday direction.
Labels:
adult,
autumn,
budget,
christmas,
december,
decor,
decoration,
DIY,
do it yourself,
dollar store,
fall,
kids,
ornament,
ornaments,
parties,
party,
party ideas,
tree,
tutorial,
winter
Sunday, October 7, 2012
DIY: Paper Pumpkin Ornaments
Hostess with the Mostess has given us an excellent excuse to go back to the Dollar Tree to grab up some construction paper!! Not that we needed an excuse...
What do you think, aren't the cute??
***
PAPER PUMPKIN ORNAMENTS
Materials:
• 1-2 pieces of orange construction paper
• 1 piece of green construction paper
• 1 piece of brown construction paper
• scissors
• paper cutter (optional)
• paper clips and/or stapler
• string
• 1-2 pieces of orange construction paper
• 1 piece of green construction paper
• 1 piece of brown construction paper
• scissors
• paper cutter (optional)
• paper clips and/or stapler
• string
Directions:
Cut the orange pieces of construction paper into 1″ wide strips (each strip will be 1″ x 11″). Then, shorten some of the strips so that you have (1) 6″, (2) 7″, (2) 9″, and (2) 11″ long pieces.
Gather the
strips of paper together (with the ends flush) and place the smallest
one in the middle. Order them by size so that the largest strip is on
the outside. Secure with a paper clip or staple (I prefer the paper clip
so that I can keep adding more elements). Line up the opposite ends so
that they are together like the top.
Cut a brown strip of paper
1/4″ by 3″ long for the stem. To make it curl, wrap the paper around a
pencil and hold it in place while you count to 20 (or sing the ABC
song).
Cut out two leaf shapes from the green paper (ours were sort of like pairs of bunny ears).
Add the stem, leaves, and a piece of string to the paper clip at the top.
Hang up and enjoy!
Labels:
autumn,
decor,
decoration,
DIY,
do it yourself,
fall,
halloween,
halloween crafts,
home,
home decor,
homemade,
kids,
paper,
parties,
party,
pumpkin,
pumpkins,
thanksgiving,
tutorial
Friday, October 5, 2012
DIY: Halloween Party Favor Bag from Coffee Filters
Savvy n Sassy has a great upcycle tutorial for coffee filters. These Halloween bags are just adorable, and are definitely party worthy ideas!
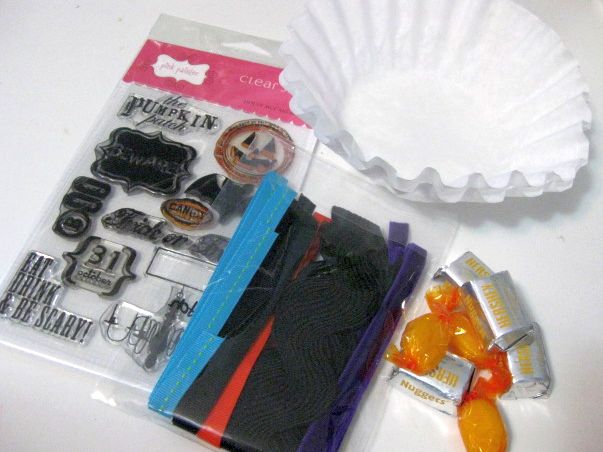
You will need: a coffee filter, some Halloween stamps, ink, ribbon and some sweet treats!
First step, stamp one side of your coffee filter.
Then, flip it over (wrong side up), and
add in your sweet treats. I chose to wrap my treats in some Halloween
paper, but that’s up to you!
Wrap up your treats, and tie with some ribbon. All done!!
Labels:
coffee filters,
DIY,
do it yourself,
favor,
favors,
halloween,
halloween crafts,
holiday,
holidays,
kids,
parties,
party,
party budget,
party ideas,
skull,
skulls
Monday, September 24, 2012
DIY: Glittered Pumpkin Place Card Holder
Infarrantly Creative's blog has stunning DIY Glittered Pumpkin Place Card Holders that would be ideal for any Halloween party! Or we think it'd be super simple to just leave off the place card holder portion and have a snazzy glittered pumpkin!
Supplies:
Styrfoam pumpkins
Hole saw and drill
Spray primer
Krylon’s Glitter Blast Spray Paint
Krylon Clear Spray
Votive candle
Tea light candles
Brad or Thumbtack
I purchased two different size pumpkins from Dollar Tree. I used my
hole saw bit (the size of the tea light candles) attached to my
cordless drill to make a hole in the top of the mini pumpkins. Using a
knife I scraped out the excess Styrofoam to create a nice even hole for
the tea light to fit in. Then I spray primed the pumpkins and then used
the Glitter Blast spray all over them. I let them dry and then I
sprayed a clear coat over the top of them. You can seriously rub your
hand all over it now and not a sparkle will come off.
Next I printed out the guest’s name on cardstock and cut it to size.
Then I stuck a scrapbook brad or thumbtack into the pumpkin to hold it
in place.
I also used the larger pumpkin with a votive (drilling with the same
hole saw bit) thinking it would make a nice fall centerpiece.
Look at the depth of color in this. It has lots of golds, orange and brown flecks in it. So rich and beautiful!
Labels:
budget,
cheap,
DIY,
do it yourself,
dollar store,
easy,
halloween,
halloween crafts,
holiday,
holidays,
parties,
party,
party ideas,
pumpkin,
pumpkins,
whimsical
Sunday, September 9, 2012
DIY: Dollar Store Party Hat Makeovers
So, in keeping with our theme from yesterday - we are showcasing this tutorial that is brought to you by "From Marriage to Motherhood." These party hats are so cute and really can be made into just about any theme for any party. We can see so many uses for these it's overwhelming really...
And turned them into these....
Super easy to do.
IF YOU WOULD LIKE TO MAKE THEM, HERE ARE THE STEPS:
Find and purchase some pretty scrapbook paper patterns. I purchased mine at Hobby Lobby....


...for $ .59 cents per sheet {for the large sheets}.

Take
a part ONE of your party hats. Choose the paper that you'd like to
cover up the hat with. Have a pair of scissors and a pen {or pencil}
handy....

Using your pen or pencil, trace the hat {I did not include the tab in my tracing}...


Cut out the outline and then you will have this....

I
use this first cut out as my template and place three sheets of paper
behind it at a time and cut out more "party hat coverings" until I have
all that I need. I save this first cut out to cover up my last hat.
Roll the paper cut out around the hat to create its new pretty covering....

I use clear tape secure the pretty paper to the party hat {you can also use double sided tape or craft glue}....
Back of the hat

If
you want to fancy up your party hats even more like I did, you can
purchase a pack of pom-pom's. I got mine at Hobby Lobby {just $ .99
cents for a pack of 24 in pink, 1" - or a pack of 36, 3/4"}. I bought
two different sizes because I didn't know which size would look best on
the hats. I preferred the larger ones so I used pink and love how they
turned out!
Labels:
beginner,
birthday,
custom,
customized,
DIY,
do it yourself,
easy,
kids,
parties,
party,
party budget,
party ideas,
party on a budget,
recycle,
upcycle
Thursday, August 16, 2012
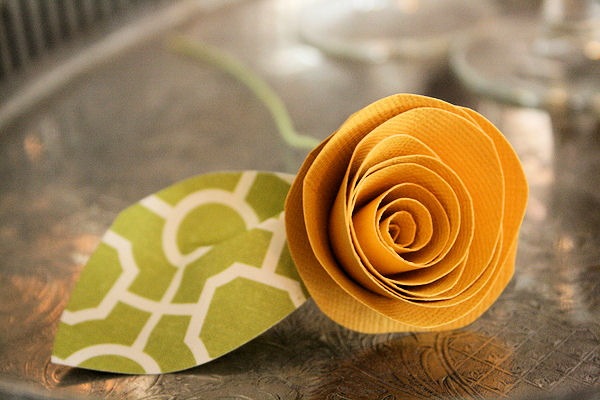
DIY: Rolled Paper Flowers
We admit it - we are in love with paper flowers. We want so badly to try our hand at this one, but just haven't had the time with all of our other projects!! We will get on this one though after being so inspired by Jones Design Company's blog, we feel that we just might die if we don't try this since they make it look so simple...what do you think??
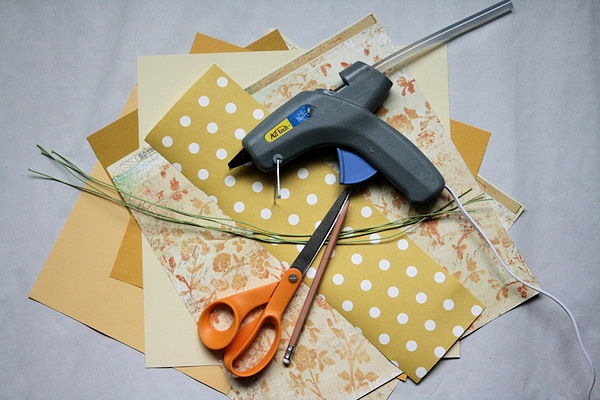
Here’s what you’ll need:
:: paper {either cover or text weight}
:: florist wire
:: scissors, pencil, glue gun
STEP ONE: cut irregular circle
This circle is approximately 8 inches, but you can do any size you wish.
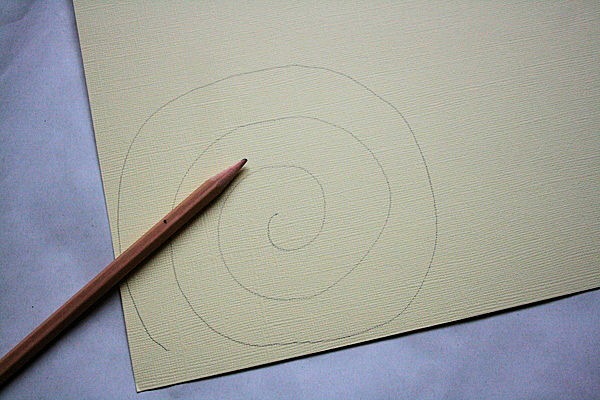
STEP TWO: cut spiral
Start at the outside edge and cut in a spiral fashion to the center.
I like a sort of bumpy shape so that the petals end up a bit irregular
If you aren’t so sure about your cutting skills, feel
free to draw your spiral before cutting. I did this one with a straight
edge, but you could make it bumpy as well.
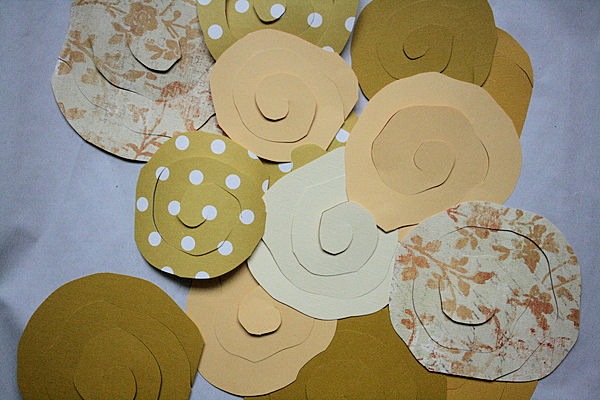
To add a little interest to my bouquet, I used a variety of yellow scrapbook papers {my favorite is that yellow dot}
STEP THREE: roll your blossom
start at the outside edge and coil tightly
Continue rolling until you get to the center. You’ll have a tightly coiled rosette.
STEP FOUR: release coil
And your flower grows.
STEP FIVE: glue together
Add a glob of glue to the center and press to adhere the coiled paper
TO MAKE A LEAF:
cut a leaf shape out of green paper
Fold in an accordion-style fold
and adhere with a dab of hot glue.
TO ADD A WIRE STEM:
Cut a piece of floral wire to desired size {mine are about 6 inches} and bend a small piece at a 90 angle.
Glue wire to the bottom of the flower.
Then attach the leaf to cover the wire.
When grouped together, you have a very sweet bouquet of wilt-less blossoms.
I also tried these with sheet music.
And attached to a wreath form covered in linen.
Aren’t those the cutest paper rosettes? Start rolling …
Labels:
accessories,
accessory,
birthday,
budget,
decor,
flower,
flowers,
gift,
home,
home decor,
homemade,
inexpensive,
paper,
paper crafts,
parties,
party,
rose,
tutorial,
wedding,
wedding decor
Subscribe to:
Posts (Atom)