Showing posts with label rose. Show all posts

Sunday, November 4, 2012

DIY: Chrysanthemum Paper Flowers

Cherished Bliss' blog tutorial on chrysanthemum paper flowers that we plan to try the minute we get home.  We love paper flowers in every variety.  Just think - you can make them whatever color / pattern you want, you can change them anytime, and they never die!  We love making them out of recycled paper as well!
Paper Flower Tutorial
Don’t you just love these colors? This is pretty easy to make. Your kids might even love to make this with you, it’s pretty easy!
chrysanthemum Flower tutorial
{What you need}
- 2 pieces of scrapbook paper
- scissors
- glue
- paper circle cut out
{Steps}

chrysanthemum collage steps
one. cut out a bunch of strips I started with the bottom yellow layer of strips at 3 1/2” x 1/2” but this depends on the size of the flower you want. Then fold it in half and glue the ends together. The first layer of pink strips are 3” long and the inner pink strips are 2 1/2” long.
two. Start gluing your paper strips around your paper circle cut out. Mine was approx. 1 1/2” in diameter.
three. Keep going around with your different layers by filling the next layer in the spaces of the previous layer. I did two layers of the yellow, two layers of the pink, and then I filled in a few gaps with the pink in a 3rd layer of the pink (but this is only necessary if you fill you have a few gaps).
four. Add your center. For my center I took another 1 1/2” circle and cut it into a spiral then wrapped it around tight and glued it down in the center. You could also add buttons, rhinestone, or whatever suits your project
There you have it. A beautiful paper flower for embellishing all kind of projects!
Flower Close Up chrysanthemum
chrysanthemum paper flower
chrysanthemum paper flower 2

Saturday, September 15, 2012

DIY: Foam Rose Flowers

Brought to you from Paper, Plate, and Plane's blog, these foam rose flowers are stunning but super simple.  We totally see the plethora of options to apply these to - we hope that you do!
You have probably made paper roses before by cutting and rolling spirals of paper.  This applies the very same technique, however, I’ve added the petal details by employing a simple tool that many of us have stowed in our crafting bins — scalloped scissors.
You will need: scallop-blade scissors, hot glue gun with glue sticks, and thin foam sheets.  I purchased a multi-colored package of 36 – 4″x6″ foam sheets from the dollar store.  They quality is much thinner than what you would find at the craft stores, however, they are the perfect thickness for this purpose.  The thinner the foam sheet, the smaller you can make your roses.
1. Cut your foam sheet into 2″x2″ squares.  A 4″x6″ foam sheet can yield six roses.
2. Using your scalloped scissors, cut each square into a spiral.  Two and a half revolutions around the spiral should be sufficient.
3. Starting from the outside of the spiral, roll the foam sheet inward.
4. Apply hot glue to the bottom of the rose.
While the glue is still hot, you can apply the rose immediately to a magnet, thumb tack, earring backing, or fashion ring.

Thursday, August 16, 2012

DIY: Rolled Paper Flowers

We admit it - we are in love with paper flowers.  We want so badly to try our hand at this one, but just haven't had the time with all of our other projects!!  We will get on this one though after being so inspired by Jones Design Company's blog, we feel that we just might die if we don't try this since they make it look so simple...what do you think??

rolled flowers
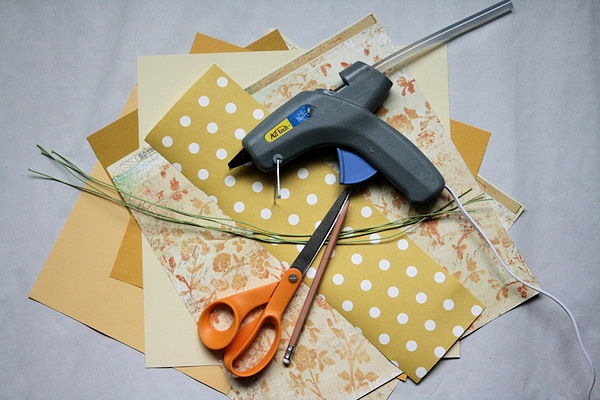
Here’s what you’ll need:
IMG_0769
:: paper {either cover or text weight}
:: florist wire
:: scissors, pencil, glue gun
STEP ONE: cut irregular circle
cut
This circle is approximately 8 inches, but you can do any size you wish.
cut 2
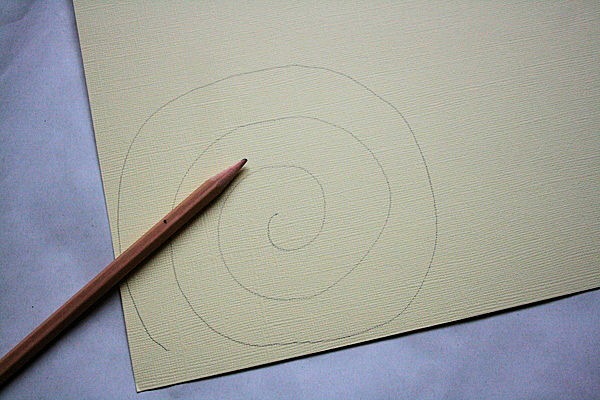
STEP TWO: cut spiral
cut spiral
Start at the outside edge and cut in a spiral fashion to the center.
spiral
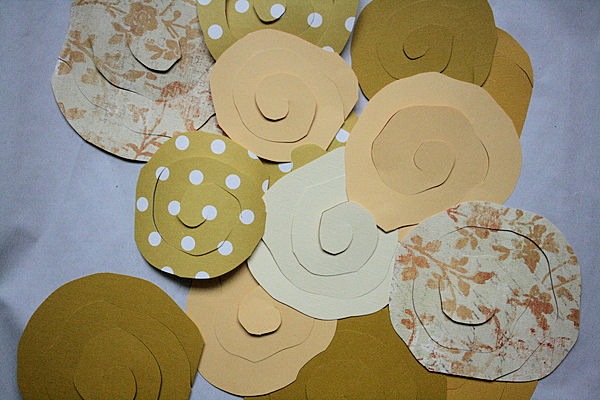
I like a sort of bumpy shape so that the petals end up a bit irregular
spiral 2
If you aren’t so sure about your cutting skills, feel free to draw your spiral before cutting. I did this one with a straight edge, but you could make it bumpy as well.
IMG_0787
To add a little interest to my bouquet, I used a variety of yellow scrapbook papers {my favorite is that yellow dot}
IMG_0800
STEP THREE: roll your blossom
start rolling
start at the outside edge and coil tightly
roll
rolling
Continue rolling until you get to the center. You’ll have a tightly coiled rosette.
rolled
STEP FOUR: release coil
open
And your flower grows.
STEP FIVE: glue together
glue
Add a glob of glue to the center and press to adhere the coiled paper
press
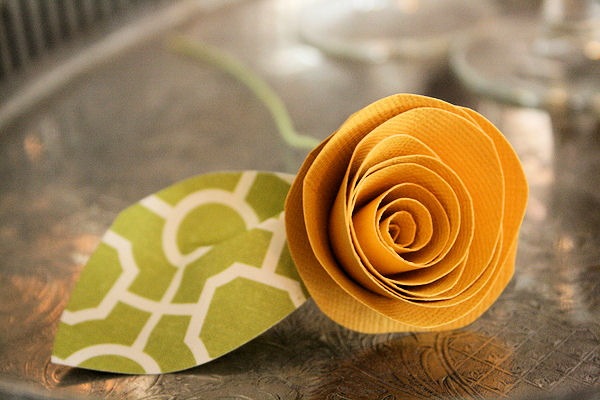
TO MAKE A LEAF:
cut a leaf shape out of green paper
leaf
Fold in an accordion-style fold
fold leaf
and adhere with a dab of hot glue.
glue leaf
TO ADD A WIRE STEM:
Cut a piece of floral wire to desired size {mine are about 6 inches} and bend a small piece at a 90 angle.
wire
Glue wire to the bottom of the flower.
glue wire
Then attach the leaf to cover the wire.
glue leaf
IMG_0845
When grouped together, you have a very sweet bouquet of wilt-less blossoms.
bouquet
flowers
sweet bouquet
I also tried these with sheet music.
sheet music
And attached to a wreath form covered in linen.
music flowers
Aren’t those the cutest paper rosettes? Start rolling …

Wednesday, August 15, 2012

DIY: Paper Flower Key Holder

Don't tell - but we may in fact be in love with Mr. Mark Montano...okay, maybe just in love with his Paper Flower Key Holder, but either way...love is in the air!  Be sure to check him out here!
 
Paper Flower Key Holder
Difficulty rating: Beginner

If you need a quick 'just because' gift for someone, this is it! It’s simple to make, couldn’t be less expensive and we can all use one. I for one am always losing my keys and this, by far, is the easiest way for me to keep track of them.
 
Here’s how:
1. Cut out a circle in the cardboard that is a bit larger than a quarter.
step2
2. Cut your wire hanger in a section that is about 10î long.
3. Bend it like you see in the photo. It should have a hook and an area where you can glue it down. Each end should have a tiny loop. The tiny loop at the top is for the nail.
step3
4. Hot glue the wire on top of the circle of cardboard.
step1
5. Cut out 6 layers of book pages in a flower pattern provided using straight edge scissors and pinking shears so that your flower has texture.
step4
6. Staple the layers together in the middle in an X (this is my big flower making secret)
step5
7. Fold up the top layer to cover the staples and continue folding up the layers to make your flower come to life.
8. Lightly spray with the Krylon Clear Coat and let dry.
9. Give it several more coats of the Krylon Clear Coat but only a little at a time. Do this until the flower is nice and sturdy.
10. Hot glue the flower on top of the wire and disk and hang it with a nail.


Thursday, August 9, 2012

DIY: Plastic Spoon Rose Jewelry

This wonderful tutorial from Cut Out + Keep shows a way to recycle / upcycle your plastic spoons.  We think that this would also be beautiful with color spoons from parties, barbecues, or other events!  Think of all the fun you can have being creative with this one.

Completed Project: Plastic Spoon Rose Picture #1

Instructions 
  1. 1
    Step 1
    You can use any colour spoon you want or you can also spray paint them afterwards.
    see picture
    - cut off the handles using scissors
    - when you have 17 (10 for outer petals, 5 for petals around the 2 in the middle)

  2. 2
    Step 2
    - Light the candle
    - Take your needle nose pliers to hold the spoon.
    - Try not to keep the spoon too close to the flame as it will cause blackening of the plastic.
    - Melt the bowl of the spoon and heat the underside.
    - let it cool down a bit but while it's still warm and bendable shape the petal by pulling the tip and bending it backwards with your fingertips.

    - You could speed the cooling down up by blowing.
    Repeat- this step for all 17 petals.

  3. 3
    Step 3
    - Beginning with the 10 outer petals take two spoons and melt what's left of the handles. Fuse placing them next to each other and smooth out the melt until the handles stick together. You could use the needle nose pliers to do this since the melted plastic is incredibly hot!
    - Repeat this 4 times so that you have 5 sets of 2 petals.
    - Now melt the handles of 2 sets and stick them together.
    - Repeat this step until you have the 3 pieces of the rose.

    This will take a while to figure out which is the right way to assemble all pieces.

  4. 4
    Step 4
    - Glue the pieces together with a glue gun or by melting the bottom side of the petals.
    - Insert the 5 petals into the 10 petals and the 2 middle petals into the 5.
    See picture.
    Now that your rose is finished melt the bottom of the rose and push it flat (I used a saucer to push it flat). Once it is flat enough melt the plastic again and push a safety pin into it and secure by laying a small piece of melted plastic over the safety pin.

    Optional:
    Pendant - hang it onto a long jewellery chain.