Showing posts with label fun. Show all posts

Thursday, January 31, 2013

DIY: You've Been Bugged!

LOVE LOVE LOVE this idea from Jen's Happy Place.  I'm doing this around my office place starting Friday.  What do you guys think??  Head to her blog for more!!


I think everyone will get a kick out of putting the
sign up by their desks that says "Don't BUG me!"
That will really show off our customer service- LOL!

One of the complaints from the boo'ed game in October was that people had to do two treats (and some people went overboard with what they gave), and also we started running out of co-workers to boo. So, I thought I would get it going by bugging two people, but then after that, each person would only have to assemble one treat. Hopefully this will work out better.
Here are my treats that I will secretly place on two of my co-workers' desks today:

This is how they will look when first given . . .


The pink mailbox!

Yep, still obsessed with vinyl! I had so much fun
with the mailboxes I decorated for Christmas gifts (HERE)
that I just couldn't pass up these Target dollar section cuties!

And the classic valentine red mailbox!

I will flip if my recipients win the $1000 a week for life!

This Target sticky note pad is so cheery-
much needed in our boring office! 

And could one ever go wrong with chocolate????

Here are the mailboxes dumped out . . .

Another fun sticky notepad from Target!

Supplies:
  • Cricut Quarter Note cartridge for name lettering (welded on my Gypsy)
  • Cricut Designer's Calendar cartridge for heart
  • Cricut white indoor vinyl
  • Metal mailboxes from the dollar section of Target
  • A rolled up copy of the sheet shown above rubber-banded to mailbox flag (I forgot to add it before I took pics, but I did add valentine ribbon from Michael's and tied it in a pretty bow which covered up the rubber band-Oops!)
  • Love Bug graphic found on the internet HERE
  • GeoSlab703 XBd BT font for headings
  • Kabel Bt BT font for body text
  • DelRay font for "Happy Valentine's Day"
  • Instant lottery tickets
  • Ande's Valentine mint chocolates with sweet thoughts/messages on them
  • Lindt Lindor chocolate truffles
  • Reese's peanut butter chocolate hearts
  • Sticky note pads from Target's dollar section
Hope you enjoyed and are inspired to start something fun like this in your own workplace! Help yourself to the sheet I created. All I ask is that you credit me and leave me a comment that you used it! I would love to see your take on it! :)

I am entering this fun "party-starter" in Decorate to Celebrate's Valentine Party challenge!

Monday, October 22, 2012

DIY: Lined Paper Tee Tutorial

U Create has some amazing tutorials and DIY projects.  We highly recommend checking them out for more!  Today's highlighted tutorial is a lined paper tee.  These are so cute and would make a great gift for not just students, but teachers!
 
A little about me first . . .
 
My name is Rachel, and I blog over  Maybe Matilda. I'm from small-town New York, currently living in Utah with my soon-to-be-chiropractor husband and our soon-to-be-one-year-old son. When I'm not sweeping up Cheerios, I love sewing and crocheting for my etsy shop, and sharing what I make on my blog.
 
I think this lined paper tee is such a fun way to bring out the inner student, and possibly even encourage a little bookishness in a little one (maybe that's a stretch, but a girl can hope, right?).
 
 
It's really simple to put together, and you can easily make it in any size. And how cute would it be if you embroidered or stamped your child's name or a favorite quote onto the lines?
Here's what you'll need to make this tee:
 
a white tank, tee, or onesie
masking tape
foam brush
blue and red acrylic paint
fabric painting medium (available at craft stores--you'll find it with the paint supplies)
 
To start, place some cardboard between the front and back of the top so your paint doesn't bleed through to the back of your shirt, then place your tape in straight horizontal lines across your shirt to mark the areas where you'll paint your blue lines. I put my first strip of tape right beneath the sleeves. I spaced the tape strips about 1/4" apart from each other, but only painted in every other open space (on an adult size tee) to create a little more distance between the lines. For my little guy's onesie, I painted in the spaces between each tape strip.
 
Mix your blue paint and fabric painting medium according to the directions on the medium (usually a 2 to 1 mixture of paint to medium), and lightly sponge it between your tape strips. A little goes a long way, so try not to get too heavy-handed with your brush. (And personally, I really like the look of a lightly painted, sort of splotchy paint line!)
 
 
(You can see here that I only painted in every other open space for the adult tee. For a baby/toddler top, you can paint in each open space.)
Give it some time to dry, then carefully remove the tape. Place two long strips of tape vertically down the left side of the shirt where you'll paint your red line. Again, place the strips about 1/4" apart, and make sure they're running straight down the tee so you don't end up with a wavy line.
 
 
Mix your red paint with the fabric painting medium according to the directions on the package, and sponge it on as you did for the blue lines. Let it dry for a while and carefully remove the tape.
 
 
If you're making a baby onesie, don't forget to lift up the shoulder flap to tape and paint underneath it!
Make sure you read the directions on your fabric painting medium to find out how to finish your shirt--you'll probably need to let it air dry for 24-48 hours, then iron it to set the paint. You can just turn the shirts inside out and toss them in the washing machine, and the paint holds up just fine.
 

Monday, September 3, 2012

DIY: Snowman Garland

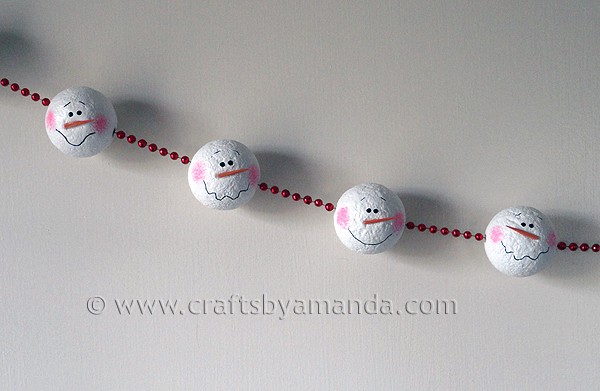
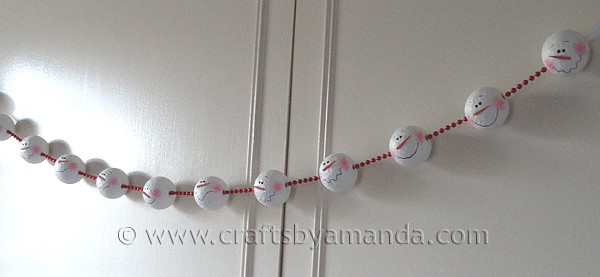
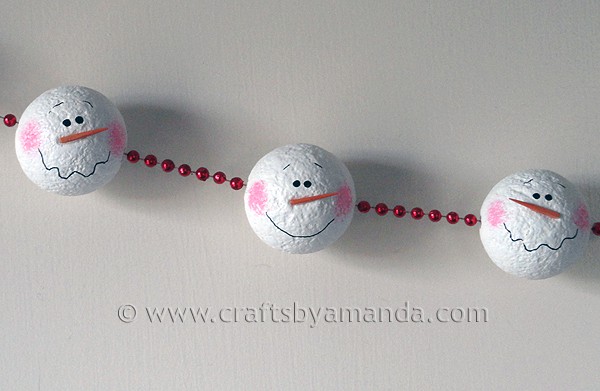
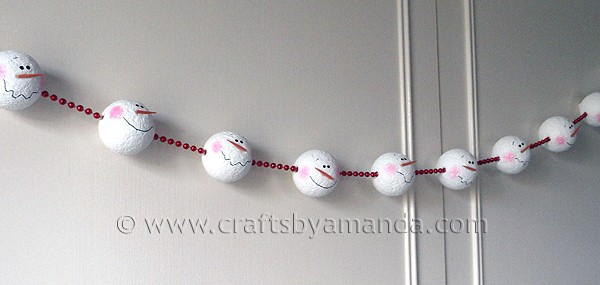
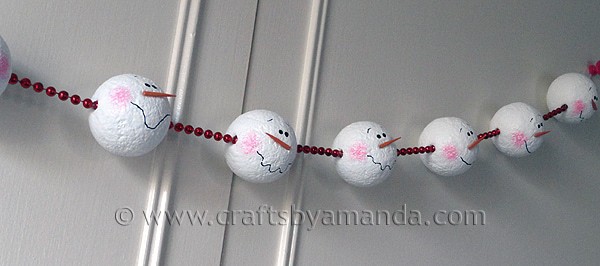
Craft by Amanda's blog has a wondrous tutorial on how to make some unbelievably adorable garland for the house or tree!  We cannot wait to make these and show them off in our office cubicle (Holiday Cubicle Decorating Contest, here we come)!

Check out her blog - she has some amazing things!
Snowman Garland

Snowman Garland
Snowman Garland 
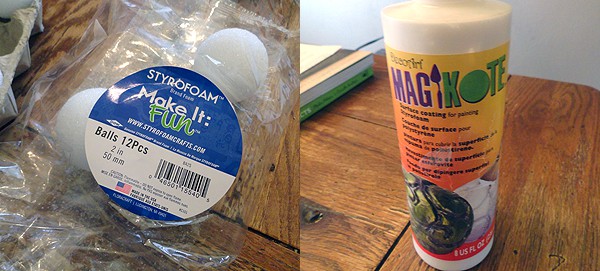
For this garland I used a bag of 2 inch Styrofoam balls and some Magikote. In case you haven’t heard of Magikote yet, it’s a product developed by Decoart that gives Styrofoam a paintable, sandable surface. I love working with these two items. 
Snowman Garland 
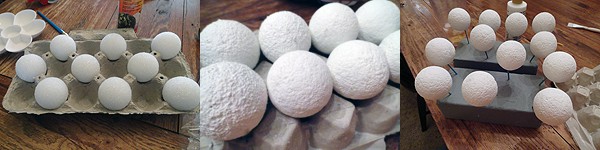
For this project, I gave each ball a good coat of Magikote. Now Magikote requires a solid 2-3 hours of drying time, so plan ahead. After the first coat I added a second. When they were dry, I sanded the balls to get rid of the rough edges. Then I inserted a toothpick into each ball (which goes right into the Magikote without cracking or anything, just like corkboard) and placed them in floral foam blocks. And that’s where they sat for about 3 weeks!
Snowman Garland 
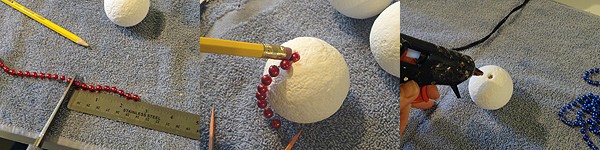
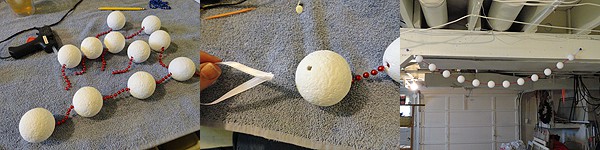
I used some red Mardi Gras beads I had sitting around. I measured them first and figured out how many sections I would need. After cutting the beads into sections, I used my thumb to press the end bead into the hole that the toothpick had been in. To coax that bugger in there more, I applied firm but gentle pressure with the eraser of a pencil. Once it was firmly inside the ball, I removed it and added some hot glue.
Snowman GarlandThen I was able to easily press the end bead back into the hole. I did this for all of the balls. When done with each individual ball, I connected them all to each other using the same method. Then I looped some ribbon and inserted them into the end heads to create the hangers. To make sure that the faces were all facing the same way, I hung the garland up temporarily.
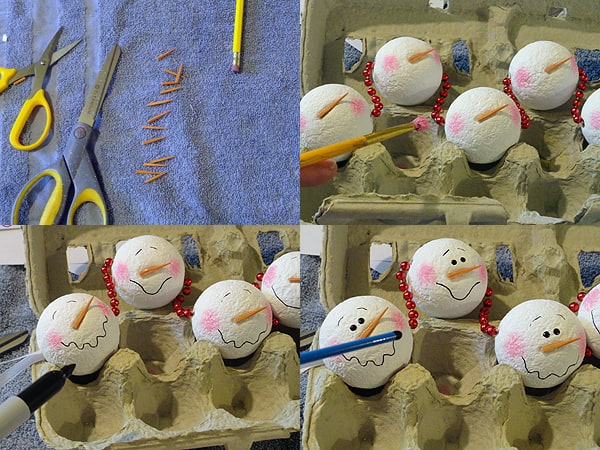
Snowman GarlandNext I cut orange toothpicks in half (I have several boxes of colored toothpicks, not sure if you can get them anymore, but you could always paint plain ones.) then trimmed them down a bit to get them to the size that I wanted. While the garland was hanging up I hot glued the noses on. Then I took the garland down to finish decorating. I applied pressure to the noses to create an indent and sink them into the ball a bit. Then I used a scruffy brush and Americana Pink Bubblegum paint to add the cheeks. I used a fine point Sharpie to add the mouths and eyebrows and the handle end of a paintbrush dipped in black paint for the eyes.
Snowman GarlandThat’s it. Once they were dry I hung it up again and sprayed two coats (dried in between) of acrylic matte sealer.
Snowman Garland

Saturday, August 25, 2012

DIY: Party Animal Necklace

These are whimsical, creative, and we adore Flamingo Toes blog for putting them together!  What do you think?  Do you love them like we do??  We must find an occasion to wear one of these bad boys...

Here is what you’ll need:
• Animals (I got these at Michael’s – and I think they are the same animals they used. They were in a tube – take your 40% off coupon)
• Beads, chain, ribbon, fabric, rhinestones, wire, etc for embellishment
• 22″ chain and closure findings for necklace
• bails (to make the animals into pendants)
• Glue (I used E-6000)
We’re going to start with the elephant so you can see what I did, then I’ll show you closeups of all of them.
The beauty of these though is that you can dress them up any way you want!
Start by gluing a rhinestone spacer to the top of the elephant’s head.
Add a colorful bead on top of that.
I think he likes his hat. :)
Cut a piece of ribbon for his blanket.
(I got this gorgeous jacquard ribbon from my lovely sponsor, The Ribbon Retreat. I have a nifty project planned with it but this little scrap made a perfect blanket piece.)
Glue to the back of the elephant.
Trim the blanket with a small piece of chain.
Add a strip of rhinestones between the blanket and the tail.
Wrap a bit of wire around each foot.
Glue a bail to the elephant’s back, towards the top.
Let everything dry thoroughly before you add your chain.
Cut a piece of chain the length you want your necklace to be (I cut mine 22″).
Feed the chain through the bail.
Add the closure pieces to the ends of the chain. I used a lobster clasp on one side and a jump ring on the other.
Now you have a super cute Party Animal Necklace!!
Here are some shots of the others so you can see how they’re dressed up.
Our zebra has a crown (lucky him!) and a fabric blanket.
Our giraffe likes rhinestones and sequins. Snazzzzy.
Our tiger is wearing a pompom collar (all the cool tigers do) and some chain around his middle. He has a flat bail, which was easy to cover with the chain.
Here’s a pic before I wrapped it.
Aren’t they fun??

Tuesday, June 26, 2012

DIY Paper Plate Basket Tutorial


The following directions are based on the craft from Martha Stewart. The tutorial on her site said to hold the basket together with a rubber band. I think that would be cute, but I love love love washi tape so I decided to use that. You can use either method, if you find another way to hold the basket together, please let me know.


1. You will need the following supplies: white paper plates (1 plate per basket), scissors, paper edger scissors (I used my pinking shears), a ruler, pencil, washi tape or rubber bands, and 4 paper clips.


2. Using the paper edger scissors or pinking shears, trim about 1/4″ off of the circumference of the plate.


3. Flip the plate over so the front side is facing down. Use the pencil and ruler to make a 9-section grid. Try your best to make the center square in the center of the plate. If you want you can measure it.


4. Use the regular scissors to cut a slit along every other vertical line. Stop cutting where the vertical line intersects with the center square.


5. Fold one side at a time up to form the “basket”. Use one paper clip to hold each side together as you assemble the basket.


6. Use washi tape and wrap it around the basket and then remove the paper clips. If you are using rubber bands, simple wrap the rubber bands around the basket. And you’re done! Now fill them up with summer treats!