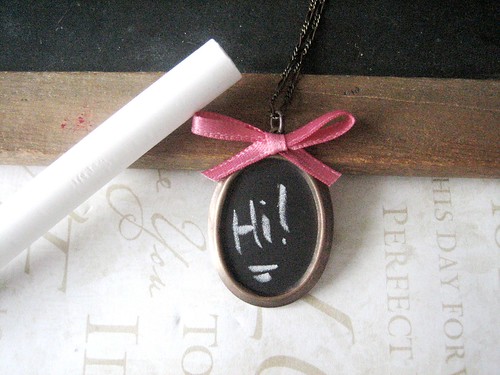
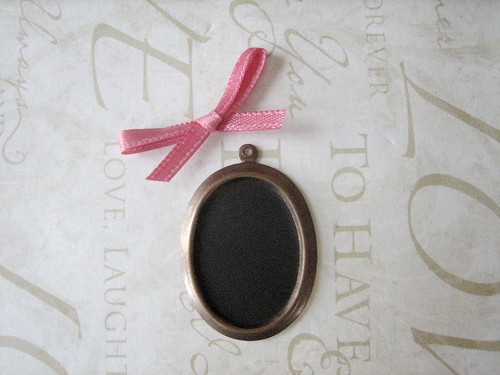
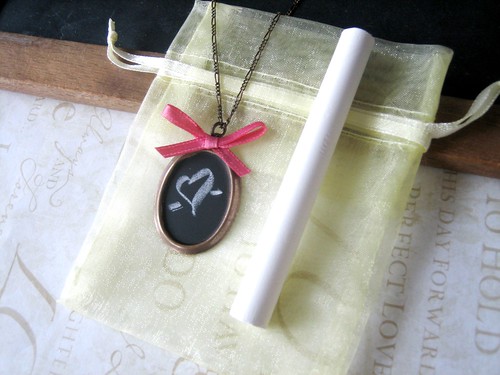
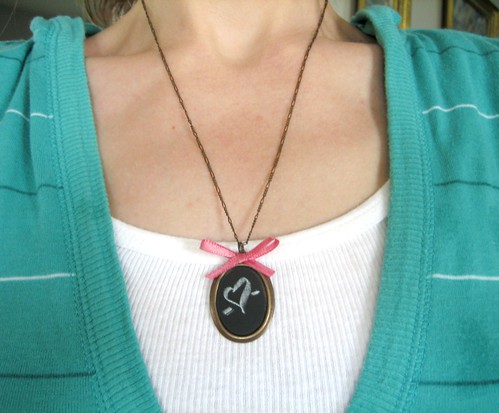
Henry Happened blog is great for easy, quick, and inexpensive DIY tutorials! We particularly like this one that shows how to make a chalkboard necklace. This is a great accessory because you can change the way it looks based on your mood!
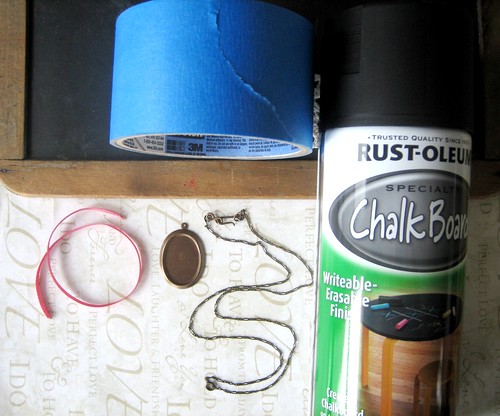
What you’ll need:
- Rust-oleum specialty Chalk Board spray
- a bezel pendant (you could find one at your local bead store or even purchase one through Etsy…this or this would do nicely)
- finished chain
- a scrap of satin ribbon
- glue (I highly recommend a tube of E6000, it is inexpensive, amazingly strong and long lasting!)
- painter’s tape
- newspaper
- basic white chalk
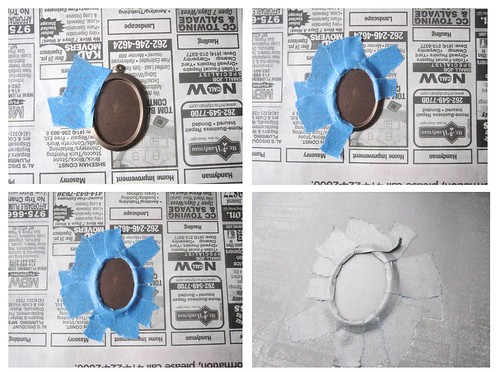
STEP 1: Using the painter’s tape,
tape your pendant down onto your newspaper being careful to cover any
areas you don’t want “chalk boarded” with the tape.
STEP 2: In a well ventilated area
(i.e. outside) apply 2-3 light coats of “Chalk Board” spray to the
exposed surface of the pendant (wait approximately 3-4 minuets between
coats). Let dry.
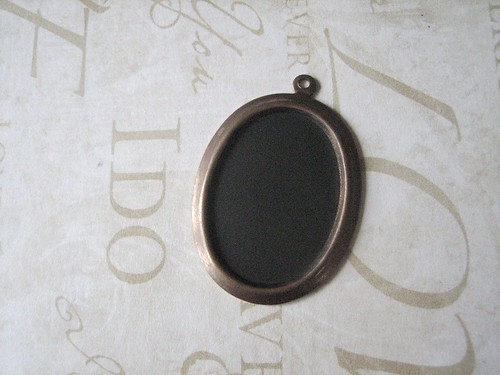
STEP 3: Once the “Chalk Board” finish
has had time to thoroughly dry (a couple of hours or so should be
suffice), carefully remove the protective painter’s tape from the
pendant.
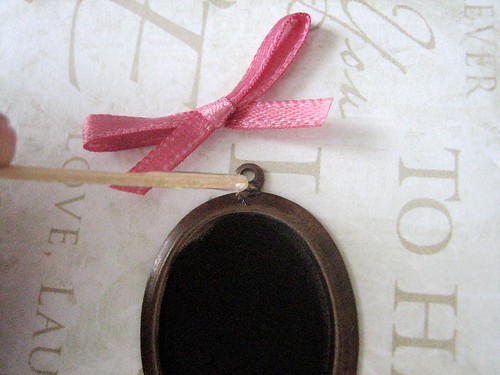
STEP 4: Tie a bow with your ribbon. Trim ends to desired length.
STEP 5: Using your glue, secure bow to top of pendant.
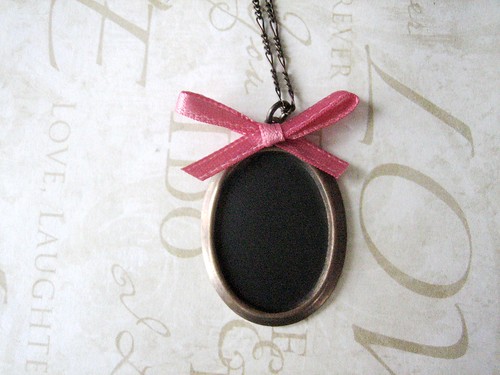
STEP 6: Attached pendant to chain.
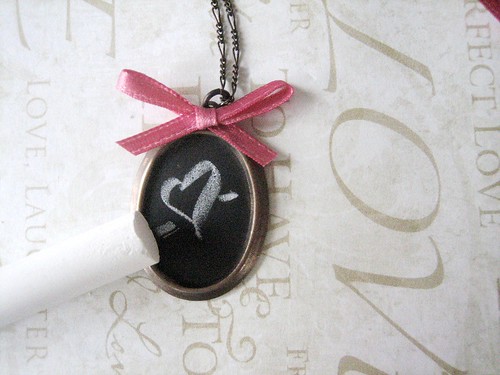
STEP 7: Using your chalk write the
message of your choice onto the pendant (using the edge of a brand new
piece of chalk will help you write small and clearly).
STEP 8: If you are giving as a gift,
place pendant and a piece of chalk into a gift bag (I chose an organza
gift bag with a bit of a shimmer in a fun, bright color).
Voila, a sweet chalkboard necklace!
This adorable DIY tutorial from How About Orange is ridiculously awesome and fun. Head to their blog for more fun crafts!!
 If
you've got paint chips sitting around begging to be made into
something, try folding them into boxes for paperclips, thumbtacks, party
favor candies, or tiny gifts. I made these from Behr swatches,
available at Home Depot.
If
you've got paint chips sitting around begging to be made into
something, try folding them into boxes for paperclips, thumbtacks, party
favor candies, or tiny gifts. I made these from Behr swatches,
available at Home Depot.
 You'll need paint swatches, double-stick tape, an X-acto knife, ruler, and cutting mat.
 For
the box bottom, cut a 1/2" strip off each of the two rounded ends of
the swatch. You should be left with a 5" x 5" square. At a point
slightly more than 1 1/2" from
one edge—about 1 17/32" if you want to be picky, but I just eyeballed
it—score a line with your knife. Repeat on the remaining three sides.
These scoring lines are shown as dashed lines above. Then cut out the
gray shaded sections. This is what the box bottom should look like:
For
the box bottom, cut a 1/2" strip off each of the two rounded ends of
the swatch. You should be left with a 5" x 5" square. At a point
slightly more than 1 1/2" from
one edge—about 1 17/32" if you want to be picky, but I just eyeballed
it—score a line with your knife. Repeat on the remaining three sides.
These scoring lines are shown as dashed lines above. Then cut out the
gray shaded sections. This is what the box bottom should look like:
 The box lid is constructed the same way. Trim a swatch down to a 3" x 3" square. At a point slightly less
than 1/2" from one edge, score a line with your knife. Repeat on the
remaining three sides and cut out the gray shaded sections.
The box lid is constructed the same way. Trim a swatch down to a 3" x 3" square. At a point slightly less
than 1/2" from one edge, score a line with your knife. Repeat on the
remaining three sides and cut out the gray shaded sections.
 Fold each sheet on the scored lines, bending flaps inward and securing them with double-stick tape.