Tuesday, January 15, 2013

DIY: Felt Bird Sachets

These are ridiculously cute!  We can see these being a year round craft - but why not bust them out for Valentine's Day since they are adorned with heart wings??  Check out Positively Splendid's blog for more DIY fun!


Supplies:
Bird Sachet Template {{click here to download}}
Felt in assorted colors (the brighter the better!)
Coordinating embroidery thread
Embroidery needle
Buttons
Cotton batting
Dryer sheets
To begin, print and cut out your templates and use them to cut out your felt pieces: 2 bird bodies and 1 heart wing for each sachet you are making.

Monday, January 14, 2013

DIY: Valentine's Mirror

The 36th Avenue has an adorable mirror DIY that would make for the perfect home decor and / or kid's project depending on how decorative you want to get with it!


My plan was a little bit different in the beginning since I was aiming for some type of cool frame.
This is what I used. An IKEA mirror-frame that I already had,
 DecoArt Paint, glue gun and Valentine’s plastic necklaces. 


TUTORIAL

1
♥

The first thing I did was paint the frame in white.

{ TIP: I always use a garbage bag to protect my table,
then when I’m done I throw the craft mess away inside of it. }


2
♥♥

After a few coats of paint I added one light coat of Silver Glamour Dust from DecoArt.
I love this stuff because you get to see the white through it under the silver glitter dust.
So pretty!


While the glue gun heated up I took the time to cut a bunch of necklaces that
I found over at Big Lots. I bet the Dollar Store will have something similar.


To get the right size all I did was to put the necklaces on top
and cut it in each corner.


I ended with this…


3
♥♥♥

The last step was to glue it!
I wish the picture could show how much the silver dust actually shines…

Sunday, January 13, 2013

DIY: Valentine Sweet Bags!

She's Kinda Crafty is a way fun blog that has some cute sweet bag DIYs.  There are two fun downloads you can use from her blog as well - so be sure to go check it out!


Saturday, January 12, 2013

DIY: Valentine's Containers

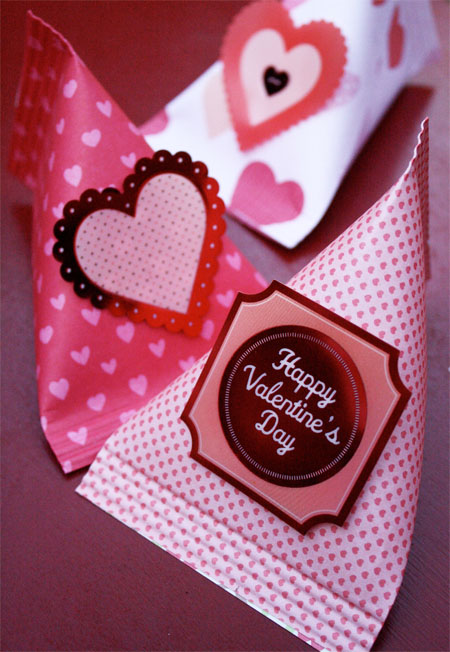
Are you having a Valentine's Day party or are you looking to give out some fun favors for a school / work / church event?  Skip to My Lou's blog has some wonderful DIY containers that are just adorable.  We walk by those paper book packs at Michael's all the time and wonder what we can do with that much holiday paper...now we know!!

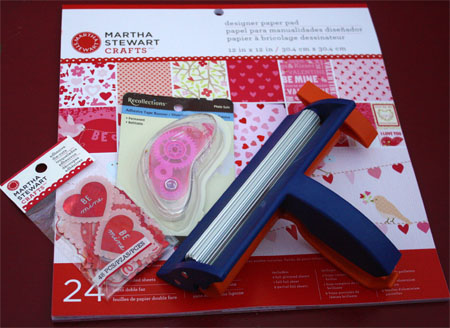
I have been making them for years, but with all the new printed papers and embellishments it is a new quick an easy craft. I found everything I needed at Michael’s Arts & Crafts. Look for heavyweight paper or cardstock {loving this pad from Martha Stewart} for these containers, cute embellishments, adhesive tape runner and a Fiskars paper crimper.
 
These containers can be made any size.  I cut paper 4.25″ X 5.5″ (roughly cutting an 8 1/2 X 11 sheet of paper in half).
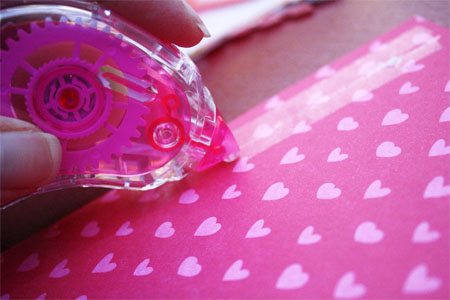
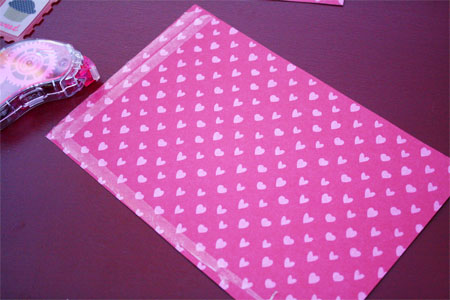
With a tape runner put two rows of tape on one edge. Glue stick or Double Sided tape can also be used. Be generous with the adhesive!
 
Put  the adhesive tape runner {my favorite} along the end and one side of the paper on the wrong side.
 
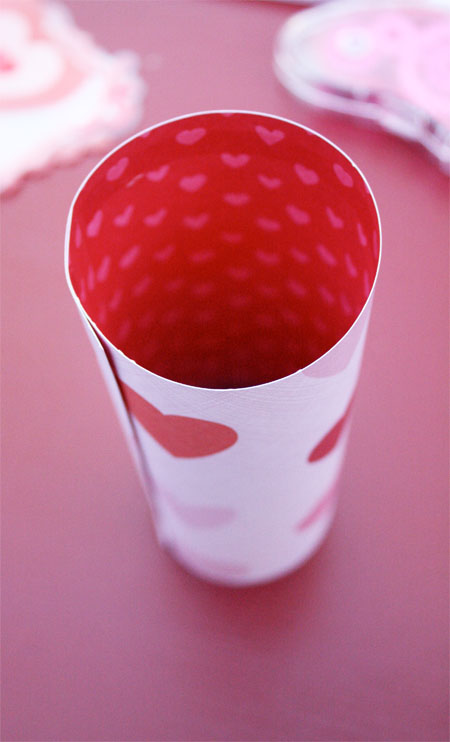
Roll paper into a tube, overlapping the edge about 1 inch.
 
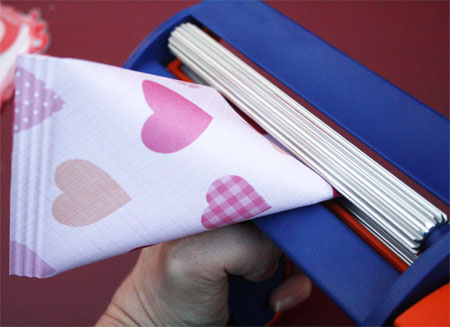
Pinch the edge with the adhesive closed. Place the closed end in the paper crimper. Turn crimper about three to four times.
 
Fill container with goodies. Place adhesive on the inside edge  of the other end. Press end together in the opposite direction. Crimp close.
 
It works best if the seam is off center.
 
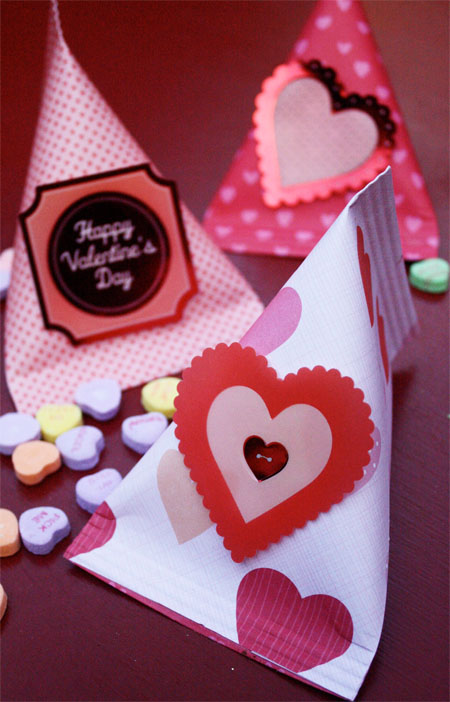
Attach embellishments to the containers.  These make a fun containers to hold yummy goodies for your special Valentine!

Friday, January 11, 2013

DIY: Valentine's Day Wrapping Paper

Thirty Handmade Days has a very fun paper design that they are sharing with the rest of us!  Head on over to their blog for some fancy pants paper!


At Christmas my genius friend Jaimee posted some beautiful wrapping paper.  I LOVED the idea and decided to make some for Valentine’s day.  I honestly ADORE the results and am working on more projects similar to this.

I made one traditional subway art type of wrapping paper.  And then I had a little fun with another sheet.  I made paper that had lyrics from what Josh and I call “Date Me” songs.  These are songs that we hear and immediately think of each other and when we were dating (14 yrs ago!).  Most of the time it’s when I’m listening to 90′s on 9.  ;) Try really hard not to laugh at the lyrics because most of them are not mushy!
Follow Me on Pinterest

Thursday, January 10, 2013

DIY: Felt Heart Garland

Oopsey Daisy is an absolutely adorable blog that helps us stay on track with our Valentine's Day themed crafts.  We are closing in with only 35 days to go until the big day filled with hearts, dinner, champagne, and stuffed animals.  Speaking of hearts - this felt heart garland couldn't be any sweeter. 


You can make your own with some scraps on hand!

Let's get started!


I started with the felt.   I secretly wanted to use all wool felt, but my frugal conscience got the best of me.  So I purchased the red and mustard wool felt, and I had the other colors on hand.  I LOVE the color scheme!  The mustard and turquoise were fun and unexpected pops of color.


Then I sat down and just started cutting out a whole lot of hearts!  I didn't use a pattern--just used the old traditional method of folding the fabric over to achieve a symmetrical heart.  I think I cut out about 90 hearts total.


It was 12:30 AM, and I couldn't thread the yearn through the needle for the life of me.  Finally I tried this trick of taping the end with masking tape. Duh!  It worked perfectly.


I knotted the end of the yarn to prevent fraying and then started stitching!


I made sure that I had plenty of excess yarn so I could sew as long of a garland as possible.  (I didn't want to have to thread that needle any more times than completely necessary!)


I wanted to be unpredictable, so I didn't repeat the colors in any certain pattern.  Crazy, I know!!


I just knotted the very end of the yarn, and started draping!

So what do you think?


Wednesday, January 9, 2013

DIY: Valentine's Day Mantel

So, it is that time of 2013 when all the stores remove any last remnants of Christmas and New Year's items and start overloading on pink and red Valentine's Day jazz!  We are getting in the spirit to with this great mantel decoration idea from My Blessed Life.

We think that this would be easily adaptable to an office / cube space if you feel like making your work spot more interesting.

We hope that you find this as inspiring as we did and gets you into the mood for pink and red EVERYWHERE!


I love the layered simplicity of how the mantel turned out.  I kept the background {old window and vintage ceiling tile} that I used for my Christmas mantel and I switched out the printer’s drawer for another one that is a bit lighter. My hubs and I dug out the V-day decor out from last year and I had a blast making it work on the mantel!


I love my DIY “Be Mine” Topiary from last year.  I also used my Ruffled Satin Heart Wreaths and little balls.


Are you tired of seeing aqua insulators in just about every mantel I decorate? Ahem. I love ‘em, so they aren’t going away anytime soon. :) My Burlap Valentine’s Wreath from last year adds a fabulous texture to the mantel. The white vases with pink tulips make me smile because they are simple and calm.


An old cigar box and salvaged piece of trim {from Southern Accents} created a perfect stand for my little white vase.  The pink leather flower is part of a boutonniere from our wedding…almost six years ago. Wow.


This yellowing, falling apart framed “art” was a gift to my husband back long before he was my husband.  It is sentimental and I love seeing it every day.  Oh, if you haven’t read our story, it’s a good one!


So pretty!