Tuesday, August 7, 2012

DIY: Upcycled TetraBox Lamp

"Demilked" has a wonderful tutorial that we are pretty sure is just this side of awesome-sauce.  We may never have the energy / time to put this one together, but we are hoping to!!  Maybe a smaller version?  What do you think??

People are so creative, no?

Monday, August 6, 2012

DIY: Felt Flower Cupcake Toppers

Soooo, we don't really need an excuse to eat cupcakes on the regular, but hey...it doesn't hurt to have an excuse anyways, right?!  It's good to know that The Proper Pinwheel shares our affinity for all things sweet.  This fantastical cupcake tutorial speaks to us in so many ways.

To make your own you’ll need:
  • Felt (9 x 11 inches)
  • Scissors
  • Hot glue gun
  • Toothpicks
Cut 3 x 9 inch strips.
Fold the strips in half lengthwise and cut (starting at the folded side!) 3/4 of the way to the edge.
Repeat the whole way down the strip.
Once it’s all cut, pull the top half to the right 1/4 inch.
Start at the right end and roll it up as tight or as loose as you would like. Use small drops of hot glue to secure it along the way.


Put a little drop of hot glue on one end of a toothpick and stick it inside the flower. Pinch the bottom tight until the glue dries, and you’re done! Stick these little flowers in the tops of your cupcakes and admire the cuteness.

Collapsible Cupcake & Cake Carrier 

Sunday, August 5, 2012

DIY: Ombre Tassel Necklace (Hand Dyed)

Oh The Lovely Things has created a tassel tutorial that took us by surprise.  This one is loveable because of not only its simplicity, but also its ability to make you go..."oooohh, pretty!"

She has taken so many wonderful pictures, that it looks like a long tutorial, but really I don't think she could have made it any easier to understand unless she was in the room with you while you were making it!  We appreciate that...


Happy Tuesday! I hope you had a lovely (long) weekend! I've been meaning to make a tassel necklace and share the tutorial here for about a month, and could never find time to do it. But it's finally here and I'm excited to share the simple how-to. I hope you'll enjoy it as much as I did!


You will need :

- White embroidery thread (100% cotton). 5 sets of 30 strands, each strand measuring 24" + 6 extra strands, each measuring about 4" + 5 extra strands, each measuring about 12"

- Scissors
- 4" long piece of cardboard (width doesn't matter)
- Dye (RIT dye is available at Joann’s or Michaels for around $2.50)
- Table salt
- A bucket of cold water
- Hot water
- Rubber gloves
- 5 small recipients, plastic or metal. If you can't find 5, one will be enough. They need to be bigger that your tassels (i.e. at least about 2" in height).
- Teaspoon or small syringe
- Chain necklace
- Needle


STEP 1 : MAKE FIVE TASSELS


1. Start with a set of 30 strands, each strand measuring 24". Wrap the thread tightly around the cardboard.


2. Gently pull the thread off the cardboard.


3. Tie the center with an extra piece of thread (about 4" long).


4. Cut the loop ends at both sides.


5. Pull down the fringe and shape your tassel.


6. Take an extra strand, about 12" long. Wrap it around your tassel (about 0.4" from the top), knot firmly and trim.


7. Trim to make the fringe on the bottom clean and straight. Notice that I haven't been very successful at that ;)


8. Cut the top thread (the one we used to tie the center at step 3).


9. Repeat all these steps to make 5 tassels. Dont' worry : once you've made the first one, you'll be able to whip a bunch out in no time.

STEP TWO : DYE THE TASSELS
If you have five recipients, you can dye your five tassels simultaneously. If you have only one recipient, just dye your tassels one by one.


1. Fill each of your recipients with about one table spoon of salt. Salt will help drive the dye onto the fabric.


2. Put your rubber gloves on, as you're going to pour the dye. If you have a syringe, you will be able to be very precise measuring the quantity of dye, but using a spoon will work very well too. I tried both and both went fine!

3. In the first recipient, pour just a few drops : about 0.5ml or 1/10 teaspoon. Pour dye in all recipients at an increasing progression, at a difference of about 0.5ml each time. The last recipient should have a quantity of dye of about half a teaspoon.

4. Now fill each recipient with hot water and wait a few seconds for the salt to dissolve in the water. 

5. Place each tassel in each recipient, starting by the last recipient (the one that contains the largest quantity of dye) making sure the tassels are fully immersed.


3. Wait just a few seconds before starting to take out the lightest shade first. Wash out the excess dye in your bucket of cold water. Then take out the next tassel, and repeat until all five have been washed out. Let them dry (mine took about 3 hours to dry).


STEP THREE : MAKE THE NECKLACE

Insert an extra piece of embroidery thread through the eye of the needle, and tie it to the chain, or the clasp of the chain. Use the needle to guide the chain through the top loop of each tassel.


You're done, enjoy your new necklace! Let me know if you have any question and I'll try my best to help you :)

Saturday, August 4, 2012

DIY: Pen Pots

You know how we feel about up-cycled, recycled, or reused items in crafting projects...we LOVE them!

This pen pot tutorial from Torie Jayne is stunningly beautiful and Eco-friendly.  So...get to it!

Pretty pen pots by Torie Jayne

Yesterday I showed you a sneak peak at how I am getting on with organizing my craft room. Today I am sharing with you the quick, easy, cheap simple idea that is...

Pretty pen pots
Tools and Materials
  • Empty tin can
  • Printed paper
  • Double sided sticky tape
  • Scissors
Pretty pen pots, How-to step by step
Making pretty pots
Wash and dry the empty tin can. Cut a piece of printed card the size of your tin can (you can use the old can label as a template). Cover the outside of the can in strips of double sided sticky tape. Remove backing from double sided tape and carefully wrap paper around can. Fill with paint brushes, pencils or pens!

Brush pot

Friday, August 3, 2012

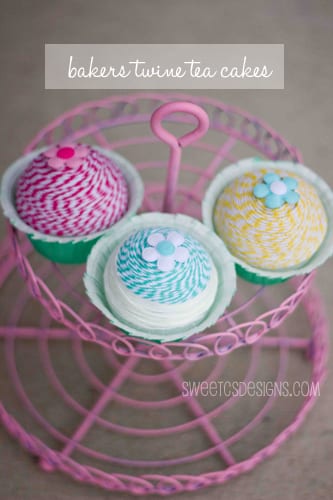
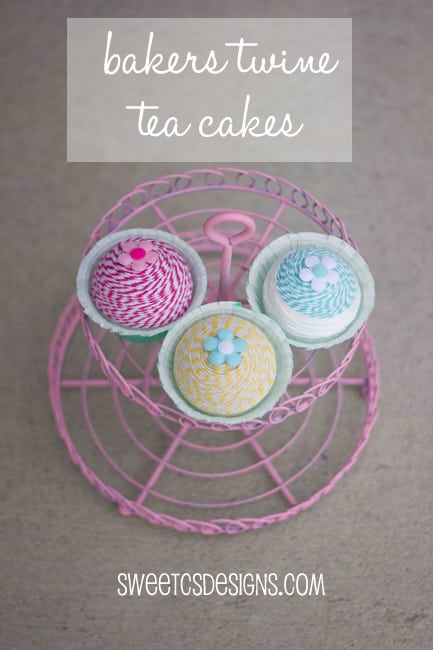
DIY: Bakers Twine Tea Cakes / Cupcakes

Okay, so I realize that this tutorial from Sweet C's Designs is meant for kids, but I want one for me!  These are so beautiful and simple who wouldn't love them??  They look like they take just a few minutes to whip up and we love things that are cute and time friendly.
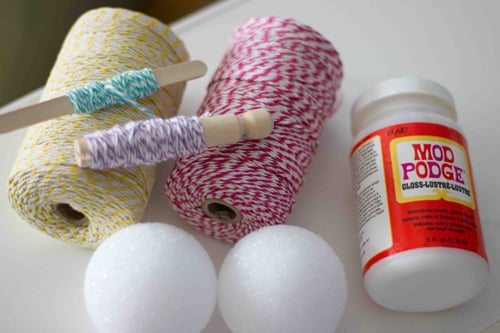
First, you’ll need Styrofoam balls, bakers twine, mod podge, appliques, and cupcake liners/cups.
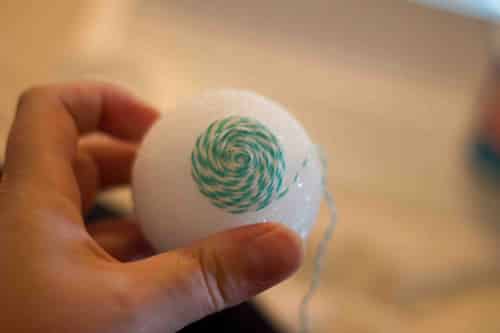
To start your cupcake’s swirl pattern, it is easiest to hold it in your hands, pinching the swirl to stay put as you build it up.
Once it is bigger than a quarter, you can glue your circle of twine to the top of your Styrofoam ball with some mod podge, and continue to wrap the twine in a circular fashion around the ball.

When you’ve wrapped the ball almost all the way down, mod podge the end of the twine to the ball, and add a healthy dollop of mod podge to the bottom of the ball.
Place in cupcake wrapper/cup and let dry.

Thursday, August 2, 2012

DIY: Tissue Paper Flowers

The Craftinomicon Blog has some amazing DIYs, including this one which shows you how to make Tissue Paper Flowers!  It basically is taking the same concept as tissue paper pom pom, but making them into smaller versions that look very flower like and would be gorgeous to change out for each season as it approaches!!  This would be a stunning centerpiece for a wedding or party...


To make these tissue paper flowers all you will need is:

Tissue paper in your desired color

A pair of scissors
Floral wire

Start by cutting your tissue paper to size. For these small flowers, I used 4 sheets of tissue paper cut to 4"x5". Stack them on top of each other, and fold like an accordion as pictured below.


Next, find the middle of your accordion folded paper (it's easiest to just fold your paper in half again, you won't see any fold lines in your finished product). Using a piece of floral wire about 6 or 7 inches long (also folded in half) secure your paper by twisting the wire around the center of your paper like so:


I find it is easiest to work with these in a variety of ways if I leave a longer wire stem. So I twist the remainder of my wire all the way down. You can cover this with floral tape later of you wish.


Now, you get to decide what kind of edge your flower petals will have. A soft, rounded edge will give you a rounder finished flower. A sharp, triangular cut, will give you something spikier, almost like a sea urchin. You can also use pinking shears or other decorative scissors before you fold your paper to get a more subtle edge. I chose a rounded edge for this tutorial.


To make poofing out your flower petals easier, I recommend fanning out your flower before you begin, like so:


Now, all you have to do is gently pull up on each layer of tissue paper and fluff as necessary to achieve a finished look. Be careful not to tear your paper, but don't worry if you get a little snag here or there. These flowers are particularly forgiving.

Continue separating and fluffing each layer of tissue until you are done. If you want a fuller flower, feel free to use more layered sheets. You can also do multiple colors. If you want the middle of your flower to be white, make sure you have a white sheet of tissue on top of your paper pile before you fold, tie etc.

Here is my finished flower:


Wednesday, August 1, 2012

DIY: Scallop Wall Art

I love my 1" circle punch and am always seeking new and fun ways to use it - so "You are my Fave"'s blog is ideal for my crafting desires!  Check out their blog and see what other DIYs you fall in love with and want to try!

DSC_0570
To make your own, you’ll need:
- thin pieces of wood
(the kind I use is called an MDF handy panel, and if you bat your eyes the men at Home Depot will cut it to whatever size you ask)
-colorful cardstock
-a circle puncher
-glue
DSC_0415
Punch lots of circles from your colorful cardstock.
DSC_0418
Then, mark your piece of wood along the edge at half the size of your circles. For example, my circles were two inches, so I made one inch marks along each side. Then connect the dots and make lines across the wood to guide you.
DSC_0420
Using your lines to guide each row, get to gluing! DSC_0422
Let each rows of circles hang on top of the row below – that creates your scallops.DSC_0526