Showing posts with label organize. Show all posts

Thursday, December 13, 2012

DIY: Embellish a Plastic Storage Container

Make and Takes blog has a great embellishing tutorial for those $1 containers you can find at most stores.  We love the idea of using all of our various ribbon pieces to make these pretty!!
Supplies for Ribbon Container:
  • Ribbon: 3 – 3ft long pieces or 1 long 9ft piece, any color
  • plastic basket with holes – mine was from the good ol’ Dollar store
Take your cut ribbon and start at the top, weaving through each hole. Make sure to leave at least 4-5 inches at the outer end to tie into a bow when it’s done. I chose to do three colors of ribbon, one for each level of holes on the container. But you can easily use one long piece of ribbon for the whole thing.
Weave the ribbon all throughout the container. Once the ribbon has gone through each hole, tie the two ends together in a bow. My son made one for his room to hold his CDs. He liked threading his green (always the color green) ribbon through the holes, making sure not to miss one.
These are easy to create and would make great gifts for anyone needing a container. I’m thinking teacher gifts!

Sunday, October 14, 2012

DIY: The Creative Crate

The Creative Crate's blog is trying to help us to stay organized and to keep our calendars on track.  We think that our New Year's resolution will be to get more organized in 2013.  How about you??

From this...
To this!!
I wanted to try to make one myself. So... I did with a $3 picture frame that I bought at a yard sale. Now it is a dry-erase calendarAll I used to make this... is a good frame with glass {not plexi-glass}...a permanent marker...ruler...and my Cricut to cut the {Month} {days of the week}{and the circles}. I drew the squares...and placed the vinyl on the opposite side of the glass than the side you will be writing on ...so they won't come off with all of the erasing. If you have a Cricut...I used the mirror feature...then your letter will stick on the back of the glass...but you will be able to read it from the front. I hope that made sense...I'm not really great about describing things...but hopefully you get the idea. Don't worry...if your squares aren't perfect. As you can tell mine aren't but it still looks ok. Also...don't be afraid of the perm. marker...if you make a mistake...use a wet paper towel and wipe...or you can spray hairspray on a paper towel and and wipe and it will come right off.
Remember to place everything backwards...on the opposite side of the glass.

Now it is a very functional...hand calendar to write on!!
If you felt like it...you could use that extra piece of cardboard that came with the frame...and put fabric or scrapbook paper on it to give it a more personalized look!

Thursday, October 11, 2012

DIY: Meal Planning Magnets

If you are someone that is way more organized than myself, you will love this tutorial from The Red Chair Blog that shows you how to upcycle those obnoxious advertisement magnets into fancy meal planning magnets for you and your family.  We love the idea of these, but we just aren't those kind of people who plan ahead.  Perhaps we could put events on these instead of food?  Things we know are coming up in that week so that we can let the other person know what's on our schedule??

Head to their blog to find the printable PDF for these!!


Materials:

  • Junk mail magnets (the best are those awful giant magnets from personal injury lawyers that are always glued to the back cover of the phone book, but any flat magnets will do: pizza delivery, dentists' offices, credit card solicitations, etc.)
  • Wide packing tape (I used the glossy kind)
  • Scissors
  • Decorative paper (I used 6 x 6 scrapbook paper)
  • Double-sided tape (optional--not pictured)
  • Computer and Printer


Instructions:
1. Start by flipping through your recipe file and listing your favorite "old standby" recipes. This tutorial will teach you how to make 35 magnets, but you can make as few as you'd like; you can always add more later.

2. Open Microsoft Word and create a table that is 5 squares wide by 7 squares high (my "squares" were each 1.25" x 1.5"). Type the name of one meal in each of the squares. Keep it simple--just name the main dish. You might also want to make several magnets that say "Left-Overs", "Dinner Out", "Take Out" and/or "New Recipe". I used a 22 point French Script MT font, and I centered the meal names in the squares.


3. Print your page, and cut out the meal names. My meal names were smaller than the outlined squares once I cut them out. This doesn't have to be perfect! And yes, if you look carefully, you'll notice that one of my meals is scrambled eggs. What can I say? I'm a lazy cook!

4. Using scissors, cut a magnet to roughly 1.5"(w) by 1.75"(h). Cut a piece of scrapbook paper to the same dimensions. If you really want to annoy your friends & family with your fastidiousness, you can color code your magnets. I used yellow for meals that are protein-based, and blue for "carby" meals such as pasta dinners; that way, I can tell at a glance if my week is balanced (I'm a vegetarian, so I need to be mindful about protein).

5. Using double-sided tape (or very good fine motor skills) to keep the layers in place, layer the magnet, scrapbook paper, and meal name.

6. "Laminate" the whole thing with packing tape. To do this, cut the tape a little bit longer than the magnet, cut off all four corners of the tape, and fold toward the back (see below). This step can be time-consuming, but it's mindless enough that it's a good while-you're-watching-a-movie project.


7. If you'd like to use my days of the week and the "What's For Dinner" header, you can download a free PDF from my website here. I'm 99% sure that this PDF is working and is scaled properly, but please let me know if you discover a problem! To "laminate" shapes with rounded edges using packing tape, use "V" shaped notches to navigate the curves.

8. Arrange the current week's magnets on the front of your fridge--keep other meal magnets on the side of the fridge for planning future weeks' meals. To further streamline your meal planning, you can make your own customized, pre-printed grocery list with the instructions that I provided here.

Saturday, October 6, 2012

DIY: Stamped Clothespins

We are gonna take a quick break from posting Halloween DIY Crafts so we can show you a great clothespin craft we found on Organize and Decorate Everything's blog!  We think these are adorable and so easy to do.

Check out their blog for more DIY!

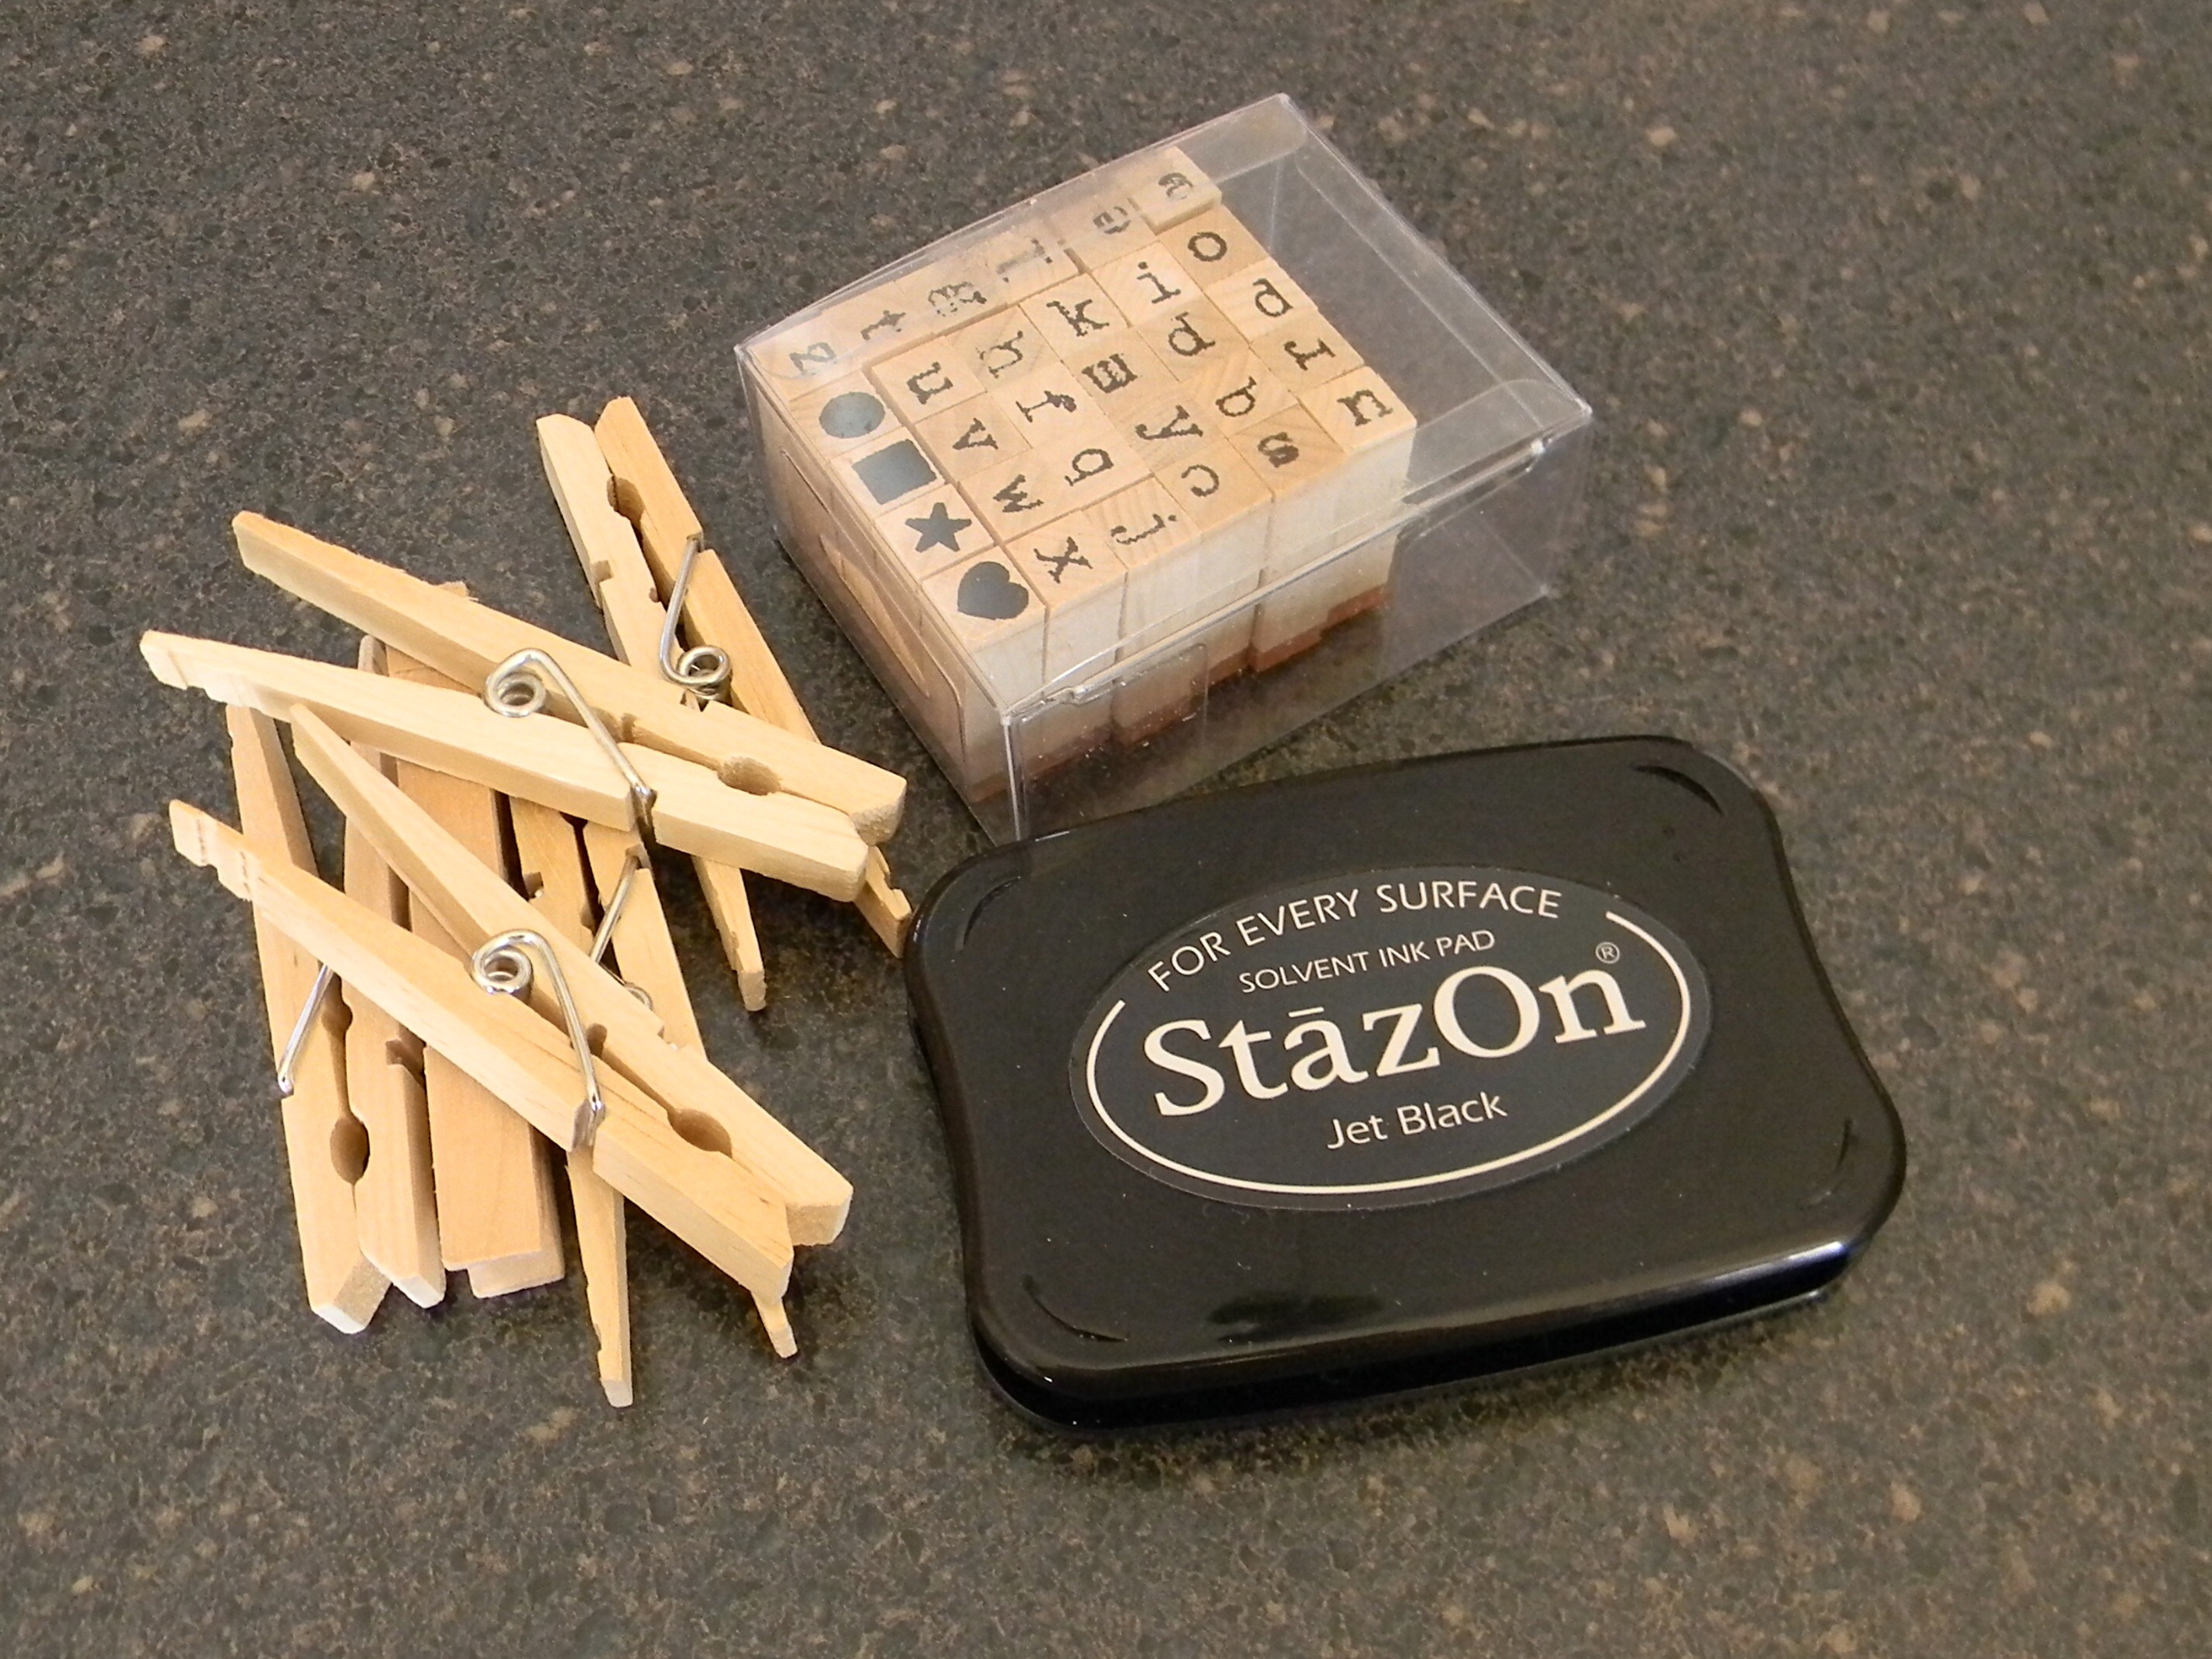
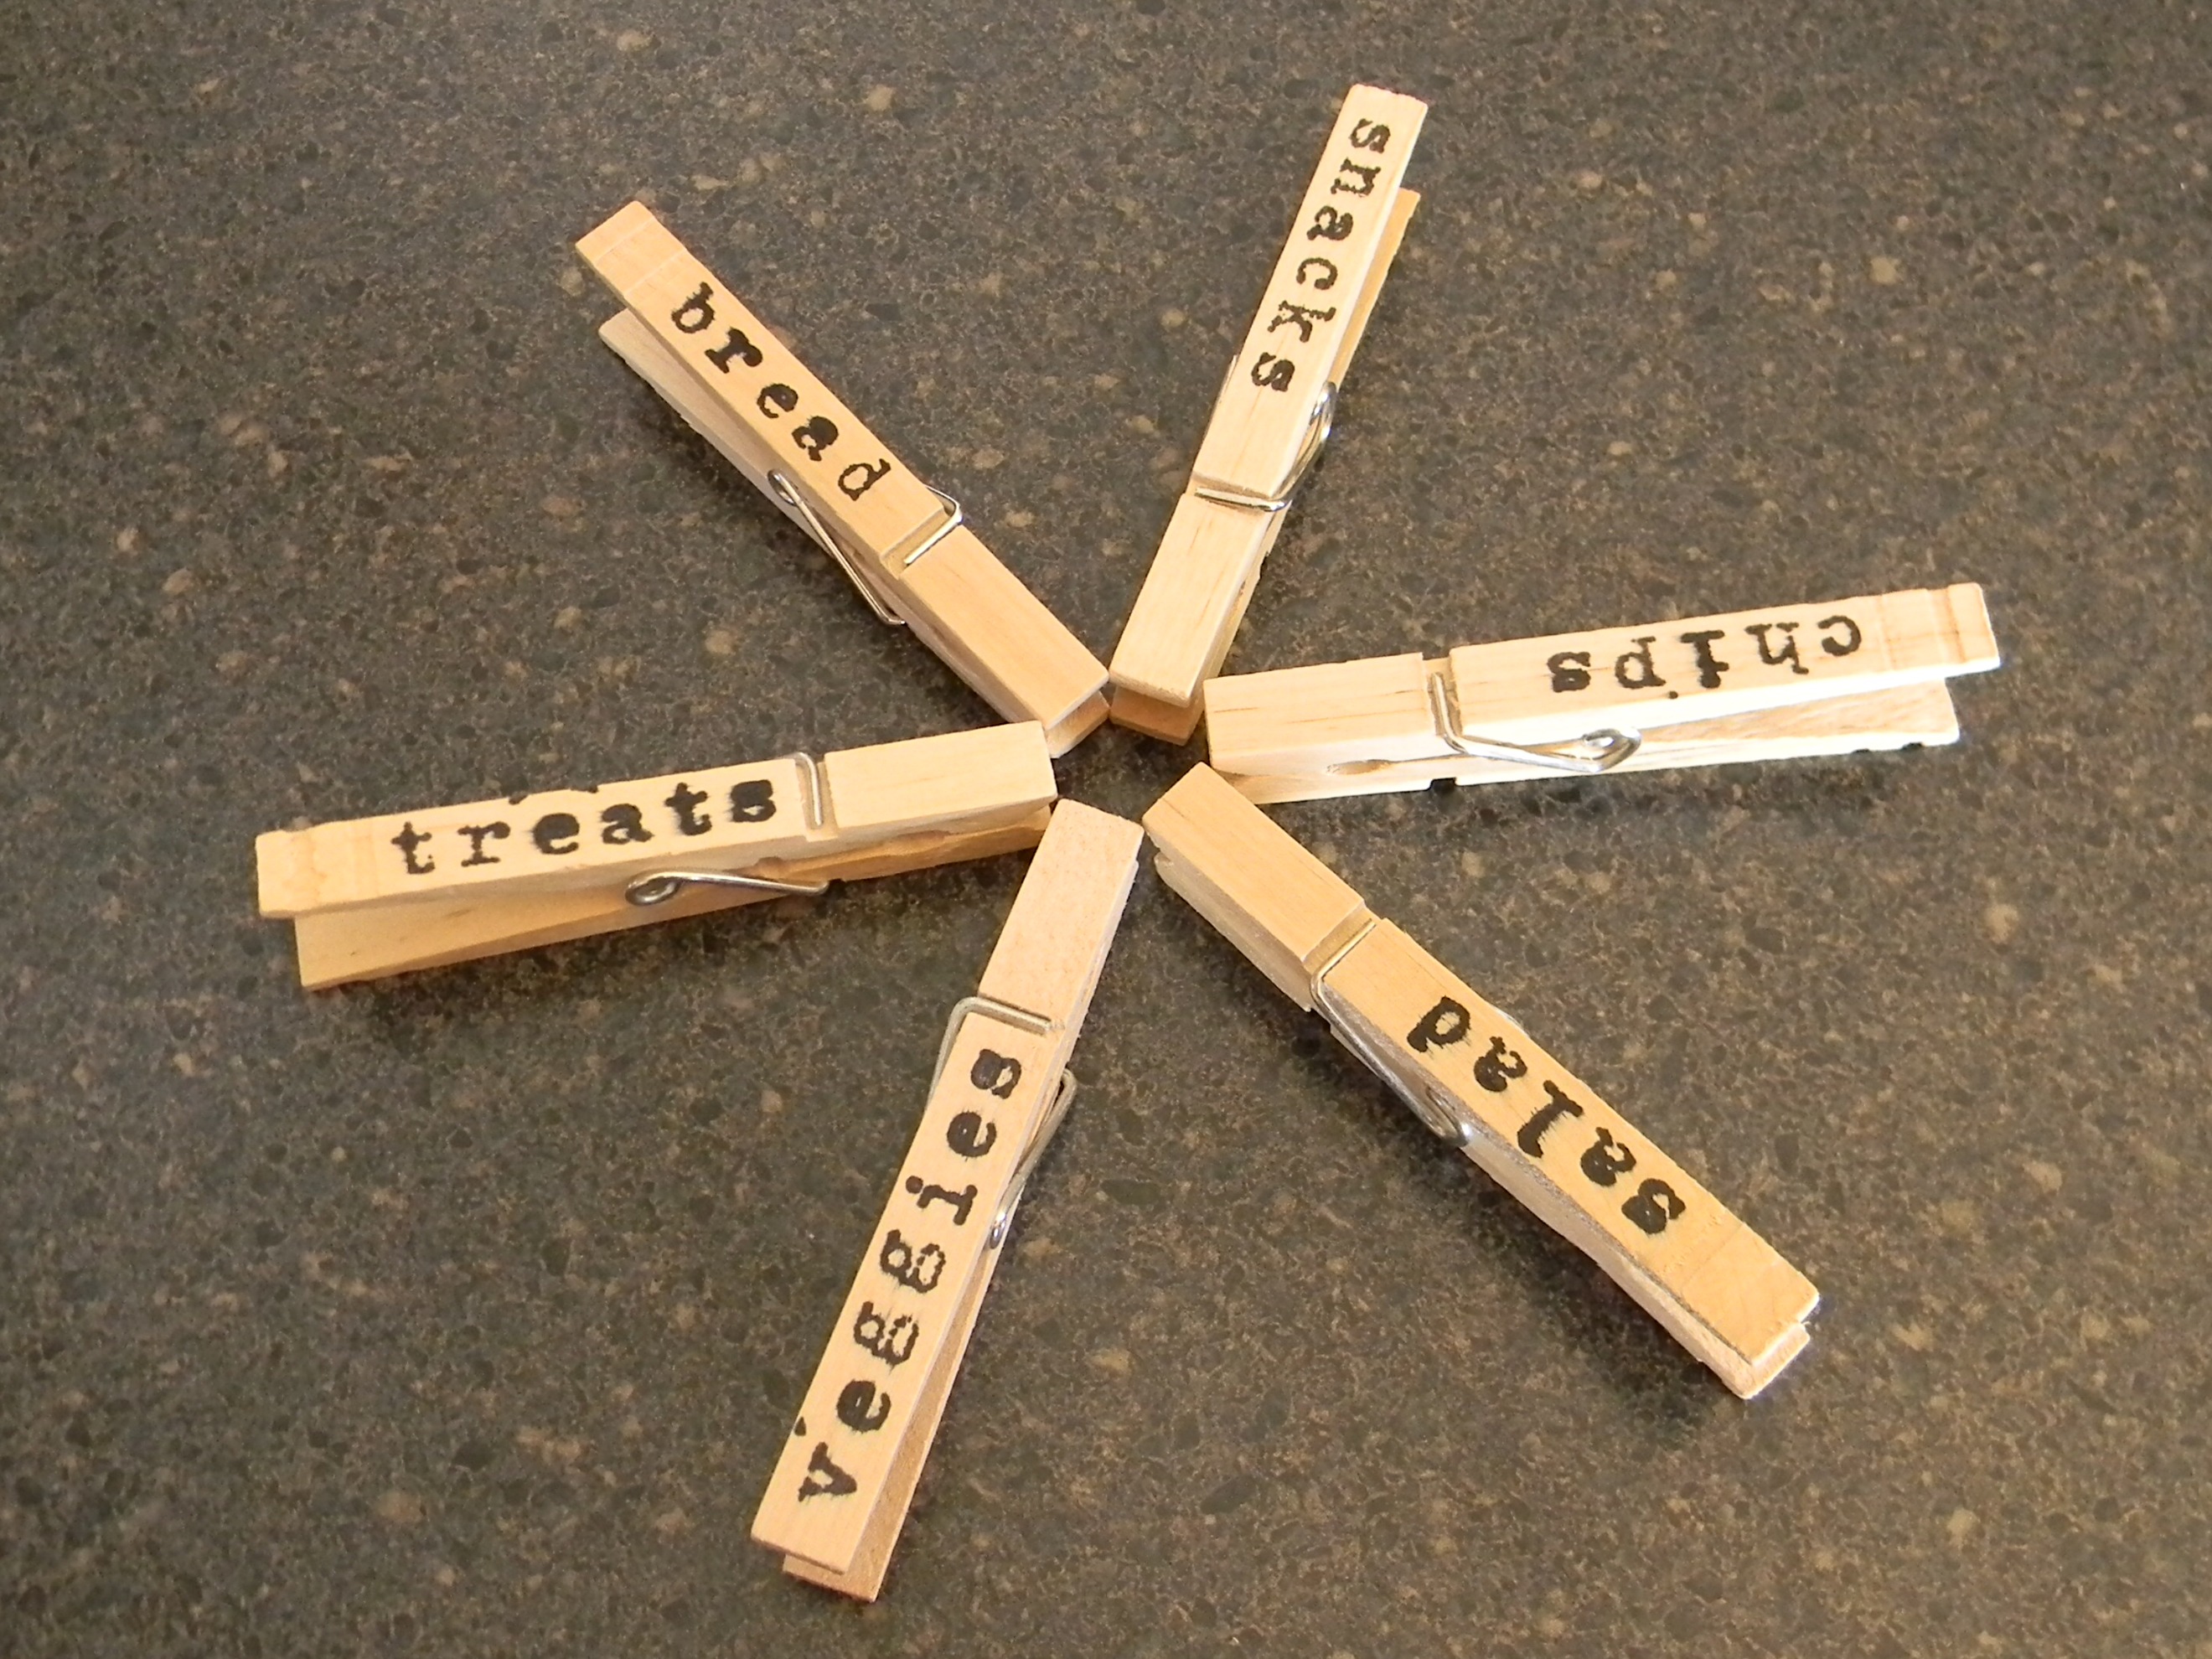
Those plastic clips don’t always work on all types of bags, but clothespins do and they’re cheaper. I used these stamps to spell out the words I needed.
I made 6 different clips to start with but might add more later, as needed.
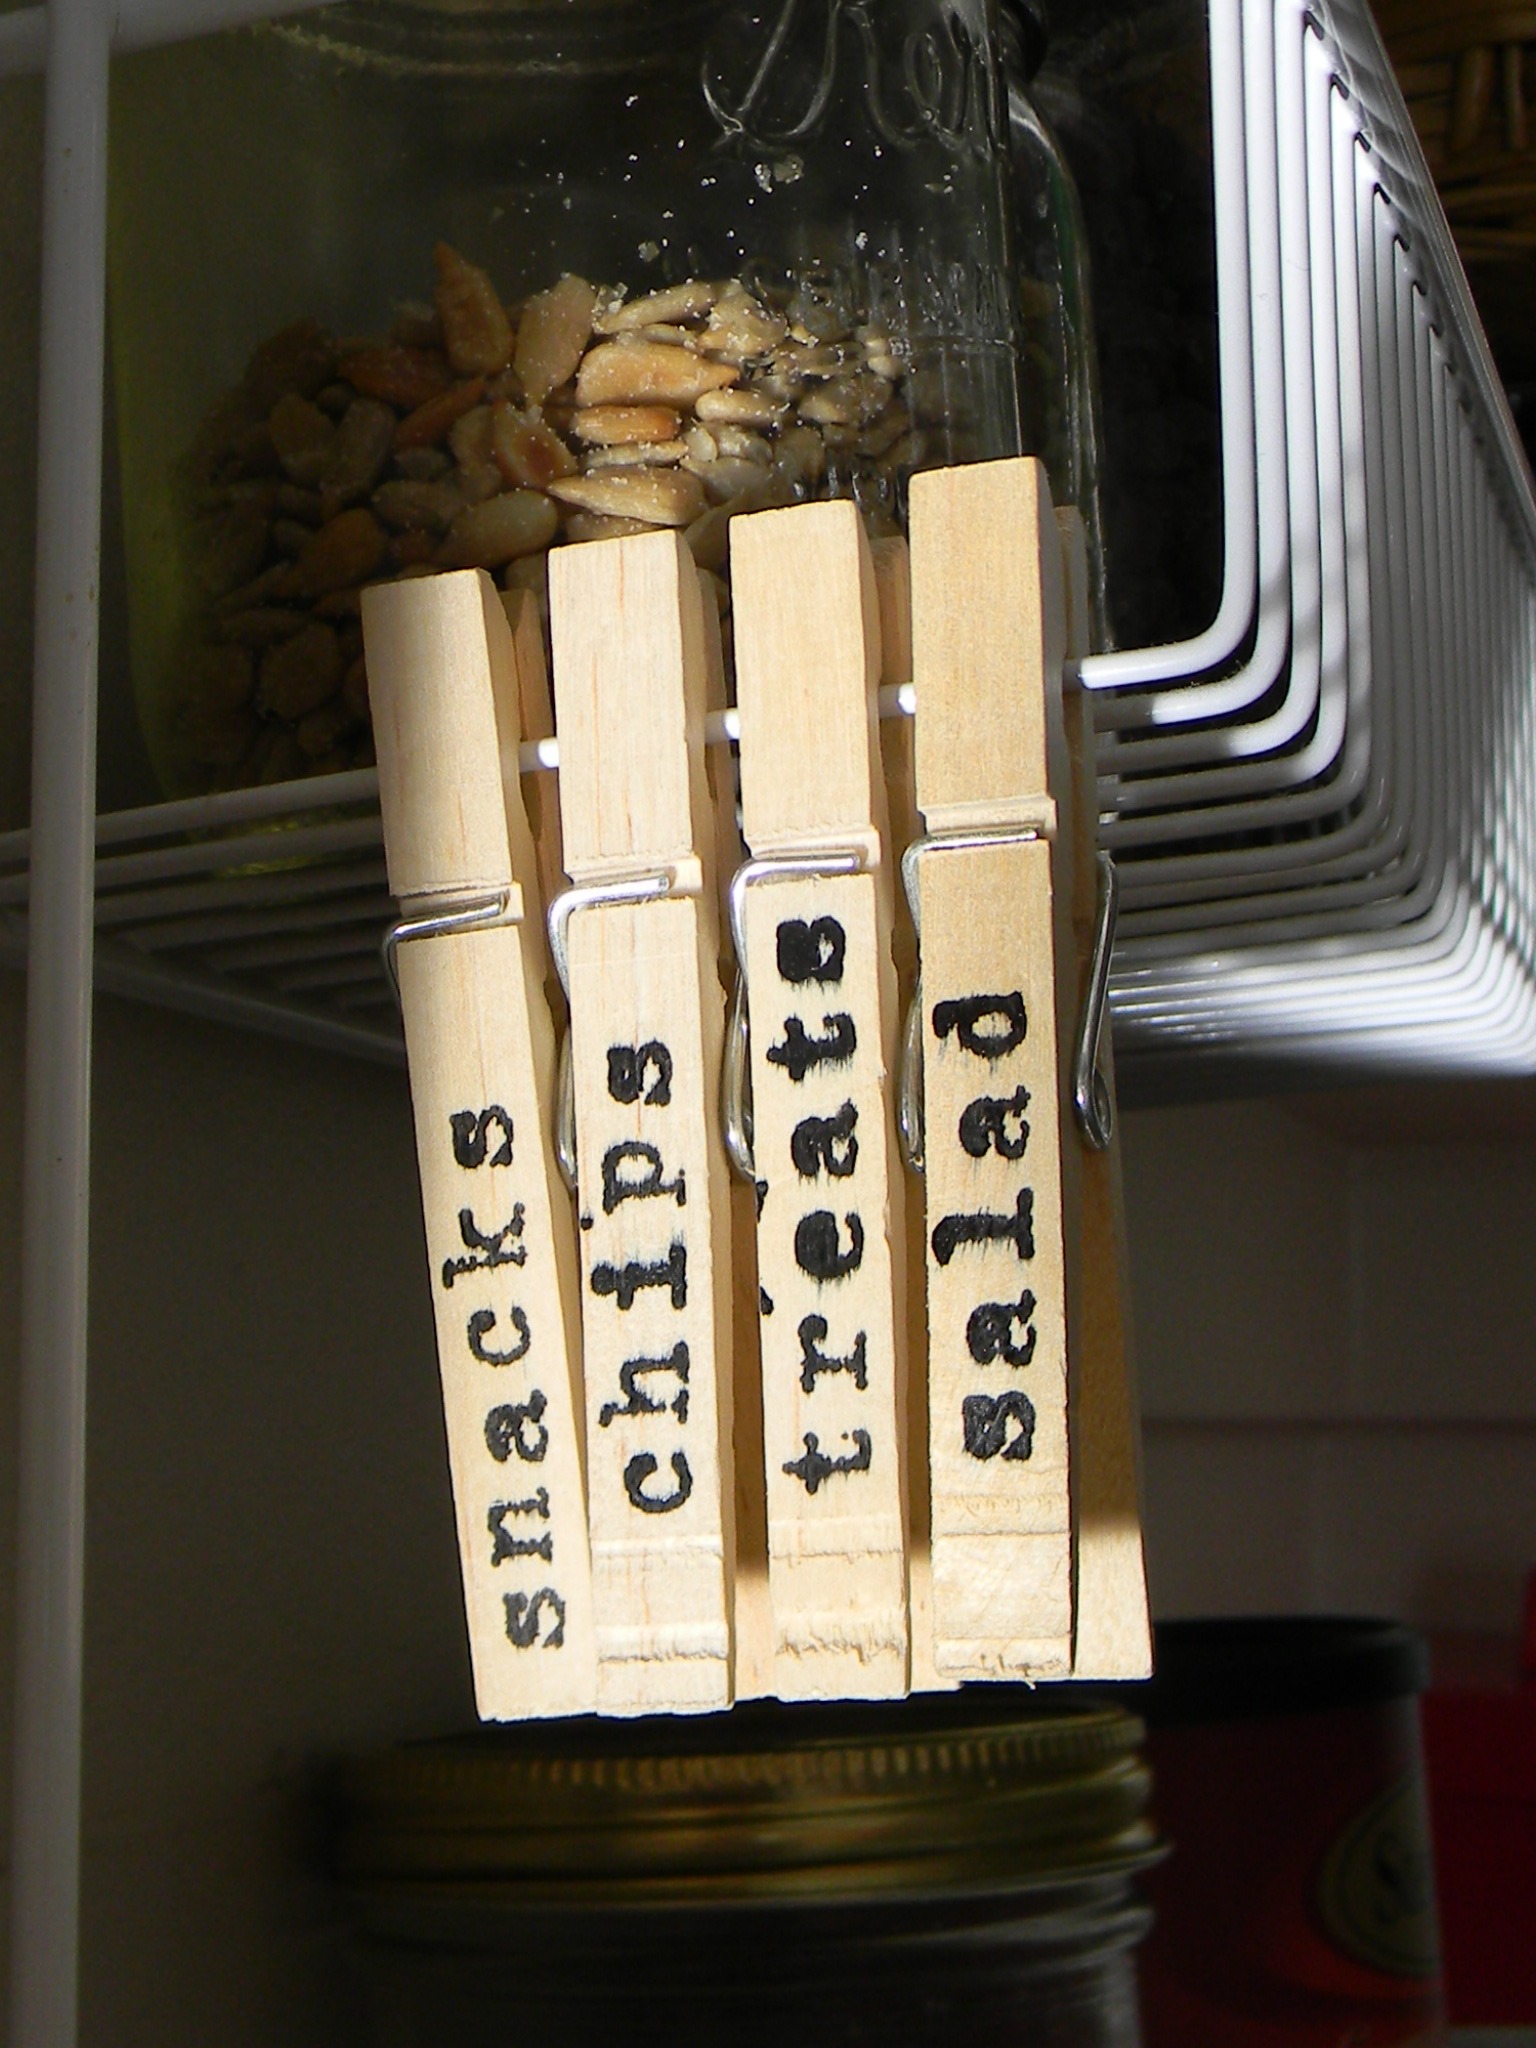
I used 2 of them immediately.
And the others are hung from a shelf in the pantry until needed.

Saturday, August 4, 2012

DIY: Pen Pots

You know how we feel about up-cycled, recycled, or reused items in crafting projects...we LOVE them!

This pen pot tutorial from Torie Jayne is stunningly beautiful and Eco-friendly.  So...get to it!

Pretty pen pots by Torie Jayne

Yesterday I showed you a sneak peak at how I am getting on with organizing my craft room. Today I am sharing with you the quick, easy, cheap simple idea that is...

Pretty pen pots
Tools and Materials
  • Empty tin can
  • Printed paper
  • Double sided sticky tape
  • Scissors
Pretty pen pots, How-to step by step
Making pretty pots
Wash and dry the empty tin can. Cut a piece of printed card the size of your tin can (you can use the old can label as a template). Cover the outside of the can in strips of double sided sticky tape. Remove backing from double sided tape and carefully wrap paper around can. Fill with paint brushes, pencils or pens!

Brush pot

Saturday, July 28, 2012

DIY: Packthread Wrapped Vase

A wonderful upcycle tutorial from Sheepy Me!

Supplies:
1.) Double Sided Tape
2.) Packthread
3.) Scissors
4.) A used bottle!


Thursday, July 26, 2012

DIY: Rotating Goal List

If you are anything like me - you are always trying to stay organized!  This tutorial from Cornflower Blue Studio may be just the thing to help out.  It's easy to make and will allow for those of us who have ever changing schedules to quickly and easily handle anything that comes our way!

You'll need post-it notes, a pencil, markers, a ruler, and an 11 x 14 inch piece of bristol board or heavy card stock.


Start by sketching out a simple layout with your pencil.  I left a half-inch border around the entire design, then added a 4.5 x 10 inch rectangle at the top of the page.  Use the bottom section of the page to add six three inch squares, evenly spaced.  And one more square inside the rectangle, too!


Now you can use your markers to fill in the design with lettering, doodles, borders, or whatever you like!


Next you need to decide on the time frame for your goals - are these weekly goals, things you want to accomplish this month, this season?  It's up to you, and you can always change it because you can switch out the post-it note whenever you like.  I decided to make my goals for the week this time.


Now fill in your goal squares with more post-its.  You can put the most pressing goals first, and order the rest in terms of importance.  Remove the goals as they are accomplished so you can keep track of your progress : )

I used a little silver clip to hang my list where I can see it as I work.