Showing posts with label cakes. Show all posts

Wednesday, August 15, 2012

DIY: Dollar Store Candle Makeover

We love dollar store shopping, despite its dangerousness since we have ZERO self control in there....

But thanks to Banman Land's blog, we'll have some direction on what we want to buy next time we go!  We love being able to jazz up our dollar store finds, and they've done a wonderful job with these number candles!  So easy, so quick, but so very cute!


Ok, I have revamped a few Dollar Store candles and gotten a lot of questions and comments so I thought I'd talk you all through it.


Here's what Maddie's birthday candle looked like when I bought it.
Kinda predictable.

I grabbed some glittery puff paint
{not to be confused with glitter glue}
I stuck all sorts of cute buttons and tiny rhinestones in the inside of the outline with the puff paint.
{If I hadn't liked the teal outline for my party theme, I would have re-outlined it with my sparkly puff paint)

I let it dry for an hour
{at least}

After it was dry,

I gently stuck a toothpick into the bottom of the candle.


Here's what it looked like when I got finished with it.
{oops, this is BEFORE the toothpick but you can imagine what that would look like, right?}

Friday, August 10, 2012

DIY: Party Animal Candle Holders

The Sweetest Occasion has come up with such a cute idea and it's so easy we can't believe we haven't seen anyone else do this before! We can see these being in ANY color.  Having a princess party?  Make them pink with glitter!  A dino party for a little boy?  Make them blue and you could even hand stencil their age on them!


Supplies -
  • plastic animals
  • plastic candle holders
  • drill with 1/8″ drill bit
  • pliers
  • gold spray paint
For the plastic animals, you can use any kind you can find. Keep in mind the size of the cake or cupcake you are sticking it on. I used the animals with a flat back, so it is easier to stick in the candle holder.
Hold the animal with the pliers and drill a hole straight down, being careful not to pop out the other side. The hole just has to be deep enough for the holder to fit.
Spray paint the animals in a few light coats, rotating them to cover all sides. Note: I used gold (w/o primer) and it worked fine for both the nicer plastic animals and the dollar store ones. I wanted a pop of color but some of the animals didn’t take to regular spray paint, be sure to use a plastic spray paint or a primer for plastic and always test one first.
I also painted the candle holders to match. Let dry.
That’s it. Party on like an animal! Rawr.

Monday, August 6, 2012

DIY: Felt Flower Cupcake Toppers

Soooo, we don't really need an excuse to eat cupcakes on the regular, but hey...it doesn't hurt to have an excuse anyways, right?!  It's good to know that The Proper Pinwheel shares our affinity for all things sweet.  This fantastical cupcake tutorial speaks to us in so many ways.

To make your own you’ll need:
  • Felt (9 x 11 inches)
  • Scissors
  • Hot glue gun
  • Toothpicks
Cut 3 x 9 inch strips.
Fold the strips in half lengthwise and cut (starting at the folded side!) 3/4 of the way to the edge.
Repeat the whole way down the strip.
Once it’s all cut, pull the top half to the right 1/4 inch.
Start at the right end and roll it up as tight or as loose as you would like. Use small drops of hot glue to secure it along the way.


Put a little drop of hot glue on one end of a toothpick and stick it inside the flower. Pinch the bottom tight until the glue dries, and you’re done! Stick these little flowers in the tops of your cupcakes and admire the cuteness.

Collapsible Cupcake & Cake Carrier 

Friday, August 3, 2012

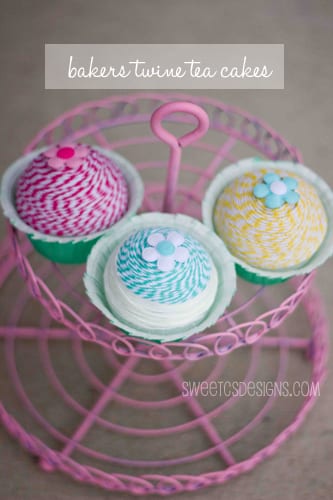
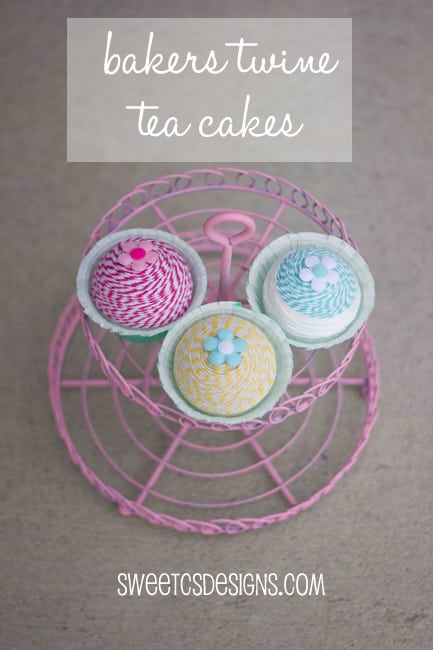
DIY: Bakers Twine Tea Cakes / Cupcakes

Okay, so I realize that this tutorial from Sweet C's Designs is meant for kids, but I want one for me!  These are so beautiful and simple who wouldn't love them??  They look like they take just a few minutes to whip up and we love things that are cute and time friendly.
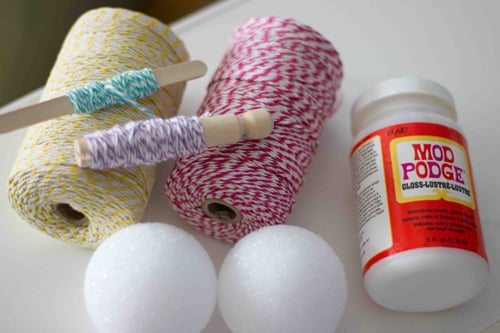
First, you’ll need Styrofoam balls, bakers twine, mod podge, appliques, and cupcake liners/cups.
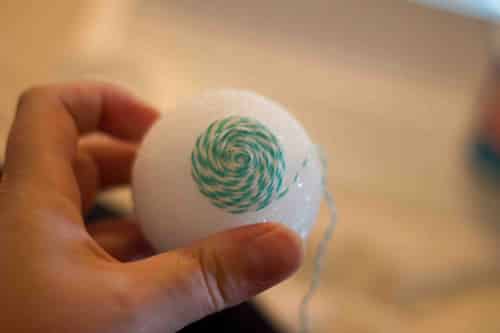
To start your cupcake’s swirl pattern, it is easiest to hold it in your hands, pinching the swirl to stay put as you build it up.
Once it is bigger than a quarter, you can glue your circle of twine to the top of your Styrofoam ball with some mod podge, and continue to wrap the twine in a circular fashion around the ball.

When you’ve wrapped the ball almost all the way down, mod podge the end of the twine to the ball, and add a healthy dollop of mod podge to the bottom of the ball.
Place in cupcake wrapper/cup and let dry.