She's Kinda Crafty is a way fun blog that has some cute sweet bag DIYs. There are two fun downloads you can use from her blog as well - so be sure to go check it out!
A site for all of my own DIY project successes and failures and for posting all of the amazing tutorials and projects I find as I go - while staying on a budget and keeping as much money in my pocket as possible!
Sunday, January 13, 2013
DIY: Valentine Sweet Bags!
Labels:
adults,
candy,
decor,
decoration,
DIY,
do it yourself,
dollar,
dollar store,
favor,
favor box,
favors,
kids,
parties,
party,
sweet,
sweets,
tutorial,
upcycle,
valentine,
valentine's day
Saturday, January 12, 2013
DIY: Valentine's Containers
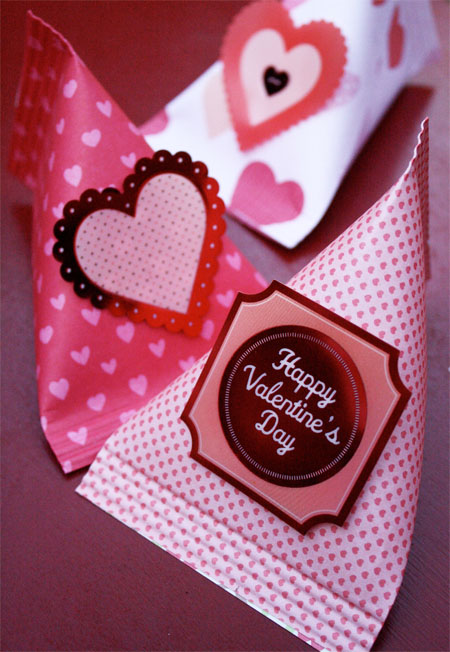
Are you having a Valentine's Day party or are you looking to give out some fun favors for a school / work / church event? Skip to My Lou's blog has some wonderful DIY containers that are just adorable. We walk by those paper book packs at Michael's all the time and wonder what we can do with that much holiday paper...now we know!!
I have been making them for years, but with all the new printed
papers and embellishments it is a new quick an easy craft. I found
everything I needed at Michael’s Arts & Crafts.
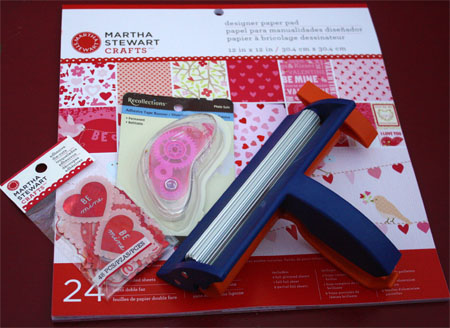
Look for heavyweight paper or cardstock {loving this pad from Martha
Stewart} for these containers, cute embellishments, adhesive tape runner
and a Fiskars paper crimper.
These containers can be made any size. I cut paper 4.25″ X 5.5″ (roughly cutting an 8 1/2 X 11 sheet of paper in half).
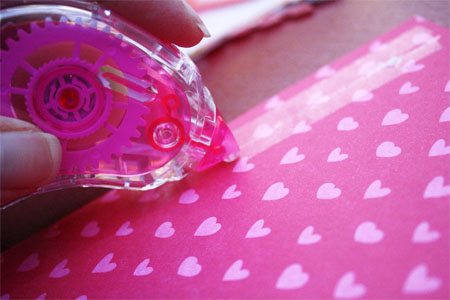
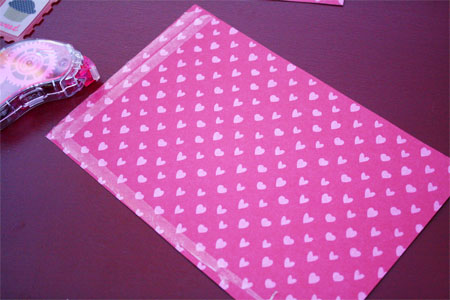
With a tape runner put two rows of tape on one edge. Glue stick or Double Sided tape can also be used. Be generous with the adhesive!
Put the adhesive tape runner {my favorite} along the end and one side of the paper on the wrong side.
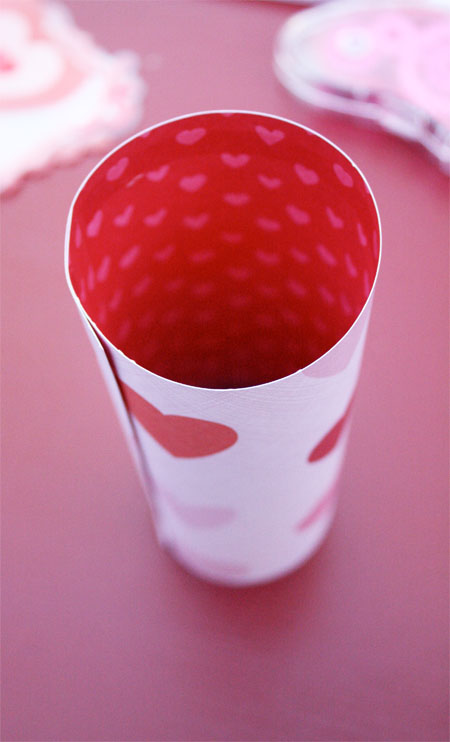
Roll paper into a tube, overlapping the edge about 1 inch.
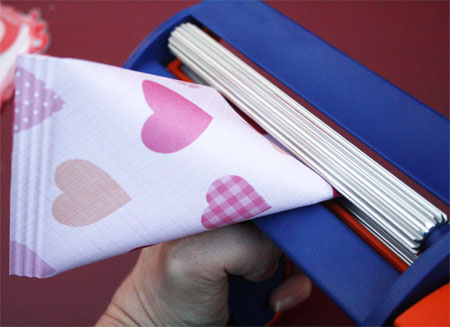
Pinch the edge with the adhesive closed. Place the closed end in the paper crimper. Turn crimper about three to four times.
Fill
container with goodies. Place adhesive on the inside edge of the other
end. Press end together in the opposite direction. Crimp close.
It works best if the seam is off center.
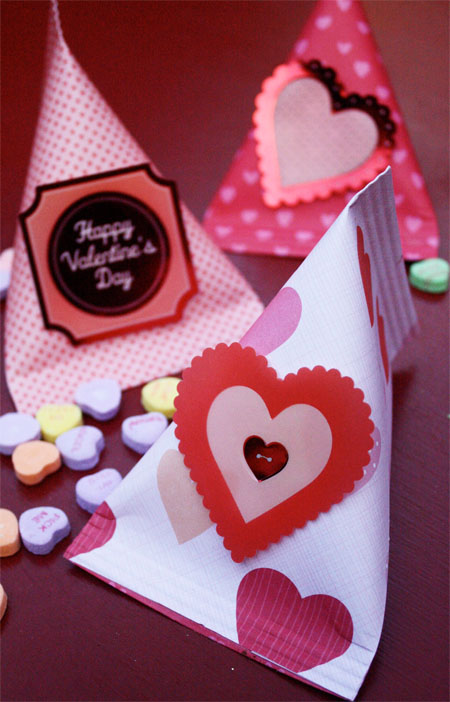
Attach embellishments to the containers. These make a fun containers to hold yummy goodies for your special Valentine!
Labels:
budget,
containers,
craft,
craft tutorial,
custom,
decor,
decoration,
DIY,
do it yourself,
dollar,
favor,
favors,
holiday,
ideas,
paper,
paper crafts,
party,
tutorial,
valentine,
valentine's day
Friday, January 11, 2013
DIY: Valentine's Day Wrapping Paper
Thirty Handmade Days has a very fun paper design that they are sharing with the rest of us! Head on over to their blog for some fancy pants paper!
At Christmas my genius friend Jaimee posted some beautiful wrapping paper. I LOVED the idea and decided to make some for Valentine’s day. I honestly ADORE the results and am working on more projects similar to this.
I made one traditional subway art type of wrapping paper. And then I had a little fun with another sheet. I made paper that had lyrics from what Josh and I call “Date Me” songs. These are songs that we hear and immediately think of each other and when we were dating (14 yrs ago!). Most of the time it’s when I’m listening to 90′s on 9. ;) Try really hard not to laugh at the lyrics because most of them are not mushy!
Labels:
craft tutorial,
crafting on a budget,
custom,
DIY,
do it yourself,
dollar,
easy,
gift,
heart,
hearts,
paper,
party,
tutorial,
valentine,
valentine's day,
wrapping,
wrapping paper
Thursday, January 10, 2013
DIY: Felt Heart Garland
Oopsey Daisy is an absolutely adorable blog that helps us stay on track with our Valentine's Day themed crafts. We are closing in with only 35 days to go until the big day filled with hearts, dinner, champagne, and stuffed animals. Speaking of hearts - this felt heart garland couldn't be any sweeter.
You can make your own with some scraps on hand!
Let's get started!
I started with the felt. I secretly
wanted to use all wool felt, but my frugal conscience got the best of
me. So I purchased the red and mustard wool felt, and I had the other
colors on hand. I LOVE the color scheme! The mustard and turquoise
were fun and unexpected pops of color.
Then I sat down and just started cutting
out a whole lot of hearts! I didn't use a pattern--just used the old
traditional method of folding the fabric over to achieve a symmetrical
heart. I think I cut out about 90 hearts total.
It was 12:30 AM, and I couldn't thread
the yearn through the needle for the life of me. Finally I tried this
trick of taping the end with masking tape. Duh! It worked perfectly.
I knotted the end of the yarn to prevent fraying and then started stitching!
I made sure that I had plenty of excess
yarn so I could sew as long of a garland as possible. (I didn't want to
have to thread that needle any more times than completely necessary!)
I wanted to be unpredictable, so I didn't repeat the colors in any certain pattern. Crazy, I know!!
I just knotted the very end of the yarn, and started draping!
So what do you think?
Labels:
beginner,
craft,
decor,
decoration,
DIY,
do it yourself,
dollar,
easy,
felt,
felt crafting,
garland,
heart,
hearts,
mantel,
office,
recycle,
tutorial,
upcycle,
valentine,
valentine's day
Wednesday, January 9, 2013
DIY: Valentine's Day Mantel
So, it is that time of 2013 when all the stores remove any last remnants of Christmas and New Year's items and start overloading on pink and red Valentine's Day jazz! We are getting in the spirit to with this great mantel decoration idea from My Blessed Life.
We think that this would be easily adaptable to an office / cube space if you feel like making your work spot more interesting.
We hope that you find this as inspiring as we did and gets you into the mood for pink and red EVERYWHERE!
I love the layered simplicity of how the mantel turned out. I kept the background {old window and vintage ceiling tile} that I used for my Christmas mantel
and I switched out the printer’s drawer for another one that is a bit
lighter. My hubs and I dug out the V-day decor out from last year and I
had a blast making it work on the mantel!
I love my DIY “Be Mine” Topiary from last year. I also used my Ruffled Satin Heart Wreaths and little balls.
Are you tired of seeing aqua insulators in
just about every mantel I decorate? Ahem. I love ‘em, so they aren’t
going away anytime soon.
My Burlap Valentine’s Wreath
from last year adds a fabulous texture to the mantel. The white vases
with pink tulips make me smile because they are simple and calm.
An old cigar box and salvaged piece of trim {from Southern Accents}
created a perfect stand for my little white vase. The pink leather
flower is part of a boutonniere from our wedding…almost six years ago.
Wow.
This yellowing, falling apart framed “art” was a gift to my husband
back long before he was my husband. It is sentimental and I love seeing
it every day. Oh, if you haven’t read our story, it’s a good one!
So pretty!
Labels:
decor,
decoration,
DIY,
do it yourself,
dollar,
handmade,
holiday,
homemade,
mantel,
office,
shelf,
table decor,
trends,
tutorial,
unique,
upcycle,
valentine,
valentine's day,
wine,
work
Monday, December 31, 2012
DIY: Three Easy New Year's Eve Party Favors
Free People's Blog has three wonderful last minute party favor ideas for those of you procrastinators out there (like me). These look fun and easy to make and definitely have the ability to be ready to go in a short amount of time.
Confetti Cones
This gold acrylic paint is my jam – it looks like liquid gold! It’s made by Reeves and I can’t get enough of it.
I painted a piece of card stock with the gold paint, and to make the
confetti I did it the old fashioned way – I used a hole punch and a
stack of multicolored post-it notes!
Roll the gold paper into a cone, fill it with confetti, and voila! An
adorable confetti cone. Make a bunch of them and place them on a table
for your guests to pick up and toss at midnight!
Mustache Photo Props
I also love the idea of making little props for photos – especially if you have a photo booth at your party! I used my mustache stamp from a while back and stamped a few on card stock and then just cut them out and glued them to coffee stirrers!
Party Hats
You can also use the gold-painted card stock to make party hats! I
added some gold glitter to the bottom for some extra sparkle. Roll your
hat into a cone shape and attach a string so it can be worn.
Stick a confetti cone and mustache in a diy glitter champagne flute and you’ve got some seriously adorable New Year’s Eve party favors!
Source: 3 Easy New Year’s Eve Party Favors | Free People Blog http://blog.freepeople.com/2012/12/3-easy-years-eve-party-favors/#ixzz2GGPJPhvM
Sunday, December 30, 2012
DIY: Eggnog Cupcakes with Spiced Rum
Baker's Royale has made a picture look so delicious we wish we could eat two dimensional objects!! These look unreal. We know that our frosting will not look this amazing, but if they taste anything remotely like they look we couldn't be happier...
Makes 24 cupcakes | Preparation: Heat oven to 350 degrees F. Line 2 muffins tins with cupcake liners.
Ingredients:
Cupcakes:
- 1 1/2 cups self-rising flour
- 1 1/4 cups all-purpose flour
- 1 cup (2 sticks) unsalted butter, softened
- 2 cups sugar
- 4 large eggs, at room temperature
- ¾ cup eggnog
- ¼ cup milk
- 1 teaspoon vanilla extract
Spice Rum Buttercream:
- 5 large egg whites
- 11/2 cup sugar
- 4 sticks unsalted butter, diced and softened
- 1/4 teaspoon salt
- ½ cup spiced rum
Instructions:
To make cupcake:
- Measure out flour and set aside.
- Add sugar and butter in a bowl and cream on medium speed until fluffy, about 3 minutes. Add eggs in 1 at a time, beating well after each addition. Add the dry ingredients in 3 parts, alternating with the eggnog and vanilla to start. Mix after addition until incorporated-do not overbeat.
- Fill cupcake liners about 3/4 full and bake for 20 to 25 minutes. Transfer cupcakes from tins to cooling rack. Allow cupcakes to cool completely before frosting.
To make Spice Rum Buttercream:
- Combine egg whites and sugar in a bowl placed over simmering water. Bring mixture to 160 degrees F while whisking constantly.
- Transfer mixture to stand mixer bowl, fitted with a whisk attachment and beat on medium high speed (speed 8 on a KitchenAid stand mixer) until mixture cools and doubles in volume and forms stiff peaks; about 10-12 minutes).
- Add butter in one piece at a time, mixing to incorporate after each addition. The mixture may appear clumpy and almost curdled looking at first-this is normal. Keep mixing and it will become even and smooth again.
- Add salt and spiced rum and mix to combine.
Subscribe to:
Posts (Atom)