Showing posts with label trends. Show all posts

Wednesday, January 9, 2013

DIY: Valentine's Day Mantel

So, it is that time of 2013 when all the stores remove any last remnants of Christmas and New Year's items and start overloading on pink and red Valentine's Day jazz!  We are getting in the spirit to with this great mantel decoration idea from My Blessed Life.

We think that this would be easily adaptable to an office / cube space if you feel like making your work spot more interesting.

We hope that you find this as inspiring as we did and gets you into the mood for pink and red EVERYWHERE!


I love the layered simplicity of how the mantel turned out.  I kept the background {old window and vintage ceiling tile} that I used for my Christmas mantel and I switched out the printer’s drawer for another one that is a bit lighter. My hubs and I dug out the V-day decor out from last year and I had a blast making it work on the mantel!


I love my DIY “Be Mine” Topiary from last year.  I also used my Ruffled Satin Heart Wreaths and little balls.


Are you tired of seeing aqua insulators in just about every mantel I decorate? Ahem. I love ‘em, so they aren’t going away anytime soon. :) My Burlap Valentine’s Wreath from last year adds a fabulous texture to the mantel. The white vases with pink tulips make me smile because they are simple and calm.


An old cigar box and salvaged piece of trim {from Southern Accents} created a perfect stand for my little white vase.  The pink leather flower is part of a boutonniere from our wedding…almost six years ago. Wow.


This yellowing, falling apart framed “art” was a gift to my husband back long before he was my husband.  It is sentimental and I love seeing it every day.  Oh, if you haven’t read our story, it’s a good one!


So pretty!

Thursday, September 13, 2012

DIY: Autumn Lunch Bag Trees

Here is another Autumn / Fall time tutorial for your pleasure.  We think these are just adorable, and would be an amazing addition to any household or office desk perhaps?  What do you think?

These come from Matsutake's blog and the step by step instructions sound like they couldn't be any easier to implement.

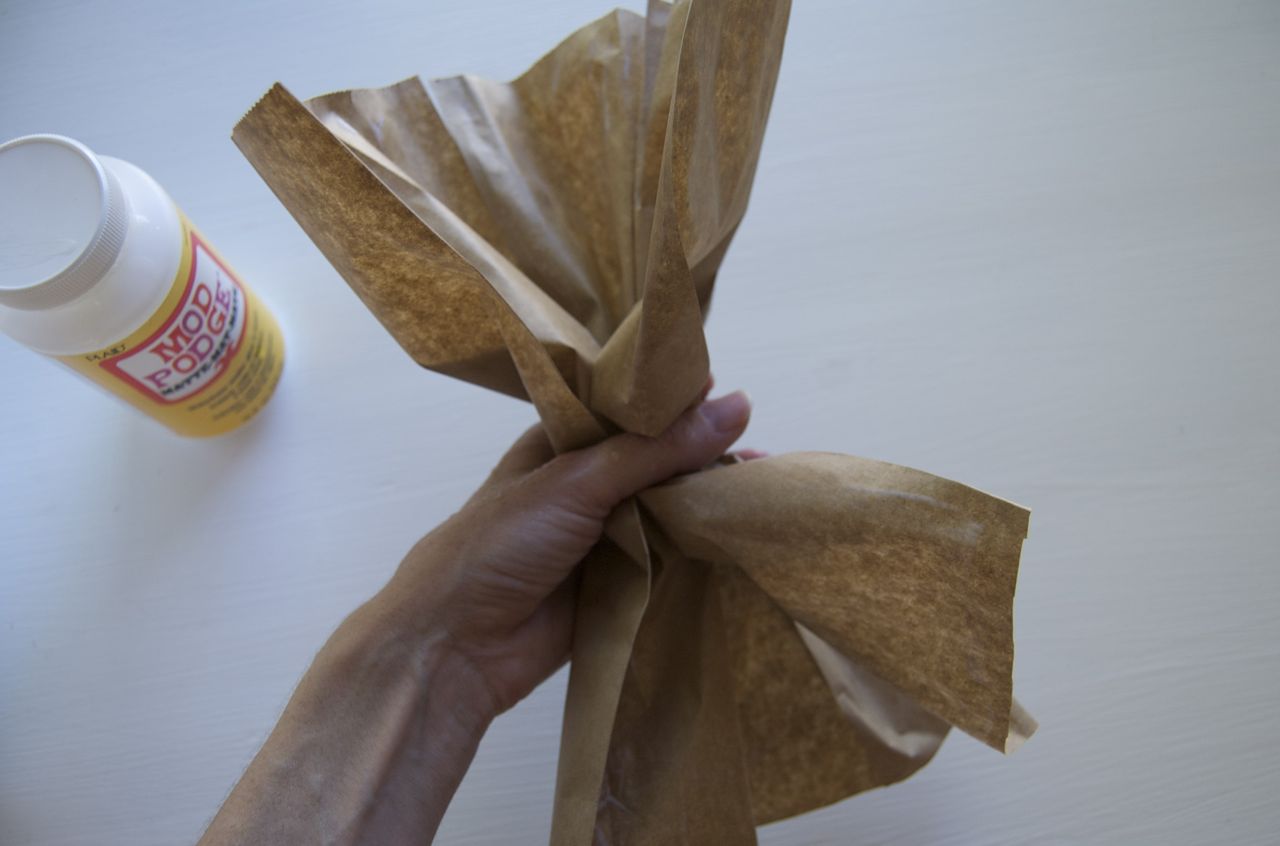
Made of three of my favorite things: Mod Podge, yarn pom poms, and trash. Yay! They're little Autumn trees made out of old crumpled lunch sacks.
First, cut off the bottom of the bag, then cut it open so it's a flat rectangle. Next, cut slits where I drew the dotted lines.
Now brush the entire surface with a layer of Mod Podge. I watered it down just a tiny bit.
Now sort of bunch it up in the middle. And separate out those strips at the top where you snipped it. Gently start twisting.
And twisting. Twist the trunk. Twist the branches. Twist the roots.
Keep twisting until it looks like a tree.
Let the Mod Podge dry. You can snip the roots and branches with scissors if you want them a bit shorter.
Plop some yarn pom poms into the trees. Add a dab of Mod Podge on the branches to hold them in place. And then photograph them all over your house.

Thursday, July 5, 2012

DIY $220 Bracelet for $5

For this cheap, fun and easy bracelet / necklace from Henry Happened's Blog you’ll need:
  • 3 yards of silk ribbon cord. I got mine (purple, of course) at JoAnn’s in the trim section.
  • 2 dozen 8mm gold beads.
Cut the ribbon into 3 equal lengths. Standard bracelet size is 7 inches so you’ll want it about 29 inches long in order to wrap 4 times.
Start by braiding about 6 inches of ribbon and then secure the end with a rubber band. Anchor the end with something heavy to hold in it place.
Start braiding in the beads by feeding the ball onto the middle strand and then tightly braiding the other two strands around it. Don’t pull too hard though or the beads will have a tendency to pop out as you go.
Continue feeding beads onto the middle strand until you run out (I had about 25) or until there’s about 6 inches of ribbon left.
Finish with another 6 inches or so of braiding. Then clamp the ends with ribbon fasteners or just tie it in a knot.
It looks great as a bracelet or a necklace!

Wednesday, May 30, 2012

DIY Upcycled Tissue Box Bookmark

Jenn Ressmann has a great tutorial on her blog (which was also a Green Crafts Showcase winner!) that is perfect for any avid book reader.  This tutorial shows you how to transform any used up tissue box and transform it into a book mark with a fun and whimsical theme.  This idea could be tweaked to just about anything!  

Head to her great tutorial and get started now!

SUPPLIES:
- Empty cardboard tissue box
- Glue
- Scrap paper (fun designs!)
- Sewing thread & needle if desired


Sunday, May 27, 2012

DIY Fabric Flowers

Love, love, love these blue fabric DIY flower embellishments!  These would make a fabulous addition to just about anything - shirt, necklace, hat, purse, go crazy!

Today's tutorial comes from Chic Envelopments, who also has a great collection of other crafts to share, so check her out!!  

SUPPLIES:
- Fabric in 7 equal size circles (use old fabric and upcycle!)
- Fabric glue or hot glue
- Button or other embellishment for fantastical topper

Cut out circles. You’ll need 7 identical size circles for each flower.

 One circle will be the base. Fold the other circles in half then in thirds.
 
 
Glue each petal down using fabric glue.

 
You can add a button or any embellishment you like to the middle. 

Doesn't get much easier than that for something so fun and unique!


Thursday, May 24, 2012

Perfect Summer DIY Quote / Statement Bangle

As soon as I saw this awesome, easy, and cheap tutorial from Lumi - I fell in love with the idea.  What a great way to make a bangle bracelet and to get it to say exactly what I want it to say!  This would be ideal as a gift for a friends or loved one and you could personalize it with their name or a message.  

Be sure to check out her fantastic tutorial for full details and other amazing crafts!

Some well done photos and a little bit of the process to entice you!

Prepare. All you'll need for this project is a raw wooden bangle, a black paint marker, plastic wrap, and some Inkodye! 

Write your message on a piece of plastic wrap big enough to wrap around  the bangle.

Practice wrapping it around your bangle to see how it'll look. Once your satisfied with your message, you can put the plastic wrap aside while you move onto the next step.

Take the Inkodye color of your choice and pour it onto a plate or palet. You will need very little dye for this bangle, so don't pour too much!


Cover the entire bangle with inkodye for a nice even shade. We also painted the inside to keep things easy. 

Make sure to remove all excess Inkodye and keep wiping until the bangle feels dry. And don't worry about wiping too much--the Inkodye has already been absorbed into the wood.

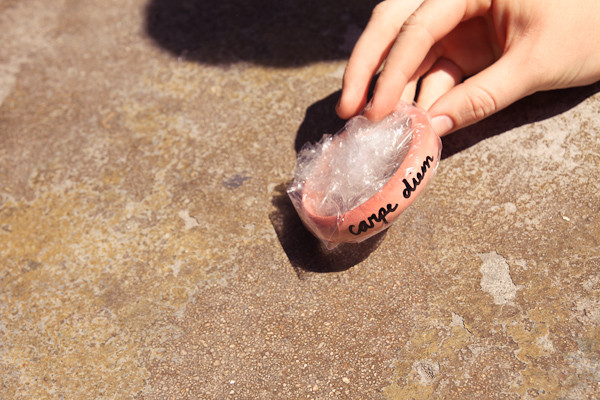
Take your plastic wrap and place your message wherever you want! Once you're happy with the placement, pull the plastic wrap taut by gathering it towards the back of your bangle.

Take the gathered saran wrap and twist it towards the middle. Tape in place. 


 Bring your wrapped bangle out into the sun. The color will start to appear instantly! 

Leave the bangle out for four minutes on each side. We recommend turning it front to back and flipping it upside down to ensure all areas develop fully.


 Once it's finished, bring the bangle inside and cut through the tape and saran wrap.

Peel back the saran wrap to reveal your dyed message! Once all the plastic is removed, it's ready to be washed.

We recommend preparing a very hot wash bath using dish washing detergent as soap.  Let the bangle soak for at least 20 minutes, occasionally scrubbing the printed part with a brush or a sponge.


Flaunt your one-of-a-kind summer bangle and don't forget to carpe diem!