Showing posts with label paper mache. Show all posts

Thursday, September 13, 2012

DIY: Autumn Lunch Bag Trees

Here is another Autumn / Fall time tutorial for your pleasure.  We think these are just adorable, and would be an amazing addition to any household or office desk perhaps?  What do you think?

These come from Matsutake's blog and the step by step instructions sound like they couldn't be any easier to implement.

Made of three of my favorite things: Mod Podge, yarn pom poms, and trash. Yay! They're little Autumn trees made out of old crumpled lunch sacks.
First, cut off the bottom of the bag, then cut it open so it's a flat rectangle. Next, cut slits where I drew the dotted lines.
Now brush the entire surface with a layer of Mod Podge. I watered it down just a tiny bit.
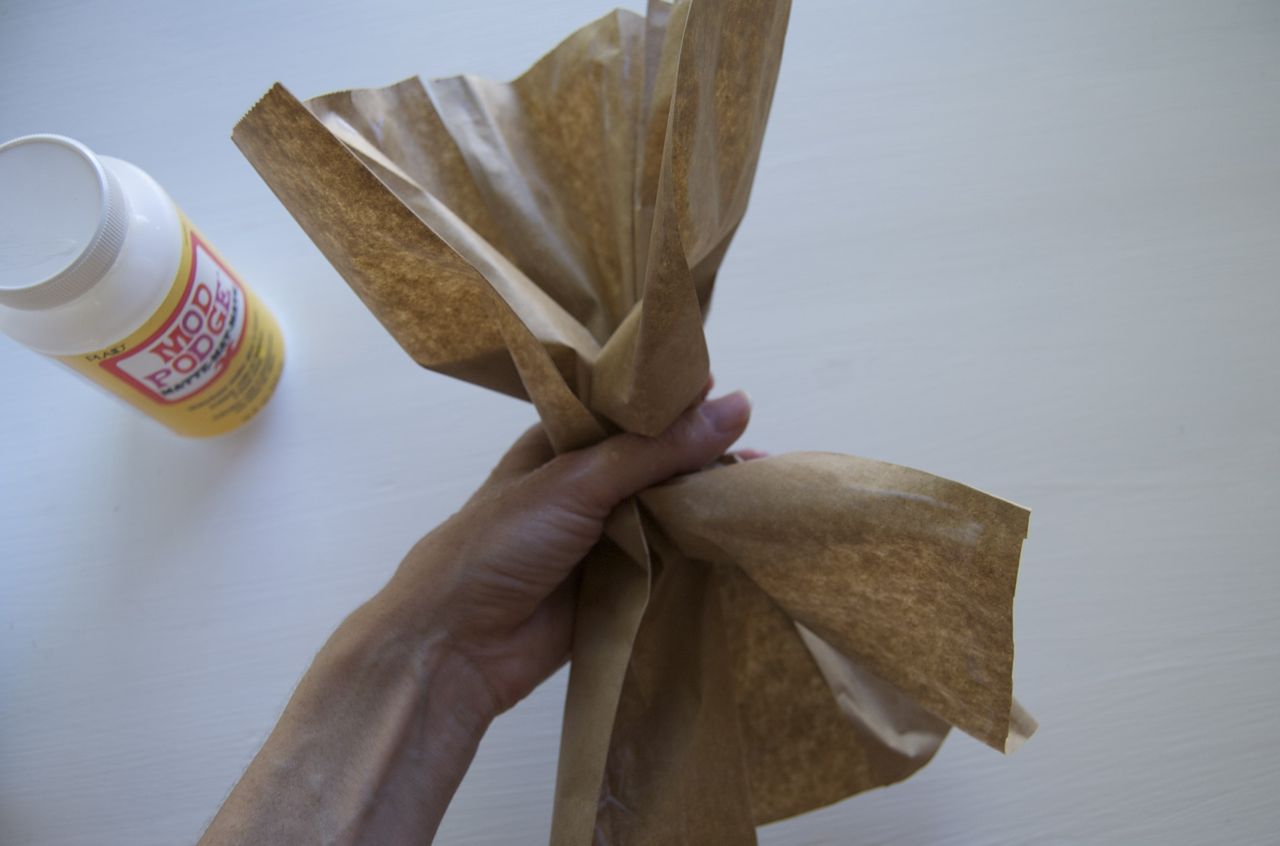
Now sort of bunch it up in the middle. And separate out those strips at the top where you snipped it. Gently start twisting.
And twisting. Twist the trunk. Twist the branches. Twist the roots.
Keep twisting until it looks like a tree.
Let the Mod Podge dry. You can snip the roots and branches with scissors if you want them a bit shorter.
Plop some yarn pom poms into the trees. Add a dab of Mod Podge on the branches to hold them in place. And then photograph them all over your house.

Monday, August 20, 2012

DIY: $12 Pendant Lamp Makeover!

We love Ikea, and we love this wonderfully done Ikea lamp makeover!  This tutorial comes to us from Apartment Therapy's blog, and we can't wait til this weekend when we can hit up Ikea and give this a shot.  This looks like a show piece - but for only $12 (including the price of lamp)!
010609-lamp2.jpg A
010609-lampthumbs.jpg
010609-lamp1.jpg
Ashley let us in on a few of her secrets ....
"After some experimentation I found that the best way to attach the petals was with 'shiny' scotch tape (the type that looks like packing tape) rather than the matte scotch 'magic' tape (which gave obvious seams/shadows that looked less than stellar). The 'petals' were cut in various lengths (I would cut a sheet of wax paper and fold it over several times so I was cutting 8 petals at a time) and attached from the bottom-->up (with shorter petals at the top)...don't be discouraged if you can see a subtle shadow cast by the tape initially as lots and lots and lots of layers are key! The petals curved naturally from the wax paper coming on a roll, and I placed most of them with the curl flipping out. Also, in lieu of wax paper I might use parchment paper for the next go-round as it has a more matte appearance when the light is off."
010609-lamp3.jpg
$1.19 (wax paper)
$0.50 (tape)
$6.00 (23.5" paper lantern from IKEA)
$3.99 (electric cord form IKEA)
---------
$11.68

Saturday, June 16, 2012

Tissue Paper Wall Art

I am seriously in love with this idea from Mr. Handsomface.  A previous post had this fantastic idea, but here is another one from this site showing how fun this project really is.  It's crazy cheap too, so hey, it doesn't get much better than that right?  I have plans to give this a shot this weekend - so I'll follow up!

You just MUST go to their blog and see all the fantastic things they have done.


This project is super easy to do and so inexpensive. I think I spent under $10 for all the supplies. The canvas is really the most expensive part, but if you look around or aren't too picky about the size you can usually find a good deal.

The supplies you'll need:
  • canvas
  • tissue paper
  • glitter paper
  • Mod Podge
  • foam brush (or paint brush)
  • white paint (optional)
The optional prep-step is to paint your canvas with a coat of white arcylic paint first. I had to do that last time I did this project because I felt my canvas was a little grey, but this one was nice and white so I skipped that step. Side note: I've stopped trying to get all the kitties out of my DIY photos. They just love getting involved! Especially Marshall, he was all up my business during this one.

First, cut out a bunch of circles from the tissue paper and glittery paper. You should be able to find glittery paper in any craft supply store in the scrapbooking section. I used a penny and nickel as a template for my circles. If you fold the paper over on itself several times, one cut will give you a bunch of circles.

Next, arrange the confetti on your canvas to get an idea of where you want it to go. I liked how it looked when I concentrated more of the confetti in one corner and had it spread out across the canvas.

Once you're happy with the placement, start gluing them down with the Mod Podge. It works best if you spread some on the canvas first, lay the circle on top of it, then add another layer of Mod Podge on top of that. When all the confetti is glued down, add another quick coat of Mod Podge to even it out.

I'm really happy with the way it turned out. I even unknowingly matched my nail polish to the design! Guess I had pink dots on the mind this week. This would look great in just about any colours though. I'd love to do dark blue tissue paper with gold glittery paper.

Tuesday, June 12, 2012

Make Your Own Mod Podge / Decoupage at Home!

Are you an avid crafter that hates how much some craft supplies cost?  Are you a novice crafter that doesn't want to pay a lot for the few projects you are trying your hand at?  Here is a great idea that anyone will love!  

Have questions?  Leave them below or check out Do it Yourself Divas BLOG!

 
You need....

A jar
Elmers Glue
Water


Empty the glue into a jar. My jar is just an old Salsa Bottle.


Add Water. You need it to be 50% glue and 50% water.


Shake shake shake

And you are done!!
I know it works because i used it to paste this paper label onto the jar :)
It could make a great gift for your crafting buddies