Tuesday, December 4, 2012

DIY: Upcycled Felted Ornaments

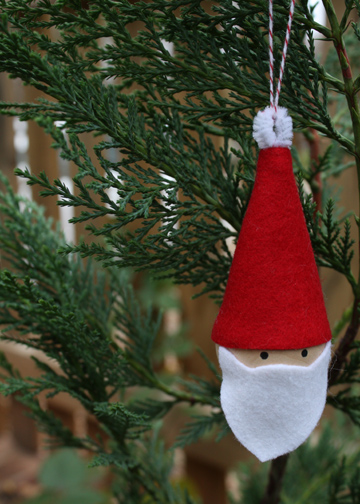
Here is another wonderful tutorial from Dollar Store Crafts blog!  We love them - you absolutely need to check them out...now.  Go on, you won't regret it.  Then come back here and enjoy the felt ornaments.

I made these tree ornaments from a felted/fulled wool sweater last year and gave them to my family members for their handmade gifts (we try to exchange primarily handmade). You can find wool sweaters by the dozens at thrift stores (although, I admit, they are probably not commonly represented at dollar stores!). Wash in hot water and dry in the dryer to shrink them into fabric that can be cut and sewn and won't unravel. These cute trees are a great way to show off your button stash, too!
Handmade ornaments are also a great gift for co-workers or people who you need to give a token gift to, but who you don't want to spend a lot of money on.

Project Estimate:
  • Wool sweater, $3-5 at thrift store
  • Assorted buttons, on hand
  • Embroidery floss or ribbon for hanging, $1
Total cost: $4 for about a hundred ornaments (if you use the whole sweater to make them)!
To make:
  1. Wash and dry wool sweater to felt it. Repeat if necessary.
  2. Cut tree shapes (triangles) and trunk shapes. I used the contrasting cuff cut in strips for the tree trunks. Use two matching triangles and one trunk piece for each tree.
  3. Sew buttons as desired on front tree triangle piece.
  4. Sandwich tree trunk piece at bottom between front and back tree pieces, and ribbon for hanging at top. Triangle pieces should be placed with right sides facing out. Sew around perimeter of triangle.

Monday, December 3, 2012

DIY: Felt Holiday Tree(s)

Danielle Thompson is keeping us inspired and in the Christmas spirit.  We love these felt trees and can't wait to give them a try!  Check out her blog for more DIY!
  Tutorialimage 

First I wanted to give credit to my initial inspiration for these (b/c it is one of my pet-peeves when people don't give proper credit... grr.. i've seen this happen so many times to other people, and even me... and it just makes me so sad. I try very hard to always give proper credit! although unfortunately with all of the things i bookmark, i do lose track sometimes where i got the idea in the first place. But very very rarely.) 
My inspiration for this actually came from a project (no surprise!) from Emily Martin/The Black Apple last year. I had the idea of making these felt trees in my head this year, and knew the concept was hidden in my subconscience from SOMEWHERE, and then i remembered her trees from last year. :-) But after looking at them for the first time this year, i realized they're pretty different! But same concept...
I wish I could provide some patterns for the felt pieces, but #1, as I've mentioned, I don't trust my pattern making skills, especially when it comes to fabric! and #2, I'm not sure that all styrofoam trees are standard sizes at all craft stores, so the patterns might end up being off depending on where you buy your tree forms.
But essentially the shape will look something like this and get smaller as you layer up the tree:
Shape 
You just freehand cut the scallop along the bottom of the shape. It doesn't have to be perfect, and I sort of like the freehand look: :-)
Scallop
To start:
1. Cut out your pieces of felt. I used generally 3-5 pieces/colors of felt per tree depending on how layered you want it to look. For each color tree, I used 3-5 shades of one color to show a gradiation of the darkest shade to the lightest shade going towards the top. On some I did a dark-light-dark-light look as well. Whatever worked with the shades of felt that I had. I used wool felt, but you could also use craft felt at craft stores... it's cheaper, but not as pretty, and you won't have the same amount of color shades as you'll find in wool felt.. i got mine online.
The first layer will be your bottom layer. It won't have the scalloped edge b/c it will wrap around the bottom of your tree form. You'll need to snip the area that wraps around like this so that it will fold over with little bulk. Then just hot-glue to the bottom:
Snip-bottom 
Then you can glue a circle of felt to cover your bottom completely.
(I used 3 different sizes of tree forms: small, medium and large. So if you do try to make a pattern, you'll need to make a different pattern for each size/shape tree as they will of course differ.) I basically just winged it with each layer of felt... wrapped the fabric around and just cut away til i got generally the shape that i mentioned above. Then i wrapped it around hot-glued, where the ends met, to the tree form, overlapping:
Treeback2 
Treeback1 
Since I knew my that my trees would only be seen from the front, i didn't stress too much about how they looked on the back. As you can see, the backs of mine look a bit haphazard. They still look tidy at least. If you wanted, and you know they'll be seen from all sides, you could add a strip of ribbon along the seam on the back like I did here, vertically:
Treeback4  
Treeback3 
If you want to be REALLY tidy, you could wait on adding the vertical strip of ribbon, and first wrap your trims and ribbons around the tree horizontally and when you're done with that, you could add your vertical strip of ribbon to hide all of the felt seams/ribbon-ends on the back. Or just leave the felt seams as-is. It really doesn't look bad, as long as you overlap the ends so that no foam shows through. If you're a sewer, you could even sew the ends together on each felt layer and slip over the form!
The great thing about using these styrofoam forms is that you can also pin things to it (as you can see I used lots of pearly colored pins). And that is actually even easier than having to use hot-glue constantly. I'm not a big fan of glueing (i don't totally trust it!), so i try to use it only if i have to. But you'll definitely want to add some hot-glue to reinforce everything.
2. Ok you're done adhering your felt layers, it's time to embellish. You can start adding your trims and ribbons to wrap around the tree horizontally. (or you can leave them as-is with no embellishment! sort of a more modern look) I wanted to embellish, but not overly, still keeping a somewhat clean design (well, clean for ME at least).

Sunday, December 2, 2012

DIY: Winter Mobile

We are obsessed with Dollar Store Craft's blog and how they always make the cutest and more elegant things with such inexpensive supplies.  Here is a great Winter Mobile for your home!  Be sure to give their blog a read!
mobile-garage
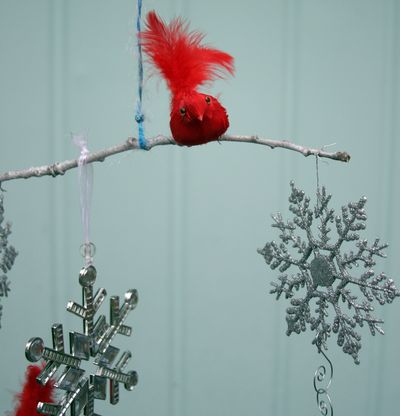
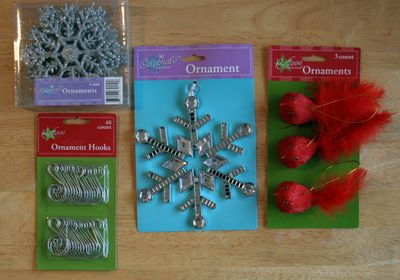
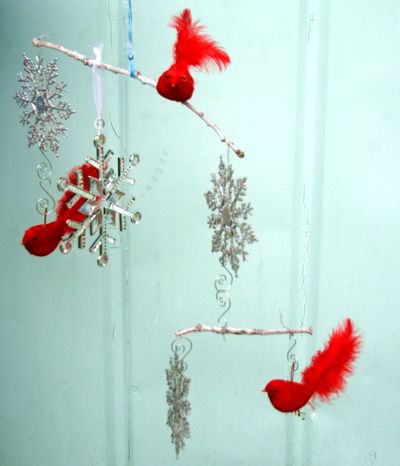
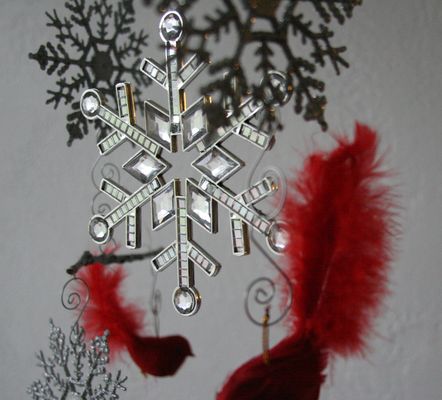
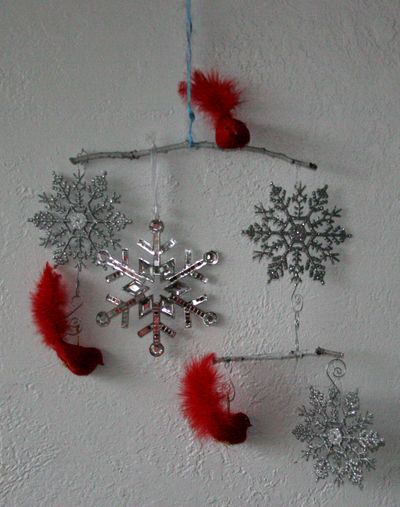
The dollar store has so many cute ornaments this year. I picked up some shiny snowflakes and pretty red birds at the store, found some branches outside, and strung them together for a wintry mobile. You can use pretty much anything on your mobile, so pick your favorite things, attach them to a string and start making one!
mobile-supplies
Project Materials:
  • Assorted ornaments, $3 or on hand
  • Swirly ornament hooks (optional), $1
  • Wire, on hand (I used the wire that came attached to the red birds)
  • Sticks, dowels, or other things to make up the backbone of your mobile, on hand
  • Spray paint (optional), on hand or $1
Total: FREE and up (I spent $4)
mobile-branches
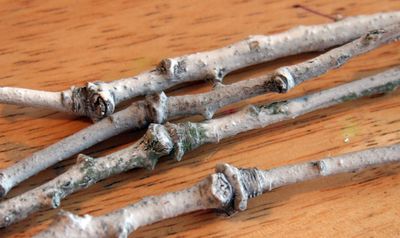
I used oak branches from my yard because I have a ton of them. I spray-painted them with a light coat of white to make them look sort of like birch branches (more wintry!). My oak branches were pretty straight, but they have pretty big knots on them which hurts the balancing process (because the knots kept me from putting things precisely where I wanted to -- strings would slide off a knot). Choosing the smoothest sticks you can find is a good idea!
mobile-sat
Balancing the Mobile:
Balancing the mobile is sort of a process of trial and error, but it's all about balance. The easiest route is to make sure the mobile has equal items on each side and hang them symmetrically. You will get the quickest results by planning a symmetrical mobile.
mobile-snowflake2
If you choose to ignore this advice and opt to make an asymmetrical mobile, here are some tips:
  • I like to think of my mobile like one of those big doctor's scales that has the heavy weights that you move from slot to slot to adjust until you get the bar to balance just perfectly. You will have to do a lot of slight adjustments to get your mobile to balance correctly.
  • I also like to think of my mobile like a teeter-totter (or seesaw): You know how they have three slots at the fulcrum so you can adjust them to compensate if one rider is heavier than the other? You can do that with your mobile by adjusting where the center attachment is located on your stick. Slide it closer to heavier items to help tip the balance in favor of lighter items.
  • You can also slide items closer to the end of the stick to help them act heavier (or closer to the center of the stick to help them act lighter).
  • It helps to have an ornament near the center of a stick (see my rhinestone snowflake) because you can move it to adjust the weight distribution.
  • Use a piece of wire to attach your components to the sticks because they won't slide around very much, making it easier to adjust the balance.
  • Items should float freely and not bump into each other.
  • Expect to have a lot of trial and error when building your mobile!
mobile-straight


Saturday, December 1, 2012

DIY: Beach Themed Ornaments

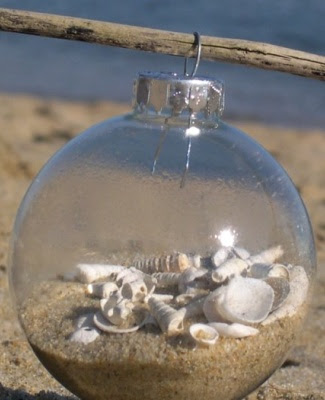
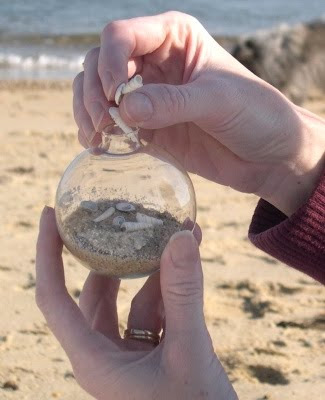
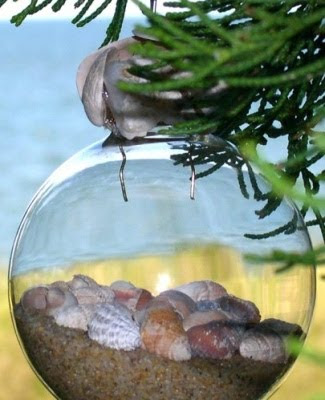
Beach OrnamentSince it's the beginning of December and the real count down to Christmas time - we decided to do TWO DIYs today.  Earlier we did Glitter Trees, which are awesome, so check them out.  And now, we bring you a DIY from Completely Coastal showing a step by step for beachy ornaments!  Why not bring the beach feel into the cold weather season?

fill glass ornament on beach

fill glass ornaments

It's super easy.

Beach Ornament

DIY: Glitter Trees

I Heart Nap Time's blog is kicking off the beginning of December with some excellent Glitter Trees that are amazing decor and eye candy.

Check out their page for more holiday DIY!
Here’s what you’ll need:
-3 Styrofoam trees: sizes 15×5, 12×4, and 9×4
-3 small candlesticks (you can find these at just about any thrift store for about 50 cents)
-spray adhesive
-glue: Elmer’s glue for the glitter and a stronger glue like E6000 to glue the tree to the candlestick
-glitter in your favorite 3 colors (we found these awesome colors of glitter at hobby lobby)
-white spray paint
Here’s what you’ll need to do:
- give your tree a good coating of the spray adhesive. you can use the elmers glue for this part, but the spray adhesive covers better and gives a nice smooth finish, plus it’s a lot faster. leave the bottom of the tree undone, this will get glittered at the end.
- once you have your tree coated in glue, cover it completely with glitter. when all 3 trees have been glitterized set them aside to dry.
- next take your 3 candlesticks and give them a couple quick coats of white spray paint. then let those dry completely. 
- now take your E6000 and glue the candlesticks to the trees. it’s best to let them sit overnight. (keep an eye on it though. on one of the trees the glue ate away some of the styrofoam and my tree tilted to the side. so just check on it for the first hour or so.)
-  when everything is completely dry, flip them over and cover the remaining part with glue and glitter. (we used the elmers glue for this part)
- then all you have left to do is decide where to put them!!

Thursday, November 29, 2012

DIY: 10 Minute Santa Ornament

The Long Thread's blog is helping us keep to our overall theme of simple projects that are quick and wonderful!  Be sure to check out their blog.

santa-ornament
Ten minutes. Really. This is sort of a variation on the elf skittles that I posted about last week. But even easier. I think these would make cute additions to gifts for family, friends or teachers. The kids can help make these if you skip the glue gun and use regular school glue. You  could sign them on the back and add the year.  You could use even smaller wooden balls to make teeny tiny Santas. Or you can take it a step further and make a little body with chenille stems, a larger ball for the belly and beads for the arms and legs.
Supplies:
  • wooden ball (1 1/2″ diameter)
  • red and white felt scraps
  • black acrylic paint
  • white chenille stem (cut to 2″)
  • twine
  • glue gun
santa-ornament-instructions
  1. Cut out the hat and beard from felt according to this template.
  2. Bend the end of your chenille stem and cut to 2″.
  3. Insert the chenille stem in the top of the hat felt and sew, right sides together, using a scant 1/4″ seam allowance. Turn right sides out and poke out the tip with a blunt tool.
  4. Place a couple of drops of glue on the inside rim of the hat and fit onto the wooden ball. Glue the beard on as well, just meeting the hat at the corners.
  5. Draw eyes with a pencil and then paint them on with black acrylic paint.
  6. Loop twine through the chenille stem and tie in a knot. Trim off the ends and put a tiny drop of glue to hold the knot in place just at the chenille stem. All done!

Wednesday, November 28, 2012

DIY: Pine Cone Garland

Twig & Thistle's blog has a great DIY that has a simple but elegant look.  I love the way that it has a natural look but really brings the holidays into the home.
Pine_Cone_Garland_1
Pine_Cone_Garland_2
Pine_Cone_Garland_3
Also, I spotted this door decoration that uses the same materials that would make a lovely companion to the garland. Instead of stringing the pine cones to the ribbon simply tie a ribbon to each hook then tie all the ribbons at the top and hang!
Pine_Cone_Garland_5
Pine_Cone_Garland_4
What You’ll Need:
Pine Cones
Ribbon
Screw Hooks
Hole Punch
Scissors
Instructions:
1. Begin by measuring your mantel or space that you’d like to hang your garland and cut your ribbon. Remember to leave extra for hanging. Once you’ve determined the length, space your pine cones out as you like on a flat surface. The pine cones I used were fairly large so I kept about 4 inches between each one. On the back of the ribbon discreetly mark where each pine cone will go, then punch a hole with a small craft punch. I used an 1/8″ round circle punch like this one.
2. Once you know how many pine cones you’ll need, screw in one screw hook into the top of each pine cone. This takes a little practice and you may need a little elbow grease but once you get the hang of it it goes pretty quickly.
3. Poke each hook through the hole you’ve made in the ribbon and hang! Easy as pie and something that will last for seasons to come!