Saturday, July 21, 2012

DIY: Cork Tile Placemat from Wine Corks

Thanks to Creme de la Craft we have found another wonderful way to reuse those wine corks!  We absolutely love upcycle projects, and this one is right up our alley.  We get to drink wine AND make fun, easy crafts?  Yes, please.

Check out their webpage for more DIY! 

DIY: Cork Tile Placemat From Wine Corks


If you're a cork collector like me, this DIY project is for you. Wine drinkers know how many leftover corks you can accumulate over the years, so let's put them to use! Not only do I love wine, but I love using cork for crafting projects. It's easy to cut, naturally waterproof with a beautiful rustic look, and it has a cushion material that makes for the perfect handmade placemat.

The DIY possibilities are endless by simply gluing corks together. You can also make coasters, table runners, trivets, floor mats or cork boards, just to name a few. Make one for yourself or maybe a gift for a wine lover? The best part is, if you know how to use a glue gun, you'll be a pro at this project.


Follow the steps below to make your own upcycled cork placemat. 


Materials:

• Approximately 50 wine corks. Don't have some handy? You have some options: (a) drink lots of wine (b) ask your local restaurants, bars or wine shops or (c) buy them online
• Utility knife
• Hot glue gun

Tip:
Use as many red wine corks as possible to add some beautiful shades of red to your placemat.


Steps:

•  Cut corks horizontally into small pieces (about 5-6 pieceseach). All pieces should be similar in size so that when they are glued together, you can easily place objects on top, but don't worry about making them exact. A little contrast in size actually gives the finished product a beautiful look.
• Place the corks into your desired shape and glue each cork to one another using a glue gun (you only need a small amount). I suggest placing a large piece of cardboard underneath in case any pieces get stuck to your work surface.
• If they do, use a knife to gently scrape them off and remove.

Friday, July 20, 2012

DIY: Upcycled Bottlecap Tray

We have been looking for a unique and fun way to upcycle / recycle our used bottlecap lids and thanks to Sweet Something Design's blog we found a craft we love!  These handy and detailed directions make this project all too easy.  We think we can find a cheap but fantastic tray at a thrift store somewhere and make it an every more upcycled / recycled project!

 
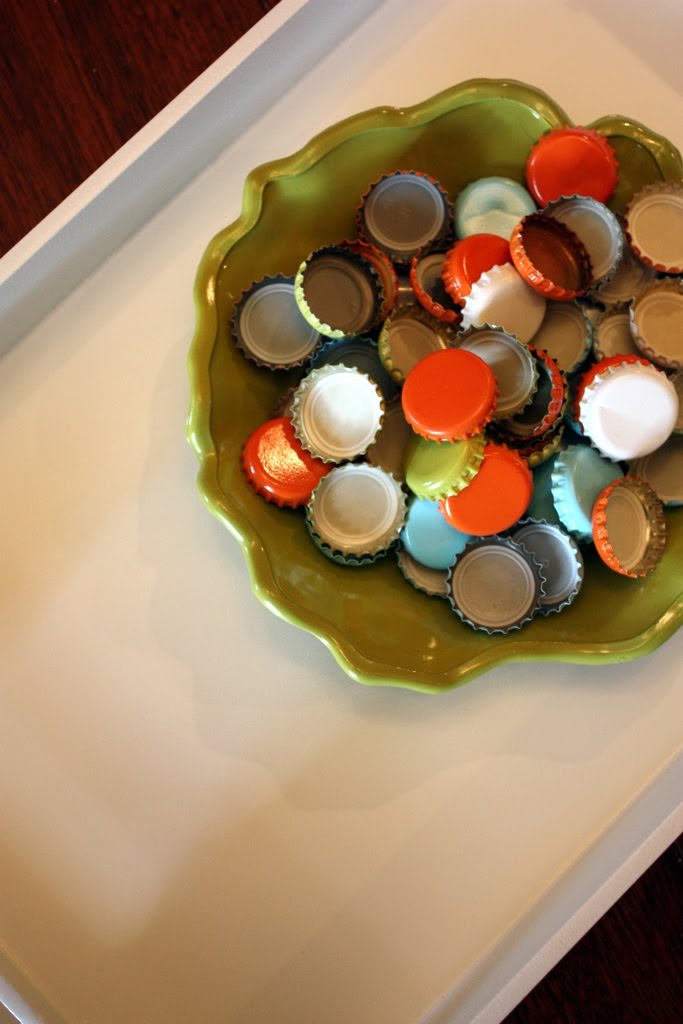
Spray painted a bunch of them in summertime colors: Blue Ocean Breeze, Ivy Leaf and Pumpkin Orange, and some white, all from Krylon. Make sure the handles are high enough, giving you plenty of room to contain the fluid and whatever you are submerging. At least half inch clearance. Start laying the caps in and play around with the pattern. 

Use acrylic water to pour over the caps. Now this 2 part epoxy is sold at Michael's, but I found it the cheapest at Walmart, in their Floral Dept. I followed the directions, mixing the compounds and poured it on. It's self-leveling, which is great! The tough part was waiting the 48 hours, because it cannot be disturbed at all.


Thursday, July 19, 2012

DIY: Fabric Covered Cork Boards

Sew Much Sunshine has made these adorable and loveable cork boards covered in fun and festive fabrics.  We cannot wait to make these ourselves!!  We see cork boards in our future...


You'll need a hot glue gun, scissors, fabric, cork & a pen or fabric marker.

 Trace around the cork leaving about an inch of room all the way around.

Plug the hot glue gun in and allow it to warm up. Cut fabric. Turn upside down and place the cork on the fabric. Spread a strip of glue along the edge of the cork. Pull fabric up and smoosh onto the glue with your fingers.

This is what it will start to look like. Continue all the way around.

Here's the completed cork.

Repeat with the second one.

And the third.


Wednesday, July 18, 2012

DIY: Crepe Paper Pom Poms

While we realize that the Fourth of July has passed, we feel that this tutorial is so easy and fun it's good to be used year round!  100 Directions shows you how to whip this up in a jiff, and imagine how cute this would look at a baby shower, wedding table, anniversary celebration (gold for the 50 year!), or anything really...maybe we'll just decorate the house in fun summer color just because we can!  What about you...do you love them like we do??

Paper pom pom decor

Materials you need:
  • Crepe paper streamers
  • Ribbon
  • Cardboard
  • Scissors

Step by step instructions to make patriotic pom pom decorations:

  1. Cut cardboard into a rectangle approximately 3″ x 6″. The size of this piece is directly related to how big or small your pom poms can be.
  2. Layer the colors of paper you want to use and wrap around the cardboard at least 7 times. The more you wrap, the thicker your pom pom.
  3. Slide the wrapped paper off the cardboard and tie a ribbon around the middle. Be careful to not tie to tightly to prevent tearing the paper. This ribbon can be used to hang your pom poms later, so make it long enough to tie and hang.
  4. Cut the edges of the paper, first cut the end of the loop and then cut toward the ribbon in strips.
  5. Carefully fluffy the pom pom pieces by gently pulling and moving them around until you get the desired look.
Patriotic crepe paper pom pom tutorial
make patriotic paper pom poms to decorate with

Tuesday, July 17, 2012

DIY: Rose Petal Salve Tutorial

Love all of those amazing smelling cosmetics at the department store or beauty store in your local mall, but can't afford the price tag that comes with them?  Why not make your own?  Live in Art's blog shows you a simply and budget friendly way of making your own amazing lip salve, which of course can be tweaked for any color or fragrance.  Make one for yourself and one to give to a friend!  

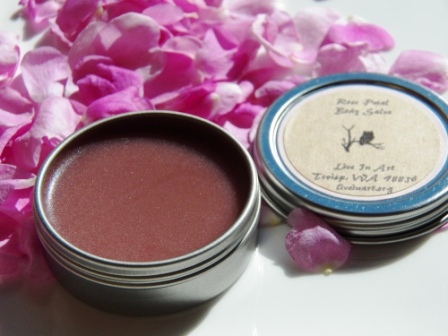
Rose Petal Salve: Tutorial

Making rose petal oil is a laborious task, but once it's done, it can be utilized in bath salts, salves, and other wonderful products. The following is a tutorial on how to make rose petal salve, using the  pre-made oil.
Ingredients:
3.5 C. rose hip oil
1.5 C. refined beeswax
1 Capsule Vitamin E
Directions:
  1. Heat the oil in one pan.
  2. Melt beeswax in a separate pan. 
  3. Once the beeswax has melted, mix the ingredients together.
  4. Allow it to blend for a few minutes over heat. Add Vitamin E & stir.
  5. Pour the mix into tin cans or small glass jars to cool.
  6. Your rose petal salve is ready to use...and should have a pink tint to it. If not, it's no big deal - it should smell heavenly!


Monday, July 16, 2012

DIY: Yarn Balls

Abernathy Crafts has a simple, fun, and budget friendly way of creating some great looking yarn balls for decor!  We love the idea of making a bunch of them in different colors and putting them into a vase for every season or holiday!  They are so inexpensive we bet you'll find more ways than one to love these things!

yarn balls 5
I didn’t know what else to call them.  They’re balls, wrapped in yarn.  Yarn balls.  I know, it’s silly.  But if you’d like to know how to make some to add some pretty silliness to your space, I’ve got a tutorial for you.
yarn balls
Materials needed:
  • Styrofoam balls (any size will do)
  • Wooden skewers
  • Craft glue
  • Yarn
Before I started on this project, I read on Pinterest that you can dye your skewers using food coloring.  So I tried it.  I filled a glass baking dish with water and several drops of food coloring.  Then I soaked the skewers overnight.  The next day I discovered that it didn’t work.  So then I added the entire bottle of food coloring.  That did the trick.  So apparently it does work but you just have to use a ridiculous amount of food coloring for the wood to soak up. 

yarn balls 2
So, start by shoving the skewers lovingly into the Styrofoam balls.  Pointed end in works best.
yarn balls 3
Starting at the bottom around the stick, spread some glue and begin wrapping the yarn around in a spiral.
banner 2
Keep gluing and wrapping the yarn around until you get to the top.
yarn balls 6

Sunday, July 15, 2012

DIY: OIympic Necklace

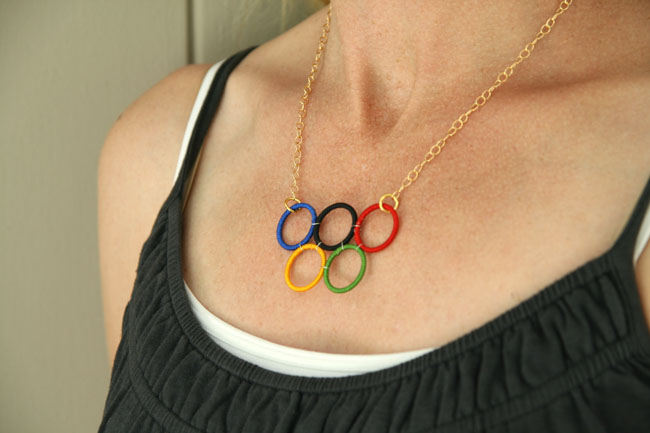
What a great fashion accessory from Remarkably Domestic's blog for the upcoming Olympic Games!  This idea is also easily adjustable to make fashion jewelry for anything!  You know you can't wait to get this started....

We’re starting to get a little excited about the Olympics over here. We aren’t a big sports family, but RD Husband has one sister who was an athlete in the Olympics in 1988 and another who has coached Olympic teams. So we have a soft spot for the games.
This necklace is easy and inexpensive to make. Here’s what you’ll need.
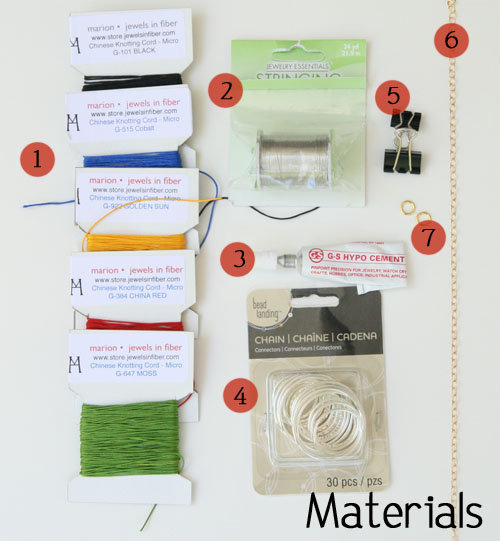
  1. Cord in 5 different colors: red, green, yellow, blue, and black. I used Chinese knotting cord in micro size G, which I ordered from here. You could also use crochet thread, embroidery thread, or embroidery floss, all of which are readily available at craft stores.
  2. 26 Gauge Wire
  3. G-S Hypo Cement, or another strong jewelry-type glue. Michaels carries Aleene’s or E-6000, which both should work.
  4. 5 rings (I actually bought a cheap Claire’s Accessories necklace and took it apart, but you can find these at Michaels in different sizes, too).
  5. A few binder clips
  6. Chain in desired length. I used about 17″, divided into two lengths of 8.5″. You could get something simple and inexpensive like this, or check out a jewelry supplier like Rio Grande or Fire Mountain Gems.
  7. Two jump rings and one clasp. (The clasp isn’t pictured. Sorry!)
Most, if not all, of these things can be found at Michaels or JoAnn Fabric.
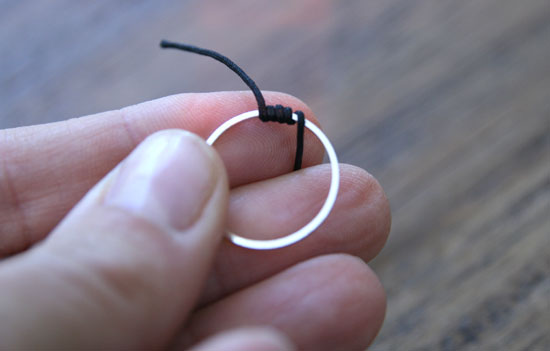
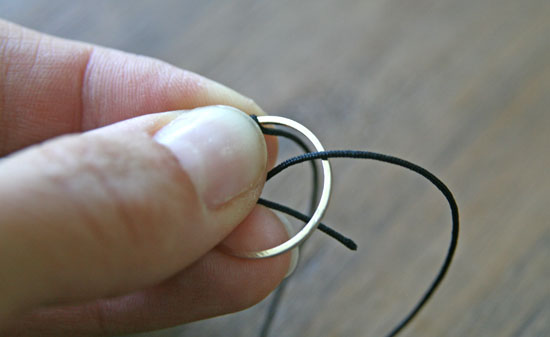
First step is covering your rings in the cord. You want to attach the cord with glue at the beginning, wrapping it a few times around.
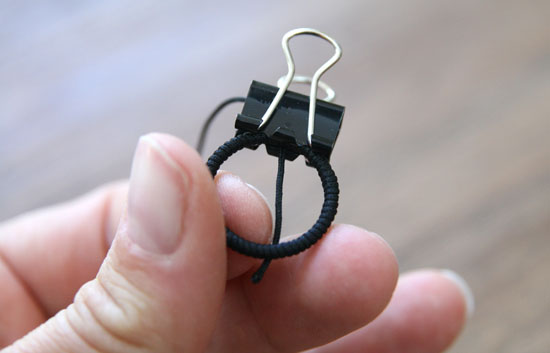
Secure it by clipping a small binder clip over it and let it dry for about 15 minutes. You can prep all your rings this way, and by the time you are done with the last one, the first one should be dry enough to work with.
Now, wrap the cord around the ring, keeping it tight and each coil snug against the previous one. You don’t want to see any metal through the wrapping.
In order to keep the right tension, you’ll need to hold the parts you’ve already wrapped tightly while you wrap more.
Stop wrapping with about a quarter of an inch or so left to go.
Now, place more jewelry glue on the exposed metal, and then continue wrapping until you have covered the ring. Don’t worry about the long ends of the cord just yet. Secure this section with your binder clip and let it dry.
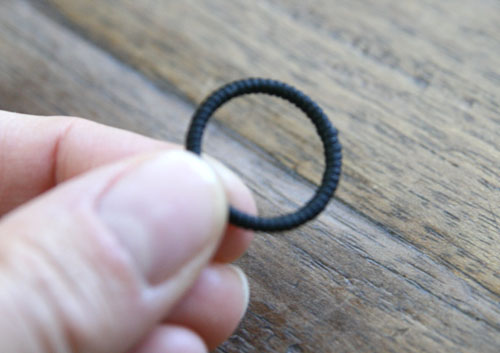
You’ll do this for each ring in each different color cord. Once they’ve dried (I let mine sit overnight just to be certain), you can clip the cords close to the ring. I chose a side I wanted to be the “back” and clipped them both on that side, so the edges wouldn’t show. Although if you’ve glued enough, the edges will sort of blend together with the ring.
Sorry for the blurry photo!
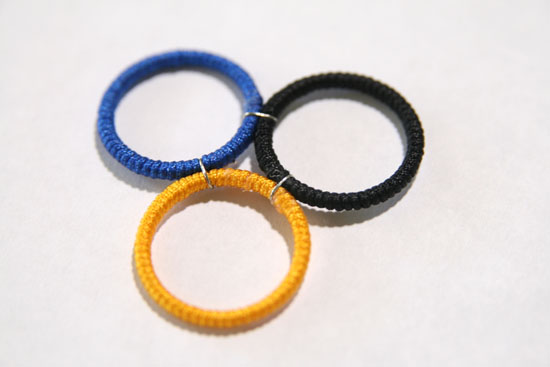
Once you have all your rings, it’s time to lay them out in the correct pattern. Check online and look at images to get your order correct. Then, you are going to start wiring them together.
Cut a small length of wire, about 3″ long, and place it over one of the connections between rings.
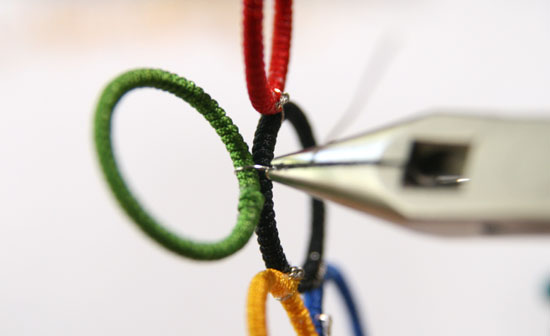
Turn to the back, and twist the two wires together, like twist ties. You can use your fingers, or if you have needle nose pliers, those work well, too.
You’ll twist until the connected wires are about 1/4″ long, and then snip the wires off. Fold them under and towards the rings so that they don’t stick out, but keep them hidden in the back.
Once you get a few together, it’ll look like this:
Make sure you are wiring them tightly together so that they keep their shape.
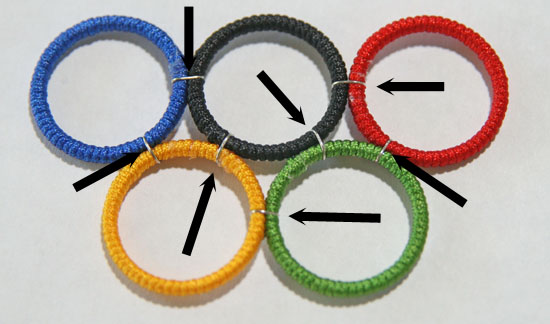
You’ll want to make attachments at all these points:

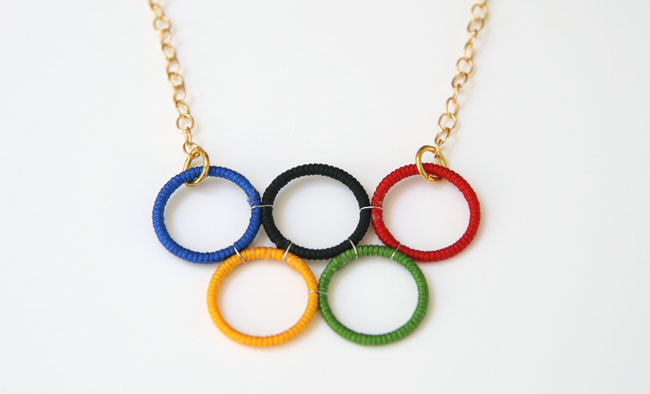
When you’re done, it’ll look like this:
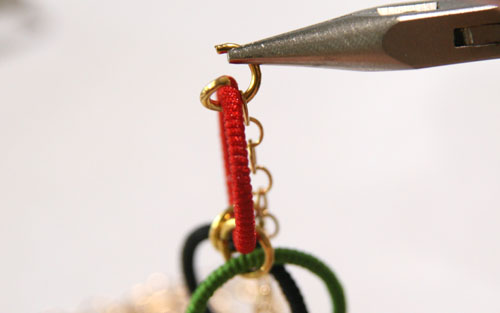
Then, you just need to attach the chain with the jump rings to the blue and red circles.
Attach your clasp, and your necklace is done!