Showing posts with label bottle caps. Show all posts

Saturday, September 29, 2012

DIY: Crayon Candles in Bottlecaps

We are forever questing to find bottlecap crafts that are easy and look good!  We love to knokw that we can upcycle these bad boys and make it look like we spent hours, when we only spent minutes.  

Craftaholics Anonymous has come to our aid with their DIY for turning old crayons and bottlecaps into mini candles!
how to make candles with bottle caps
these tiny candles are a really fun to make and come together quickly. AND you can up-cycle several materials in the process.

To make these colorful tiny candles, I used several materials that usually end up in a land fill: bottle caps, broken crayons, and empty soup cans. the only thing i bought to make them was the pre-waxed wicks which cost me $1.50 for a set of 12.
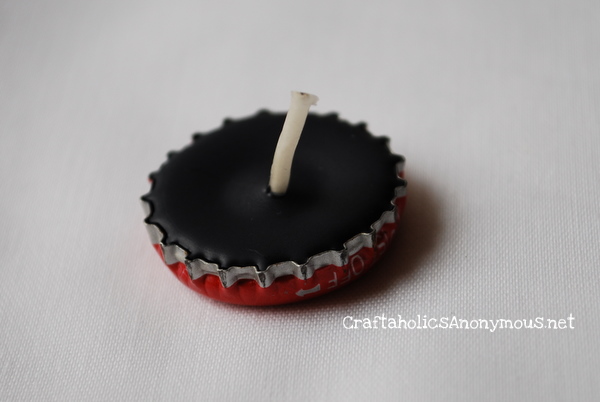
How to Make Bottle Cap Candles
supplies: bottle caps, crayons {or wax}, pre-waxed wicks, soup cans, wax paper {optional}, small cooking pan, scissors, and water
remove paper from crayons. you can also use candle wax if you wanted.
put crayons in clean, empty soup cans.
take your pre-waxed wicks and…
bottle caps
put wicks inside the bottle caps. i placed my bottle caps on wax paper in case i spilled some wax.
then using a small cooking pan filled with a couple inches of boiling water, place the can in the pan and melt the crayons. {you could also use a candle warmer to do this}the crayons melt pretty quickly. *note: it only takes a few crayons to fill a bottle cap!
pour the melted crayons or wax into the bottle caps.
let cool for 1-2 hours. then trim the wicks and you have some fun tea light candles to enjoy!
**added later: crayon wax does not smell that great when burned. if you plan to burn these candles, you may consider adding a scent to them**

Thursday, September 20, 2012

DIY: Upcycled Bottlecap Flowers

A Bird in the Hand's blog has given us an idea on how to upcycle our bottle caps into something wonderful.  We have been looking for a way to upcycle our bottle caps and this may be just the thing.

Be sure to check out their blog for more fun DIY!


Now, here's a step-by-step tutorial.  First I collected my materials.  I used bottle caps (I used 20 in mine), a tin can lid, a chopstick, and glue (I started with super glue but switched to epoxy b/c some weren't holding).

From there, I started bending my bottle caps into the shape of flower petals.  The basic idea was inspired by a previous Iron Craft project where I had created a felt flower.  I used my pliers and just started bending until I got the shape I wanted. 

For me, the easiest way to do it was to grab the rim of the bottle cap and pull it down to flatten it.  Then I would bend in the two sides.  Finally, I would bend down the top.  My first few petals looked like blobs of metal so it takes a little trial-and-error.

As I went, I laid my petals out on the tin can lid to determine how many I would need.  I did two layers of petals, but you can switch it up and do more if you like.

Next I glued on the petals.  I did the entire outside row first and then switched to the second layer.  Like I mentioned above, I tried using super glue but found that some of my petals weren't holding so I switched to epoxy.

Finally, I added one more bottle cap in the center.  Now you have a finished flower!

From there, I attached a chopstick by gluing it onto the can lid in between two of the petals.  This allowed me to turn it into a garden stake.  But there are lots of other possibilities.  You could paint it, add leaves (maybe cut from soda cans?), turn it into a pin, etc.